
This article contains affiliate links
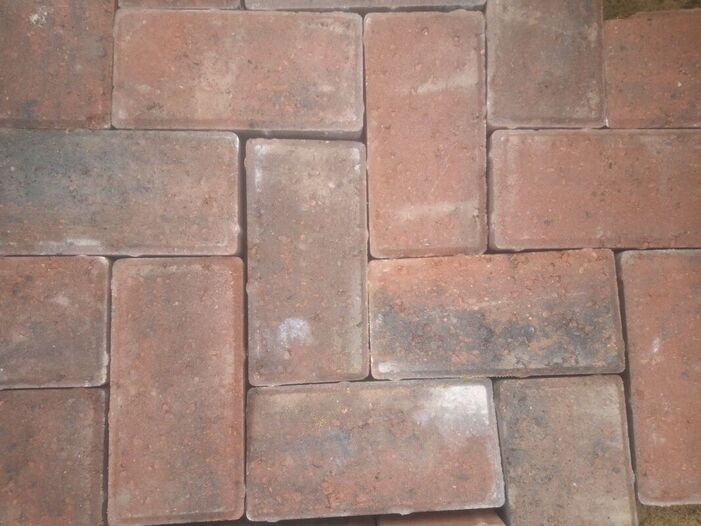
Slate chippings are a robust and durable landscape aggregate perfect for surfacing patios, paths and flower borders.
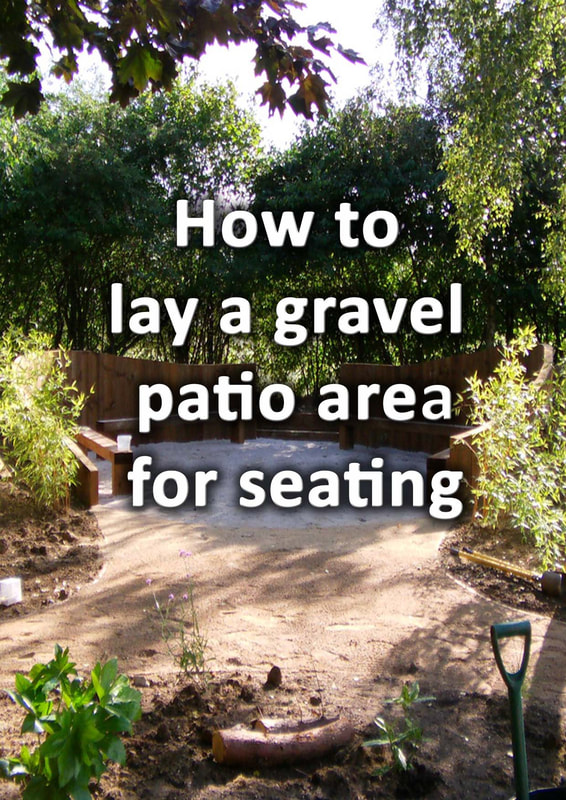
Unlike many landscape gravels slate chippings have a flat form leading to less displacement when walked upon. This makes them generally more stable and more comfortable to travel over. Their natural tones and coarse, visual, texture makes them suitable for a wide range of garden styles and designs. If you want to know how to lay slate chippings you have come to the right place! In this article I explain how to lay slate chippings to patios, driveways and garden flower boarders. I will cover topics such as ground preparation, correct size grades and the best edging for slate chippings. How to lay slate chippings for paths and patios
Slate chippings are perfect coverings for garden surfaces which host pedestrian traffic. Paths and patios laid with chippings are both functional and aesthetic. The visual texture and natural colours can contrast well with lawns and surrounding planting. As slate is naturally durable and hard wearing it is well suited to well travelled parts of the garden. It is important however to prepare the ground like any other surface designed for human walking. 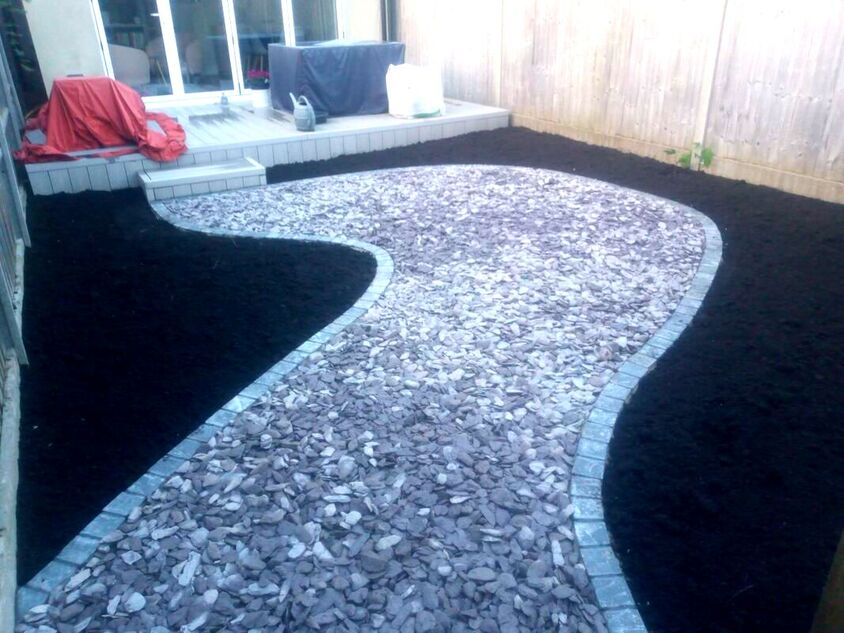
This means basing up your slate chipping area in a similar fashion to a patio. This translates to removing the top, soft layer of soil, laying a sub-base and laying membrane.
Typically you will need 80mm-100mm of sub-base and around 30-40mm of slate chippings. This means excavating down to a depth of about 125mm. Below I will include step by step instructions with images of how to lay slate chippings in your garden. The guide will include pictures of my latest slate chipping project in West London. How to lay slate chippings step by step
Step 1: Setting out
One of the most crucial parts of any landscaping project is setting out and planning. Mark out the area you wish to lay your chippings to define its shape.
It is a good idea to work out how many square metres your area covers. This will enable you to calculate the correct amounts of sub-base and chippings you will require. 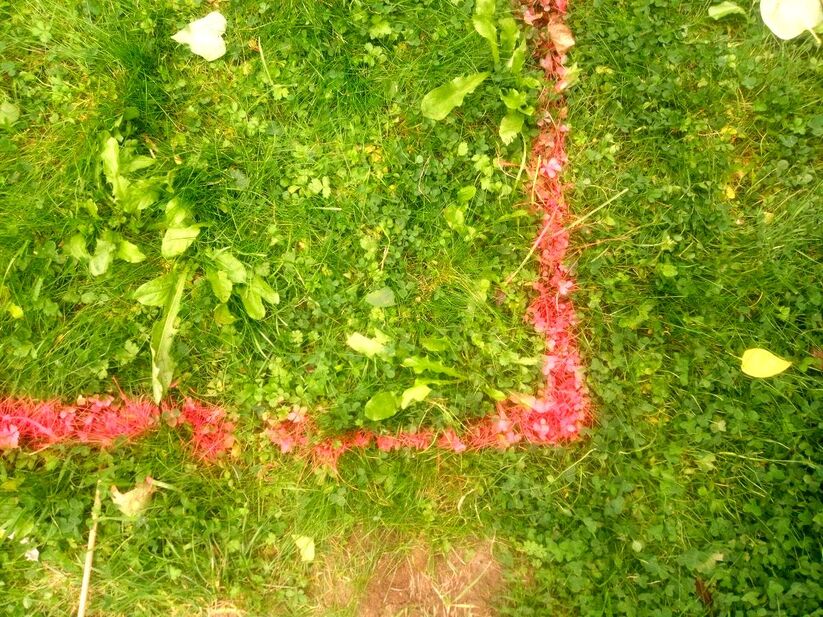
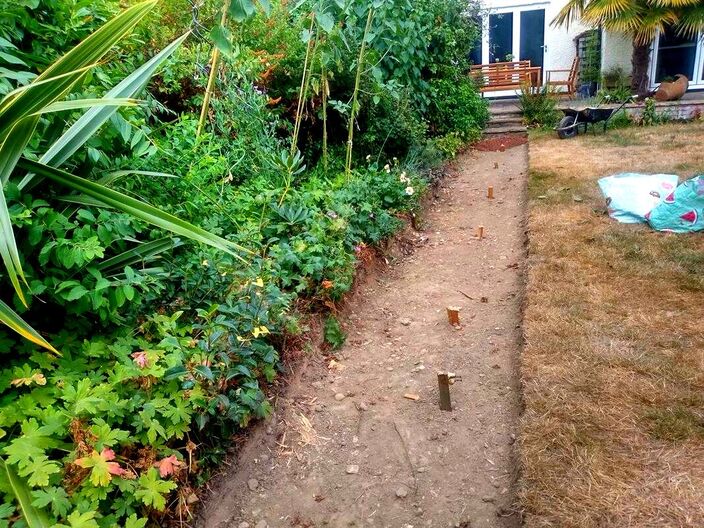
Step 2: Levels
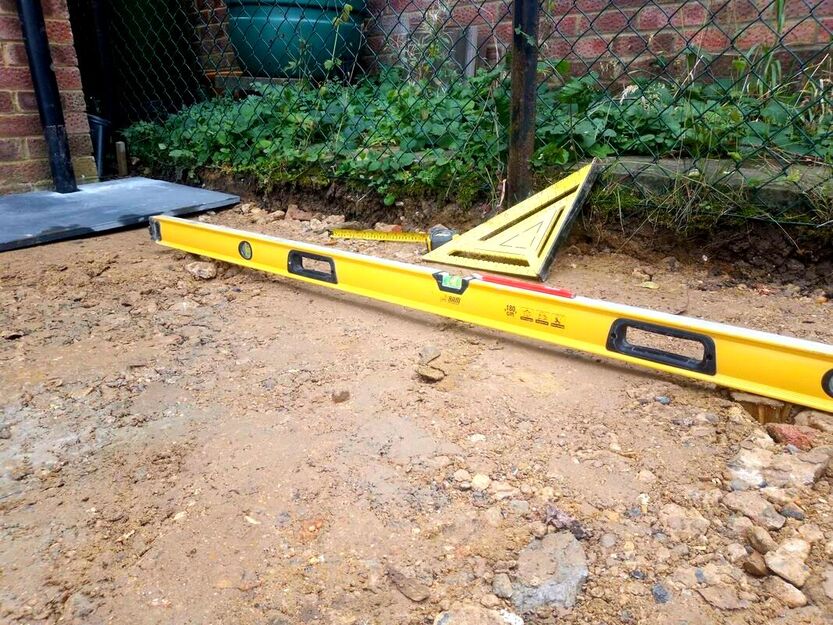
An often overlooked element of laying decorative gravels is surface levels. You will need to lay your chippings onto a base which is relatively level. This will prevent chippings working their way to lower gradients over time. Slate chippings look the best when they are laid to a consistent level. To achieve this mark your finished level with a tight string line. Pegs can then be tapped to the proposed sub-base or completed level. This will enable you to excavate to the correct depth and level your sub-base. 
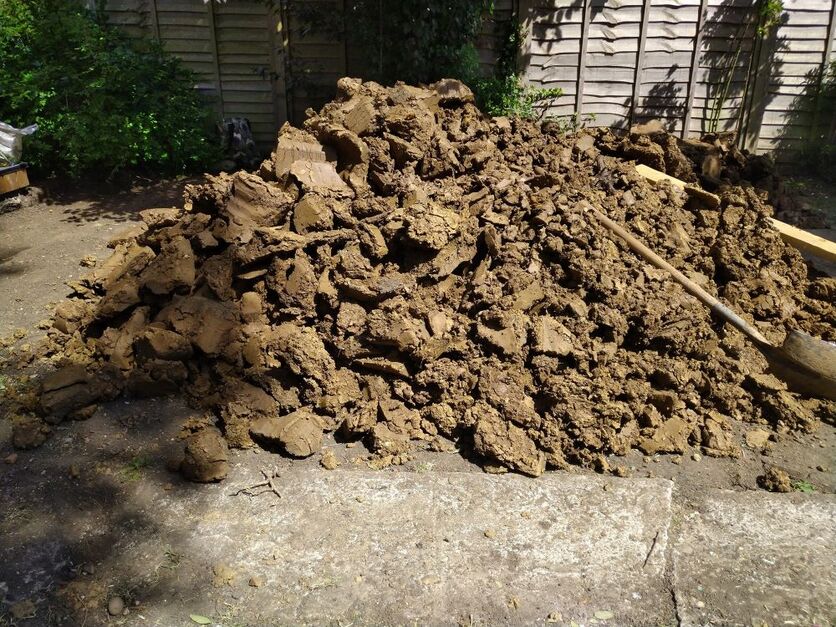
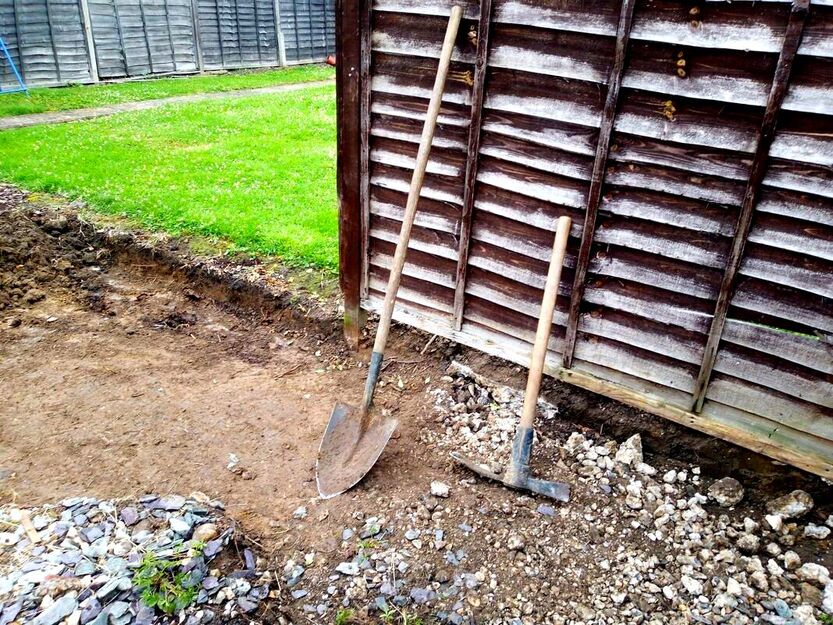
Step 3: Excavation
Excavate out any soft soil from under your chippings area, this is not necessary for flower beds. Excavate your soil to the desired depth and dispose of the soil if you cannot utilise it. The best way to do this is by ordering a skip. Make the excavation as neat and as consistent as possible with square sides. 
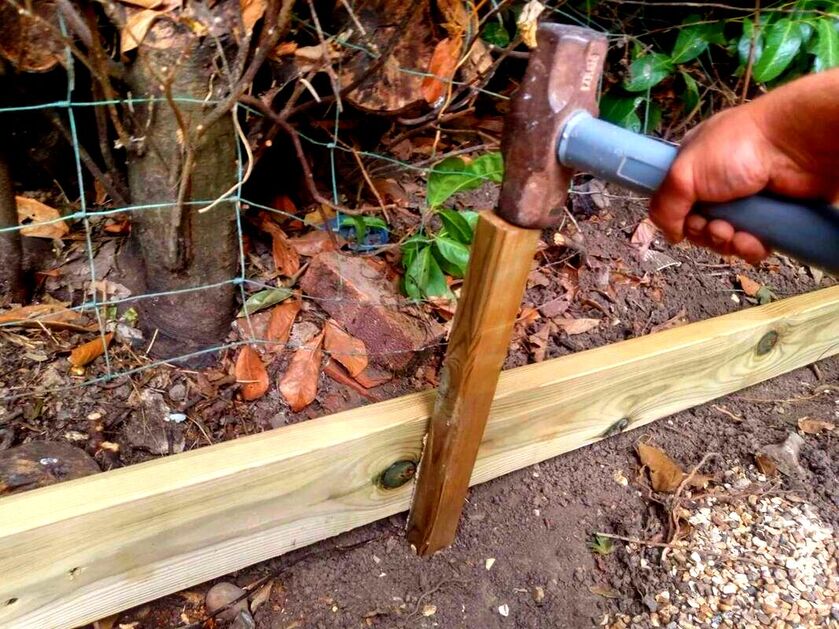
Step 4: Edgings
Most of the time you will need to install retaining edgings to contain your slate chippings. Edgings will provide a clean edge to the surface and prevent it mixing with surrounding soil. There are many options when it comes to retaining chippings and gravels. Why not check out our article on the best edgings for gravel surfaces here. I personally find slate edgings and slate sett edging are the best edgings for slate chippings. These are what I have used in this particular case study. Why not visit myarticle on how to create and install these slate border edgings here. Depending upon what edgings you chose you may require to create a shallow concrete foundation or haunch. 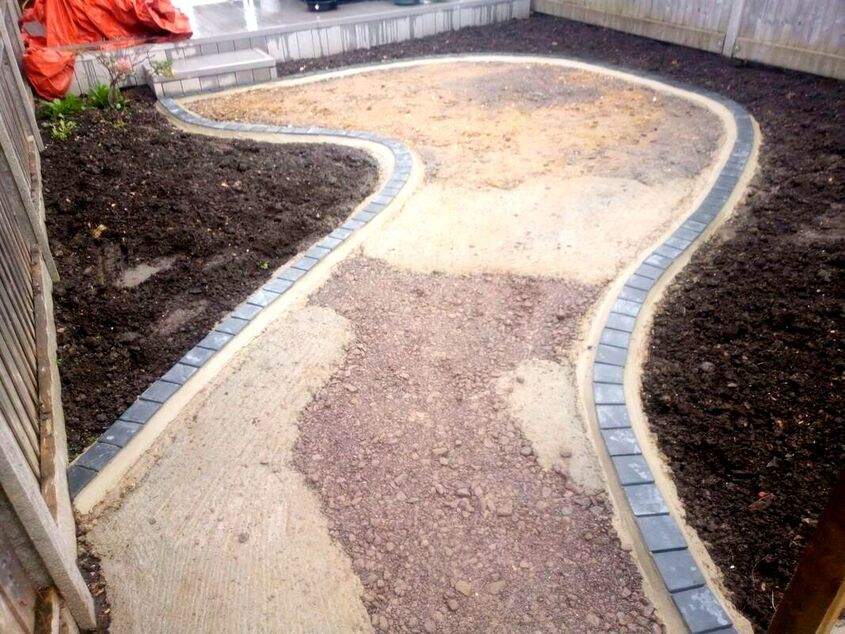
Step 5: Sub-base
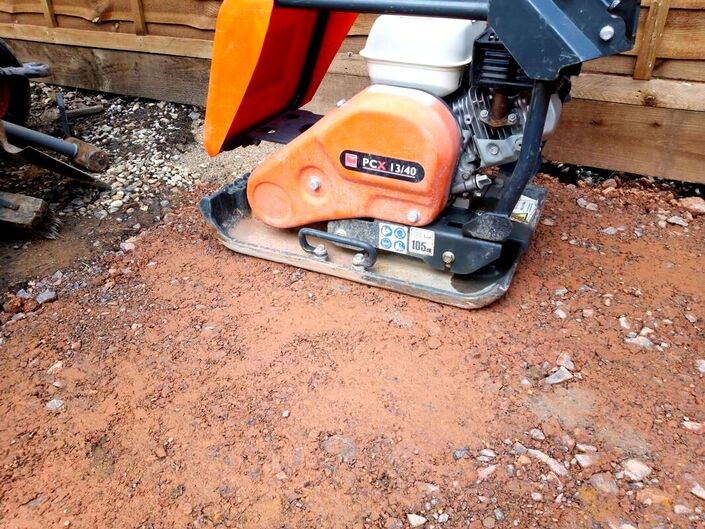
Supply and spread your sub-base aggregate as level as possible. I always find pegging out your sub-base level every 2 metres is a great way to do this. You can then easily rake your sub-base to the top of the pegs. Once your sub-base is laid, compact your base well with a vibro-compaction plate. 
Step 6: Membrane
A durable landscape membrane will prevent your sub-base mixing with your chippings. It will also help to prevent weed establishment and root penetration. Lay out your membrane preferably not on a windy day pegging it down securely. 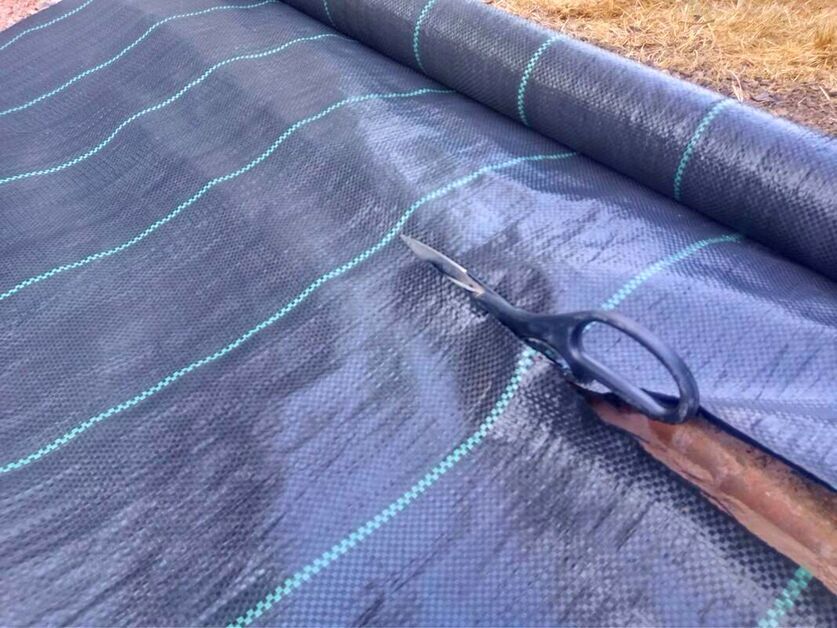
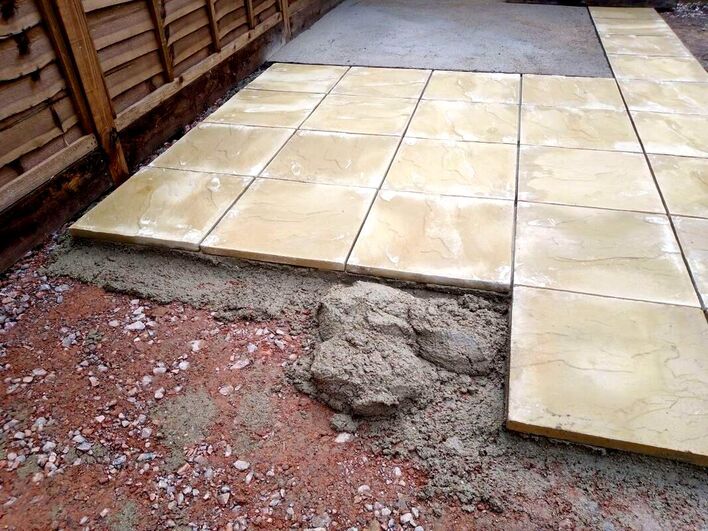
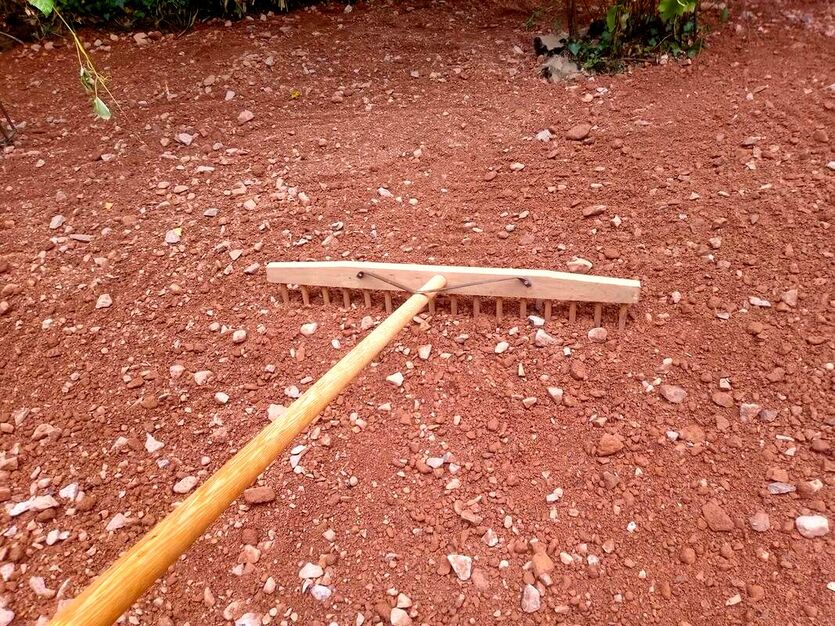
Step 7: Laying your chippingsSpread your slate chippings to your prepared area as level as possible. This is best undertaken with a wheelbarrow, rake and shovel. Slate chippings can be particularly challenging to shovel especially the 40mm grade. Consequently, I recommend using a long handled shovel with a pointed end. You have now completed your slate chipping area and you can admire your masterpiece! 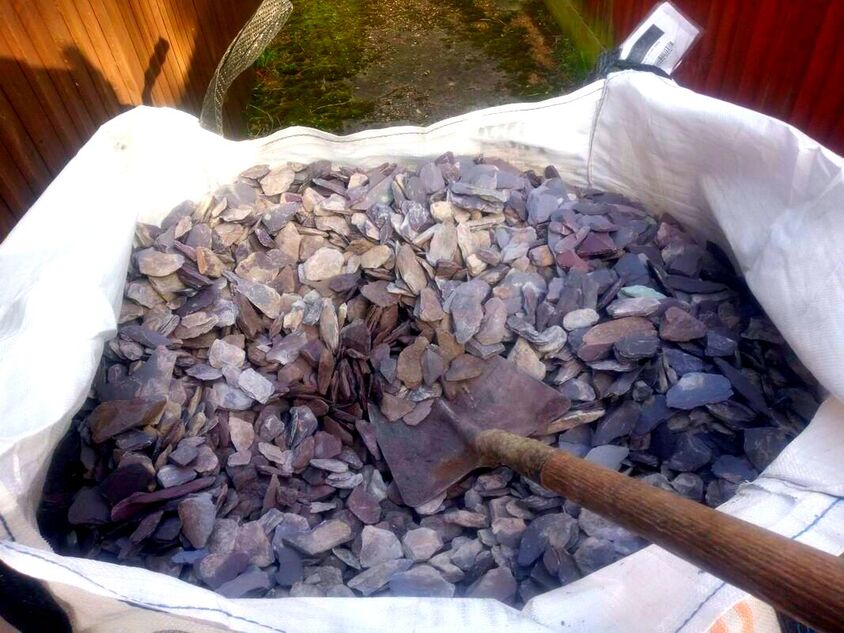
How to lay slate chippings on a drivewayJust like laying slate chippings for patios and paths driveways will require a suitable sub-base. This means a robust sub-base such as well compacted mot type 1 aggregate at a depth of 150mm. As driveways are exposed to greater forces, a thicker grade of chipping around 40mm will be necessary. You will also require robust, retaining, edgings to hold the surface in place securely. How to lay slate chippings on soilIf you are laying slate chippings on flower borders and soil you will not require a sub-base. It is well advised however, to mix in plenty of organic matter such as compost first. This will reduce compaction from the weight of the slate and provide nutrients for plants. A finer size grade of slate chippings is best for flower borders such as 20mm. 20mm gravel will be easier for perennials and bulbs to penetrate during the spring. Make sure you install a robust landscaping membrane so weeds do not become established. 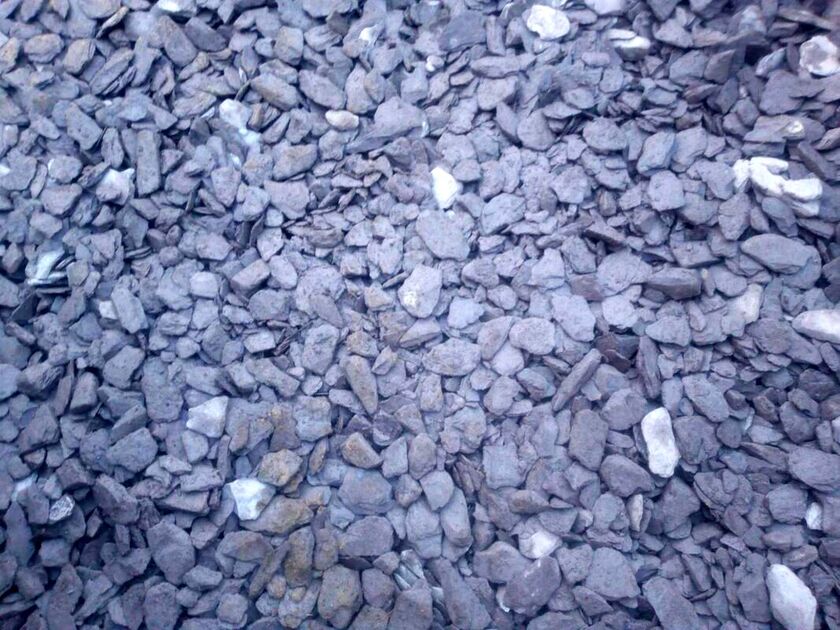
FAQS about slate chippingsHow to prepare the ground for slate chippings?If you are preparing the ground for slate chippings you will at least require a robust landscape membrane. This will prevent underlying soil and silt rising up between the chippings causing weed establishment. If your slate is for a path or seating area it is best to remove the top 125mm of topsoil. This will enable you to install a robust base suitable for pedestrian traffic. For slate paths and seating areas spread a minimum 80mm depth of compactable mot type 1 under the membrane. If want to drive a car over surface make sure you have a minimum 150mm layer of mot type 1. 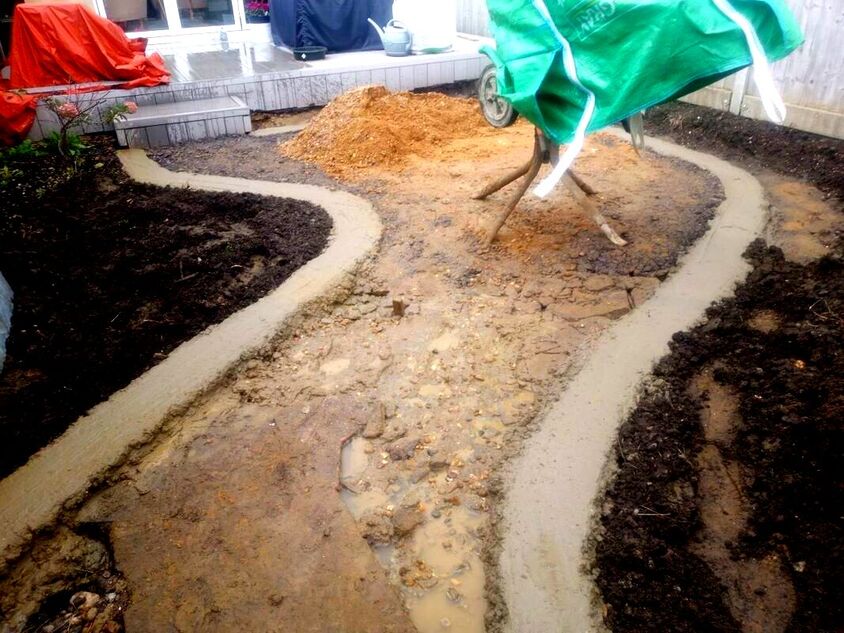
How deep should you lay slate chippings?Due to the flat nature of slate chippings you do not get much displacement under foot. Consequently you can lay them to a generous thickness. For 40mm grade slate chippings lay at a depth of around 50mm depth. For 20mm grade chippings lay to a depth of around 30mm. Can you put slate chippings straight on soil?
It is not a good idea to place slate chippings straight onto soil. Eventually soil will seep up through gaps leading to silting and weed establishment. At the very least it is best to lay a robust landscaping membrane under the chippings. Can you put slate chippings on grass?
You can certainly replace areas of grass with slate chippings however you should not lay them straight onto grass. For paths and seating areas make sure you excavate the top 125mm of topsoil and dispose of. This will enable to lay a solid 80-100mm sub-base layer under your slate. The sub-base can then be compacted and a robust landscaping membrane applied. Your slate chippings can then be laid on top. 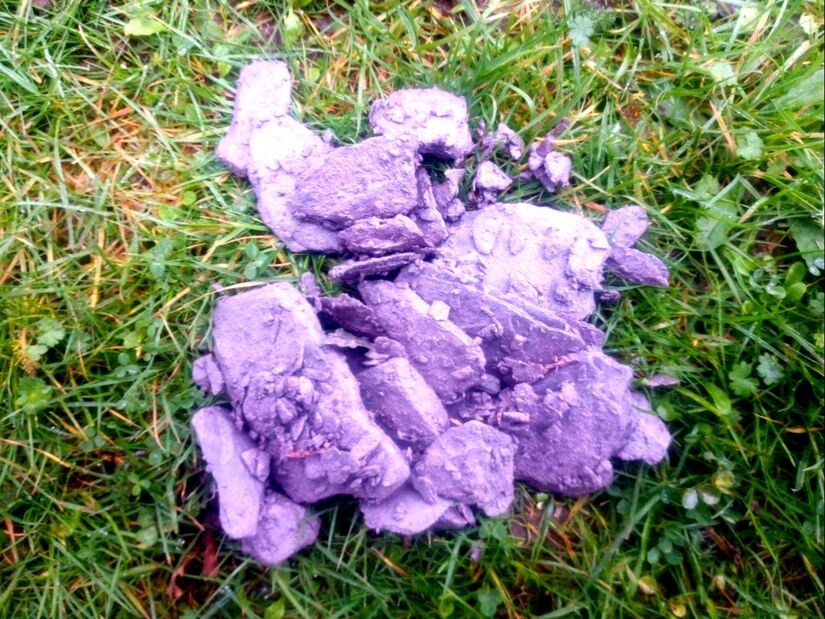
Is slate better than gravel?
The main advantage of slate chippings over gravel is stability. As slate has a more flat and horizontal form it is less likely to displace under foot. This makes it a firmer surface with a reduced threat of aggregate becoming stuck in vehicle tyres and shoe treads. Slate chippings have a unique visual texture compared to gravel so what is best for you may come down to personal taste. How to lay slate chippings on a slope?
Slate is generally better at sticking to slopes than traditional and more circular gravels. However, gravel grids will provide you with more stability on a slope. Make sure you go for a dark coloured grid or one which compliments your slates colour. Aggregates always end up slipping to the bottom of the slope anyway only retaining what’s within the grid. This means white grids will be fully visible on a slope and will look awful! It is always best to level areas as much as possible which will base loose gravels and chippings. Will plants grow through slate chippings?
Most plants are capable of growing through slate chippings; however delicate bulbs such as snowdrops and crocus may struggle. If planting bulbs or perennials under slate make sure you scatter a thinner layer over such areas. 20mm grade slate chippings are much easier for plants to grow through than 40mm. If you do not want plants growing on or through your slate make sure you install a sub-base and membrane. Should you put membrane under slate chippings?
You should always lay a membrane under slate chippings to prevent soil or sub-base mixing with the chippings. The only circumstance I could see laying slate chippings without a membrane is on top of a concrete base.
Thank you for reading our article on how to lay slate chippings. Below I have linked to some other resources you may find helpful.
'As an Amazon associate I earn from qualifying purchases'
0 Comments

This article contains affiliate links
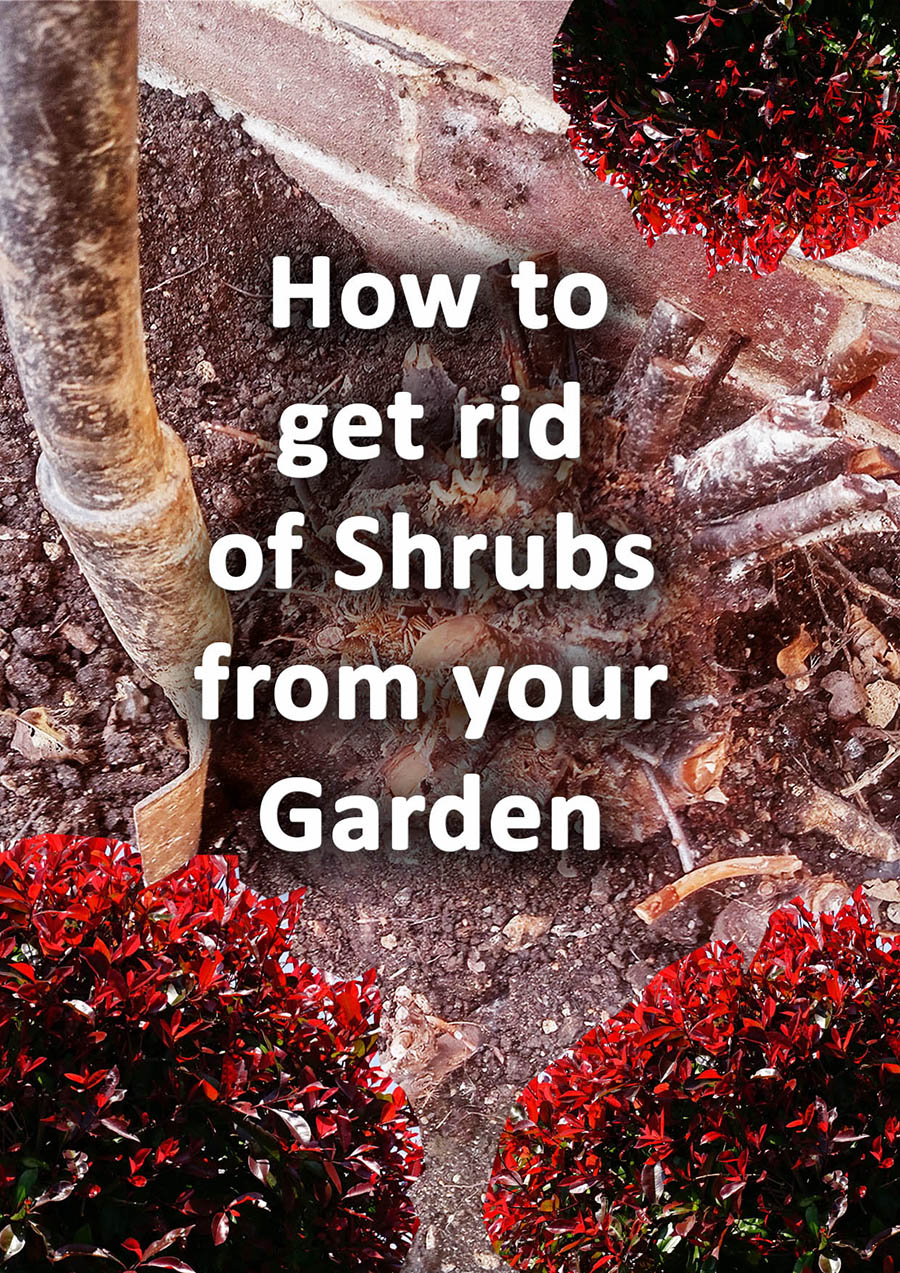
When developing your property you may be faced with the challenging task of removing hedges.
Hedges can be a cost effective way to create screening and form a physical boundary. Many hedges however, over time can become large and manageable for many people. As hedges grow tall, they also grow outwards reducing the size of your garden. As hedges grow larger they can also steal nutrients and sunlight from other plants. Consequently many seek to remove hedges from their garden by the roots. In this article I will explain how to get rid of hedges from your garden by the roots. I will also answer some common questions regarding removing hedges. Is it difficult to remove hedges?
It really depends upon how large and established your hedges are. Generally speaking if you want to remove a hedge it has probably become too large or unsightly. Hedges are often planted very close together meaning their roots become intertwined. This makes them rather difficult to remove without the correct equipment and process. Typically the best way to remove large hedges is with a small excavator machine. As one plant is removed the next one can be pulled loose into the hole of the previous. This process can be heavy and messy, you will also need to dispose of the old hedges. 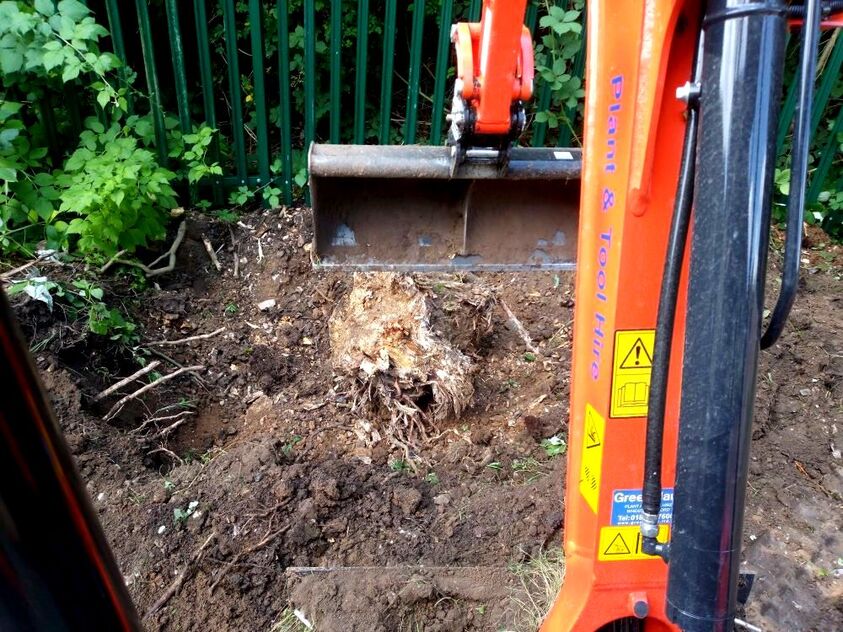
Should you remove a garden hedge?It is always worth carefully considering if you should remove your hedge or not. You may find one removed you may open your boundary and find yourself feeling very exposed. If you wish to replace a hedge you must bear in mind it can take a few years for a newly planted hedge to become established. A hedge which is very established and made up of native species it could be an old hedgerow. In some countries such as the UK old hedgerows are protected by law. Consequently you may want to check with your local authority. Many hedges are planted to create shelter from prevailing winds across your property. If you live in an exposed location you may want to consider what shelter your hedge is providing. 
How to regenerate a garden hedge
If your hedge has become very overgrown and sparsely vegetated you may be able to regenerate it. As hedges grow older they use up most of the nutrients within the surrounding ground. Consequently many hedge species can be regenerated with a good prune and soil amelioration. Please note this is not possible with some species of conifer especially leylandii. However robust hedging species such as privet can be cut very low to the ground. The stumps can then be mulched with well rotted manure and bark mulch. This can stimulate very fast growing whippy foliage which can be reformed into a new hedge. It must be said however, this strategy does not always work especially if the hedge is very old. 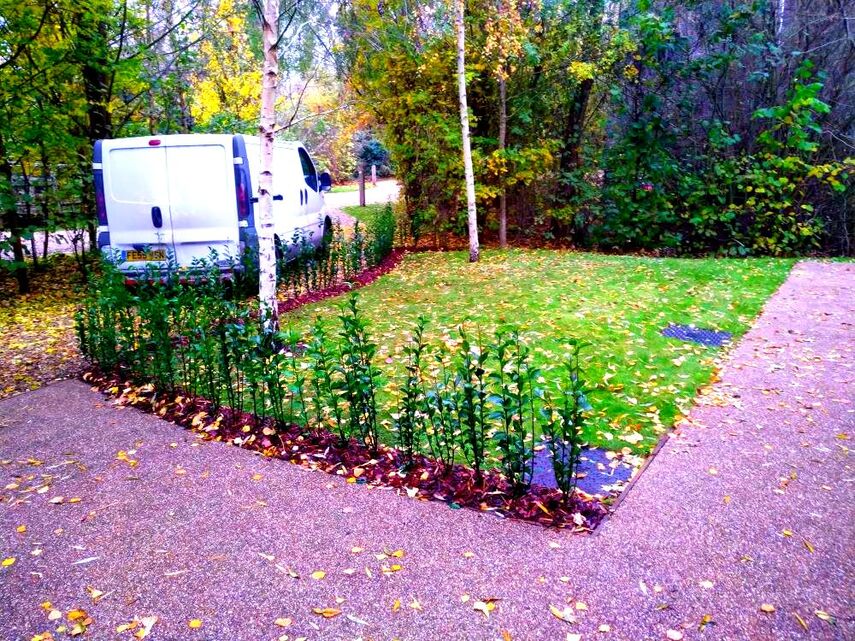
How to remove a garden hedge by the roots step by step
Step 1: Pruning
It is easier to remove a hedge by the roots if you trim off all the side branches of your hedge. This will leave you a vertical step which can be used for leverage. A great tool for this is a hand saw or long handled loppers. Pruning out single stems will also help compact down your waste materials. These branches can then be shredded or laid down methodically inside a skip. Step 2: Excavation
The next step is to excavate around the first root ball as much as possible to expose the root mass. I find a spade is effective for digging around the roots and a digging bar good at breaking soil from under the root mass. Keep digging until you can wobble the root ball by pulling on the trunk. 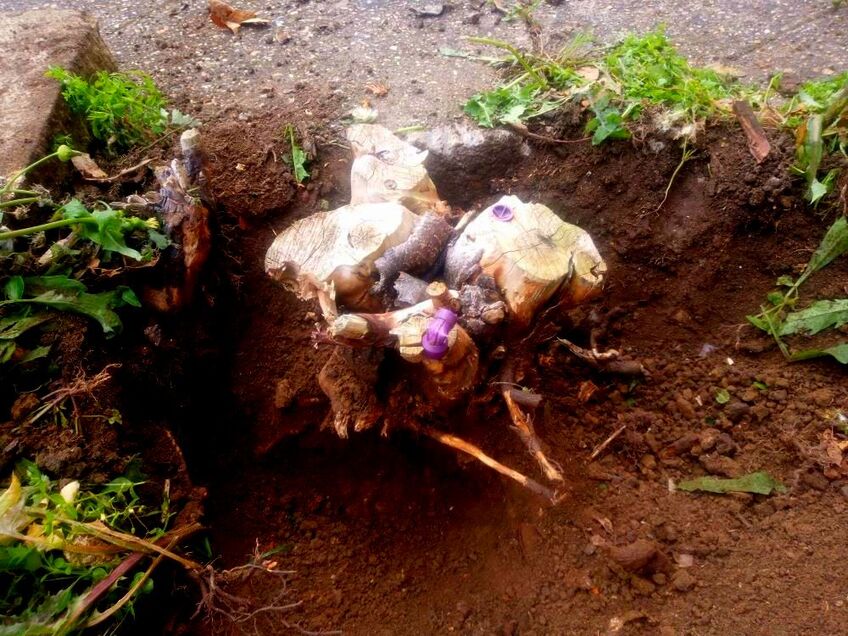
Step 3: Snap the anchor roots
Using an axe, mattock or digging bar snap through the large anchor roots. These are the thick horizontal roots spreading out from the centre of the hedge. When these are severed, pull the central stem back and forth to flake soil away from the deep taproot. Excavate any loose soil away to expose the vertical tap root. 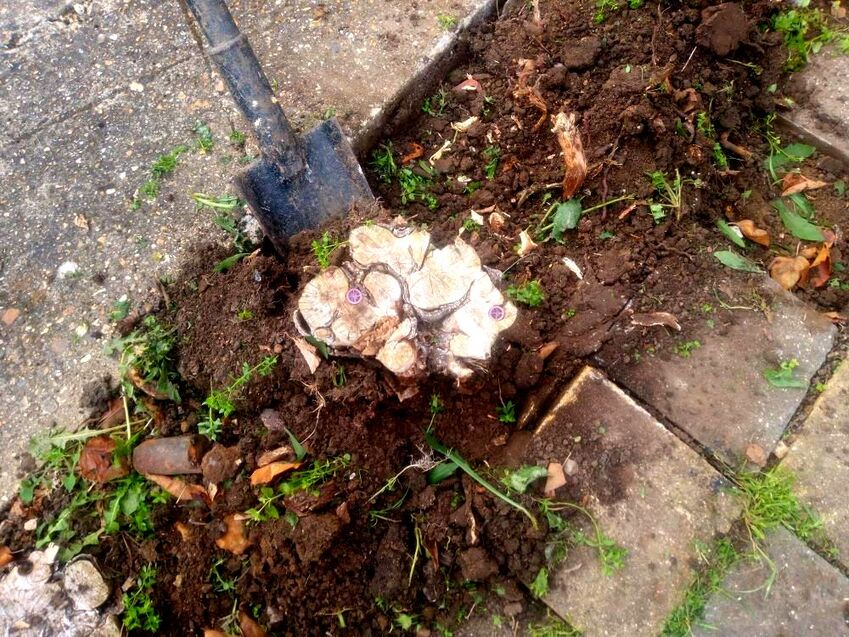
Step 4: Break the tap rootWith some hedges you may be able to snap the tap roots by pulling at the trunk. If not, try to cut through the deep vertical roots with an axe or digging bar. As you cut into the tap root it should weaken and eventually snap, the whole hedge should now be loose. If your vehicle has a strong tow bar some strong rope can help pull out the stumps. 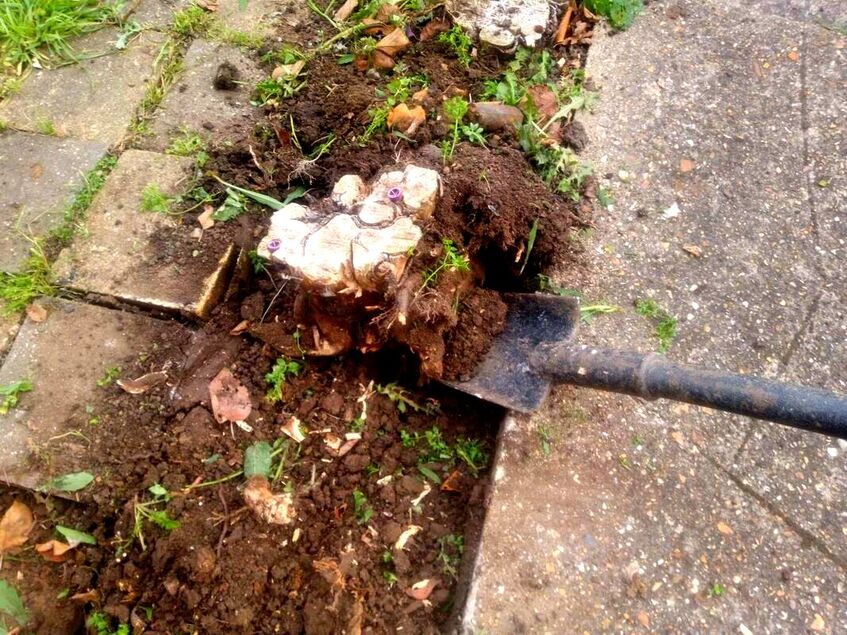
Your hedges and stumps should now be removed completely by the roots!
FAQ'sWhat is the best tool for removing hedge roots?
Bar far the best mechanical method of removing hedge roots is an excavator machine. For large stumps and roots a stump grinder is also very effective. The best hand tools for removing hedge roots are long bars with a blades at the end. The two most common are grafting spades and long digging bars. These can be thrust down into the ground deeply to cut through anchor roots. Mechanical leverage can then applied to lever out stubborn stumps. It helps however to excavate around hedge stumps first with a digging spade. 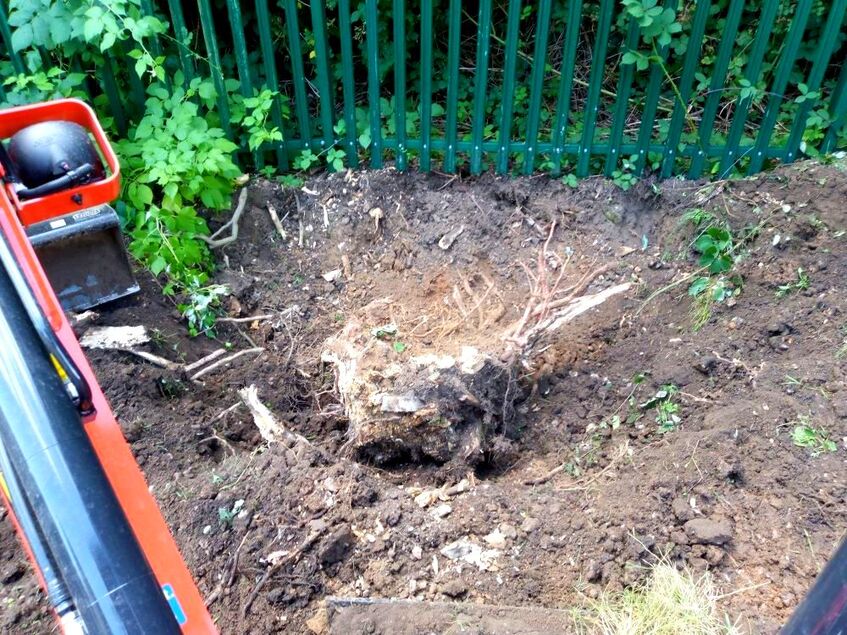
How deep are hedge roots?
Hedges like most shrubs have many more horizontal roots than many people expect. They do also have one or more central tap roots which can go quite deep. How deep the roots of hedges are however depends on the species and size of the hedge. When removing hedges you should dig up horizontal anchor roots while severing vertical tap roots. Will hedge roots grow back?
If you cut hedges down to the ground there is a fair chance the plants may grow back. The closer to the soil level you cut them the less chance they will have of re-sprouting. However some coniferous species of such as Leylandii will not be able to regenerate new foliage from old wood. If you want to remove a hedge it is always best to remove them with the roots. This will make it easy to grow other plants or install a new boundary of some sort. 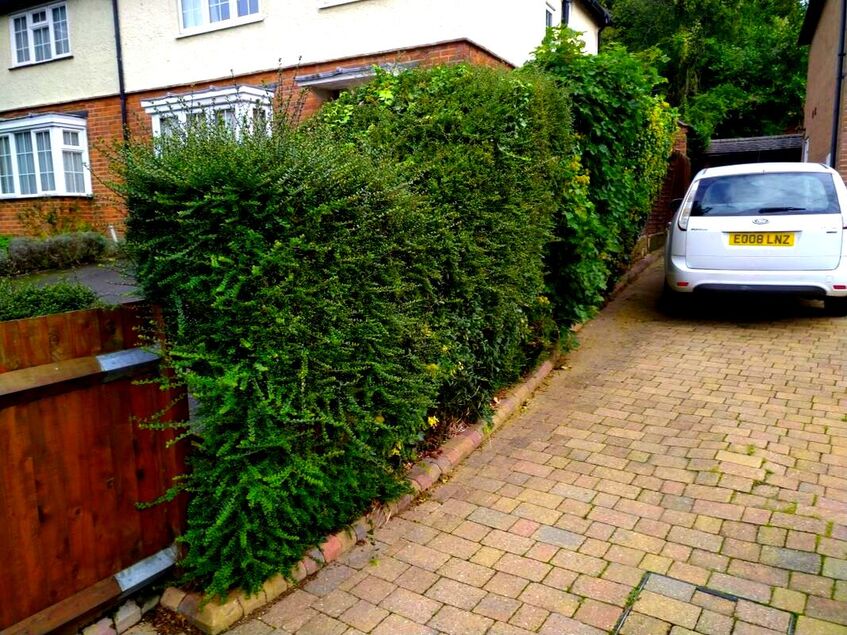
What are the disadvantages of a garden hedge?
The main disadvantages of growing hedges are that they take long to establish and require ongoing maintenance. Another big disadvantage is they can become very broad over time taking up much valuable garden space.
Thank you for reading our article on how to remove garden hedges by the roots. Below I will link to some other articles you may find useful.
Hedge Removal Made Easy: Step-by-Step (evolutiontreesurgeryltd.co.uk)
How to Remove a Hedge and Dig out the Stumps (youtube.com) How to Remove Hedges - Step by Step Guide (myjobquote.co.uk)
'As an Amazon associate I earn from qualifying purchases'

This article contains affiliate links
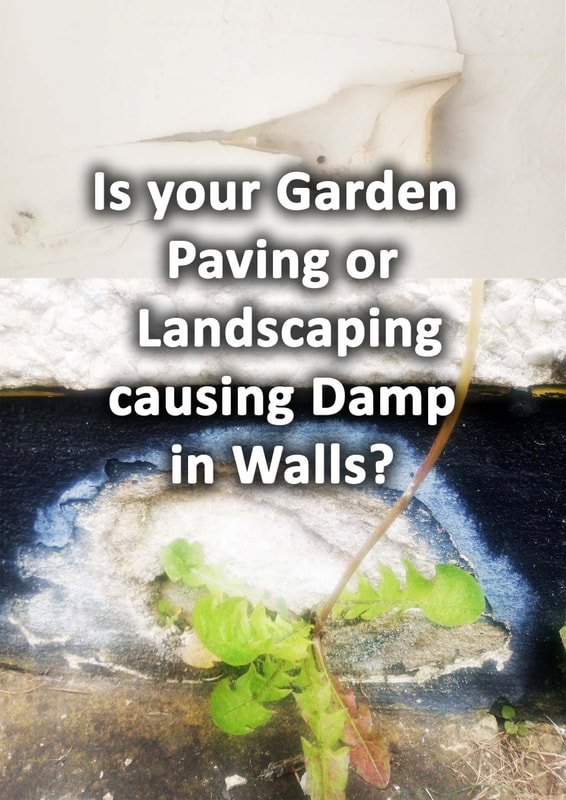
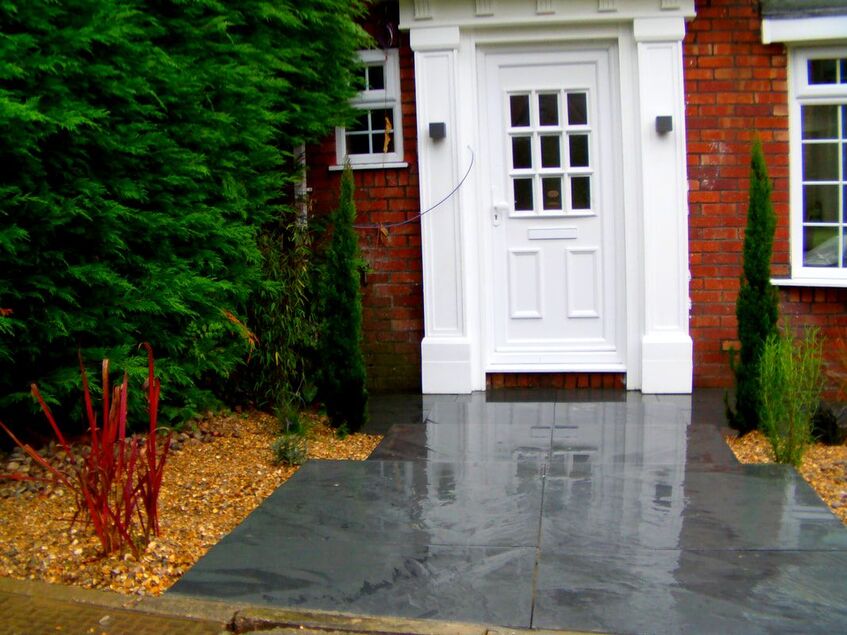
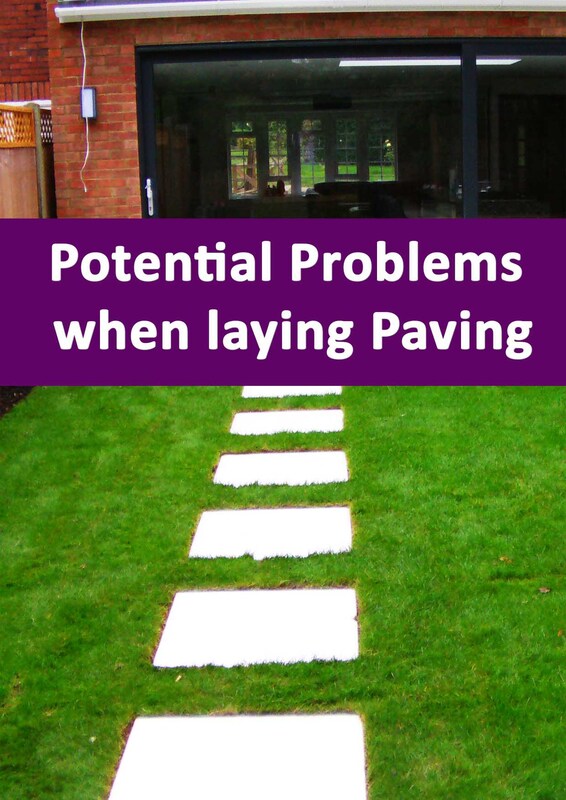
Gravel stips or ‘splash traps’ have been implemented where paving adjoins buildings
There is some debate however as to weather these features are necessary or either a good idea entirely. From experience laying countless paving and patio projects for a number of contractors and clients I have formed my own view. In this article I will discuss what I have learned about gravel trap installation over the years. I will explain why gravel traps have been installed so widely, if they are necessary and how they should be installed correctly. Why are gravel strips installed between paving and buildings?One of the most common cases for installing gravel channels around buildings is for drainage. However, if the sole function was to allow water to drain away a channel drain would be much more effective. The problem with collecting large quantities of surface water in channel drains is where to direct it? Sustainable drainage strategy prefers as much surface water to permeate back into the ground as possible. This means gravel traps do offer some limited drainage benefits around paving. The problem is these gravel channels soon become silted and clogged after a few years. This results in a moisture retentive sponge sitting against your building all year. Such gravel traps can start to encourage weed establishment and look generally unsightly. 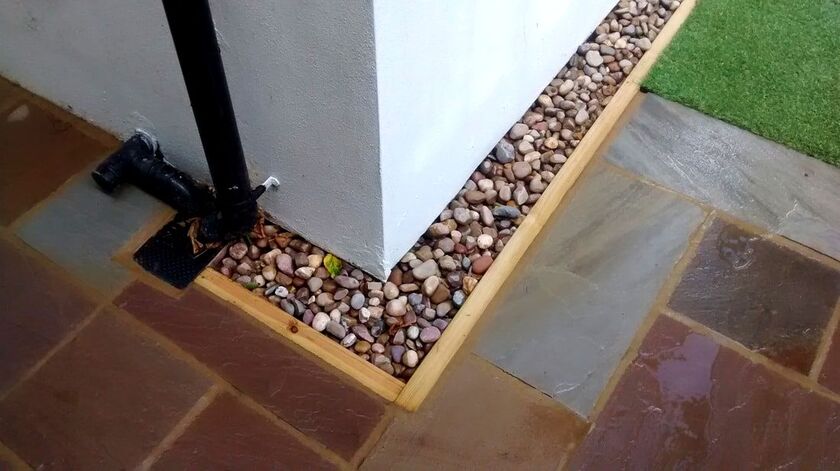
The truth is if paving is laid correctly it should direct water away from the building.
However, it takes more skill to lay paving with the correct falls away from walls and building entrapments. Consequently, gravel traps have sometimes been installed by lazy contractors or those not skilled enough to lay paving to slight falls. There is some claim that gravel borders will reduce water back splash during heavy rain. Gravel would certainly reduce back splash however the eaves of most roofs jut out further than most gravel and splash traps. There is no doubt that in many cases gravel traps can look visually appealing. This is especially so if the gravel contrasts or compliments the paving material you are using. Gravel strips can also help to mask small cuts around the edges of paving. 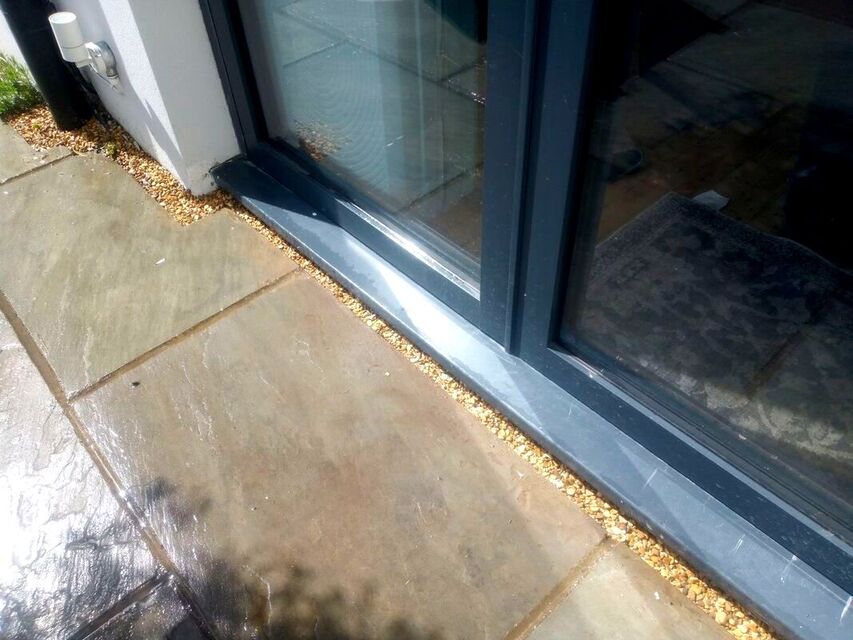
Should you install a gravel strip around your home and paving?I don’t think there is any scenario which dictates that a gravel trap should be installed. If water is falling off paving and sitting against your home a grated channel drain is the best option. Such should be integrated into a greater patio drainage strategy and system. However, if you decide to install a gravel trap for aesthetic reasons make sure it is installed correctly. Correctly installed gravel traps should include a level of water proofing and a perforated drainage pipe to channel away standing water. 
How to install a drainage gravel trap around your home
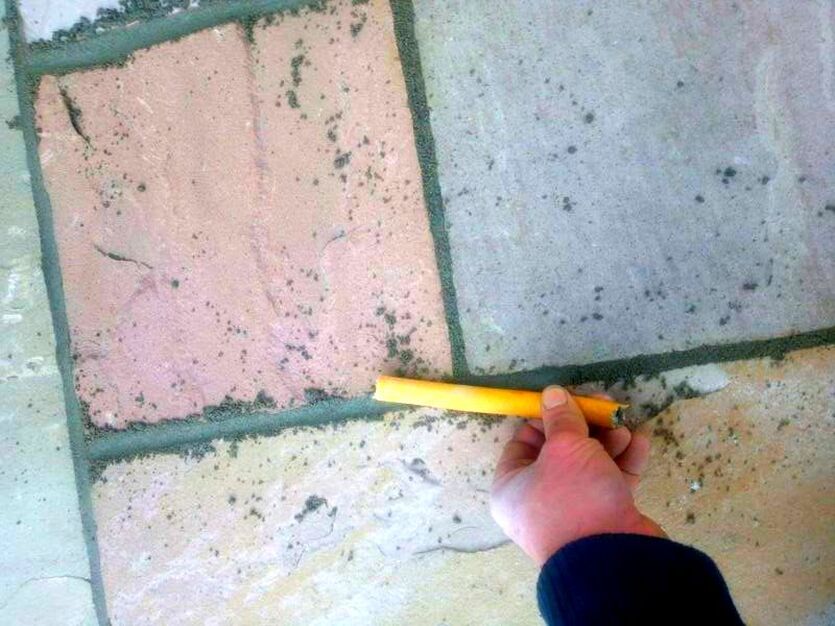
Step 1: Create your trapIf you have existing concrete or paving around your home you will have to mark out and cut your channel. Typically such a channel is between 60mm and 100mm wide. A breaker should then be used to break out the strip of hard standing. In the example we are using here we are revamping an existing gravel trap which has become blocked. In such a case remove all of the gravel and silt from your drainage channel. 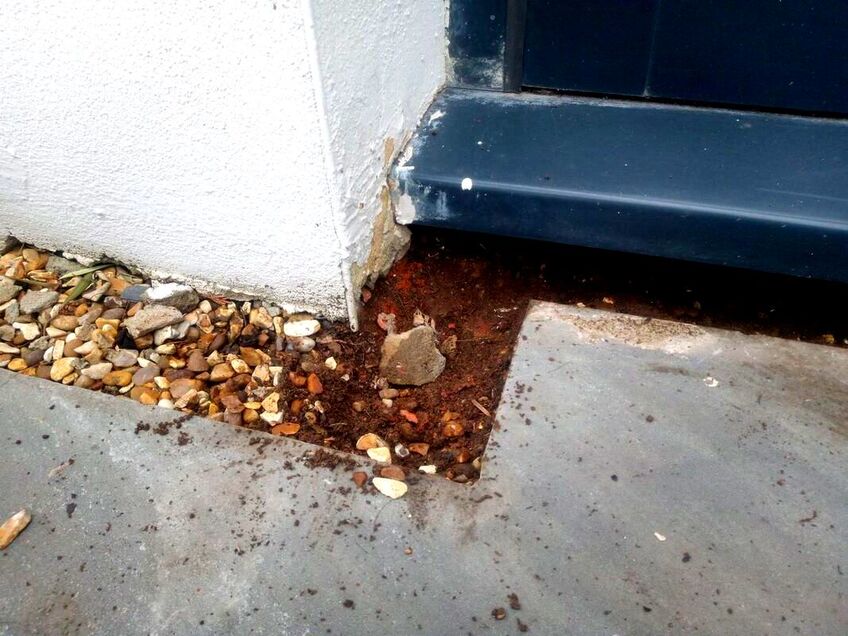
Step 2: Air dry your gravel trap
Whether you have broken out a new gravel trap or cleared out a new one you must allow it to dry out. Make sure you give the inside walls and edges a goof brush off with a stiff hand brush. Once your gravel trap is dry you can rework the channel. 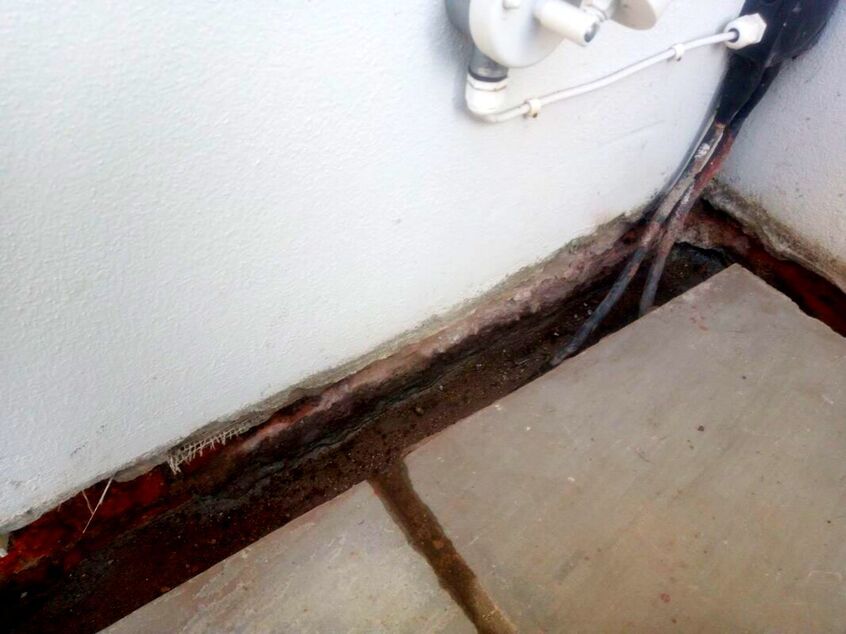
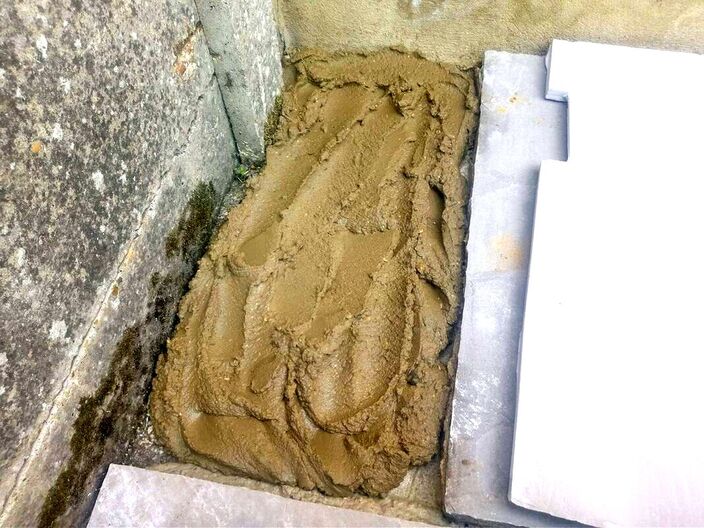
Step 3: Re-line your gravel stripIt is always best to line your gravel strip with a smooth water proof render. This will reduce the risk of damp and silting. Mix up a 1:4 plastering sand mortar mix and add a bonding and waterproofing agent. Mix up the mortar to a stiff brick laying mortar and render the inside of your channel as smoothly a possible. If you want water to flow out of the channel create a level mortar base. Once your channel is re-lined allow to set. Step 4: Waterproof gravel strip with bitumen paintWhen your mortar is well set, (after a few days) apply two coats of external grade bitumen paint. Take maximum care not to stain your paving or the walls of your home above the gravel line. Once this is complete leave to cure for 24 hours. You can now refill your gravel trap with free draining non-calcareous gravel or install a drainage pipe. 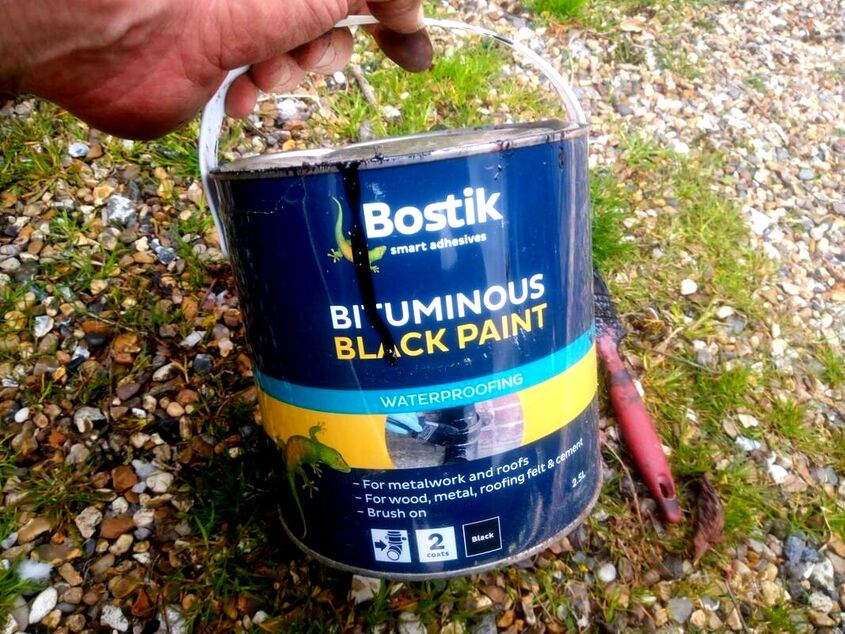
Step 5: Install a perforated ground pipeI find most perforated pipes on the market are too larger diameter and flexible for gravel traps. Consequently I recommend a 32 mm PVC ground pipe is normally best for such gravel traps. You will need to drill multiple drainage holes to the pipe smaller than the propose drainage gravel. This must then be laid to the base of your gravel trap. Elbow attachments will enable you to install your pipe work corners. 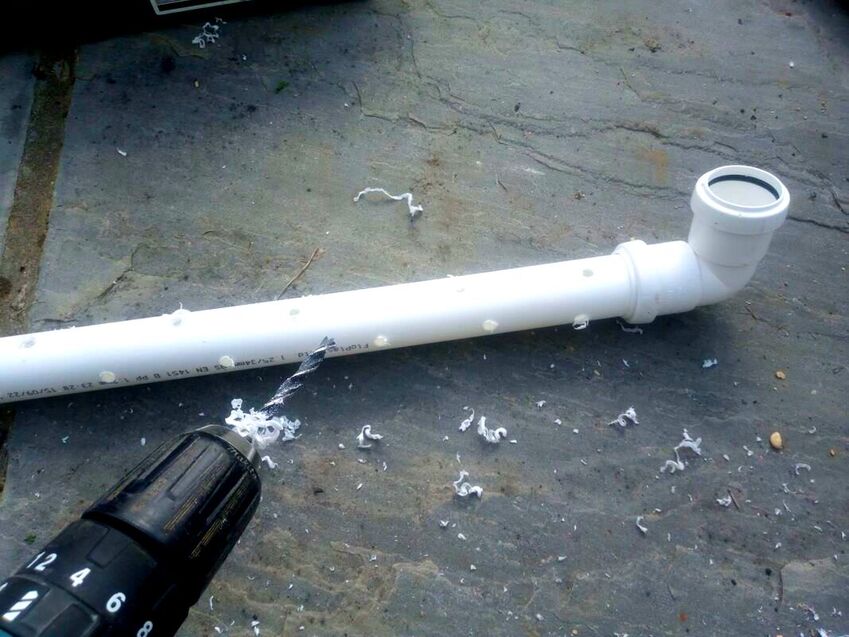
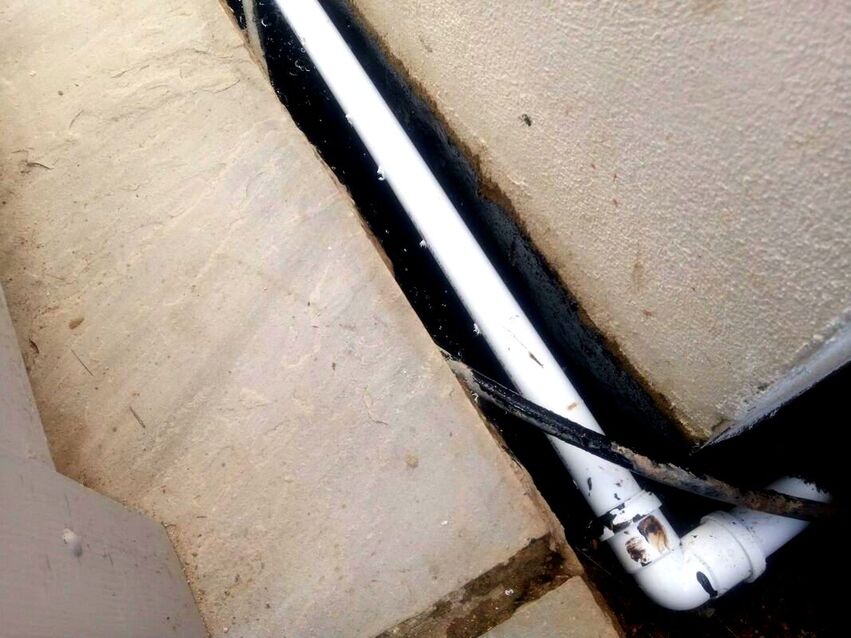
Step 6: Connect your pipe to its destination drain
You will then need to connect your pipe to your drainage destination. If you already have a garden drainage soak-away or wetland this could be adequate. If not you may want to install a soak-away of some sort. The size of this will depend upon the catchment area of the paving. In the example here we created a small linear soak-away in a low lying flower border. For more information on topic, visit out article on patio drainage and garden soak-away installation. 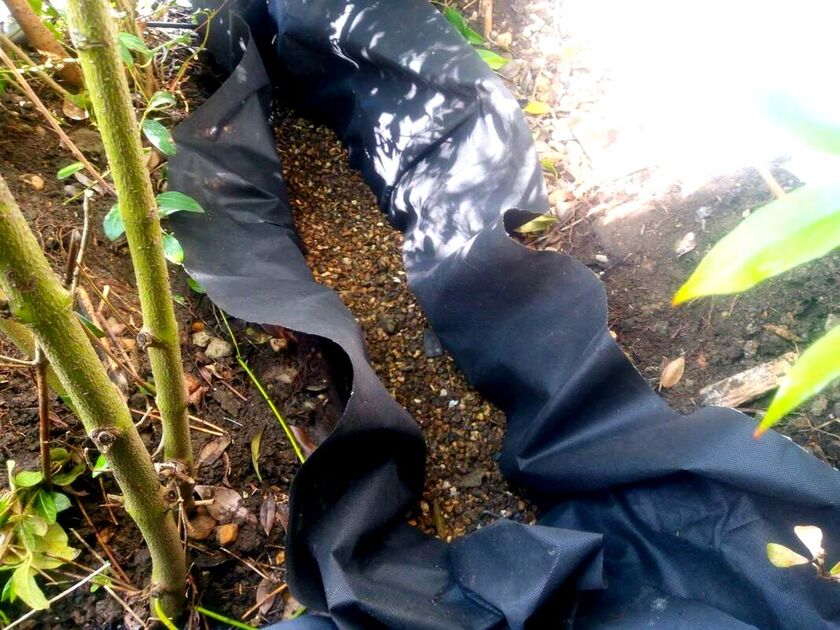
Step 7: Refill your gravel strip with gravelWhen you have completed your pipe-work back fill your gravel strip with gravel. The best gravel for drainage channels is a non calcareous, free draining aggregate like 10mm pea gravel. 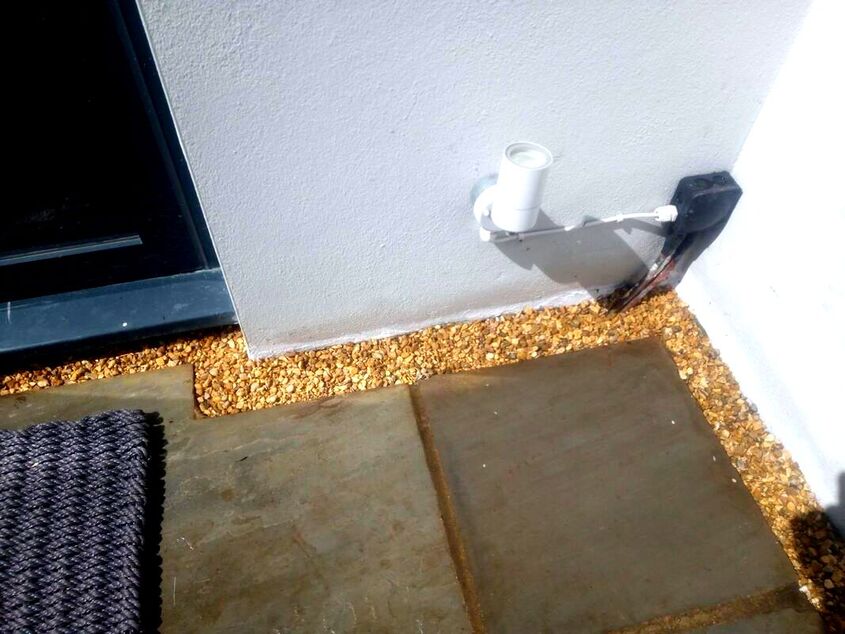
Thank you for reading our article on gravel strips and slash traps for paving around homes. Below I will link to some other articles you may find helpful.
'As an Amazon Associate I earn from qualifying purchases'
This article contains affiliate links
Slate is one of the most effective natural stones for creating beautiful garden edging.
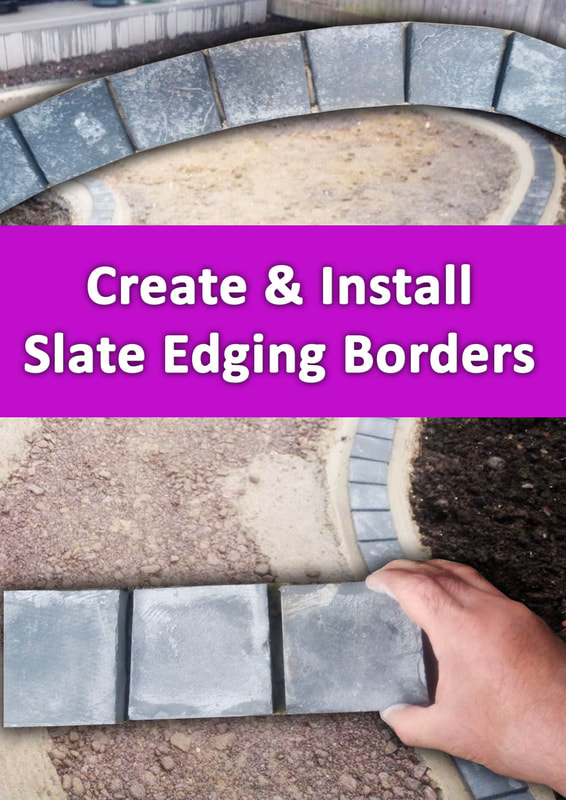
Not only does it come in a range of aesthetic tones it is extremely durable and weather resistant. What makes slate even more exceptional for garden edging is its suitability for any type of garden design and themes. Slate can be utilised for border edging in contemporary, traditional, or any international theme of garden design. Due to slates fine grain and dense structure it can be worked to either a clean or rustic finish. Consequently, in this article, I will show you how to make affordable slate garden edgings from paving. These slate edgings can be cut to form any shape including bricks, setts and gentle curves. Our step by step guide with pictures demonstrates how to create slate sett garden edging laid to form a curvy border. These slate edgings are perfect for edging; lawns, patios, paths and flower borders. Is slate good for garden and landscape border edging?
Slate is extremely suitable for garden and outdoor border edging. Any material intended for outdoor use must be durable and weather resistant. As slate is metamorphic rock formed at extremely high pressure it is extremely impervious and dense. This means it is resistant to water penetration and freeze and thaw action. Low permeability combined with naturally dark tones means it is very resistant to staining. Typically, even impervious and light coloured materials such as porcelain can obtain surface stains. Bird poop, and tannins from dead leaves and berries can still stain the surface of very light garden edgings. 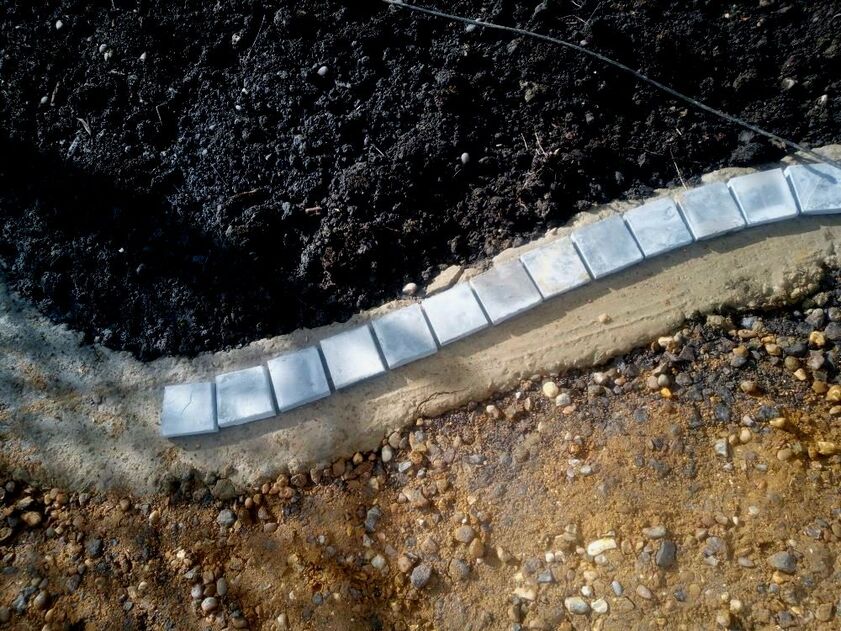
With slate however, its dark hues means stains are less likely to spoil its look. Slate also has an extremely high compressive strength like concrete.
This means when combined with an appropriate compacted base and strong mortar bed slate can last outside for a lifetime. As a material slate is universal in theme meaning it can be applied to many different landscape designs and styles. Its natural aesthetics and durability make it ageless when it comes to style and design. Slates tones and smooth surfaces provide excellent contrasts to other landscape elements such as lawns, gravels, planting and water. 
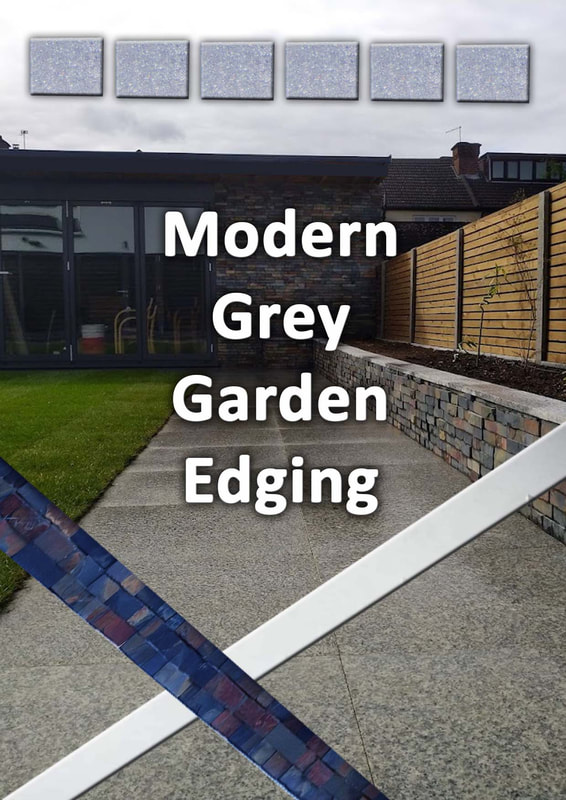
How to install slate sett edgings to a curvy garden borderMost slate garden edgings on the market come at an expensive premium. In this section I show you how to create garden border edgings from slate paving. I will then show you how to prepare a base and install your slate edgings to your new borders. In this example I will be using 900 x 600 x 20mm Brazilian Black Slate paving slabs cut into slate setts. Tools you will need
Shopping list
Step 1: Marking out
Mark out where you want your slate border edgings to run. If you want straight edgings, the line can be marked out with a tight string line. Curvy edgings can be marked out by a line marker spray. If you wish to experiment with the curve visually first mark it out with a length of hose pipe. Step 2: Excavation
Excavate a square and linear foundation for your new edgings. The excavation should be slightly wider than the edgings themselves and reach a depth of about 130mm. This will enable a sub-base of 80mm a mortar bed of 30mm and leave 20mm for your paving edgings. Make sure the excavation is neat, consistent with no loose left in the base. 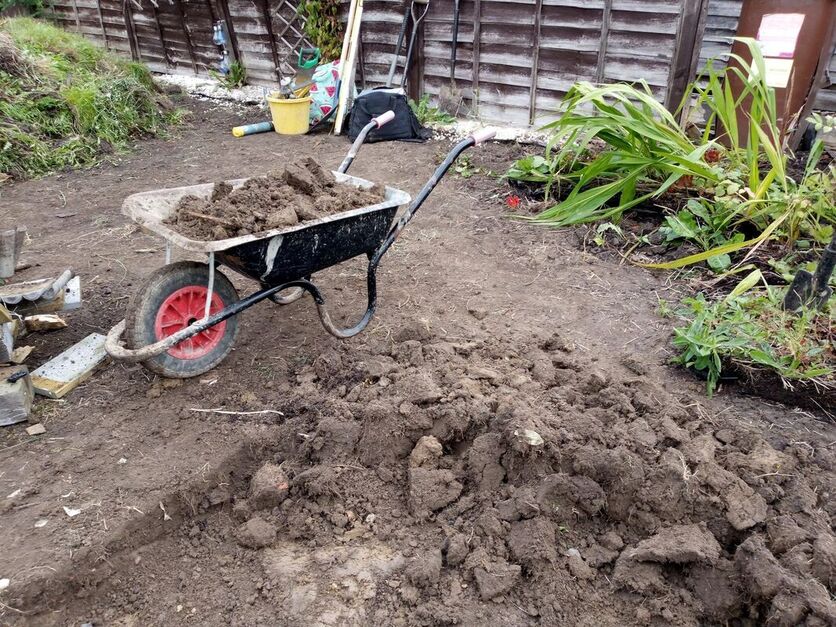
Step 3: Working out levelsMake sure you plan your levels correctly, you want your edgings to be level with no dips or bellies. If you are working between two levels set up a tight string line so you can discover the completed level. It is a good idea to peg out your sub-base level throughout your excavation. This way you can lay your edgings down upon a consistent bed or mortar. 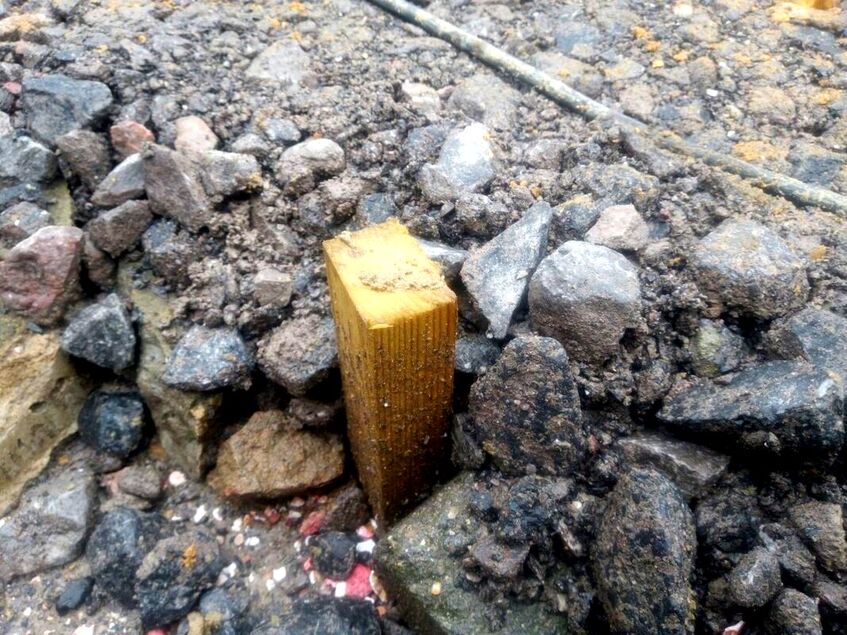
Step 4: Installing sub-base
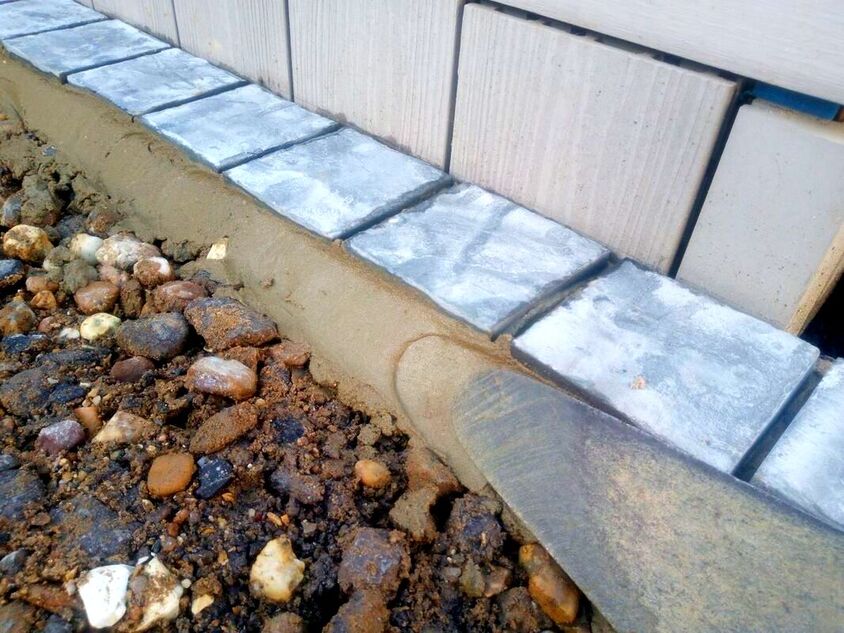
Supply and spread your sub-base evenly to the top of the pegs. One of the most common aggregates for this is mot type 1 which compacts well. Once this is spread it can be compacted with a sledge hammer or tamper. Alternatively you can lay a concrete foundation to base your edgings like in the image below. 
Step 5: Cutting your edgings
In the example here we have created our own slate sett effect edgings from paving slabs. In order to achieve this you will need to mark sections of your slabs into 100mm squares. If however, you prefer a brick or block effect these shapes can also be marked and cut. Once you have market out your edging shapes cut them out with a grinder and diamond blade. 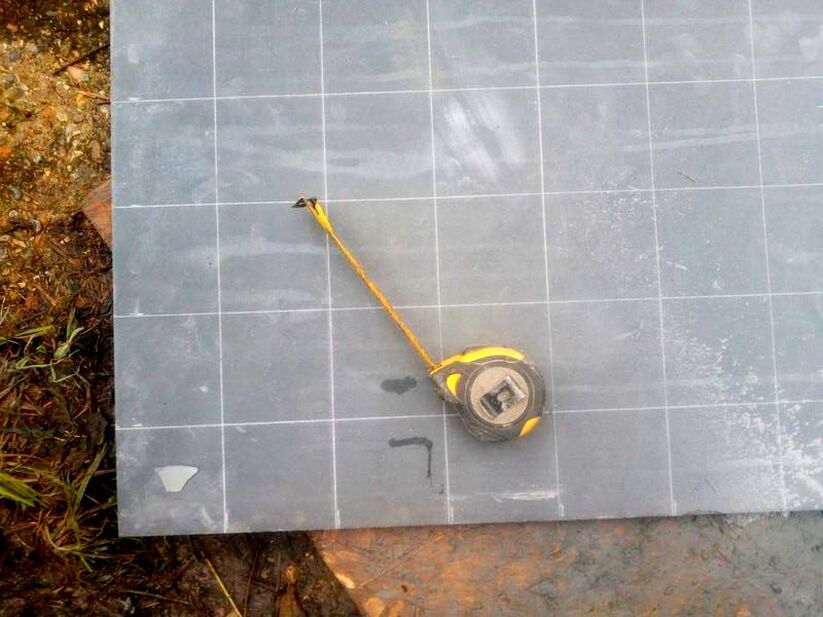
Step 6: Mixing Mortar
Mix up 4 parts sharp sand and 1 part cement with water until it reaches the consistency of bricklaying mortar. Make sure you add some plasticiser which allows mortar to be as workable as possible without too much water in the mix. Slate can have some problem bonding to wet mortars so it is also a good idea to ad a bonding agent. It is always more efficient to use a cement mixer when mixing mortar. 
Step 7: Laying your edgingsLay a fillet of mortar along your sub-base foundation. Make sure you work valleys and peaks into the mortar; this will provide give to bed your edgings down level. To make your slate edgings extra strong you may want to cut extra key groves to the base with a grinder. Bed down your edgings until they are flush and level. 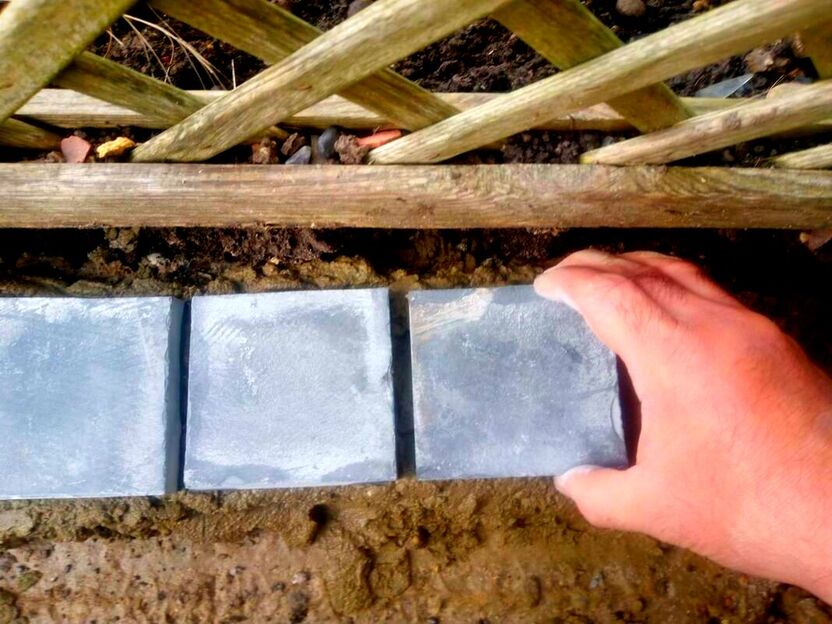
Step 8: Cutting curves into slate edgingsIf you are laying edgings to a curve like in the example below your will need to cut them to accommodate the curve. This can be achieved by cutting slight angles to adjoining edgings. Overlap the edgings to follow the curve and then cut the overlapping angles to each edging block. For a step by step guide of creating perfect curves with square pavers visit our step by step guide here. 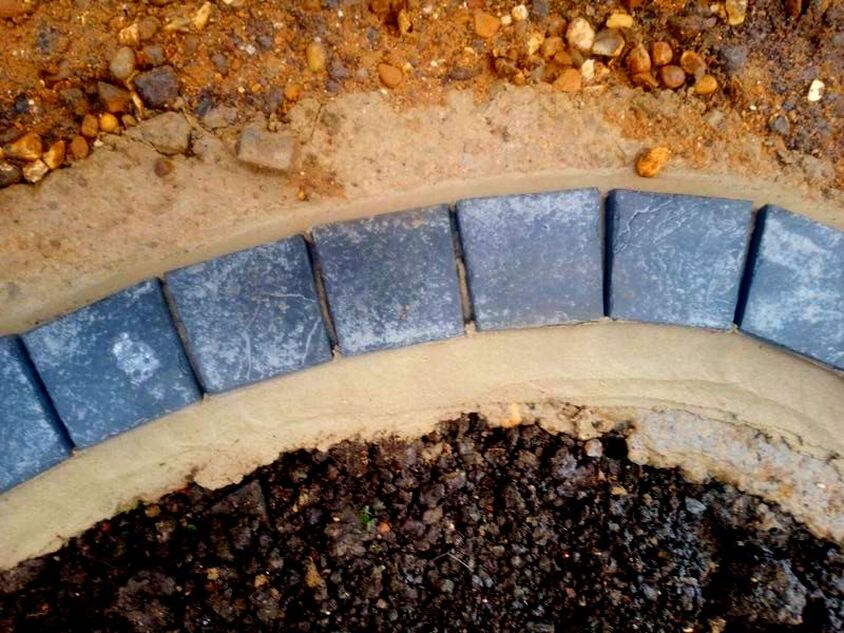
Step 9: Jointing your edgings
Leave your newly laid edgings for at least 24 hours to set hard. The next day joint your slate edgings with a plastering sand and a cement mortar mix. Especially for black slates I find adding a little black mortar dye very effective for jointing slate edgings. Mix 3 parts plastering sand to 1 part cement dry and gradually add water with some plasticiser. Do not make the mix too wet as it could stain your slate edgings! The mix should be just damp enough to get a finish with a jointing iron. You should just about be able to form a ball with the mix in the palm of your hand. You should also only grout when the weather and the edgings are bone dry. 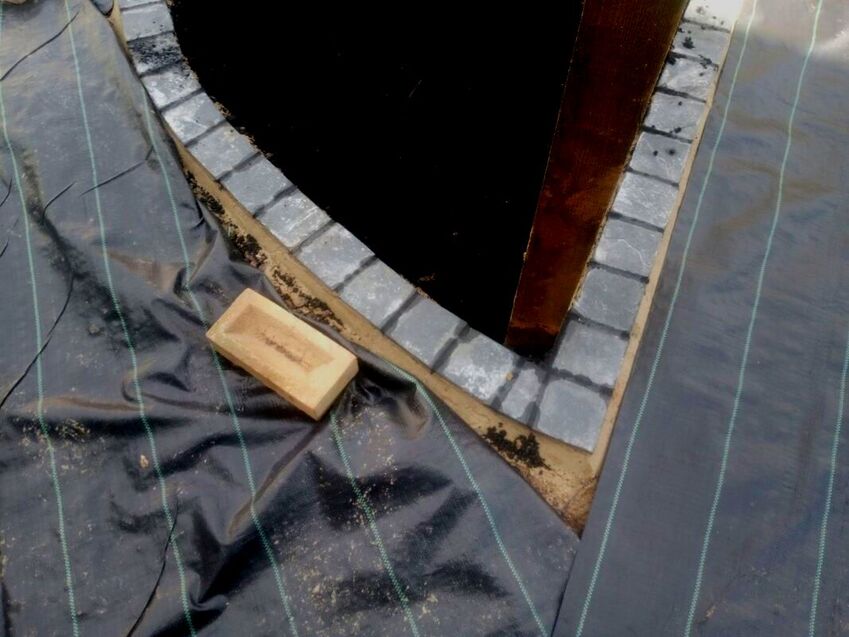
Step 10: finishing
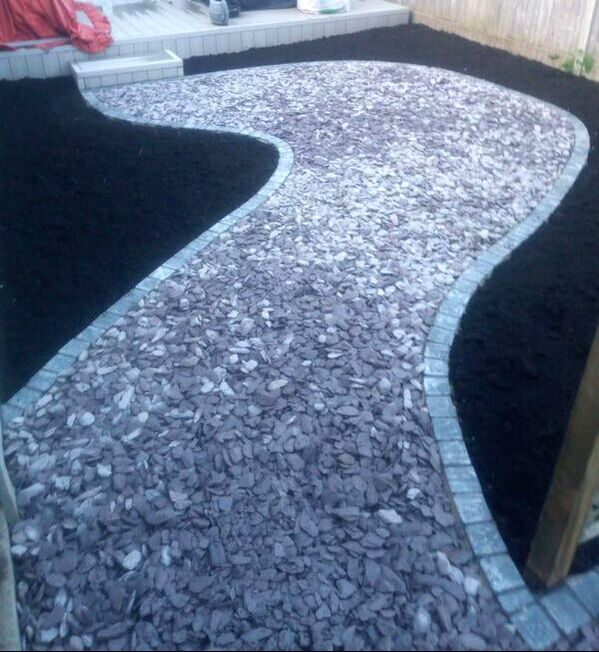
When you have completed jointing your edgings, sweep any excess grouting mix off with a paint brush. Tidy up the surrounding area and fill up any gaps around the completed slate edgings. In the example here I filled the pathway between the edgings with slate chippings! Clean up the area of materials and tools and admire your completed project. This is the most rewarding part of any hard landscaping project. 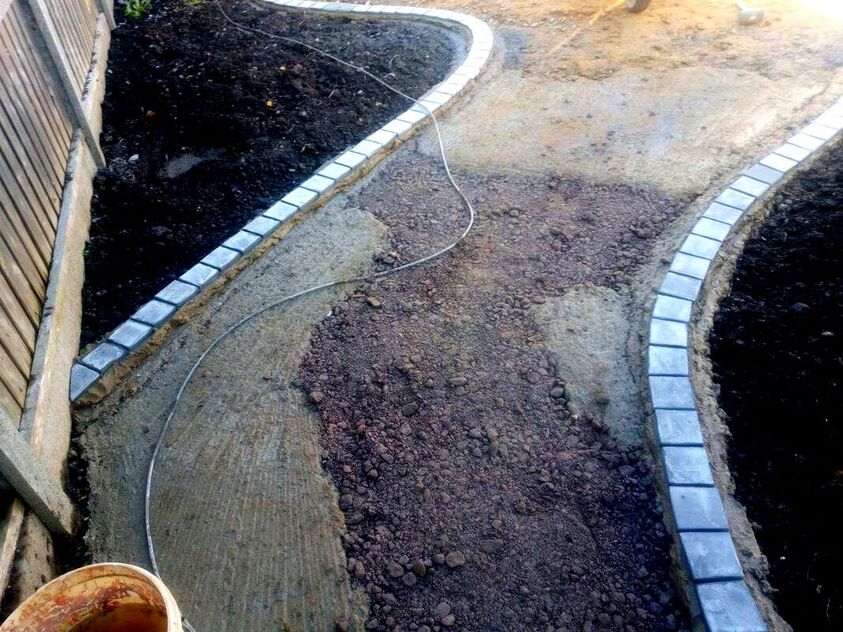

FAQS about slate garden border edgingIs slate edging expensive?
|


|
|

|
'As an Amazon associate I earn from qualifying purchases'
This article contains affiliate links
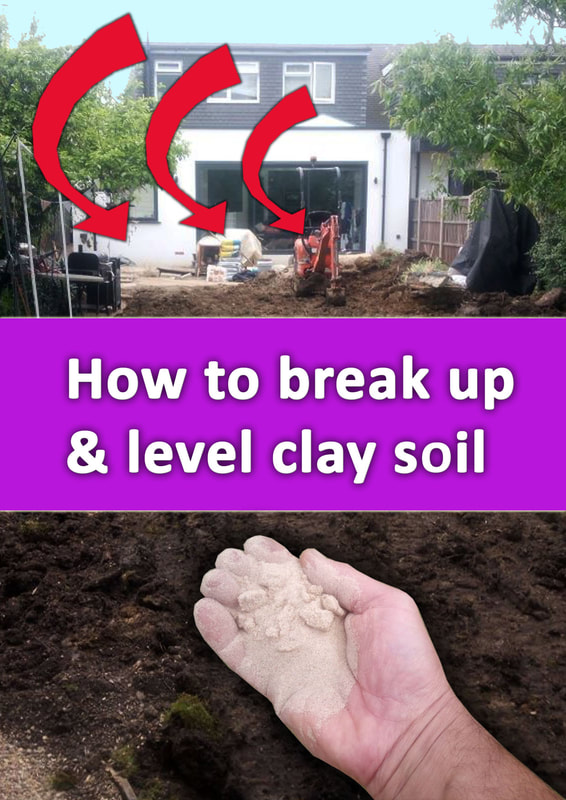
Clay soil is well known for its ability to become compacted and form dense clods of earth. These clods can be challenging to break up at any time of the growing season.
During winter the clay can become saturated, sticky and unworkable. However in summer the clay can become rock solid becoming impossible to break up.
Such composition is due to clay soils heavy and dense particles which bind together tightly. Fragmenting clay particles is critical if you want to transform difficult ground into fertile growing spaces, and sound foundations for landscape installations.
Breaking up and levelling clay is necessary for the installation of lawns, patios, flower borders and many other garden projects.
Consequently in this article, I will explain how to break up and level clay soil in your garden. I will explain the best tools to use, the best time of year, clay soil improvement and much more.
Why level clay soil?
There are many reasons why it is advantageous to level clay soil.
Firstly levelled clay soil can help form soil stability, this is especially so if your existing ground is undulating or on a gradient.
As clay sub-soil compacts well, levelled cay can provide the perfect platform for concrete foundations and base aggregates. This can enable the construction of many exciting landscape structures and installation projects.
Probably the most typical reason to level clay soil in a garden is to create a perfectly level lawn.
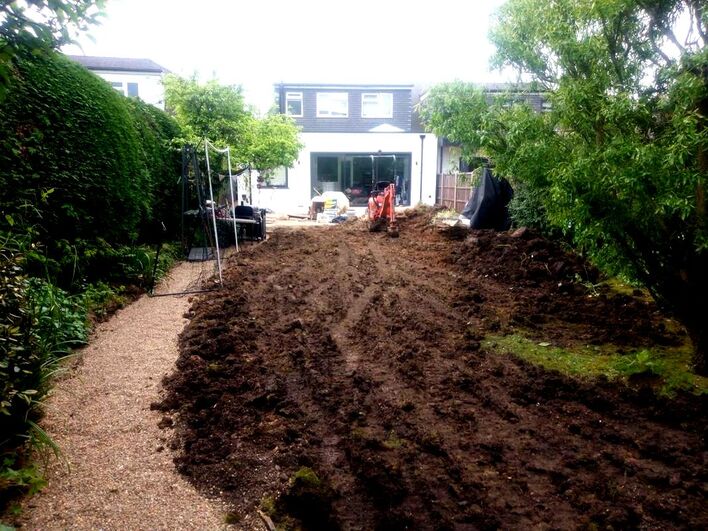
Although lawns are best laid on humus rich loams these soft soils are not best for levelling.
Large depths of soft topsoil’s can lead to uneven settlement, sinking and displacement. A better option is to level your clay subsoil fist using a skilled excavator operator to form a level base.
A 25-50mm layer of humus rich loamy soil and then be spread and levelled before the lawn is laid. Finally, one of the most important reasons for levelling clay soil is improving drainage.
When there are low spots or ‘bellies’ in clay soil, water accumulates in times of heavy rain.
These low spots become saturated and boggy leading to further compaction and water accumulation. Eventually these muddy hollows ensure your whole garden becomes easily saturated and boggy.
Consequently by making sure clay soil is levelled and flush you can allow rainwater to run off your gardens surface. This will lead to a better looking garden and a well drained outdoor space.
What is the best way to level clay soil?
The best way to level any area of clay soil is to firstly assess you existing levels. Look at your site from multiple levels to try to gauge the lie of the land.
If you have level features surrounding your site such as walls and fences see how the ground slopes around these features. If you want to make clay soil perfectly flush and level you can set up string lines across your area.
Make sure you pull your string line tight so there is no sag in the line. Now chip off or dig down any high spots or mounds in the clays surface.
If you have a large site an excavator machine with a skilled operator can level areas very effectively.
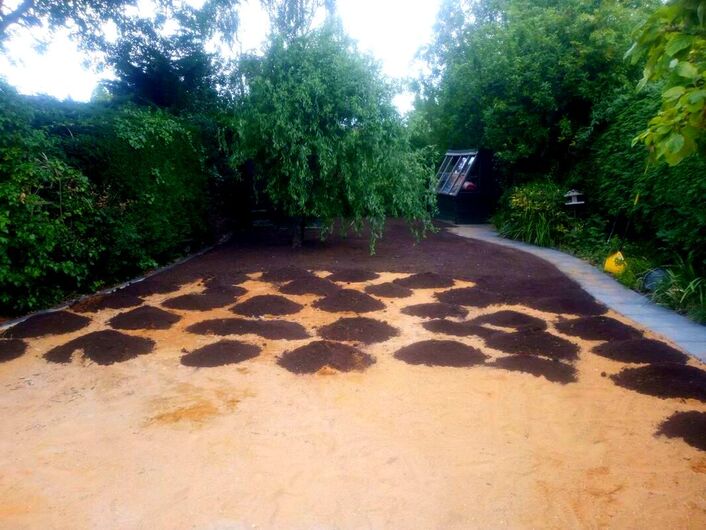
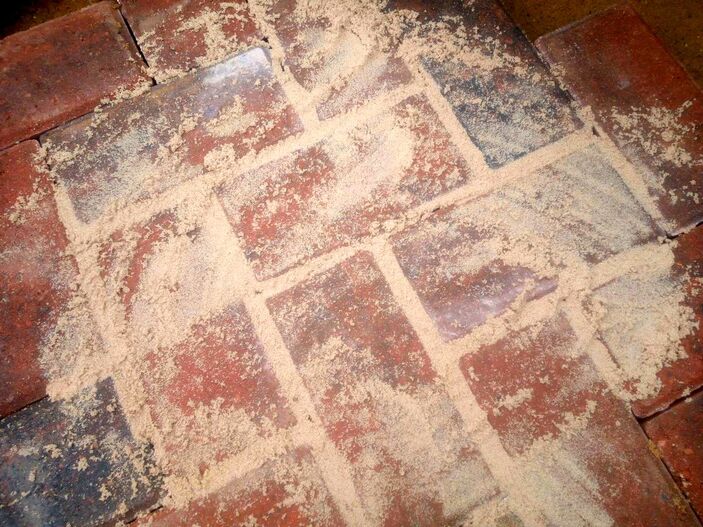
One of the best ways to level clay soil is to dig over the soil in autumn and spread a 50mm layer of sharp sand over the top.
During the winter as moisture within the clay freezes it will break it and fracture the clods.
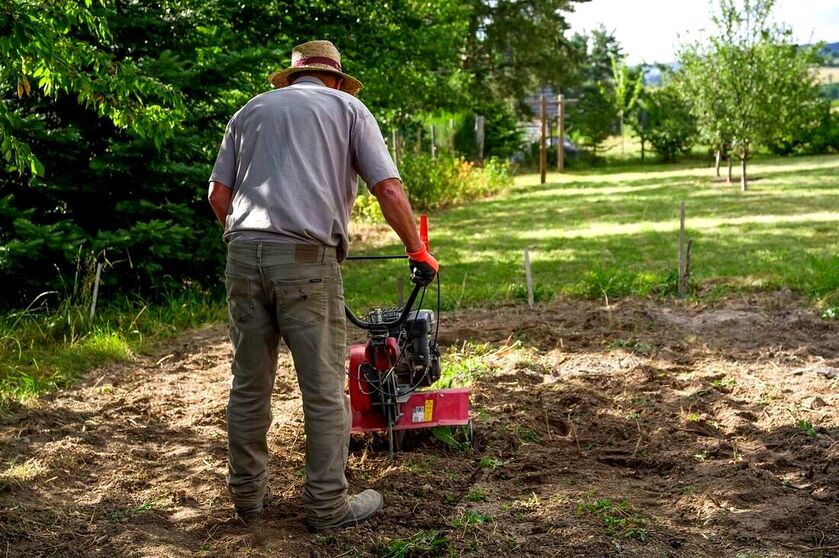
The sand will slowly seep into the clay and help to break apart the clay particles. Then during a warm spring day the whole surface can be tilled with a tiller.
This will lead to a loose and fluffy clay soil which can then be easily raked and shovelled level.
One of the best ways to level clay soil is to dig over the soil in autumn and spread a 50mm layer of sharp sand over the top.
During the winter as moisture within the clay freezes it will break it and fracture the clods.
The sand will slowly seep into the clay and help to break apart the clay particles. Then during a warm spring day the whole surface can be tilled with a tiller.
This will lead to a loose and fluffy clay soil which can then be easily raked and shovelled level.
How do you break up clay soil?
To break up clay soil you will first need to ensure the clay has an intermediate moisture content. If the clay is too wet it will be too sticky to work and become stuck to your tools.
It will also compact even more underfoot as you work. However, if the clay is too dry it will possibly too hard to penetrate with digging or tilling tools.
The clay soil should be ever so slightly damp to touch but not soggy. You will then need to dig over the clay so it forms lumpy, turned over, clods.

At this point it is well worth spreading plenty of sharp sand, grit and organic matter over the clay soil.
When you till the surface these materials will blend with the clay preventing the particles sticking together.
This will help you reach a fluffy and well textured clay loam in the future.
Now use a tiller machine to break up the clay particles and become a loose and workable topsoil.
When you till the surface these materials will blend with the clay preventing the particles sticking together.
This will help you reach a fluffy and well textured clay loam in the future.
Now use a tiller machine to break up the clay particles and become a loose and workable topsoil.
How to level a lawn with clay soil
Although clay can be challenging to break up and level it can act as a sturdy base under garden lawns.
If you want to create a perfectly level lawn on clay you need to apply a process of cut and fill. This basically means breaking up high areas of clay soil and spreading them into low areas.
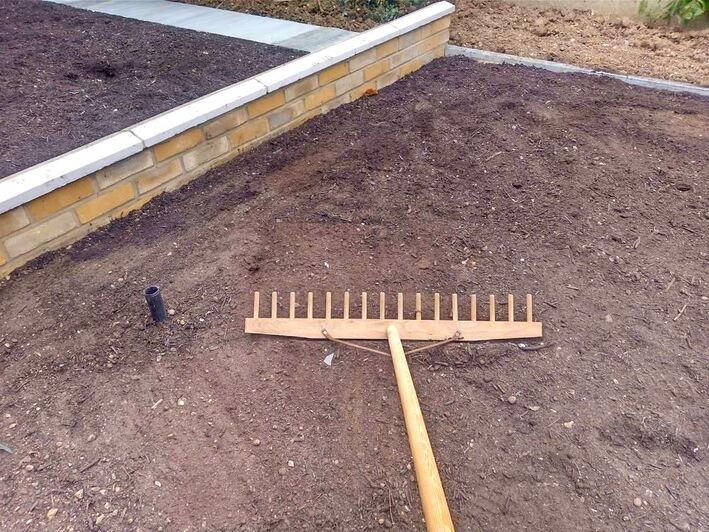
This can be done by chipping off the old lawn and identifying high and low spots. If you want your lawn perfectly level you can mark out your levels with pegs.
Using a very long spirit level and a hammer, tap in pegs along your lawns perimeter.
Tap in pegs so the level reaches the pegs at each end and the bubble sits between the lines.
Carry on all the way around the lawn so you have a visual reference to your completed level. It is a great idea to install level edgings or mow strips around the edge of the lawn.
This way you can lay your new turf perfectly level to the top of the installed edgings.
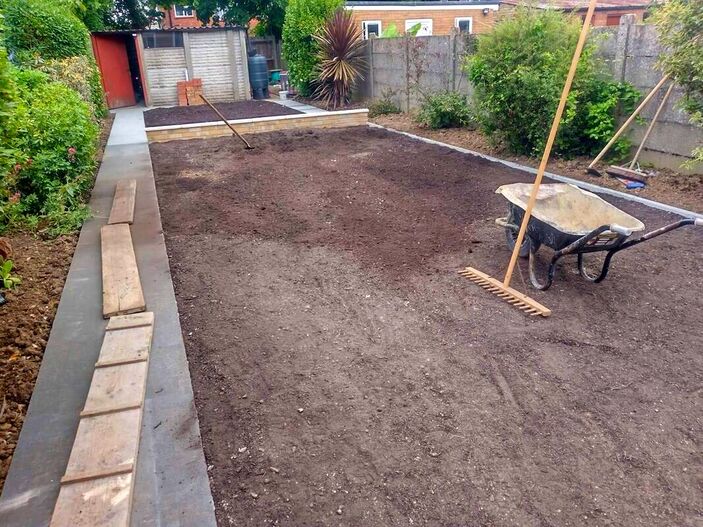
Now break up your high areas of clay and spread them into your low areas.
This will allow for a more stable and level soil to base your new lawn. Your clay can then be tilled, raked level and a loamy topsoil spread to the finished level.
Carry on all the way around the lawn so you have a visual reference to your completed level. It is a great idea to install level edgings or mow strips around the edge of the lawn.
This way you can lay your new turf perfectly level to the top of the installed edgings.
Now break up your high areas of clay and spread them into your low areas.
This will allow for a more stable and level soil to base your new lawn. Your clay can then be tilled, raked level and a loamy topsoil spread to the finished level.
What is the best way to dig clay soil?
To make digging clay as easy as possible try to do it when it is warm and dry. This will reduce the risk of the clay particles sticking to your tools as you work.
During the middle of the summer however, your clay may be too hard to dig effectively. Consequently, dry days during the spring and autumn are best for digging clay.
The best way to dig clay soil is with a long handled spade and working from a clean edge.
If you slice out narrow and consistent clods these will easily break and crumble under a tillers blades.
Try to slice out rectangle sections about 4 inches (100mm) thick, these will easily dislodge using leverage.
The clogs will also be not too heaving so you can work at a consistent pace. The clods of clay can then easily be turned over or loaded into a wheel barrow.
If you only need to dig down a few inches use an iron bar or grafting spade to break up the top surface. This can be achieved by thrusting down into the clay and levering the handle back towards you.
The loosened clay can then be easily be scooped up using a long handled shovel.
How to improve drainage on clay soil
Clay soils have a particular vulnerability when it comes to poor drainage. As clay particles are extremely fine and dense they can soak up moisture like a sponge.
This can lead to water logging and compaction neither of which is ideal for plants, lawns or people. However there are steps you can take to improve drainage on clay soil.
Firstly, you will need to make your clay soil as level as possible with no low spots. Such low areas encourage the accumulation of standing water leading to boggy conditions.
It is best to have more flush and even soil gradients with perhaps a very slight slope to your lowest boundary. This will enable excess water to escape.
Secondly, you should try to work in as much organic matter to the soils surface as possible. This will help to invigorate soil life and create air spaces within the clay.
Such action will not only improve your clay soils fertility, it will also improve its permeability.
Another way to improve drainage on clay soil is to mix in sharp sand or horticultural grit into the surface.
This gritty material mixes with the fine clay particles and prevents them from sticking together.
Grit and sand is best added when the soil is being dug over or tilled so it can easily mix with the clay.
Drainage channels, swales and ditches can also be excavated around the perimeter of your garden. These will help to draw water away from primary areas such as lawns, patios and flower borders.
For a more comprehensive resource on how to improve drainage on clay soil visit our in-depth article here.
For a more comprehensive resource on how to improve drainage on clay soil visit our in-depth article here.
Tools for breaking up and levelling clay soil.
If you’re going to break up and level clay soil yourself, I have listed the best tools for the job below.
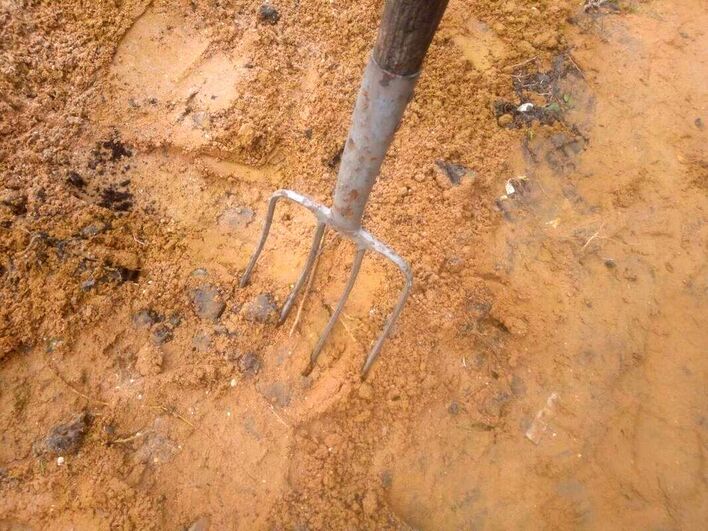
Fork
Garden forks allow you to force into stubborn and compacted clay especially when it's dry.
Spade
Spades enable you to neatly slice into clay soil cutting out manageable sections for breaking up later.
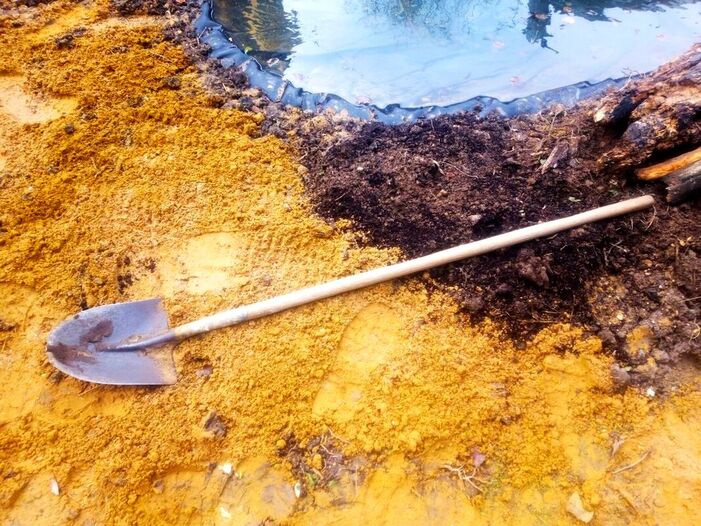
Long handled shovel
A good long handled shovel will allow you easily scoop up loose clay which has been broken up during turning and excavation.
Grafting bar
A grafting bar is a great tool for thrusting down into thick and compacted clay ground, it can also be used to chip off high areas of compacted, clay soil.
Mattock
Mattocks and pick axes are excellent tools for loosening clay soil which has become compacted.
Wheelbarrow
Wheelbarrows are very effective at moving around and carting excavated clay soil away from site or into low areas.
Mechanical Tiller
Mechanical tillers are perfect for breaking up clay into smaller clod and enabling clay soil to mix with grit and organic matter.
Thank you for reading our article on how to break up and level clay soil. Below I will include some other resources you may also find useful.

|

|

|
'As an Amazon associate I earn from qualifying purchases'
This article contains affiliate links
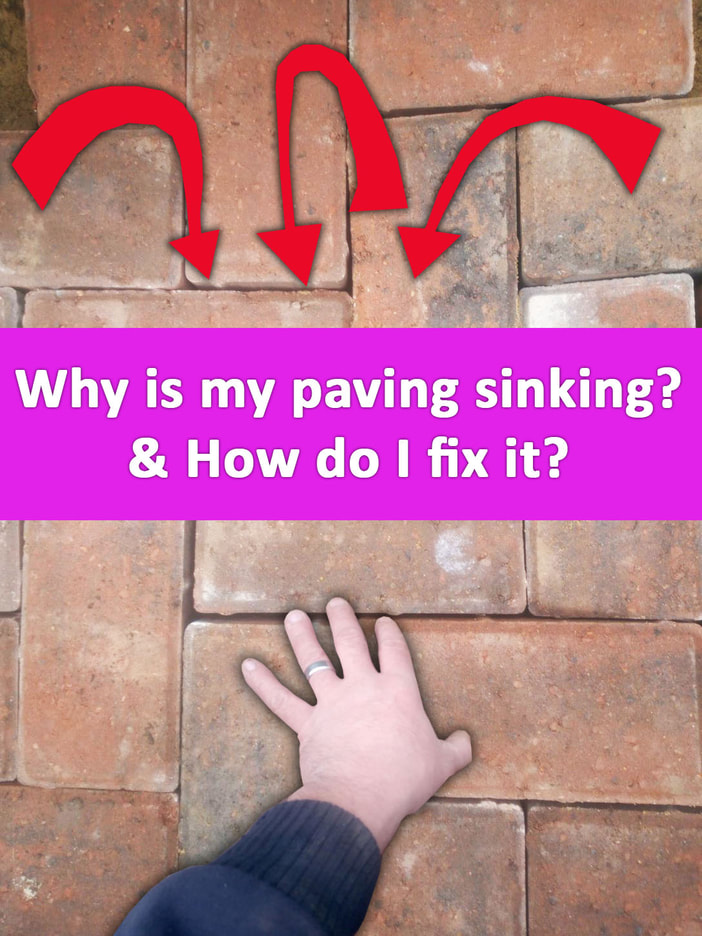
Sinking paving can not only look unsightly it can also be a hazard. Wether your surface is a driveway, patio or pathway there could be many reasons why you’re paving is sinking.
Unfortunately it cannot always be easy to diagnose exactly what is causing your surface to sink. In fact, there are multiple possible reasons why you paving could be sinking.
Sinking paving could be down to a single phenomena or a multitude of varying factors causing the problem. In this article I will break down all of the possible reasons why paving is sinking.
I will explain the tell tale signs which could lead to a specific cause in each case. I will also explain how to rectify the problem whether your paving is laid upon sand or mortar.
Is it normal for paving to sink?
Paving should be built in a way which prevents any substantial movement or sinking. Therefore paving should not have any reason to start sinking.
However, there are numerous factors which could lead to paving sinking over time. These will all be listed and described in the sections below.
Even if paving has initially been installed correctly some of the factors listed can could cause paving to sink.
Why is my paving sinking?
Recent services installation
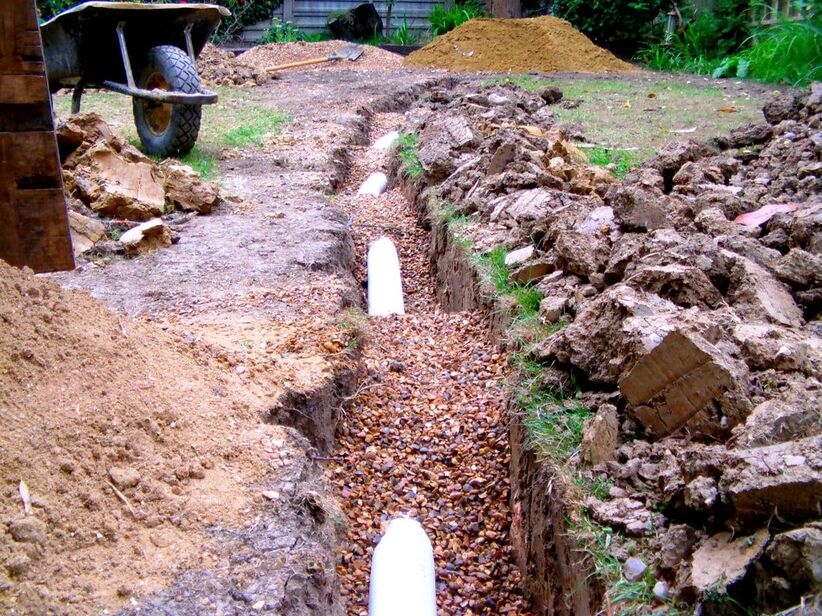
A common reason for paving sinking is the installation of pipes and services under the surface.
When the ground is disturbed under paving it loses its tight level of compaction. This is especially so if underlying subsoil is excavated into.
Trenches for pipe work and services regularly need to be excavated deeper than the sub-base of the paving. This leads to large quantities of loose, soil, material being removed.
Soil is extremely difficult to re-compact once it has been excavated and disturbed. The result is a slow sinking of the paving’s surface after such services have been installed.
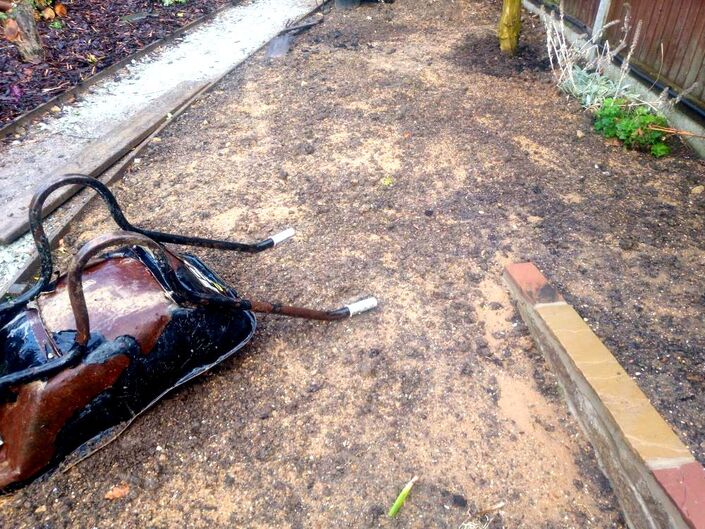
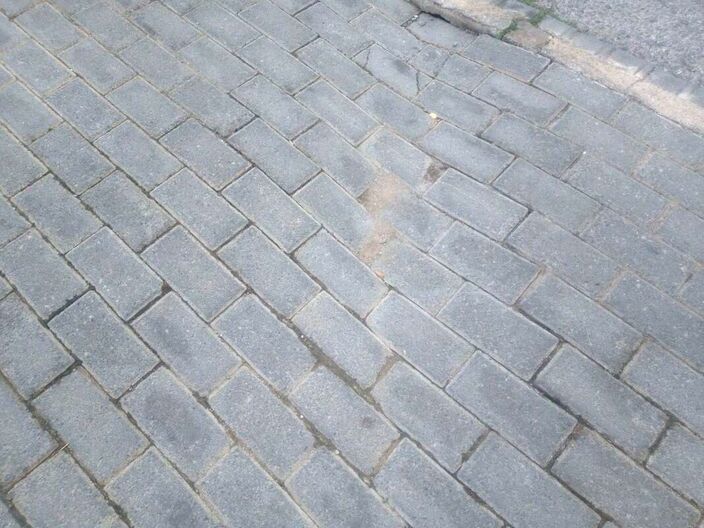
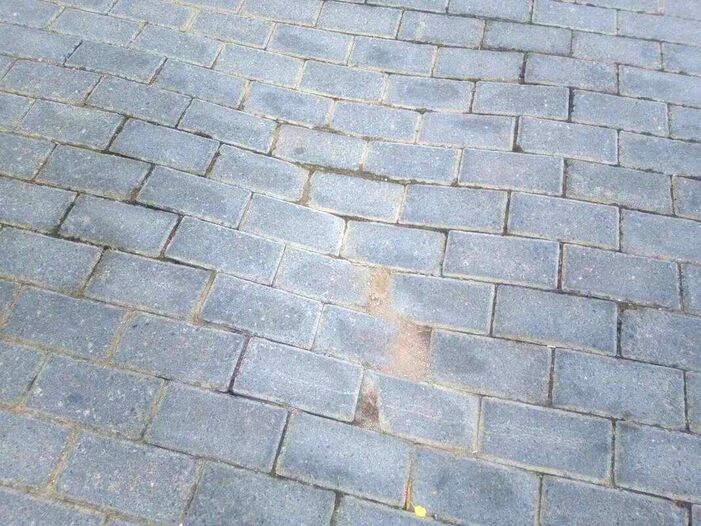
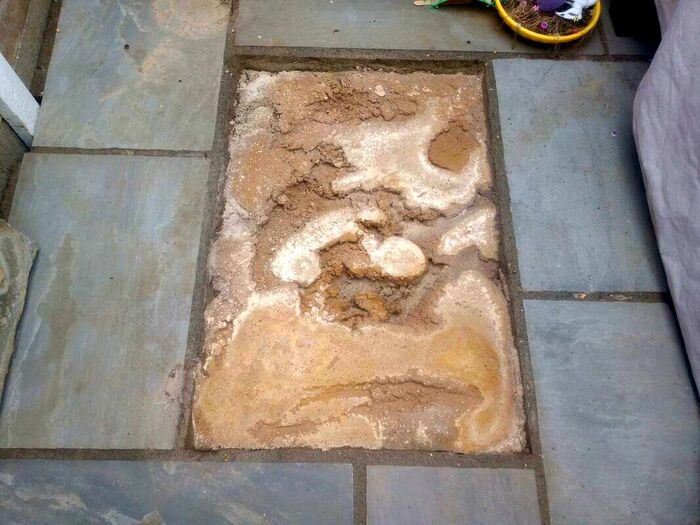
The tell tale signs of service sinking is long and thin areas of sinking leading to and from the property.
Suck linear sinking can be seen in the image above.
The tell tale signs of service sinking is long and thin areas of sinking leading to and from the property.
Suck linear sinking can be seen in the image above.
Ground movement
Unfortunately we do not have power over what occurs naturally under the grounds surface.
Some localities are simply subject to more subterranean forces than others. This can be more common on regions with undulating levels and particular soil types.
If the ground around your property is moving you should also see signs of subsidence elsewhere.
Lawns and other parts of your landscaping will also possibly see signs of ground movement. Furthermore
soils such as clay can contract during dry summers and expand during wet winters.
Such movement can lead to cracks and voids opening up under paving leading to sinking.
soils such as clay can contract during dry summers and expand during wet winters.
Such movement can lead to cracks and voids opening up under paving leading to sinking.
Tree roots
It can be quite surprising how much of an impact tree roots can have upon paving. This is especially so on block paving or pavers laid upon sand.
Tree roots can travel very easily and freely through sand seeking out moisture. This can lead to very long roots dissecting your paving bedding layer.
As roots grow they can cause severe sinking and undulation to paved surfaces. Tree roots also have the potential to also cause disturbance to paving bedded upon mortar.
If you have nearby trees and long ridges in your paving it could be expanding tree roots.
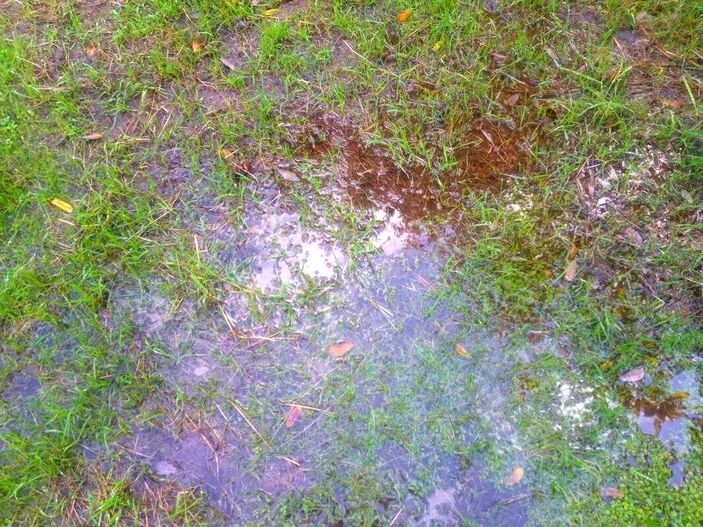
Saturated ground
The moisture content of the ground under your paving can also affect the risk of movement and sinking.
If the underlying ground becomes too saturated moisture can lubricate subsoil particles and sub-base aggregates. This lubrication can mean your paving is more likely to sink under heavy loads or sudden impacts.
Very often as paving gradually sinks water pools locally leading to an exacerbation of the issue.
If you have extremely saturated ground, cracks and puddles you may need to install garden drainage and patio drainage before undertaking repairs.
Incorrect base
By far one of the most common reasons for sinking paving is an incorrect sub-base.
This typically involves not excavating to an adequate depth or spreading the correct amount of compactable aggregate. Very often clients are tempted by a very cheap installation prices only to regret it later.
The most costly part of any paving construction is the movement of tones of heavy materials.
When a base is installed too shallow or with insufficient base-work it is likely to sink or crack. Make sure you ask your contractor to specify what base they will install under your paving.
Make sure you familiarise yourself with the correct specification and request that is priced for.
Incorrect construction
Paving which has been laid incorrectly is also a major reason for paving sinking.
Even if the base has the correct specification, poor execution and laying practices can lead to sinking.
Common problems include laying paving on weak mortar with voids under the pavers. This can lead to pavers becoming cracked and loose.
By far the worst scenario is paving laid upon sand with weak retaining edging. As the edging fails the sand sinks leading to sinking paving.
Make sure the contractors you hire have a good track record and specify how the paving will be installed.
Make sure the contractors you hire have a good track record and specify how the paving will be installed.
Excessive loads
Even though correctly laid paving should take heavy loads excessive loads can lead to failure.
This is especially so if one section of paving is exposed to excessive loads in contrast to other sections. If you are planning on subjecting paving to heavy impacts and loads make sure you install a thicker base.
If you expect certain areas of paving to be exposed to great stress consider installing a reinforced concrete base under your paving.
How to repair sunken block paving
Step 1: Remove the blocks
Firstly you will need to lift the block paving out of the affected area.
This can be tricky as the sand wedges the blocks together tightly. Try to leaver the sand out between the gaps with an old knife before attempting to lift the blocks.
The best way to lift block paving is to wedge two screw drivers or trowels down each side of the blocks. The blocks can then slowly be worked out gradually until they become loose.
Step 2: Remove the sand
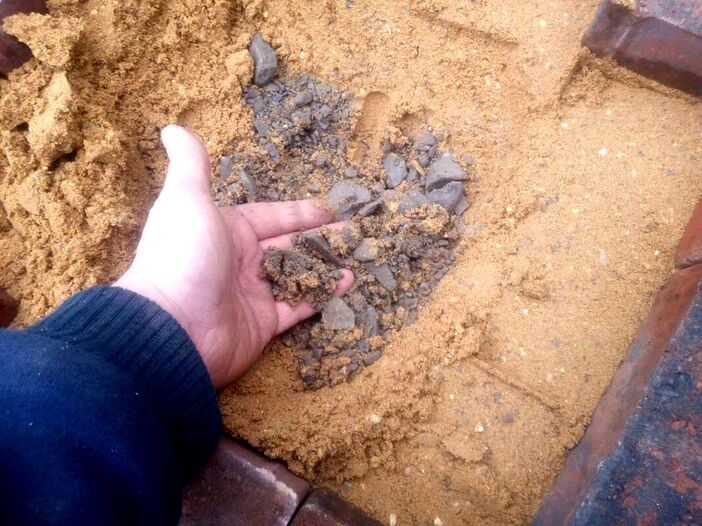
The next step is to remove the compacted bedding layer of sand from under the blocks.
Try not to mix up any of the sand with the sub base. If the sand is too contaminated with dirt and sub-base you may want to consider replacing it.
The best sand for repairing and basing block paving is sharp sand.
Step 3: Examine the base
When the sand has been removed examine the state of the sub-base. Is the base very thin? Is it mixed with soil or are there large roots infiltrating the base?
If so you will want to replace the base with a new level and robust one.
Step 4: Excavate the sub-base
Most of the time you will have excavate out the old sub-base and replace it. This will involve excavating out the old sub-base to a depth of 100mm and disposing of it.
Make sure there is no loose material left inside your excavation.
Step 5: Install a new sub-base
Supply and spread mot type 1 compactable aggregate to a minimum depth of 100mm.
Make sure the sub-base is well compacted with a tamper or the head of a sledge hammer. Alternatively you can lay a concrete base to the paved area.
Make sure you leave enough thickness for a 40mm bedding layer of sand and the thickness of your block paving.
Step 6: Screed the sand level
Apply your sharp sand on top of your new levelled sub-base and compact it well.
Then, using a straight edge, screed the sand level to the base of the surrounding blocks. This can take some care and skill but will provide you a level base to re-lay your blocks.
Screed your sand so your new blocks are about 3mm higher than the surrounding blocks.
This means when you compact the blocks at the end they will vibrate down level.
Step 7: Lay the blocks
Relay your blocks as tightly as possible onto your new levelled and compacted sand layer.
Step 8: Compact the blocks
The best way to compact your blocks is with a compactor plate but for small areas you can use a piece of timber and a hammer. Tap your timber over the blocks to bed them down flush and level.
Step 9: Sand the blocks
Sand your block paving gaps with kiln dried sand or sand advertised as block paving sand. Make sure you do this on a dry day when every part of the blocks and gaps are dry.
It is essential the fine sand trickles tightly between the blocks to lock them into place.
How to repair sunken paving slabs.
Step 1: Remove the paving slabs
Remove the paving slabs from the sunken area, if some of the pavers are broken you may want to replace them.
If some of the paving is particularly stubborn to remove you may need a hammer and bolster or even a hand breaker.
Step 2: Remove the bedding layer
Remove the bedding layer from under the paving. If the bedding layer is sand simply scrape it out but if solid mortar you may need to break it out.
Step 3: Examine the base
When the sand has been removed examine the state of the sub-base. Is the base very thin?
Is it mixed with soil or are there large roots infiltrating the base? If so you will want to replace the base with a new level and robust one.
Step 4: Excavate the sub-base
Most of the time you will have excavate out the old sub-base and replace it. This will involve excavating out the old sub-base to a depth of 100mm and disposing of it.
Make sure there is no loose material left inside your excavation.
Step 5: Install a new sub-base
Supply and spread mot type 1 compactable aggregate to a minimum depth of 100mm.
Make sure the sub-base is well compacted with a tamper or the head of a sledge hammer. Alternatively you can lay a concrete base to the slab laying area.
Make sure you leave enough thickness for a 40mm mortar layer and the thickness of your paving.
Step 6 Work out your levels
In order to level your sunken paving you will want to lay your paving flush with the surrounding level paving.
A good thing to do is set up a tight string line across the surface. This will enable you to work to a new and consistent level.
You can also assess the area with a long spirit level so you can lay your new paving level.
Step 7: Mix up your mortar
Mix up a 1:4 sharp sand and cement mix dry until it is well mixed. Then slowly add water and plasticiser so it reaches a good workable consistency.
You do not want your mortar too wet or too dry! You want it damp enough to create a good vacuum seal with the pavers but not that moisture runs out.
You should be able to heap up the wet mortar on a trowel without it running off.

Step 8: Bed down your paving
Lay your mortar onto you sub-base gently and evenly. Using a trowel create ripples and peaks in the mortar so you can easily bed down your paving level.
You should however try to ensure there is a solid mortar base under your paving with no gaps or voids.
Use a string line or spirit level to lay your paving to a new flush and level surface.
Step 9: Joint your new paving
Now all you have to do is joint your paving slabs. This is best done with a 3 parts plastering sand 1 part cement mix.
The mix should be reasonably dry but damp enough to form a ball in your hand. Pack the mortar into your joints tightly and then finish with a jointing iron or old hose pipe.
For a more in-depth guide on how to joint paving visit our step by step paving grouting article here.
Thank you for reading our article on how to repair sunken paving. Below I will link to some other articles you may find useful.
How to Repair Sinking Patio Pavers | Western Interlock
How to Fix Sinking Pavers (9brothersbuilding.com)
How to Fix Sinking Pavers (9brothersbuilding.com)
|
|

|
'As an Amazon Associate I earn from qualifying purchases'
This article contains affiliate links
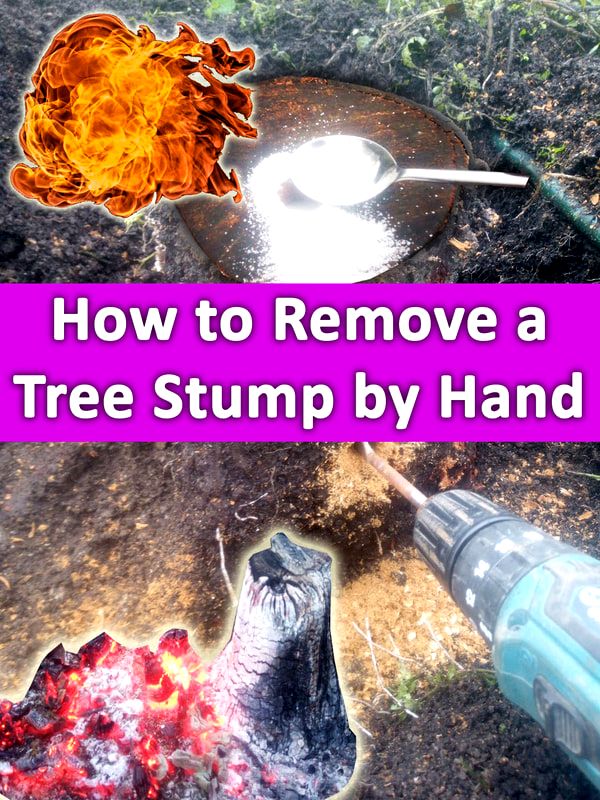
There is no doubt that removing a tree stump by hand can be a daunting task. This is especially so if you need to undertake the work with hand tools.
There are a few reasons why you may have to remove a tree stump by hand. The most typical are a small budget or not wide enough access for a mechanical grinder.
In most cases however you can indeed effectively remove a tree stump by hand. In the end how easy it will be will depend upon the age, species and size of the tree stump. It will also be important to employ the correct tool for the correct task and stage of your manual tree stump removal.
In this article I will explain the process of removing a tree stump by hand step by step. I will also explain a little about the structure of trees roots so you can gradually work the stump loose.
I will also answer some typical tree stump questions as well as other means of removing them without machinery.
Can you remove a tree stump by hand?
You can remove a tree stump by hand successfully if you use the correct process and hand tools.
How easy it will be however will depend upon the size of the stump, and the stumps age. If the stump is so large in size and mass you would not be able to physically shift it then breaking it loose is probably a waste of time.
I would recommend if you think you could physically roll it or shift it from site it is worth removing by hand. The stump of any tree is one of the most tough and dense parts of the trunk. This makes it difficult to cut into manageable and movable sections.
However if you are persistent and patient, many tree stumps can be removed by hand.
If a tree has a diameter of over 600mm then removing by hand becomes much less likely.
How large is your tree stump?
If your tree stump is so large you could not physically move it by hand then there is little point trying to remove it.
Typically trees with a girth of over 600mm in diameter are very troublesome to remove by hand. In such cases you are better seeking the assistance of mechanical methods.
What is the position of your tree stump?
If you are attempting to remove any tree stump by hand you will need good access around stumps circumference.
This is so you can easily access and excavate around all of the stumps anchor roots. Anchor roots are the horizontal roots which grow out away from a trees base anchoring it into position.
In order to remove the tree stump you will need to easily access all of the the roots. Very often, unwanted trees grow along boundaries and fence lines making it challenging to access their roots.
In such cases it can be extremely difficult to remove a stump by hand without damaging your neighbour’s garden. You will need good access to dig all the way around the stump to a reasonable width and depth.
How much tree stump should I leave?
When removing a tree stump by hand it helps to leave a good height of tree trunk attached to the stump.
This can enable you to apply mechanical leverage to the stump making it easier to move. This gives you a great advantage when trying to work the stump loose.
By pulling and pushing at the trunk you should slowly be able to work the roots loose as you excavate. Consequently you should try to leave about two meters of trunk attached to the tree stump.
How to remove a tree stump by hand
Tools you will need
- Spade
- Digging bar
- Sharp axe
- Sharp large wood chisel
- Sledge hammer
- Wheelbarrow
- Builders bucket
Safety equipment
- Steel toe cap boots
- Gardening gloves
- Safety goggles
Step 1: Preparation
Make sure you have all the tools you need and safety equipment to hand. When removing stumps you will need to excavate around the roots thoroughly.
Therefore, it makes sense to do this at a time of year when the ground is soft but not too boggy. Spring and autumn is the best time of year to remove tree stumps by hand.
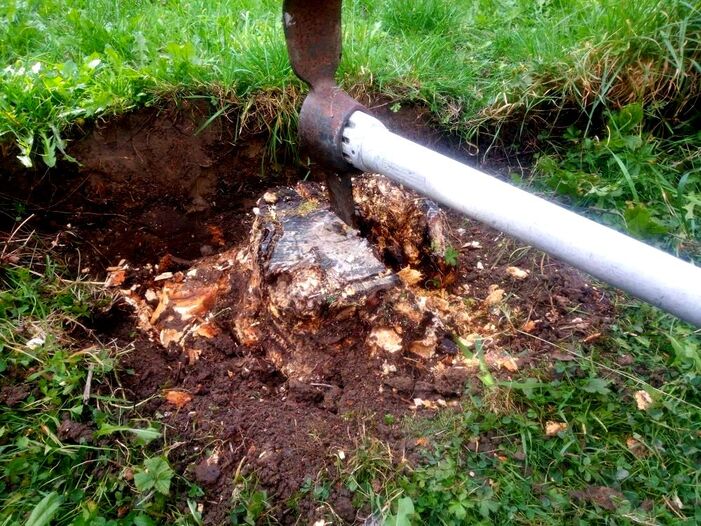
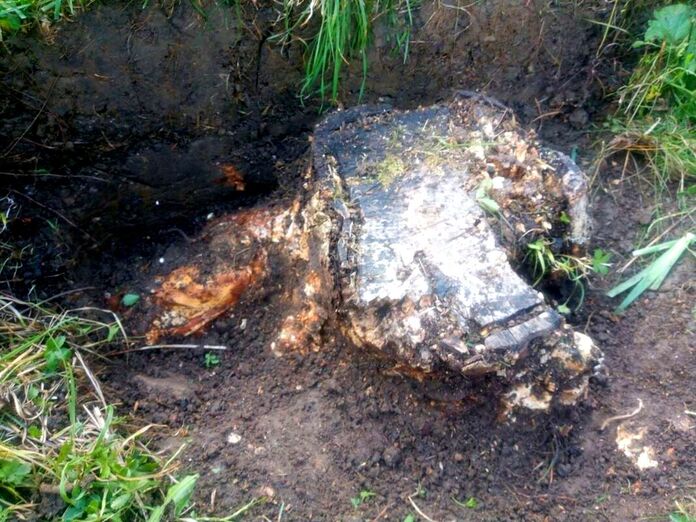
Step 2: Digging around the roots
You will need to excavate around all of the lateral anchor roots, these grow out from the stump horizontally.
Try to dig out the soil from under the roots and the stump itself as much as possible. As you dig push and pull at the stump to see if there is any movement.

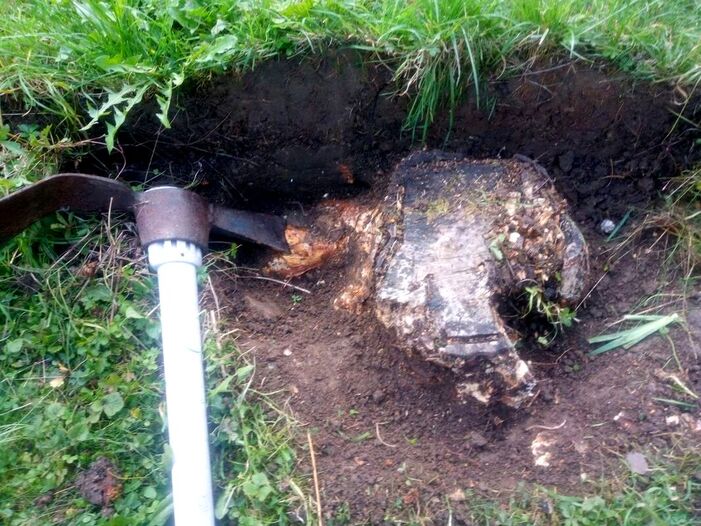
Step 3: Chopping the anchor roots
If you apply pressure or impact the stump with a hammer you should see the anchor roots move and vibrate.
After you have excavated around them well you will need to sever these lateral roots.
This is best done with an axe or the axe blade of a mattock. Once the anchor roots have been cut all the way round the stump should be easier to move and dislodge.
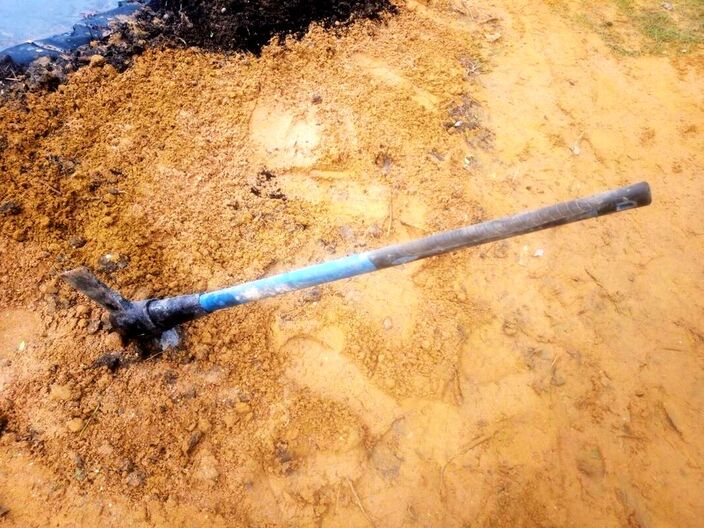
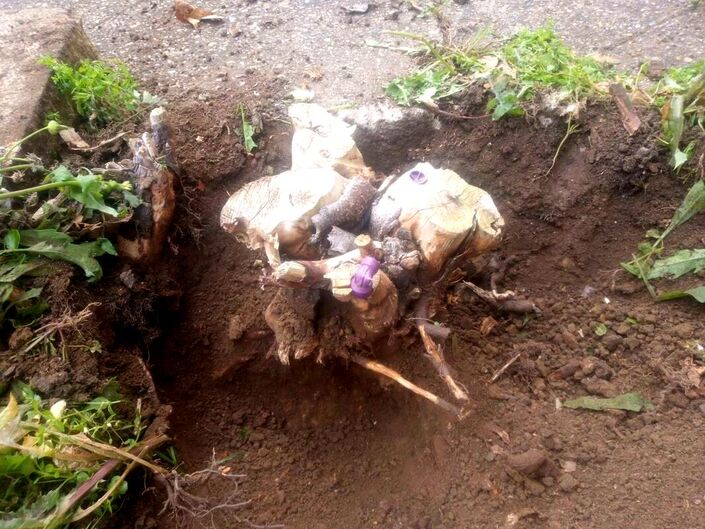
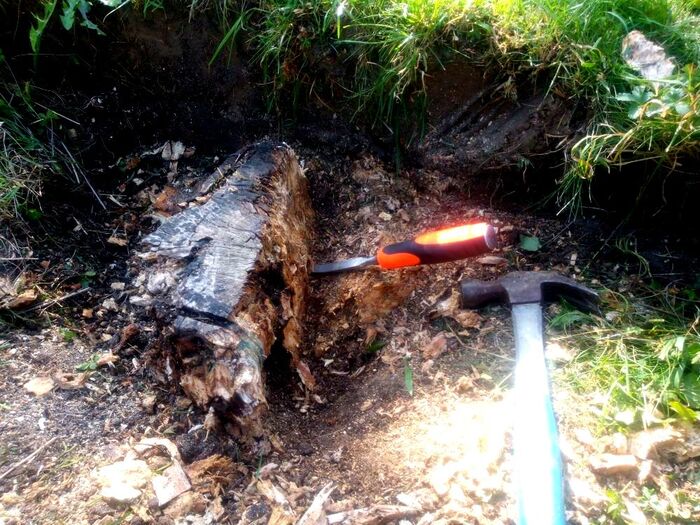
Step 4: Chisel out stubborn sections of stump.
You may find that certain sections of the stump are just too robust to cut out with an axe.
In such a case you will need to get up close and personal. For these parts of the stump you will need to gradually chew out sections with a sharp chisel.
Slowly and carefully tap your chisel with a hammer into the thick roots gradually chipping out large sections. Eventually the stump should become loose with only the central tap root remaining.
Step 5: Rock the stump
You should now be able to significantly move the stump from side to side. Rock the stump back and forth to help make the tap root loose and exposed.
Excavate more soil out from around the central tap root as you rock it loose.
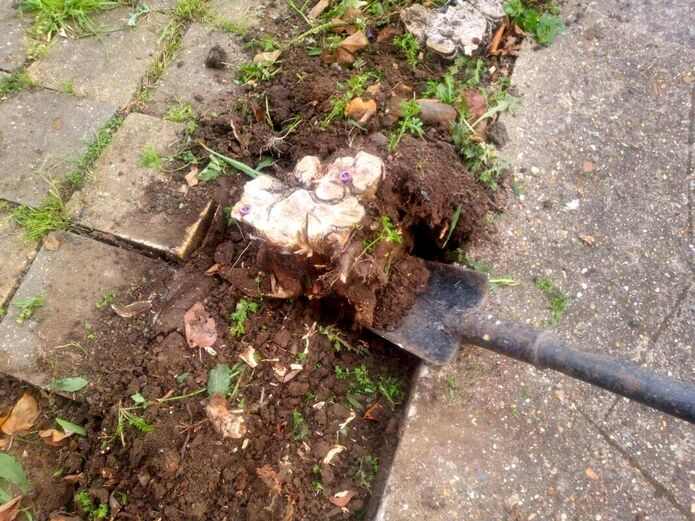
Step 6: Chop through the tap root
You should now have reasonable access and a good view of the central tap root. You will need to cut this tap root to completely remove the tree stump.
This can be achieved using a sharp axe, mattock blade, bladed iron bar or a grafting spade. Once the tap root has been cut you on now completely remove your tree stump.
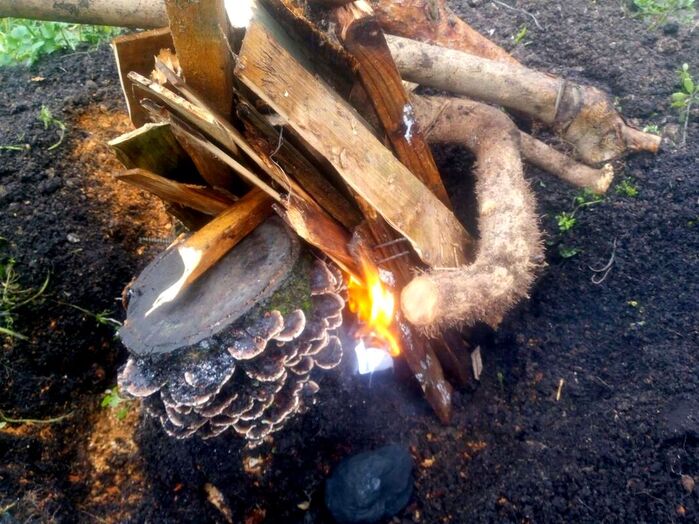
How to remove a stump by burning
A great way to remove a tree stump without the use of heavy machinery is to burn out the stump.
To be effective however, steps must be taken to make sure the fire does not cause a safety risk. When burning out stumps the stump should be at least 3 metres away from buildings and boundaries.
This is especially the case with wooden structures and fences. To burn out the stump completely you will need to add combustible materials to the tree stump.

This will help to build enough heat to burn down to the core of the stump. As tree stumps are submerged in the soil they have high moisture content.
This makes them more challenging to burn than dead branches and sticks. Consequently when burning out a stump it is recommended to excavate around the stump as much as possible.
This will allow air and light get to it to help dry it out.
This makes them more challenging to burn than dead branches and sticks. Consequently when burning out a stump it is recommended to excavate around the stump as much as possible.
This will allow air and light get to it to help dry it out.
Step 1
Excavate around the tree stump exposing the whole stump and roots. Heap the excavated soil up around the perimeter of the stump area to create a safety barrier.

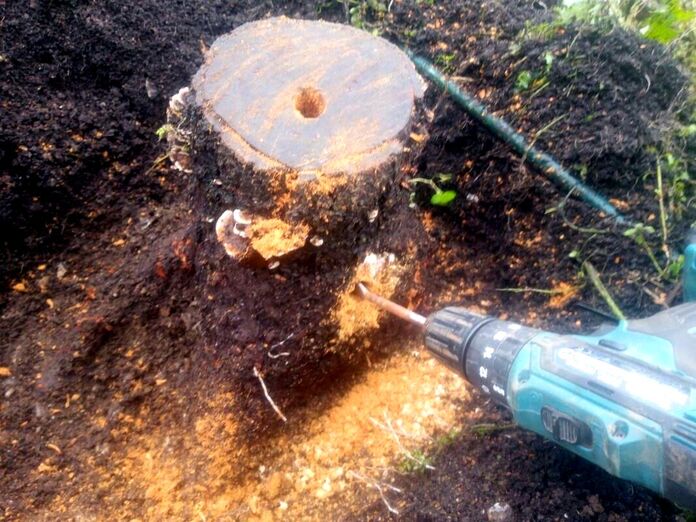
Step 2
When the stump is dry drill large holes into the stump using a power drill. This will allow oxygen and heat to penetrate the stump during the burning process.
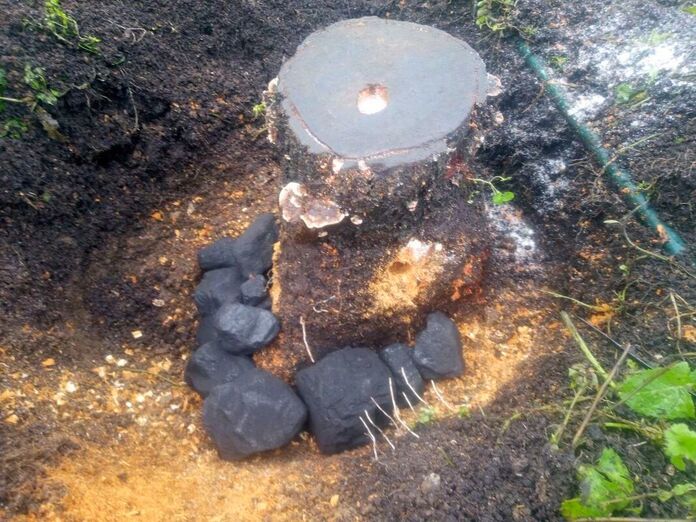
Step 3
Heap coal or charcoal in and around the tree stump, this is so you can create a large amount of heat around the stump when burning.
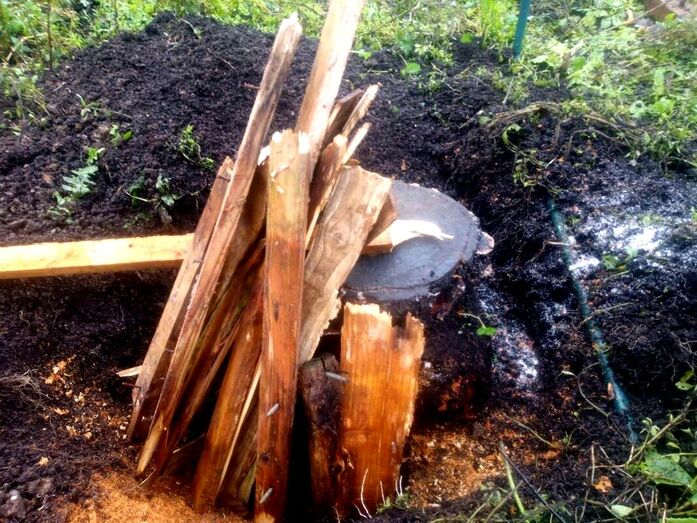
Step 4
Heap up thin woody material such as dry twigs and kindling in a pyramid over the top of the coal and charcoal. As this burns this will ignite the coal and charcoal below.
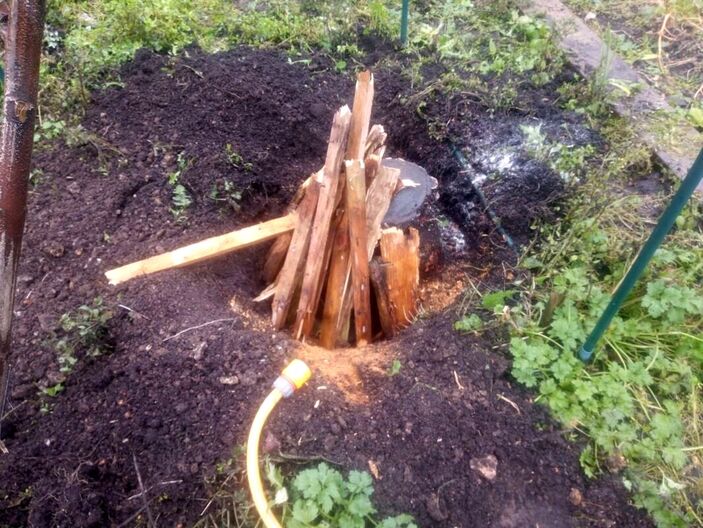
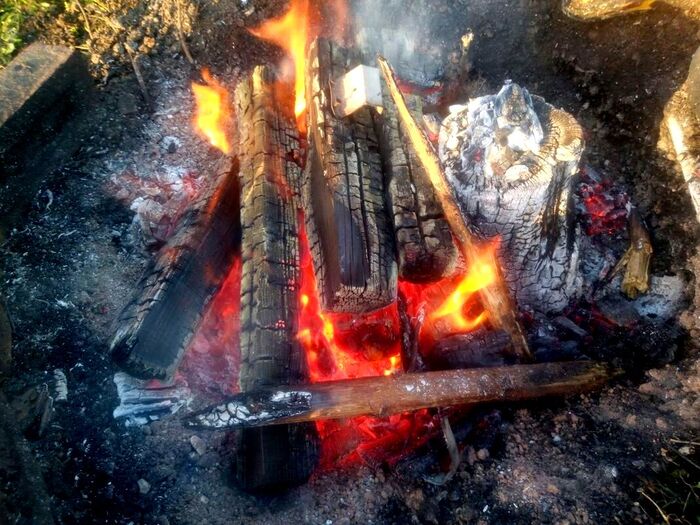
Step 5
Get your garden hose ready on standby encase your fire gets out of control. Wet the ground and fences around the outside of your burning area.
Step 6
Using firelighters or paper light the sticks and kindling over the coal. Eventually your coal and charcoal should be burning bright burning through the stump. The stump could take up to 12 hours to completely burn through.
Step 7
When the stump has burned through completely make sure the fire is out by drenching the soil with plenty of water.
How to remove a tree stump with Epsom salt
Epsom salt contains magnesium and sulphur which can draw moisture out of a tree stump and the root system.
The result is the tree stump rotting away quickly under the soil. This makes the stump easy to break through and remove.
To remove a tree stump with Epsom salt drill vertical holes into the stump about 2 inches deep.
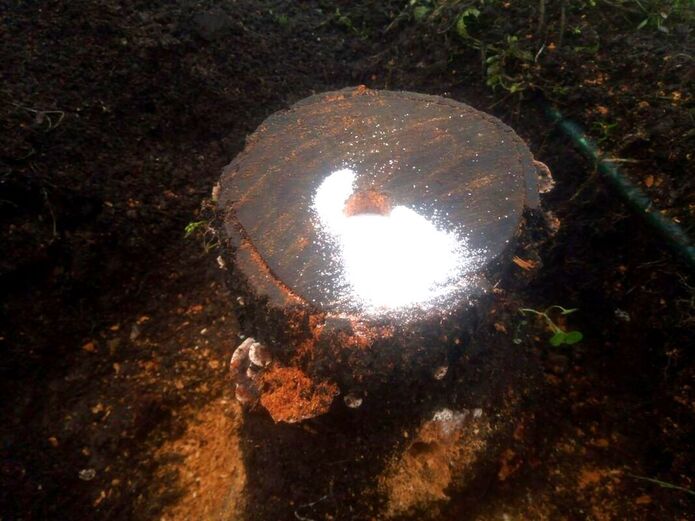
Then fill the holes with Epsom salt and gently poor water over the holes. You will then need to cover over the stump with a sheet material like plastic.
This can be anchored into position with heavy masonry materials such as bricks. After a couple of months the centre of the stump should be well decomposed and easier to remove.
This can be anchored into position with heavy masonry materials such as bricks. After a couple of months the centre of the stump should be well decomposed and easier to remove.
Growing mushrooms to decay your tree stump
Probably the most productive, eco-friendly and exciting way to remove tree stumps is by growing edible mushrooms on them.
This will be a slow process however you can reap a tasty and seasonal reward in the mean time. Most edible mushrooms feed on the dead and dying wood of trees through their mycelium.
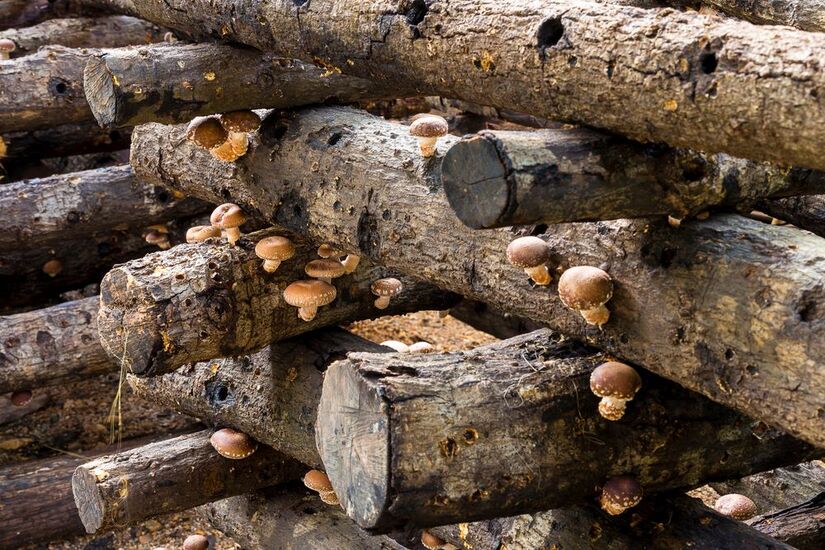
This slowly breaks down the wood over time until it degrades into crumbly organic matter.
This process can take a few years but is probably the most natural way to degrade a tree stump. You will need to purchase wooded dowels infected with edible mushroom mycelium.
These can be obtained from an online retailer. Some of the best mushroom species for tree stumps include Oyster mushrooms, Shiitake, King Oyster and Reshi mushrooms.
You have a greater chance of success is you match the correct tree species with the correct mushroom mycelium. Mycelium suppliers usually provide a list of appropriate tree hosts.
Thank you for reading our article on how to remove a tree stump by hand. Below I have linked to some other articles you may find useful.

|

|

|
'As an Amazon associate I earn from qualifying purchases'
This article contains affiliate links
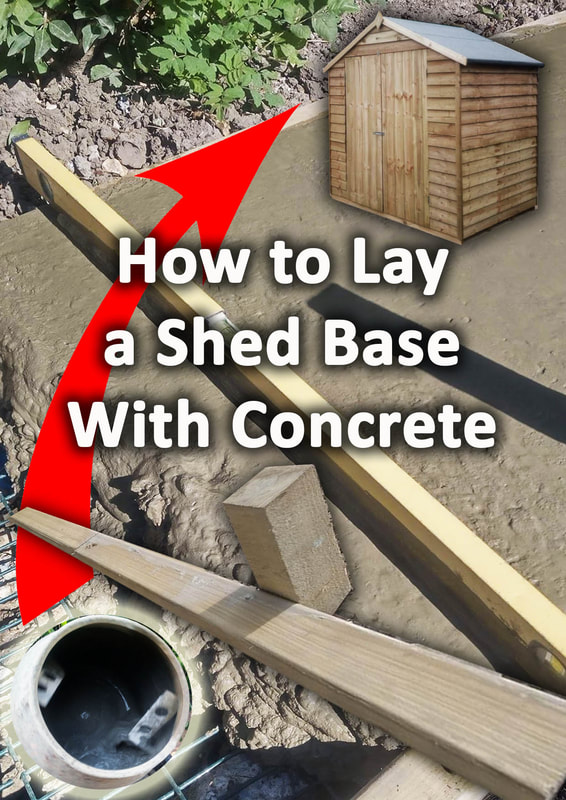
Any time you plan to install a shed in your backyard you will require a stable base.
There is no doubt that concrete is one of the best materials for a level and robust shed base. Concrete can mould perfectly into the shape of underlying ground and be formed into any shape.
A high compressive strength combined with resistance to outdoor conditions makes it a sound shed base option. It is extremely important however that concrete shed bases are installed correctly from the start.
The majority of concrete bases will require excavation and the working of large quantities of heavy materials. This means quite an investment of time, labour, and cost.
Consequently, in this article, I will answer some typical questions regarding installing a concrete shed base. I will explain how to lay a concrete shed base step by step with pictures.
The pictures I will display have been taken from multiple shed bases I have built on my own landscaping projects.
How do I prepare the ground for a concrete shed base?
To prepare ground for concrete you will need to make sure the soft topsoil layer is removed.
You want to excavate to a minimum depth of 150mm deep. This should expose a sturdier layer of subsoil which is less likely to move and displace under the heavy load of concrete.
It is also advisable to scatter a minimum 50mm layer of compactable mot type 1 to the excavated ground.
When compacted this aggregate bites into the top layer of the soil making it firmer.
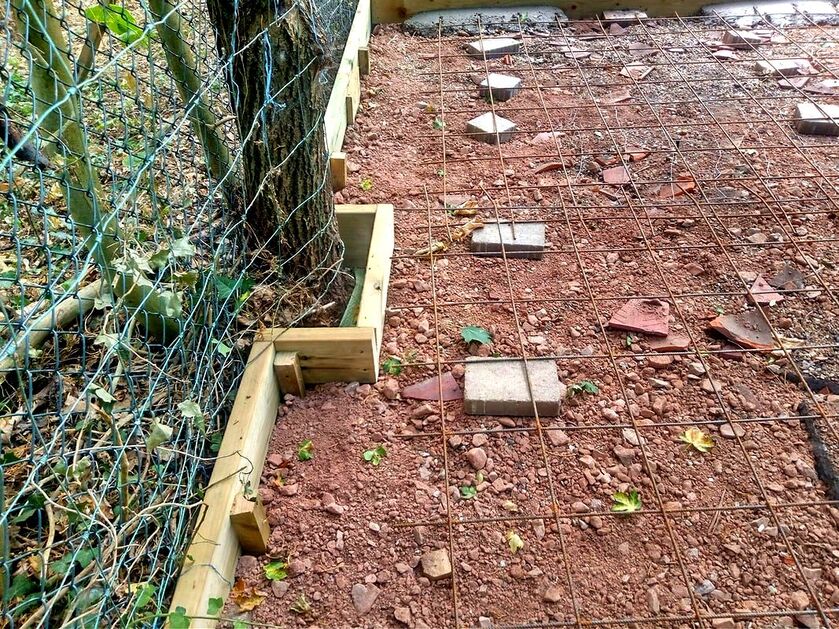
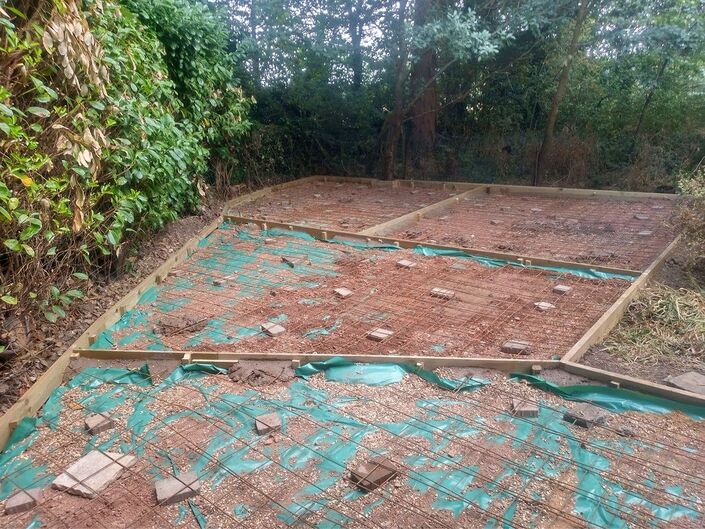
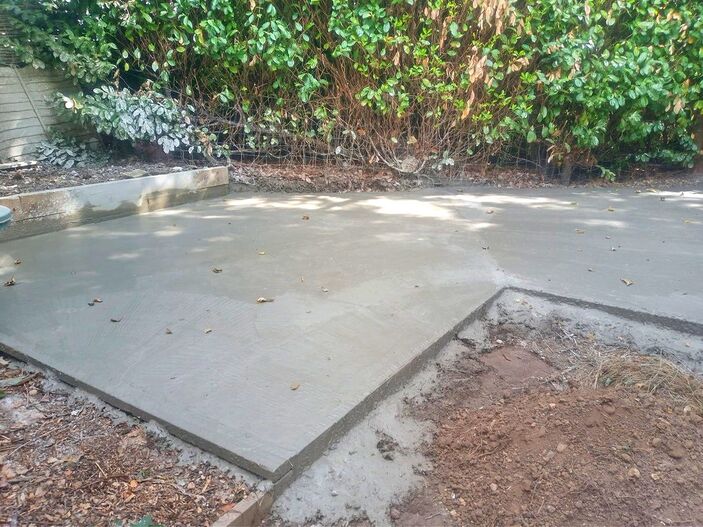
This also helps to create a bonding action between the concrete and the underlying soil. The edges of your concrete should be as neat and square as possible.
It is therefore best to retain your concrete base with timber formwork such as treated 6x2 timber boards.
Such formwork can be observed in the image above.
How thick does concrete need to be for a concrete shed base?
For most garden shed bases a concrete thickness of around 100mm is adequate. For small sheds 75mm is probably fine but for larger structures housing heavy materials up to 125mm is best.
In such cases it is also advisable to have a minimum 50mm layer of crushed concrete aggregate or mot type one under the base.

Do I need membrane under a concrete shed base?
In order for wet concrete to cure correctly it requires a stable amount of moisture.
An effective way to ensure the underlying ground does not absorb the concretes water away is with a membrane. This is more advisable during hot and dry summers where the ground is very absorbent.
A membrane can stop the concrete drying out too quickly leading to cracking and poor curing.
Such a damp proof membrane can be seen in the image below.

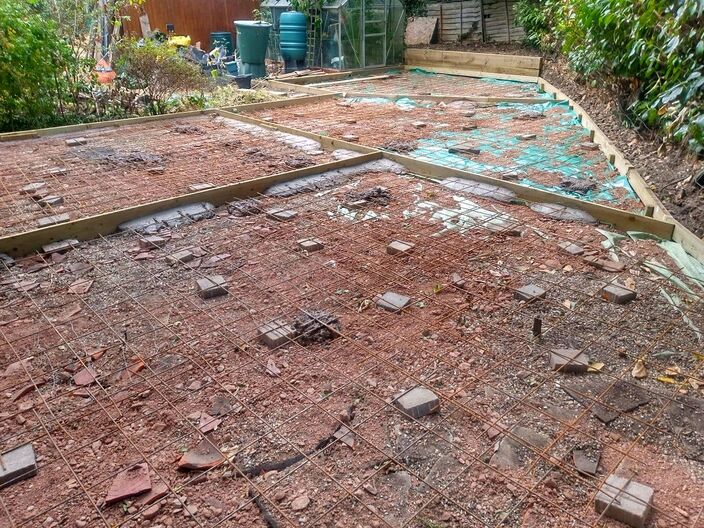
Does a concrete shed base need reinforcement?
Reinforcement bars within a concrete shed base allows a slight flexibility. This flexibility provides extra rigidity against uneven and very heavy loads.
Consequently, you may wish to add reinforcement mesh to the base if your shed will house heavy loads. Some examples of these may include large quantities of masonry materials or ride on lawn mowers etc.
You may also wish to add reinforcement if your ground is liable to natural movements. For example, sandy soils or sites with saturated or boggy ground which are more likely to move over time.
Reinforcement should be raised up slightly so it sits within the middle of the concrete layer. This can be seen in the image below of one of our concreting projects
How much concrete do I need for my concrete shed base?
You will need to work out how many cubic metres of concrete you require. This can be executed by multiplying the length x width x depth of your concrete shed base.
For example say your shed base is 2 metres x 4 metres and at a depth of 100mm. The calculation will be:
2 x 4 x 0.100 = 0.8 cubic metres
If you are buying ready mix concrete you can purchase it by the cubic metre. However if you are mixing ballast and cement yourself you will need to buy ballast by the ton.
Most builder’s merchants and haulage suppliers sell materials such as ballast by the ton.
Consequently, you will need to work out how many tones there are to a cubic metre of ballast.
There are about 1.6 tonnes of ballast to a cubic metre. Therefore:
0.8 x1.6 = 1.28 tonnes of ballast
To make things even more awkward for small quantities below 4 tones many merchants won’t deliver loose.
Therefore you will have to buy the ballast in jumbo bags.
1 jumbo bag of ballast = 0.85 tonnes or 850kg
Therefore for 1.28 tonnes of ballast you will need:
1.28 / 0.850 = 1.505
Therefore, for our case study you will need to purchase two jumbo bags of ballast for your concrete shed base!
How to lay a concrete shed base by hand step by step
Step 1: Location
One of the most crucial elements of laying a concrete shed base is the location. You want to position your base somewhere accessible and which complements the existing circulation of your site.
Try to locate your base away from growing trees as these can lift your base as they grow. If concreting near a boundary try to lay up to the fence line to prevent weeds and samplings establishing.
Step 2: Excavation
Excavate your shed base area as neat and square as possible. This will make it easier to purchase the correct amount of materials for the concrete shed base.
If you need to get rid of soil from your excavations this is best done by ordering a skip. Why not visit our article on how to fill a skip correctly.

Step 3: Shuttering formwork
'Shuttering' and 'formwork' are simply forming a retaining mould for your concrete shed base.
This is normally achieved utilising treated 6x2 timber fixed to timber pegs with external grade screws. The form work will enable you to set levels and the exact shape of your concrete before you start concreting.
Such timber form work can be observed in the landscaping project below.
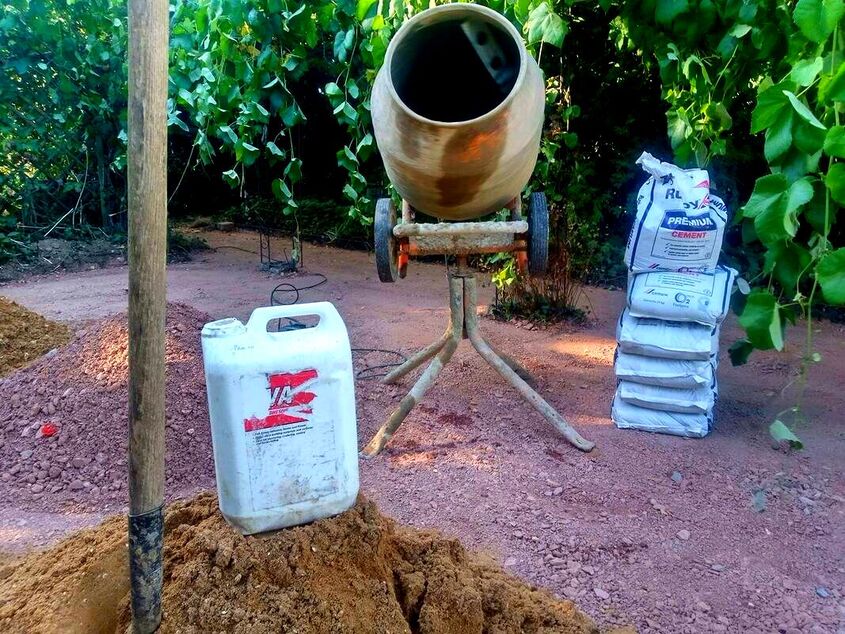
Step 4: Setting up your work space
This is more relevant if you are mixing up concrete manually, however a methodical workspace is always essential.
Concreting can be a fast and intensive process so preparation is key. Make sure you have all the tools and materials you need close to hand before work commences.
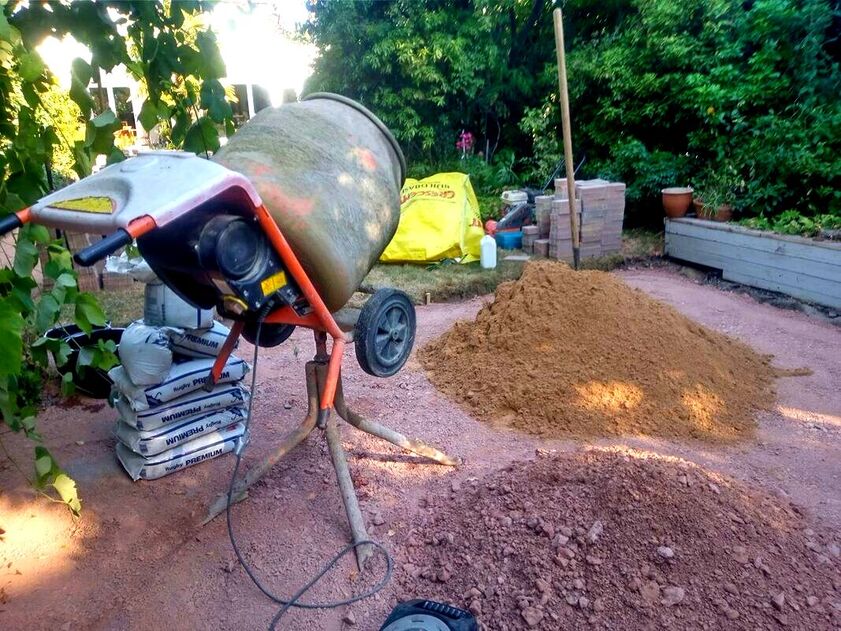
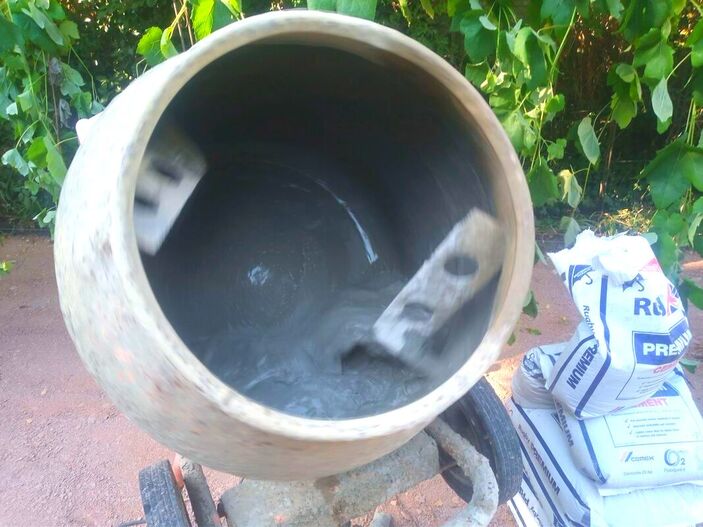
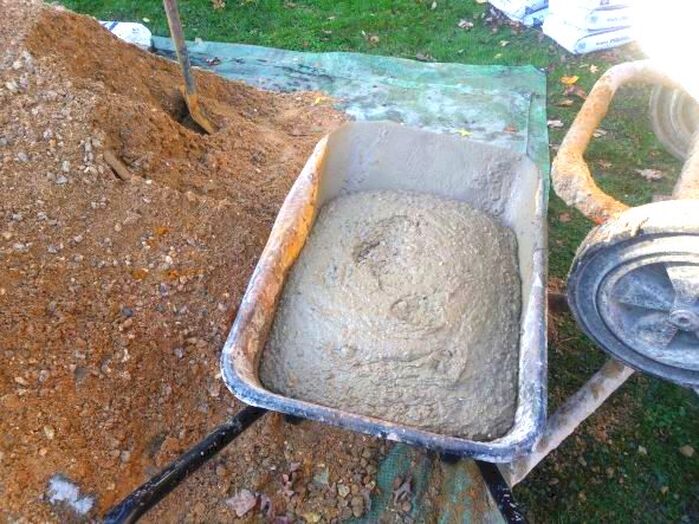
Step 5: Mixing concrete
Fill your mixer with around half a builder’s bucket of water and add half a 25kg bag of cement. Let the mixer hydrate the cement well with no lumps, add more water if necessary.
Shovel around 12 shovels of ballast gradually into the mixer gradually. If you are unsure about your ratio, measure out your materials in buckets.
Add water until the mix has the consistency of runny porridge.
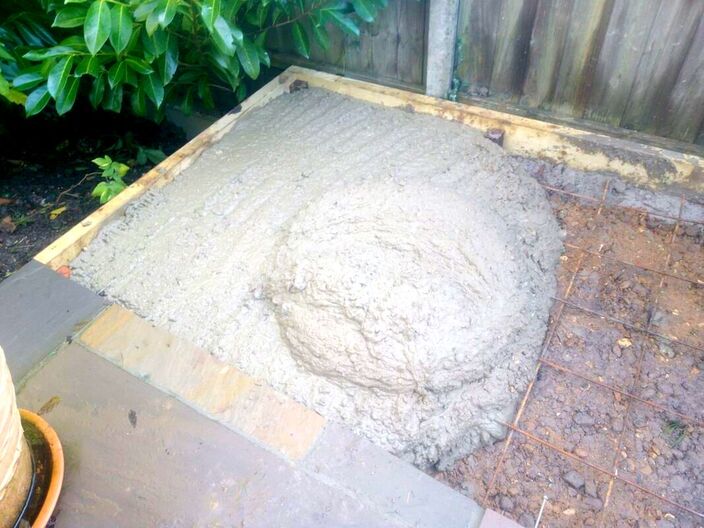
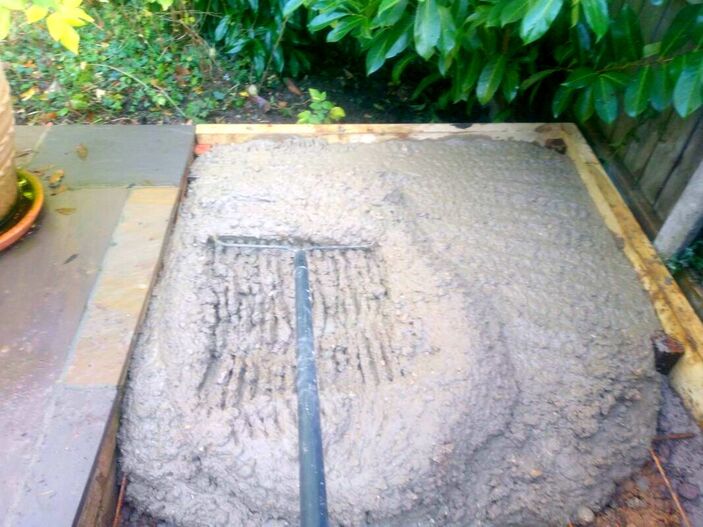
Step 6: Pouring the concrete
Pour your concrete into your formwork, it is best to start at one end and level a section at a time.
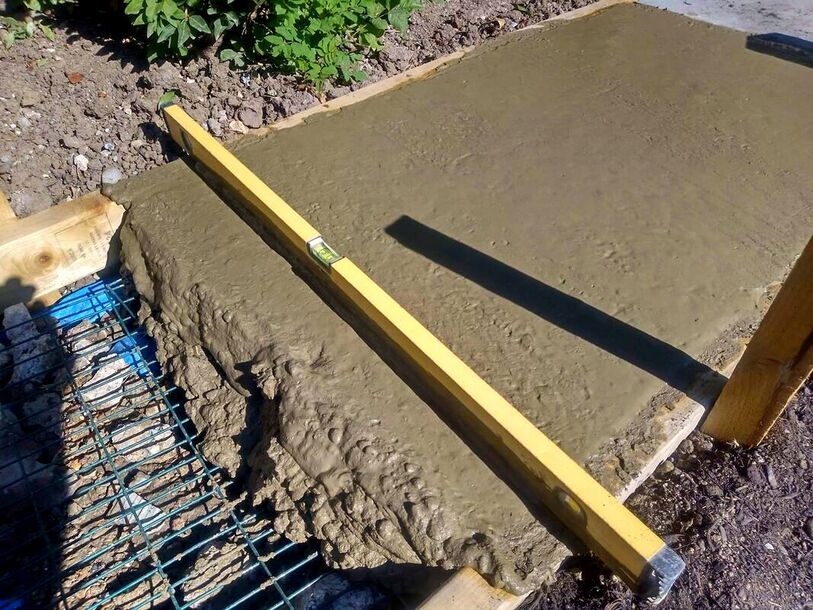
Heap up your concrete and move it roughly level with a spade. Make sure the concrete is slightly higher than the formwork. Tamp down and drag the excess concrete towards you creating a level surface.
Keep going back over the area in front of you to blend in a consistent level. Using a medium sized spirit level gently pump the surface to reach a smooth and level surface.

Step 7: Curing
Concrete requires time to cure and set. Allow you concrete to set with no threat of disturbance!
Pet cats somehow have a love or leaving foot prints in new shed bases so keep your cats in or fence off your masterpiece.
Try do undertake this work when there is no threat of frost overnight.
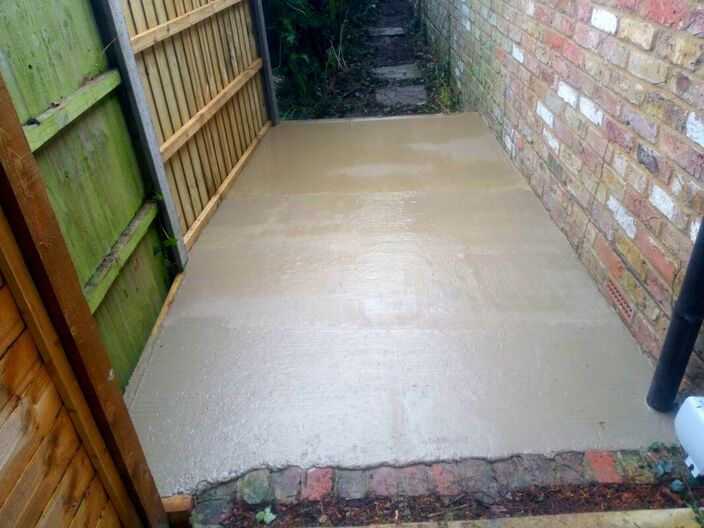
Step 8: Completion
You have now completed your concrete shed base, clean your tools and clear away your workspace. It is best to leave your base to cure for two days before installing a new shed.
This is because it takes a couple of days for the wearing surface or the concrete cream to go fully hard.
FAQ’s
Should I buy ready mix concrete for a concrete shed base?
If you are concreting a large area above 25 square metres it is probably best to buy ready mix.
To lay a larger area in one hit can become tiresome with the threat you may not be able to keep the concrete workable to tamp level. The draw back however with ready mix is you will more than likely end up with more than you need.
Concrete pumps are often cleaned out on site near to where the concrete is being laid. This can lead to stained patios and concreted lawns and flower borders.
Consequently, I would only buy ready mix for larger and thicker shed bases.
How to work out how much concrete I need for a concrete base?
Concrete is typically worked out and sold in cubic metres. Therefore, you will need to times the length x width x depth. For this question I have repeated the break down I explained earlier in the article.
For example say your shed base is 2 metres x 4 metres and at a depth of 100mm. The calculation will be;
2 x 4 x 0.100 = 0.8 cubic metres
If you are buying ready mix concrete you can purchase it by the cubic metre. However if you are mixing ballast and cement yourself you will need to buy ballast by the ton.
Most builder’s merchants and haulage suppliers sell materials such as ballast by the ton. Consequently, you will need to work out how many tones there are to a cubic metre of ballast.
There are about 1.6 tonnes of ballast to a cubic metre. Therefore:
0.8 x1.6 = 1.28 tonnes of ballast
How many bulk bags of ballast do I need for my concrete base?
To make things even more awkward for small quantities below 4 tones many merchants won’t deliver loose. Therefore you will have to buy the ballast in jumbo bags.
1 jumbo bag of ballast = 0.85 tonnes or 850kg
Therefore for 1.28 tonnes of ballast you will need:
1.28 / 0.850 = 1.505
Therefore for our case study you will need to purchase two jumbo bags of ballast for your concrete shed base.
How many 25kg bags of cement do I need per 850kg bag of ballast?
For a 5:1 ballast to cement concrete mix you will need 6 bags of cement to every 850kg bulk bag of ballast.
How to make a concrete base level?
The very best way to make a concrete shed base level is to install level form work or shuttering.
This can be achieved using 6x2 treated timber fixed to timber pegs driven securely into the soil. The timber edging can be levelled with a spirit level before it is fixed into position.
You can then tamp the concrete level with a long straight edge across the level form work.
This can be observed well in the image of one of our projects below.
A good tip is to make you concrete a little wetter so it naturally wants to run level with less manual effort.
Concrete base and concreting services in Buckinghamshire
If you require concreting services across Buckinghamshire and surrounding areas, please do not hesitate to contact us.
We provide concrete bases for sheds, summer houses and garden offices. We can also provide concrete garden pathways and sideway concrete installation.
Our typical service areas include:
Amersham, Aylesbury, Bovingdon, Chalfont, Chesham, Hyde Heath, Great Missenden, Princes Risborough, High Wycombe, Penn, Beaconsfield, Tring, Gerrard's Cross and Denham.
Thank you for reading our article on how to lay a shed base with concrete. Below I have linked to some other articles you may also find useful.
|
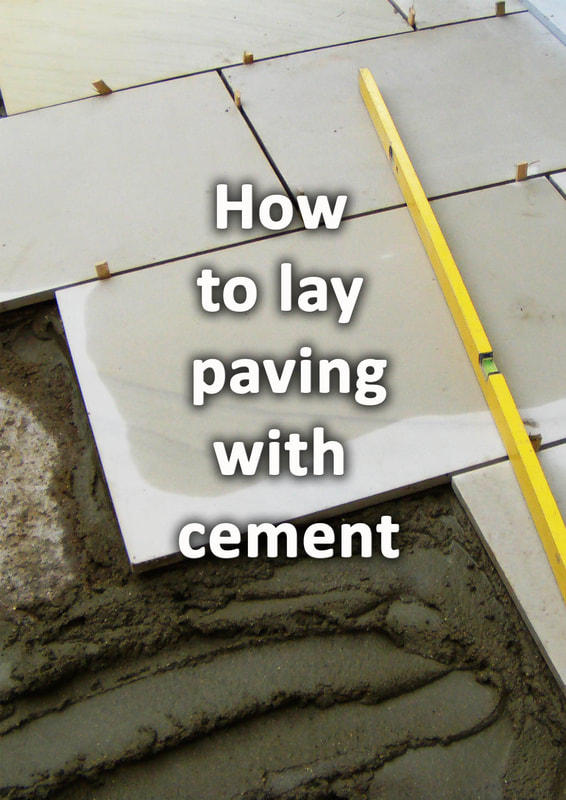
|
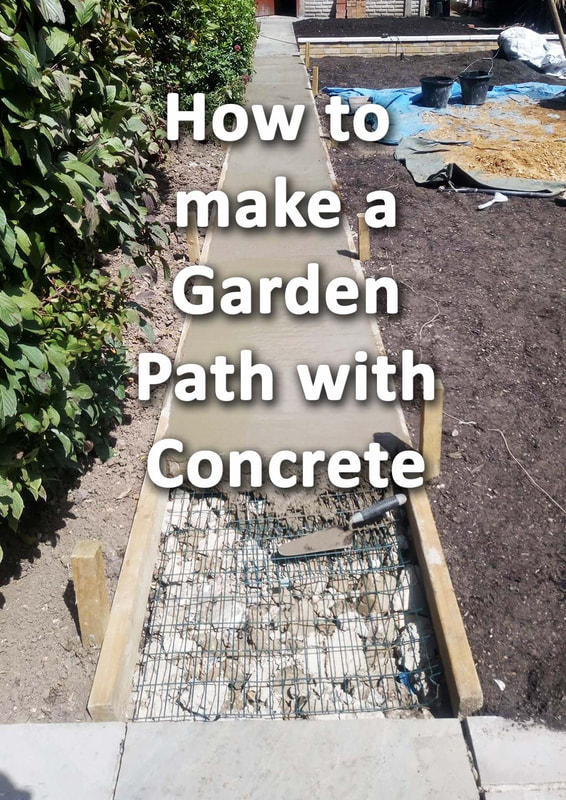
|
Helpful links about installing concrete shed bases
How to Pour a Concrete Shed Slab! DIY! - YouTube
How to Lay a Concrete Shed Base (7 Step Guide) | iMix Concrete
A step-by-step guide to laying a concrete shed base | HSS Hire
'As an Amazon Associate I earn from qualifying purchases'

This article contains affiliate links
Like most professional careers a landscaper’s daily tasks and duties can vary greatly depending upon multiple factors.
Some landscapers may work in organisations focused upon public open spaces, whereas others may focus more on domestic garden projects. Whatever the realm of landscaping sector landscapers operate they will often undertake a multitude of varying tasks.
Landscaping is one of the most varied and diverse trades within the construction industry. Most landscapers have experience in gardening, construction and landscape maintenance.
In this article I will aim to break down the various types of landscaping a landscaper will undertake. I will also try to give a holistic summery of what a landscaper is and what they do.
What is a landscaper?
A landscaper develops, improves, builds and maintains landscapes both in the private and public sectors.
Garden and landscape work is as varied and diverse as regular construction. Consequently, landscapers are very often multi-skilled in a wide variety of professions and trades.
Some landscapers may be more proficient in soft landscaping which includes; groundwork, planting and maintenance of green spaces. Hard landscapers on the other hand are more likely to be landscape builders than gardeners.
Most landscapers however will have at least some experience in both hard and soft landscaping.
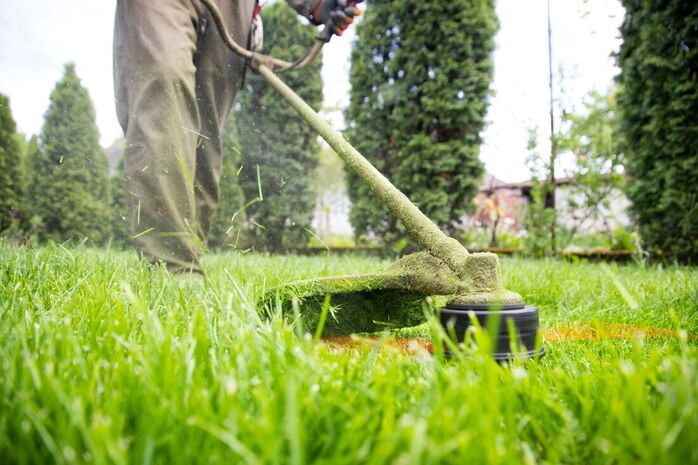
Is a landscaper the same as a landscape gardener?
As landscaping is such a varied profession it is often difficult to try to pin a single task to a particular title.
Many landscape gardeners and landscapers will be capable of doing the same work and projects.
The term 'landscape gardener' however does lean towards more of a gardening theme. This implies more of a garden maintenance or landscape development role.
On the other hand the term landscaper implies the creation and building of new landscapes and gardens. Hard landscapers will typically be focused upon building with hard materials and soft landscapers will be focused upon groundwork, planting and turfing.
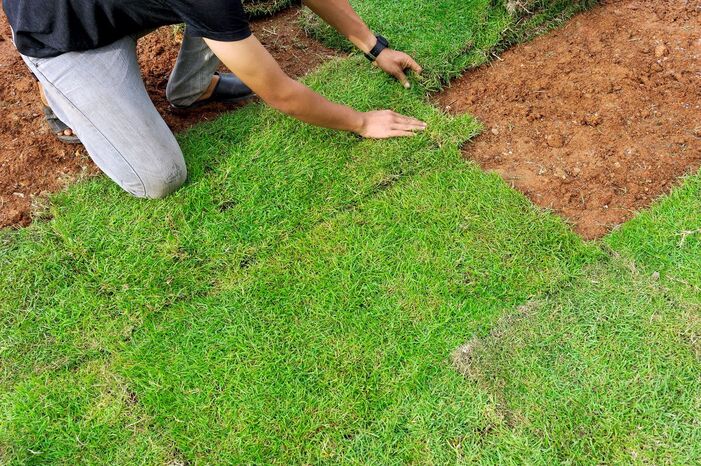
What projects does a landscaper do?
What projects you do as a landscaper will depend upon the company and sector you work in.
If you build public open spaces you could be involved in playground installation and even skate park construction. However in private gardens your focus maybe more upon laying patios, decks and installing new lawns.
However, landscaping is so diverse landscapers could end up being involved in any of the tasks listed below.
- Groundwork
- Excavator operator
- Planting
- Laying new lawns
- Landscape drainage
- Landscape irrigation
- Bricklayer
- Stone layer
- Paver
- Surfacing specialist
- Carpentry
- Plasterer
- Tiler
- Concrete worker
- Play ground installer
- Tree surgery
- Fencer
Commercial landscaping
Commercial landscapers operate within the public realm creating and maintaining a variety of landscape spaces.
Many of these include public parks, gardens public displays and recreational facilities. Most local authorities will employ their own in-house soft landscaping teams.
These will normally be maintenance operatives and green keepers. However many commercial landscaping projects rely upon private sub-contractors hired by the public sector.
Commercial landscaping typically involves large scale tasks requiring heavy machinery.
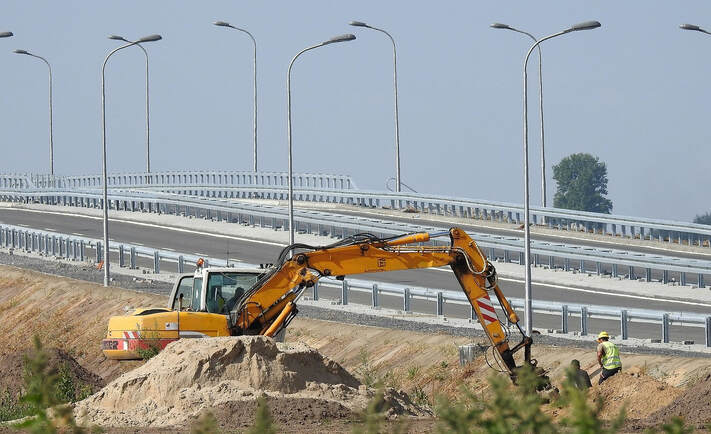
Domestic landscaping
Domestic landscaping is mainly undertaken by the private sector and typically involves private gardens.
Domestic landscaping teams are generally made up of small groups of highly skilled landscapers who can undertake multiple tasks. Most landscapers who work on domestic projects rarely get bored!
This is due to the fact a single project can include such a variety of work and tasks. Some of these can include; labouring, machine operating, levelling, concreting, and fencing paving and much more.
Some domestic landscapers can end up focusing in one particular specialty they are good at or enjoy. Some examples of these include fencing, planting and paving.
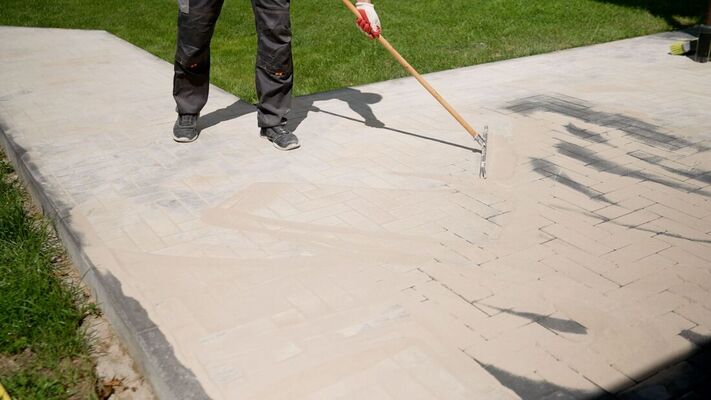
Do you need qualifications to become a landscaper?
Most of the time there is no absolute need for formal qualifications to become a landscaper. The real way to truly learn the landscaping trade is with hands on experience.
However, anyone wishing to become a landscaper will hugely excel their career by having a formal qualification. For example, an accredited course in horticulture, landscape construction or garden design will provide a key advantage.
A foundation in such subjects or a very keen interest and love for the work will stand candidates in good stead. If you are serious about becoming a hard landscaper it will benefit you greatly to learn a relevent trade.

The two best trades for landscaping are bricklaying and carpentry. My personal advice is don’t simply start a course and go through the motions. Most courses will never be effective if you are not steering the ship!
Save up, buy some materials and practice at home, to get started offer to do small projects for free to build up skill & confidence. Do not underestimate the level of skills needed to be successful in landscaping!
Most high earning landscapers run their own business or are sought after contractors. To rise to this level you will need to develop good communication and interpersonal skills.
Organisation and logistics is key to becoming a profitable landscaper so you should be both forward thinking and organised.
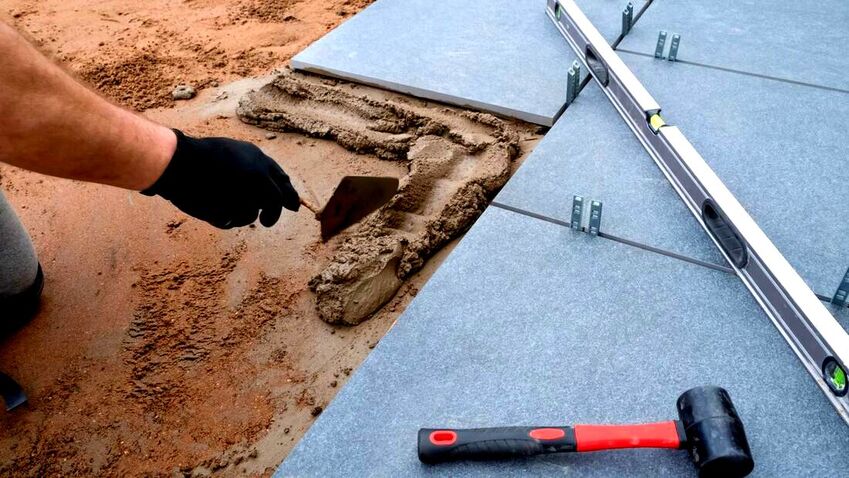
Successful landscapers will need to acquire the ability to qualify themselves with new skills. To excel your career you will need to learn how to market your portfolio.
This can include learning how to build websites, implement seo and campaign strategies. Most of the time there are no entry qualifications required to start landscaping.
However, if you are serious about becoming a profitable landscaper you will need to become a ‘self learner’ I would seriously recommend a course in horticulture or learn a relevant trade first.
How do I become a landscaper?
The best way to become a landscaper is get some hands on experience.
By all means do a course but you must first establish if you like the work. Try to get into a company at entry level; most good companies are always searching for people.
From experience I can say you can learn so much by watching. However it is important to not simply stay a landscaping labourer for years on end. Take an interest in the project you are doing and try to become indispensable to your team.
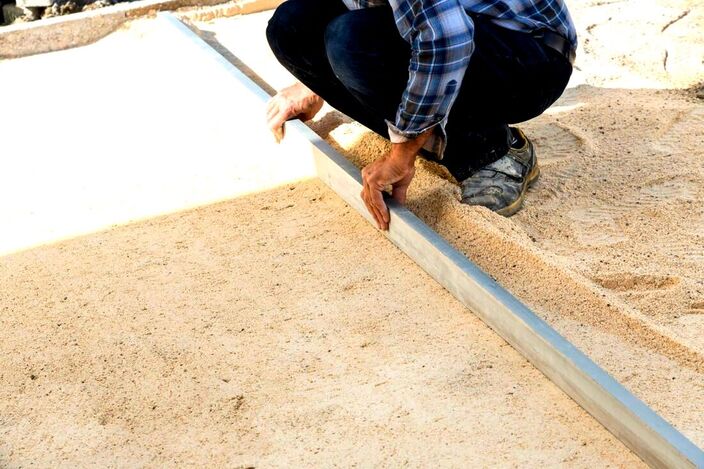
A good labourer is worth their weight in gold! Nobody will invest in time training you if you don’t master the basics and work hard!
Then you need to take ownership of small projects and build confidence. When you become experienced enough, take responsibility for larger and more complicated tasks.
This is the only way to become a good all round landscaper through experience and gaining confidence.
Then you need to take ownership of small projects and build confidence. When you become experienced enough, take responsibility for larger and more complicated tasks.
This is the only way to become a good all round landscaper through experience and gaining confidence.
How much do landscapers get paid?
How much landscapers earn depends upon what type of landscaping, geographic location and experience level.
The average salary for a landscaper in the UK is £22,500 per year.
However, this number is an average and not representative of what most landscapers earn. If you are a young trainee your pay is more likely to be between £15,000 and £18,000 per annum.
If you work for a company and have reasonable experience expect to earn around the national average, £22,500.
On the whole hard landscapers do earn more than soft landscapers. Hard landscapers normally have a skilled trade and undertake more varied and multi skilled tasks. Consequently it is common for hard landscapers to earn between £25,000 and £35,000 per year.
Hard landscapers who run whole projects and command a team can earn between £32,000 and £42,000 per year.
However if you are a self employed landscaper with a few staff you can expect to earn between £45,000 to £90,000 per year. Larger landscaping company directors and CEO’s can earn even more than that.
It is important to remember that landscaping rates will also depend upon your location. For example London landscapers will earn more and have a higher cost of living than rural landscapers.
Is landscaping a good career?
Landscaping can be an extremely profitable and fulfilling career. If you love to be physically active, building and the great outdoors it could be for you.
In a recent study in the UK showed that landscaping is one of the happiest professions. Seeing that the UK Generally has quite changeable weather this has considerable merit!
In a study of the happiest professions across the world landscaping always made the top 10. A combination of physical exercise, satisfaction of admiring a completed project and greenery certainly contributes.

If you can work for yourself and get involved within all stages of a project it will be very rewarding. From personal experience designing, building, and taking care of outside spaces is very fulfilling.
There are however also some downsides you must consider to becoming a landscaper. Firstly, you will lose income due to bad weather it is just a part of the game.
I have experienced some projects which have been held back for over six weeks! You also have the threat that any physical injury can put you out of work.
Every landscaper I know has had injuries arise that has put them out of work so this should be a consideration.
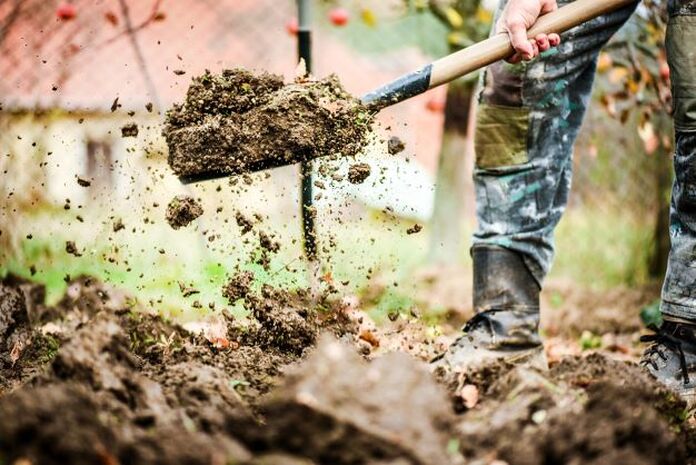
It is always important to weigh up the pros and cons of any big career decision.
However there is nothing worse than spending your life doing a job you hate. If you love gardening, being active and building landscaping is a very fulfilling profession.
Why not visit our more in-depth article on is landscaping a good career here. Here I break down all of the advantages and disadvantages of this unique profession.
Thank you for reading our article on what is a landscaper. Below I will include some other articles you may find useful.

|

|

|
'As an Amazon associate I earn from qualifying purchases'
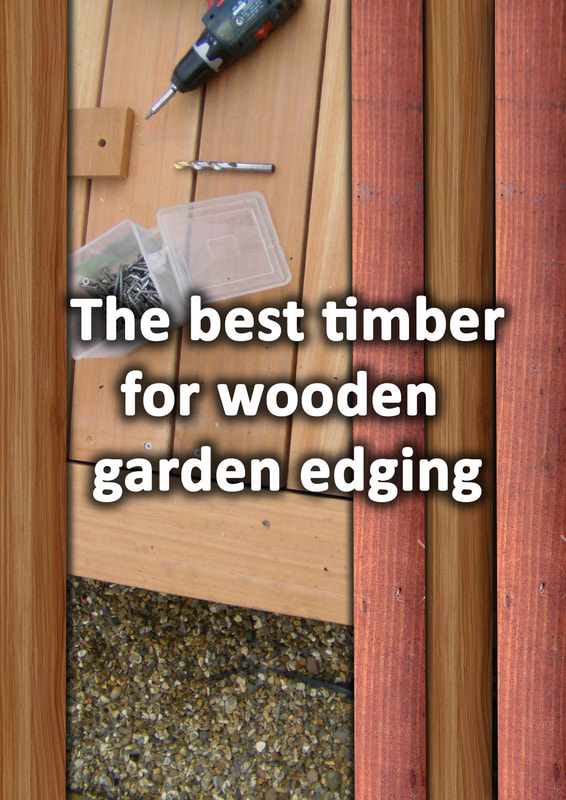
This article contains affiliate links
Timber edging has always been a popular choice for garden and landscape edging.
Being an organic material it has a natural aesthetic and less heavy effect on the landscape. When it comes to choosing timber edging however there are many elements to consider.
Some of these will include appearance, budget, durability and maintenance. The type and grade of timber you install will greatly depend upon the specific requirement of your edging.
If your edging needs to be robust to retain soil you will need thicker sections of timber edging. In such a circumstance perhaps timber sleepers would be better suited.
In this article, I will break down all of the considerations of installing timber garden edging. I will also list and describe the best timber for wooden garden edging for every scenario.
Is wood good for garden edging?
Whether wood and timber is good for garden edging really depends upon your specific gardens design.
There are many advantages of using timber and I personally love both aesthetic appeal and flexible qualities. Thinner cuts of timber can create perfect curves and even circles within garden designs.
Many timber products utilised for outdoor use and construction are treated to reduce decay. There are also many hardwoods which can naturally resist the vigour’s of the outdoors.
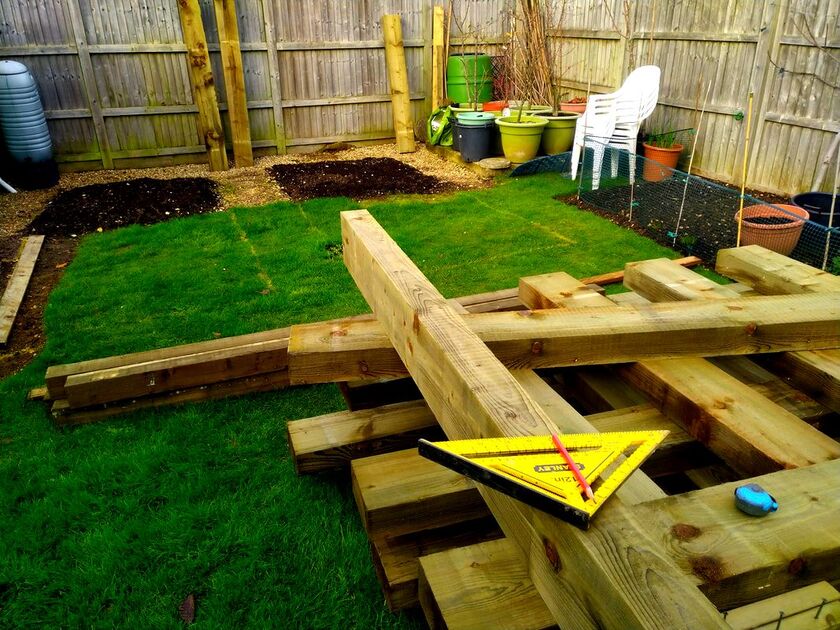
However I would say although most external timber products will last they can't last forever!
Even hardwoods will eventually decay but how fast will depend upon your site and application. If you are using thin edgings in very saturated soil they will degrade faster.
As a general rule I say use masonry materials for large retaining edging if your budget allows. So yes, wood and timber is good for garden edging but be aware of its limitations after a decade or two.
Treated timber edging
Many softwood timbers are pressure treated so they are more suitable for outdoor use.
This treatment helps to repel moisture and reduce the rate at which the timber degrades. As softwood timber is fast growing and cheaper to buy treated timber is the most typical outdoor choice.
Most fencing materials such as timber panels, posts and gravel boards are treated in this way. Such timber can also be stained for greater protection and a more aesthetic appeal.
It is no surprise that timber gravel boards are one of the most popular choices for flexible and flush garden edging.
This can be seen in the image below!
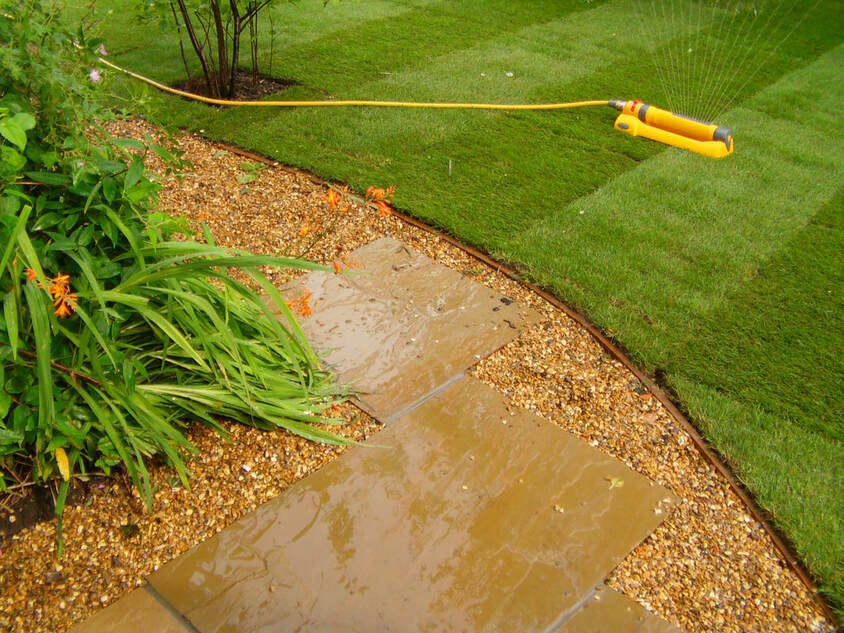
Flexible timber garden edging
While concrete and masonry materials are well known for their compressive strength, timber is hailed for its flexible properties.
Consequently it is no surprise that thin and flexible timber edging is often utilised to form curved garden edging. Timber has the added benefit of absorbing seasonal changes within the soils moisture content.
This allows timber to flex and contort without breaking and cracking like concrete or masonry edging. The most common example of flexible timber edging is fencing gravel boards.
These can have groves scored into them with a saw for extra flexibility and give. Thin timber decking boards can also be joined together and installed in this way.
This is extremely useful if you want thin, hardwood, garden edging but can only source the material in decking.
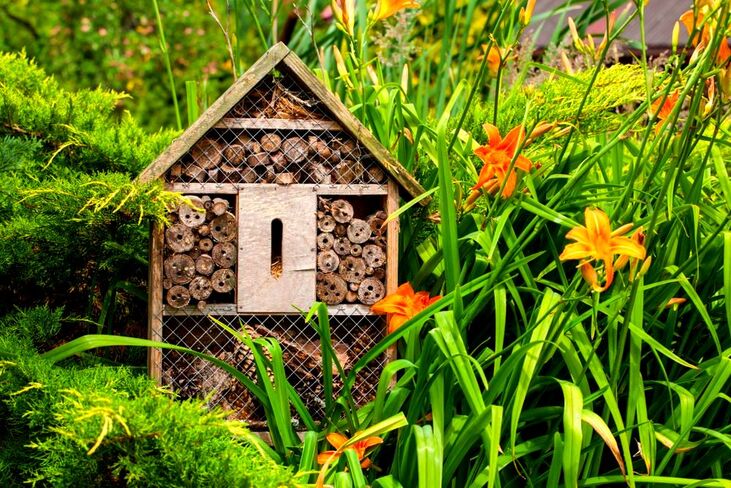
Raised timber edging
There are a couple of reasons why you may wish to have raised timber edgings in your back yard. The most common reason is to retain soil back off of patios and lawns.
Another reason for raised timber edging is to create a small physical barrier or junction between varying surfaces. When it comes to raised timber edging durability is very important!
If your timber is too thin or week it will not be able to resist knocks and pressures applied to it. This is particularly the case with raised and retaining timber edging.
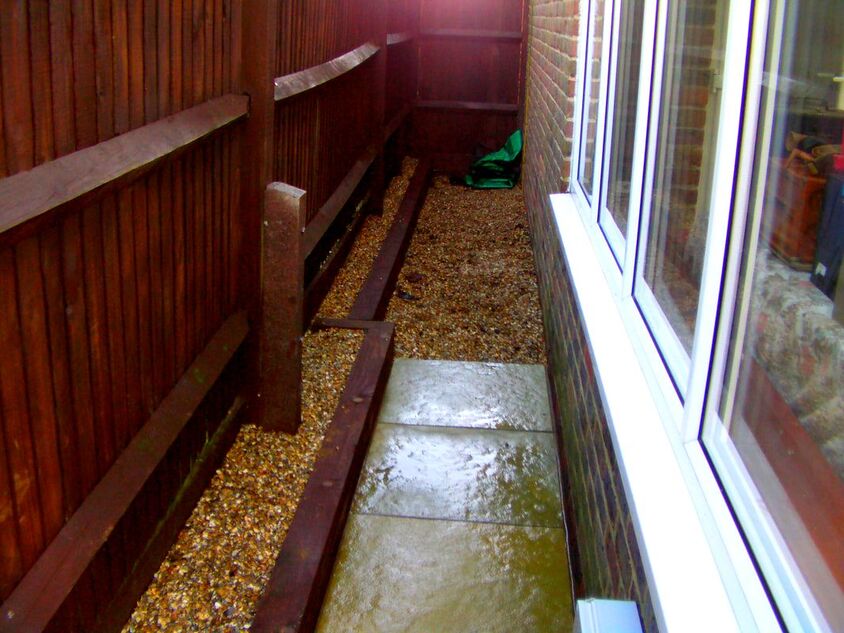
Such edging is even more at risk from degradation over time due to wet soil and applied loads.
In an ideal scenario the best raised timber edging will be at least 75mm in thickness. However, for retaining soil I would recommend raised timber edging be at least 100mm thick.
This is why timber sleepers are the best raised timber edging material for external use.
In an ideal scenario the best raised timber edging will be at least 75mm in thickness. However, for retaining soil I would recommend raised timber edging be at least 100mm thick.
This is why timber sleepers are the best raised timber edging material for external use.
Using timber sleepers as garden edging
Timber sleepers are large and robust sections of timber commonly utilised for landscape construction.
Originally sleepers where created to a sturdy base to railway lines, hence the name ‘railway sleepers’. Most sleepers measure 2.4 metres x 200mm x 100mm thick. This makes them the optimum thickness for creating raised beds and retaining garden edging.
Sleepers are very effective at forming long, straight and robust outdoor structures. However sleepers can also be used to form robust curves to within garden landscaping.
Sleepers can be cut into shorter sections and set vertically into the ground. Such vertical sleeper retainers are normally set in concrete for extra rigidity.
Such vertical sleeper edging can be seen in the background of the image below.
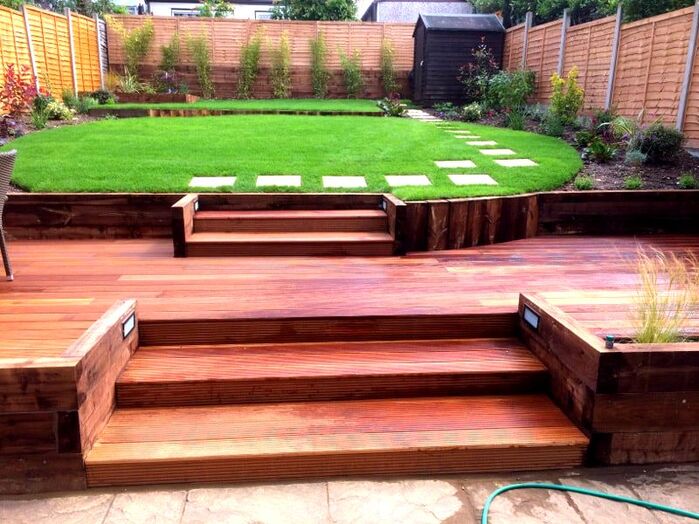
Hardwood garden edging
Hardwood is always the preferred timber for outdoor edging for two reasons. Firstly it is much denser than softwood and more resistant to outdoor conditions and rot.
Secondly it generally looks much more aesthetically pleasing than softwoods. This is especially so with hardwoods such as Cedar, Redwood and Balau which display radiant colours.
However, surprisingly there is not much choice on the market when it comes to hardwood edging. My guess for the reason would be the cost does not justify the amount needed for most gardens.
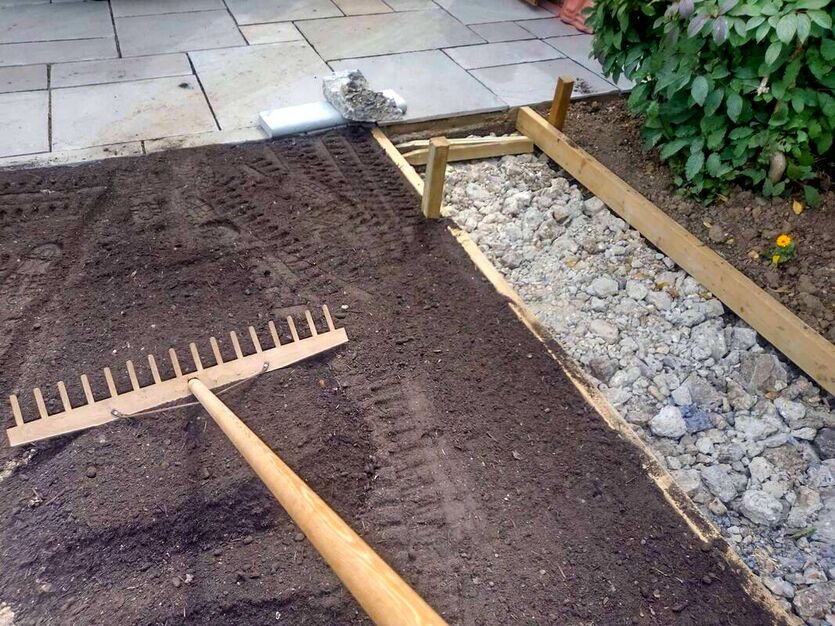
Consequently from a market perspective demand would be very low. However, there is an effective solution for creating the hardwood edging of your choice.
Try to purchase your preferred hardwood edging choice in decking boards. Hardwood decking can easily be worked into excellent garden edging of different styles and designs.
Try to purchase your preferred hardwood edging choice in decking boards. Hardwood decking can easily be worked into excellent garden edging of different styles and designs.
Balau garden edging
Also known as Shorea Balau, this tropical hardwood originates from Southeast Asia. Balau is well known for its radiant red look when oiled and fine grain.
This hardwood is extremely resistant to decay, rot and insect damage making it ideal for garden edging. Balau can provide a very contemporary feel with its orange tones contrasting well with creams and blacks.
Balau decking boards can be purchased and formed into very effective garden edging.
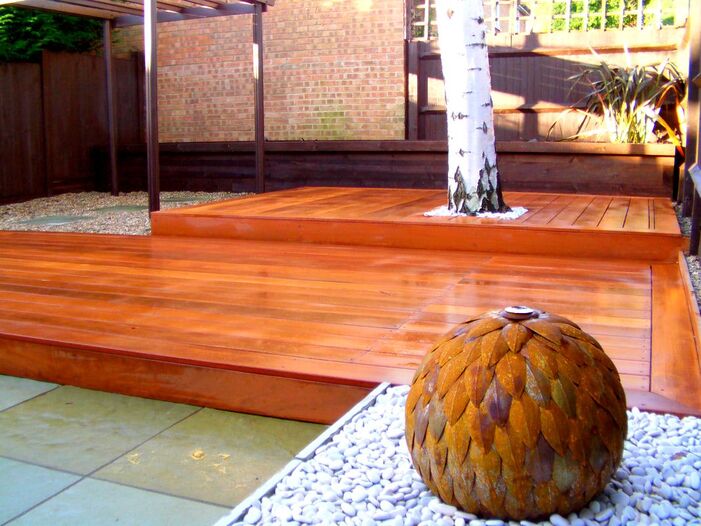
Teak garden edging
Teak is a well known tropical hardwood from Southeast Asia. Like Balau it is extremely durable and dense making it perfect for outdoor construction.
Teak has a rich golden brown colour which can really bring sophistication to a landscape project. The good thing about teak is it a little more accessible than some other tropical hardwoods.
Its colours also generally match other timber products such as garden furniture on the market. Always make sure your teak hardwood is purchased from a sustainable source.

Cedar garden edging
Cedar is been favoured for its durability and light weight making it perfect for a variety of construction projects.
Cedar actually comes from a coniferous tree which actually makes it softwood. However natural compounds in this timber make it extremely insect repellent and resistant to decay.
These natural compounds also give the wood a very pleasant aroma. Cedar edging does come in a range of products but simple deck boards can be utilised as edging.
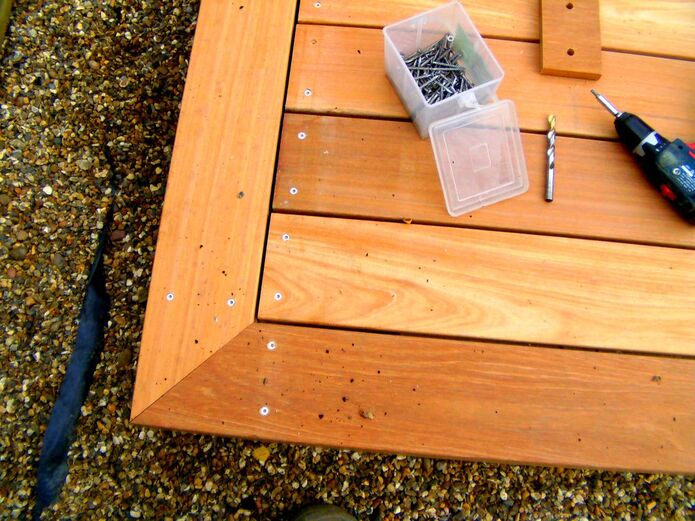
Redwood garden edging
One of the most delightful qualities of Redwood timber is its vibrant, reddish brown, tones.
This time is extremely hard wearing and naturally resistant to moisture and decay. Redwood has become a popular material for both decking and outdoor edging materials.
Like Cedar redwood is light weight and very easy to work into any specification. Redwood is also less likely to warp and change its shape during seasonal fluctuations in temperature and moisture.
Cypress garden edging
Cypress timber is well known for being moisture resistant and tolerant of outdoor conditions.
It has long been favoured for its light brown colour which has a modern feel. Cypress like Redwood is well known for its stability and reduced risk of contraction.
This has made it very popular for any type of outdoor or landscape construction. There is not many Cypress products on the market specifically designed for edging.
However garden edging can easily be made from Cyprus boards or cypress decking!
Thank you for reading our article for what timber is the best for garden edging. Below I will link to some other articles you may find useful.
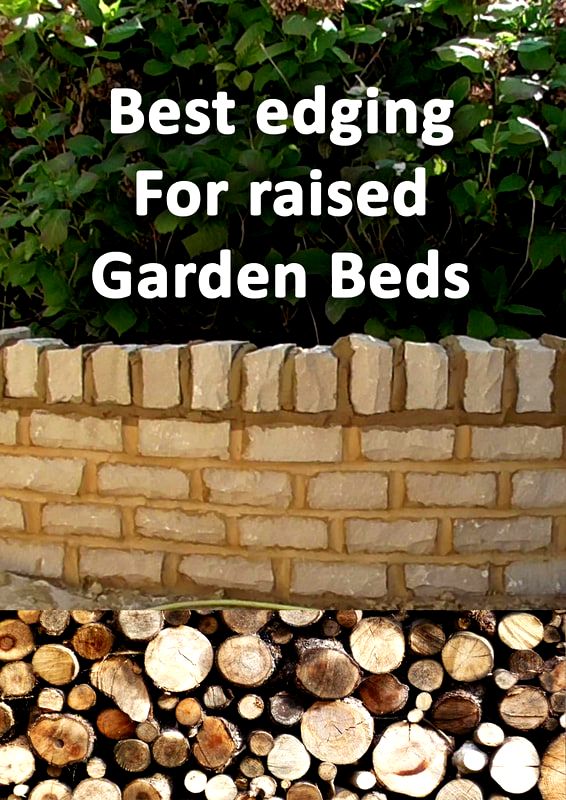
|

|

|
'As an Amazon associate I earn from qualifying purchases'

|
The Author
Paul Nicolaides
BA (Hons) Dip
Paul Nicolaides has over 30 years of recreational gardening and 20 years of professional landscaping experience. He has worked for landscape contractors including design and build practices across London and the South East. In 2006 he qualified with a BA Hons degree and post graduate diploma in Landscape Architecture. In 2009 he founded Ecospaces an ecological landscaping practice which aims to improve social cohesion and reduce climate change through landscaping. In 2016 he founded Buckinghamshire Landscape Gardeners which designs and builds gardens across Buckinghamshire and the South East. This blog aims to provide easy problem solving information to its audience and encourage others to take up the joy of landscaping and gardening.