This article contains affiliate links
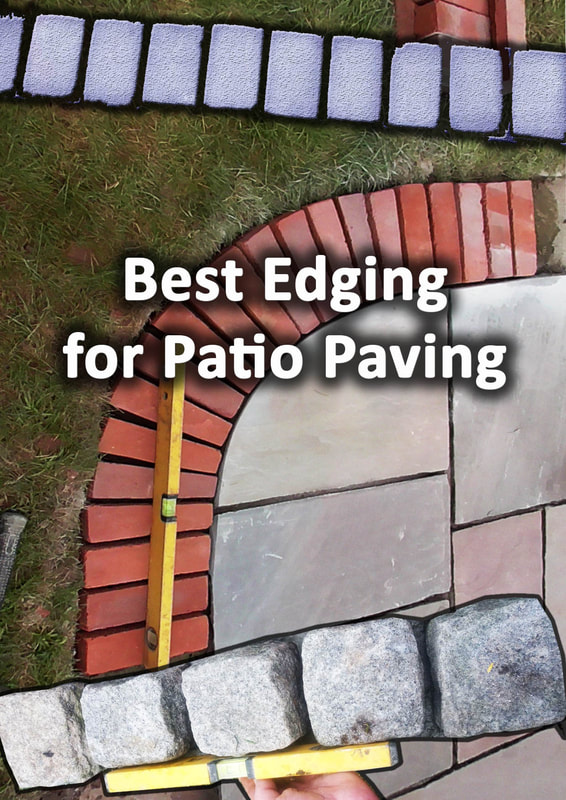
When it comes to installing the perfect edging for paving, attention to detail is everything.
Not only is it essential for your paving to look good it must also be structurally sound and robust. The best edging for paving will both compliment paving aesthetically as well as providing a strong perimeter border. However, the word edging really is a broad term when it comes to paved surfaces. Edging for paving can create bold visual borders or add some form or retaining function. Most of the time however paving edging has more than one function. Paving edging now comes in a wide variety of products and materials ranging from timber to metal and masonry materials. In this article I cover the main types of paving edging and six of the best material choices for edging paving. Retaining edging for pavingRetaining edging is one of the most functionally important parts of any paved surface. Such edging ensures that paving has a robust perimeter which contains both the paving and its base. If paving is laid upon sloping ground then retaining edging can become even more important and pronounced. On substantial gradients paving edging may be laid onto retaining foundations or even retaining walls. This could be a soldier course of brickwork along the top of a low retaining wall. 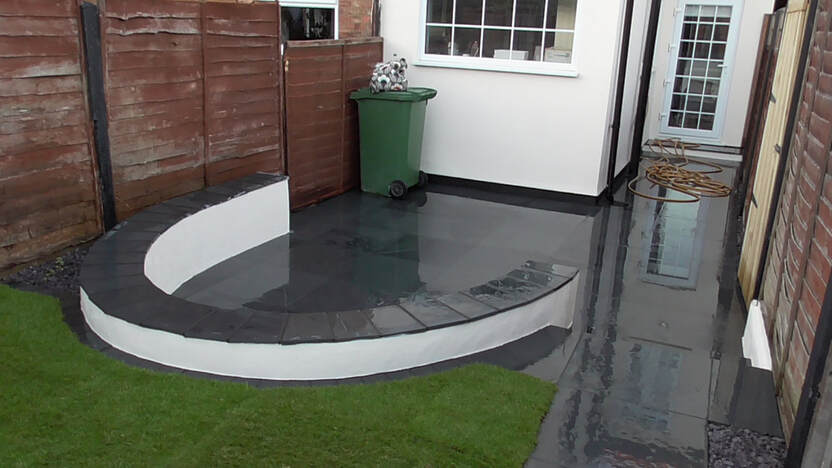
Most of the time however, retaining edging forms a ridged barrier between paving’s base work and the surrounding ground.
This can ensure the longevity of a paving’s base by ensuring it remains well compacted over time. By far the most important retaining edging is that used within flexible paving. Flexible paving includes paving laid upon compacted sand such as block paving driveways. Edging blocks and kerb edgings are concreted into position to provide a strong retaining edge. 
This helps to keep the compacted sand and base work firmly in place so no displacement occurs.
Common materials used for retaining paving edging include; kerb edgings, path edgings, bricks, blocks and sets. Border edging for paving
Border edging for paving typically serves more of a visual function than a functional one. Very often, large expanses of the same paving material can become monotonous and boring. Consequently a border edging will normally be a contrasting tone or material which is in keeping with the paving's style. A good example of this would be a row of dark red bricks bordering multi-tonal sandstone. Such can be seen in one of our patio project examples in the image below. Occasionally border edging can be even more dramatic with big colour contrasts between materials. 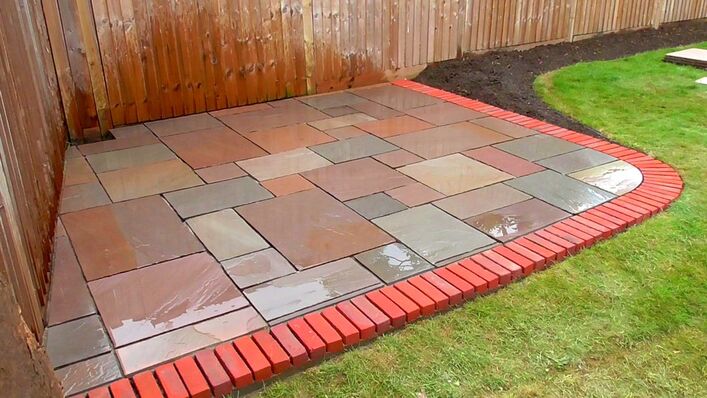
Such an example would be a header course of blue engineering bricks edging cream, porcelain, paving.
However, border edging can also have other functions such as retaining paving edges and proving junctions to different surfaces.
Border edging can also be utilised to form design patterns within paved surfaces. 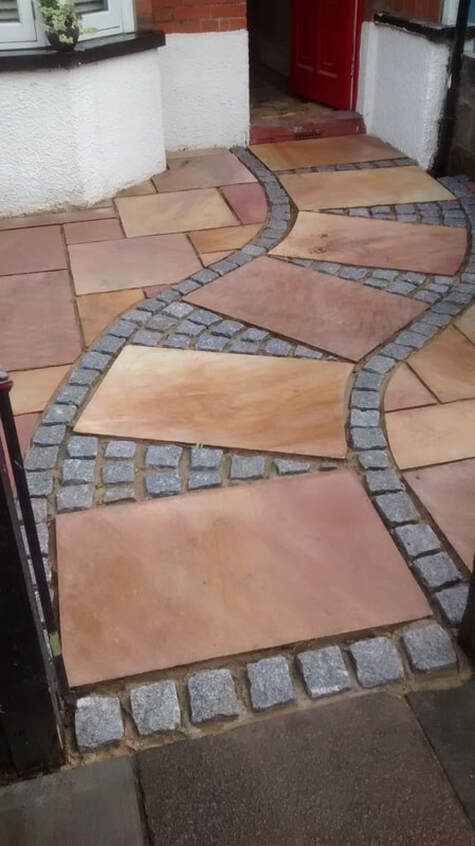
What is the best edging for a patio?The best edging material for a patio will depend upon your specific projects design and personal preferences. Generally however, the best edging for a patio will visually contrast the patio itself but still compliment the design as a whole. Often a differing colour or visual texture to the primary paving material is the most effective. This is why a solider course of decorative landscape bricks regularly works well with patio slabs. The best edging for a patio will also be robust and have a retaining function to the patios base. Such edging will separate the paving’s base aggregates from the surrounding ground. On the whole masonry materials such as concrete, brick and natural stone have such qualities ideal for patio edging. 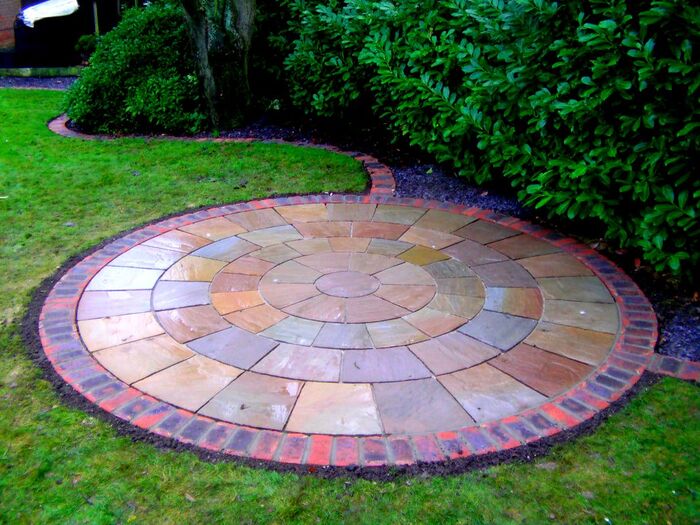
What is the best edging for driveways?
The best edging for driveways is an edging with aesthetic appeal and a high compressive strength that does not degrade over time. Typically driveway edgings will need to retain large quantities of compacted aggregates with no threat of failure. Consequently the best edgings for driveways are masonry materials such as concrete edging kerbs, brick and natural stone walling. Furthermore, effective driveway edging will compliment the driveways surfacing material. Commonly this will come down to aesthetic design and personal choice. It is very common for driveway paving such as block paving to come with their own associated edging products. 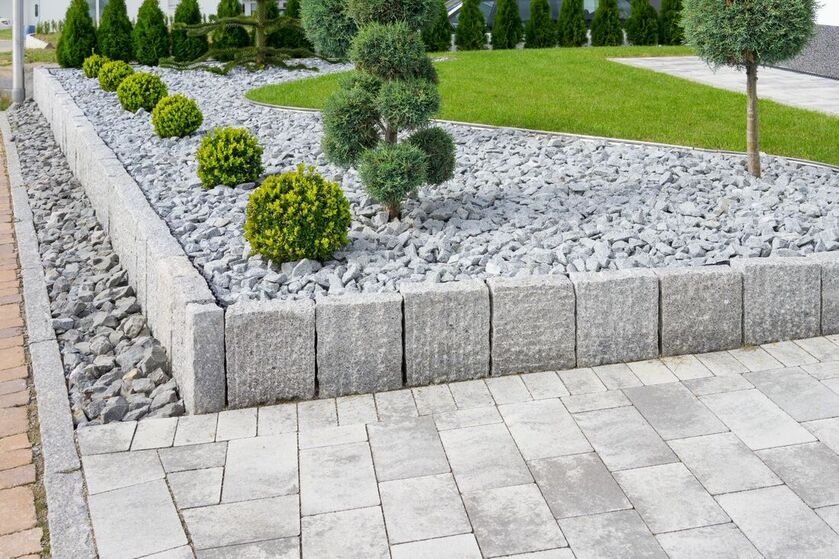
6 of the best edgings for pavingBrick edging borders
Bricks are one of the very best edging materials for paving edging. Not only do they look good they can also be laid to form retaining walls and attractive borders. Bricks laid in a soldier course can create a pleasant visual texture to the edge of the paving. They can also help to add contrast to the patio surface as a whole. 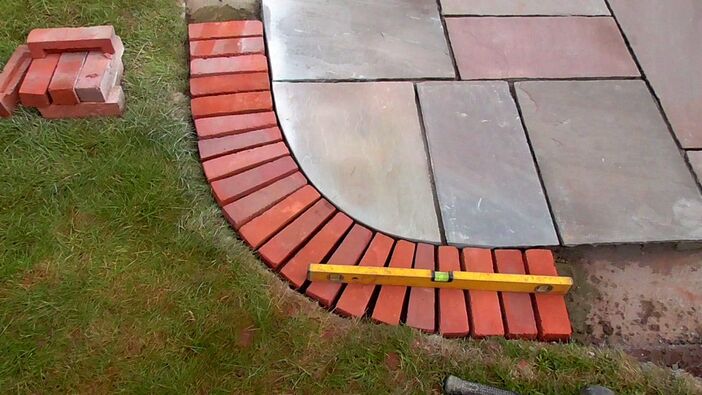
Natural stone set edgings
Setts are robust cubes of natural stone which are extremely robust and hard wearing. For centuries square sets were used to surface roads and pavements within the public realm. Natural stone sets can also make attractive and strong edgings to paving slabs. Their sheer mass and depth enable them to retain other heavy paving materials effectively. 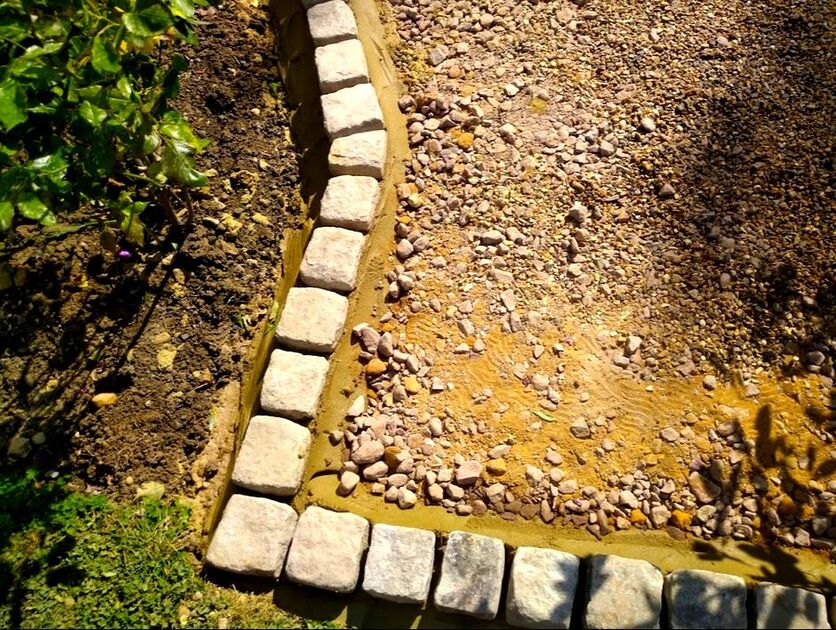
Kerb edgings
Kerb edgings are generally made from concrete and specifically designed for edging paving. Some kerb edgings have curves or bull-nose designs while others have a more angular profile. Kerb edgings are particularly useful if you want to implement raised or retaining edgings to paving. These can also be used to form raised beds or build steps like in the image below. 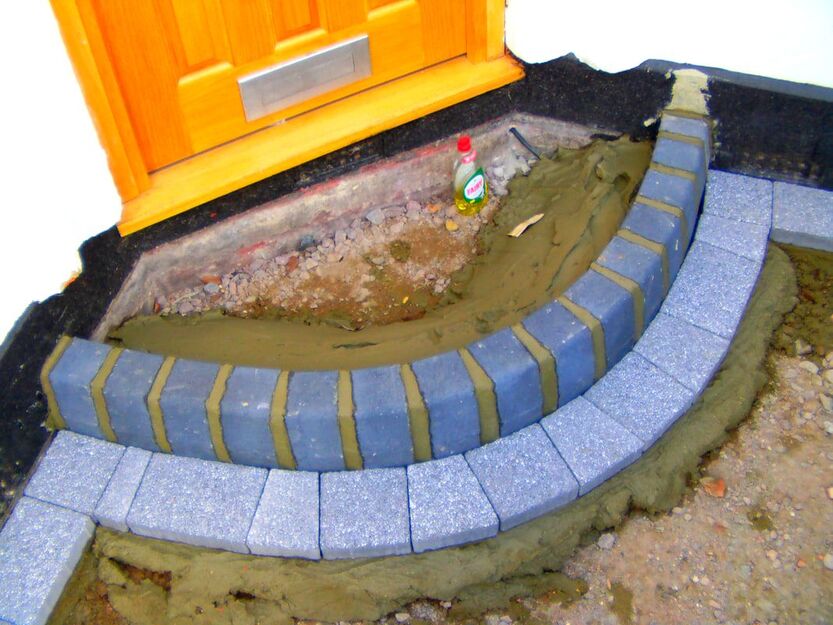
Concrete block edging
Concrete blocks are some of the most versatile of building materials. Blocks can be cut into a multitude of different shapes and sizes for utilisation as edging. The extra advantage of using concrete block is you can clad it in pretty much any other material. Blocks can be rendered, painted, clad or tiled. Smaller concrete blocks such as block paving can also be used as flush edgings to paving. 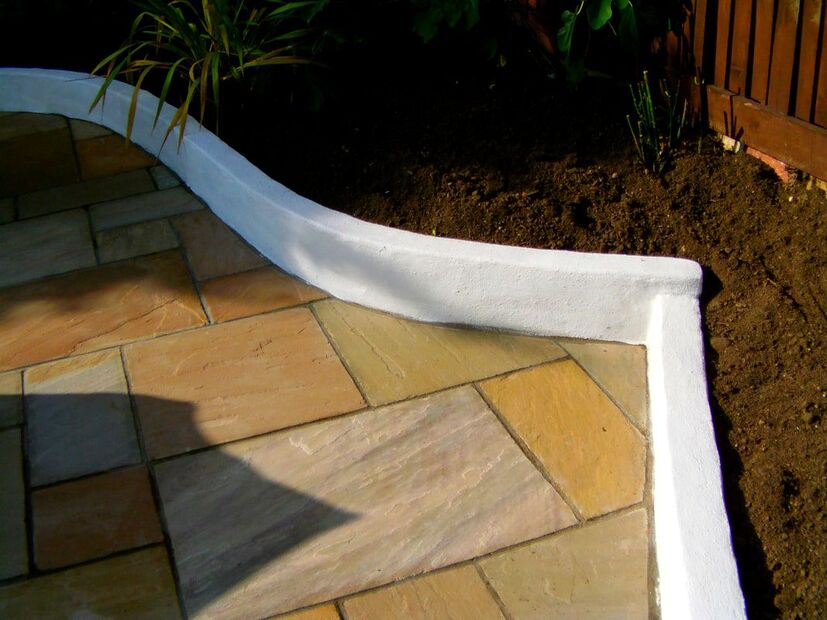
Path edging kerbs
Path edging kerbs come in a range of styles and colours but generally take a similar form. These edging kerbs are typically around 1 metre in length, 150mm deep and about 50mm wide. Pathway edgings are designed to form a robust retaining edging to patios and pathways. Such edging kerbs are an effective way to create clean and modern, flush or raised edgings to paving. 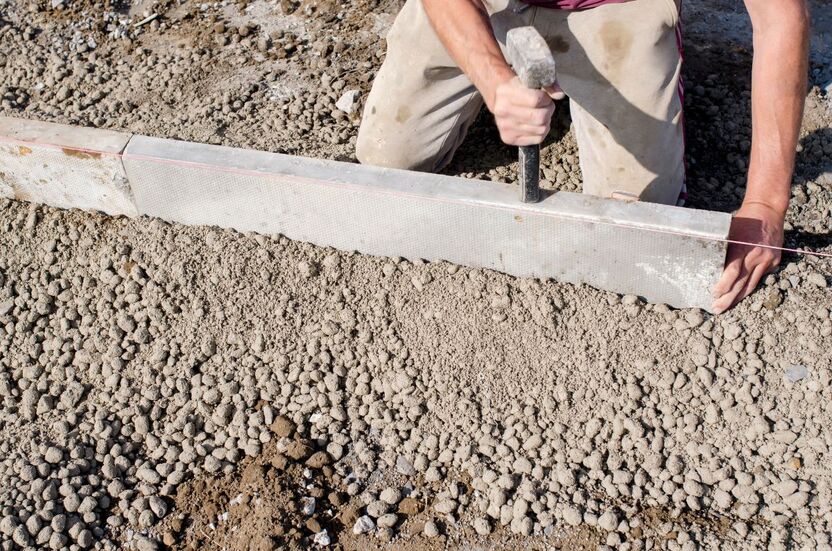
Sleeper edging
Sleepers are robust sections of treated timber used extensively within landscaping. Generally sleepers are around 2.4 metres long 200mm wide and 100mm thick. Sleepers can be used as edging for paving in two main ways vertically and horizontally. Horizontally they can be laid along the straight edge of paving to create a retaining border edge. If you have a curved paving edge, sleepers can be set in vertically to form a meandering edge or retaining feature. 
Thank you for reading our article on the best edging for paving! Below I will like to some other articles you may also find useful.
'As an Amazon associate I earn from qualifying purchases'
0 Comments

This article contains affiliate links
Wooden gates are a commodity for the garden and other backyard projects. Not only are they only great for side gates but also out buildings chicken coups and animal enclosures.
The problem is, most pre-made timber gates on sale are made from thin and flimsy materials. These can easily degrade over time becoming more of a liability than an asset. Furthermore, there is one main advantage of building gates from scratch. They can be built to fit any width or gap perfectly flush. Building your own strong wooden garden gate is not as technical as many people assume. Consequently, in this article, I will explain how to build a very strong timber gate step by step. The gates dimensions will be 900mm wide by 1.8 metres tall. 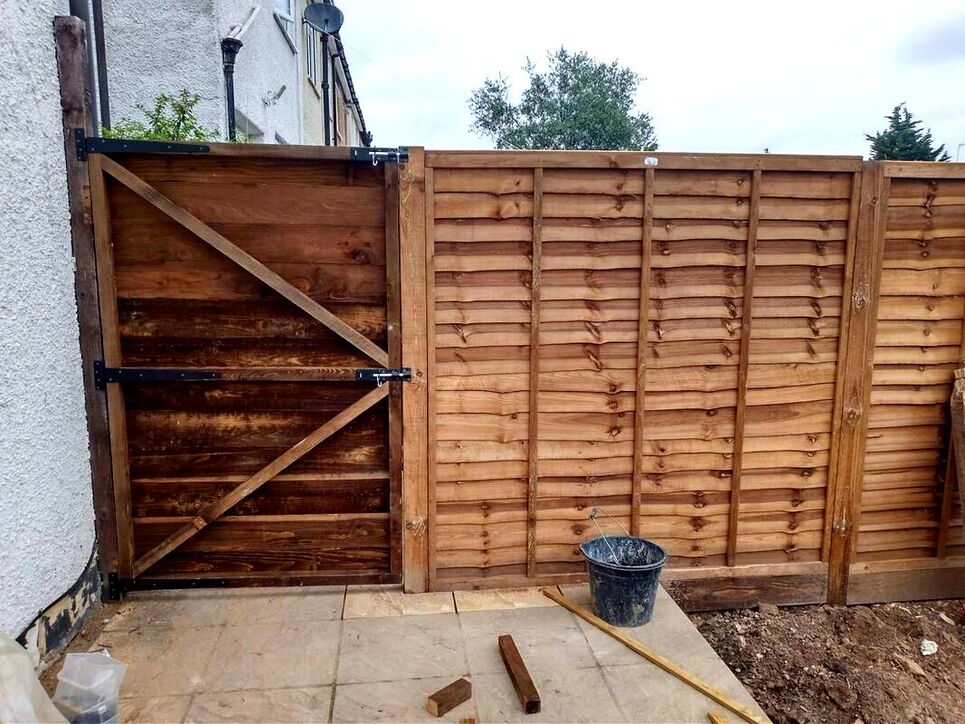
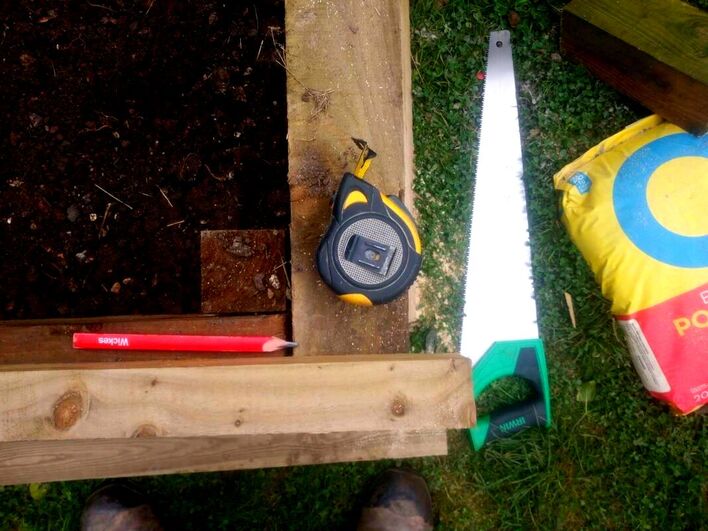
Shopping list5no. 47x47mm treated timber 1.8m long 6no. 150x22mm treated timber gravel board 1.8mm long 1 Pack of external grade 80mm wood screws 1 pack of external grade 50mm wood screws 1 large bolt lock 3 large wooden gate T Hinges Tools you will need
Step 1:
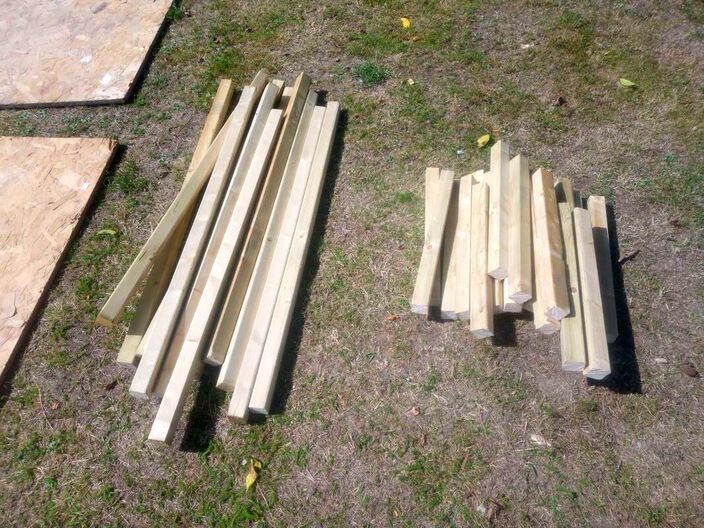
Take two 1.8 sections of 47x47mm timber and lay them out parallel on a flat piece of ground. You will then need to cut three pieces of 47x47 to a length of 806mm. When placed between the two long vertical braces, these will make the gate 900mm wide. 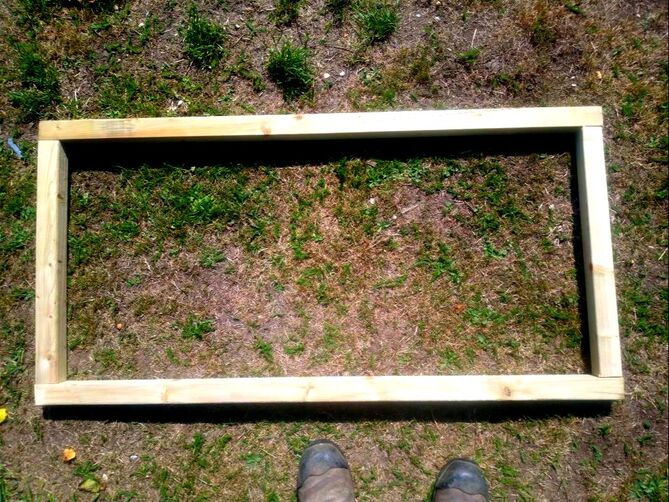
Step 2:
Using a set square and carpenters pencil mark the three 806mm lengths accurately and squarely. Then cut the three horizontal braces as neatly and square as possible. 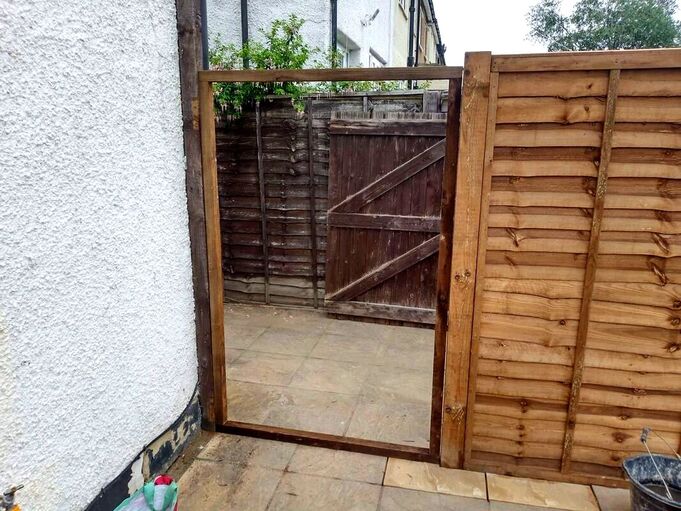
Step 3:
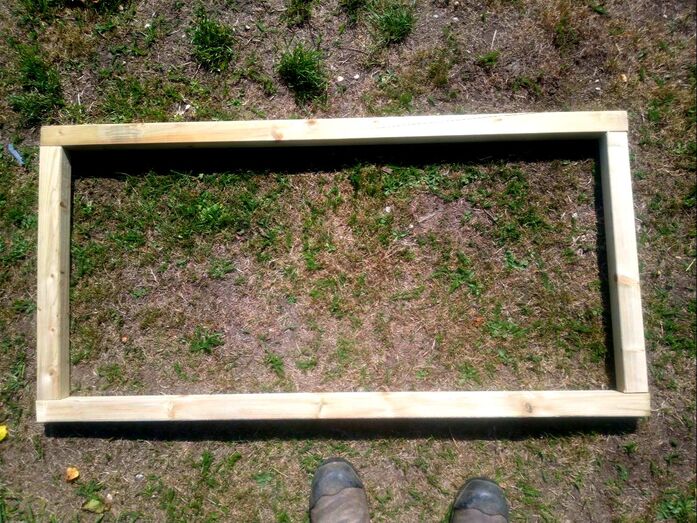
Offer up the top, bottom and middle braces tightly between the two verticals, you now have the complete frame of your new gate. 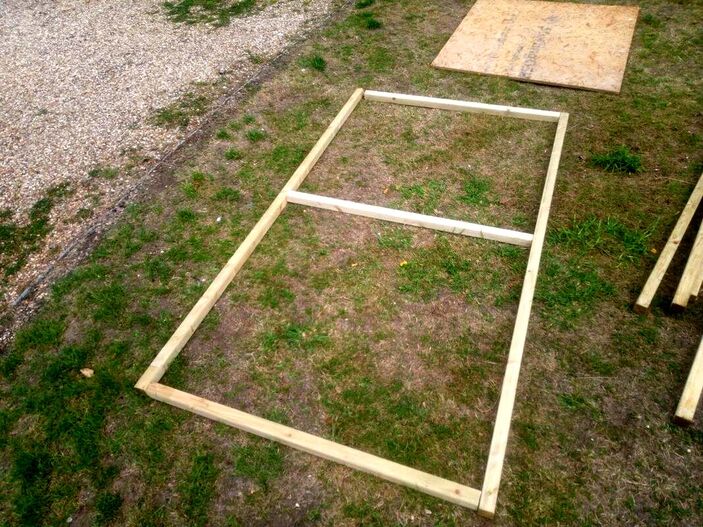
Step 4:
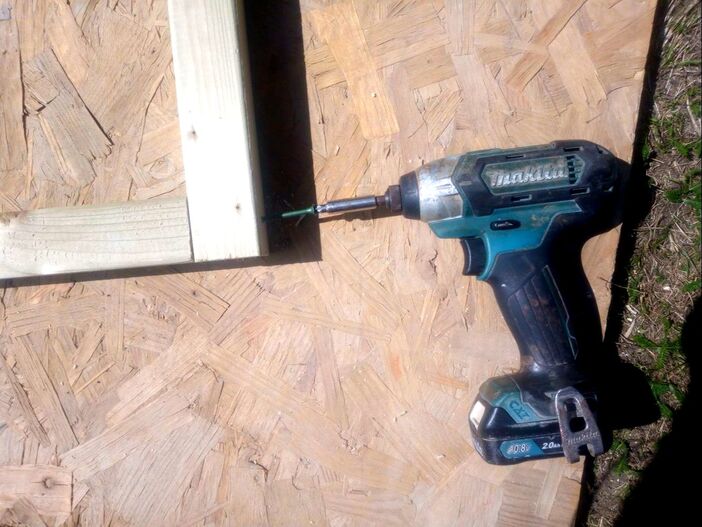
Drill pilot holes through the vertical timbers into the horizontal braces as central and square as possible. 
Step 5:
Screw the new timber framework together using the 80mm screws. Make sure this is done on a hard and flat surface to ensure flush joins. 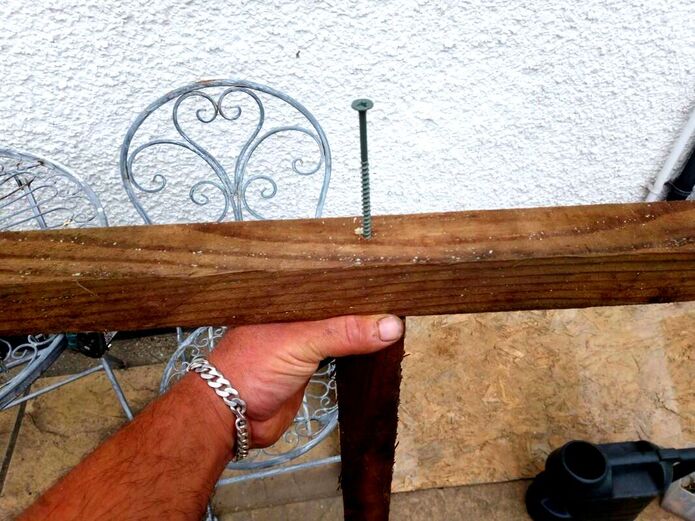
Step 6:
You will need to cut two sections of 47x47mm timber to make triangular corner braces. This makes the gates frame extra strong and prevents diagonal torsion forces warping the frame. Offer up your timber from the top corner to the corner of the central horizontal. Mark a diagonal line so it can fit perfectly between the two horizontals. Now cut the diagonals as neatly as you can. 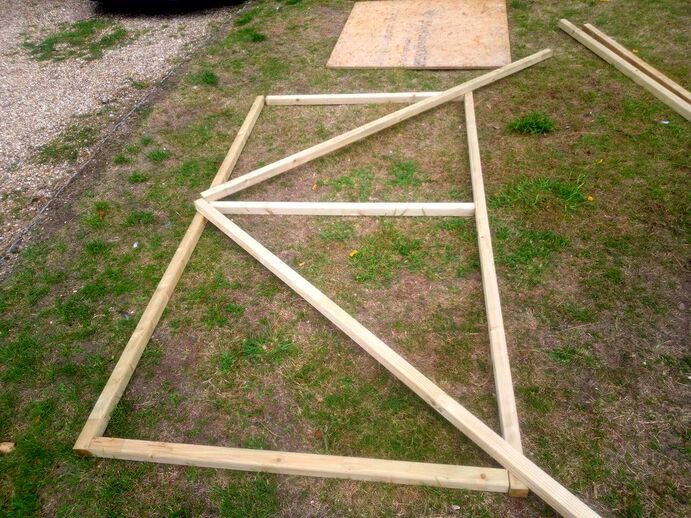
Step 7:
Offer up the corner diagonals and screw them tightly into the frame, you have now completed the gates frame. 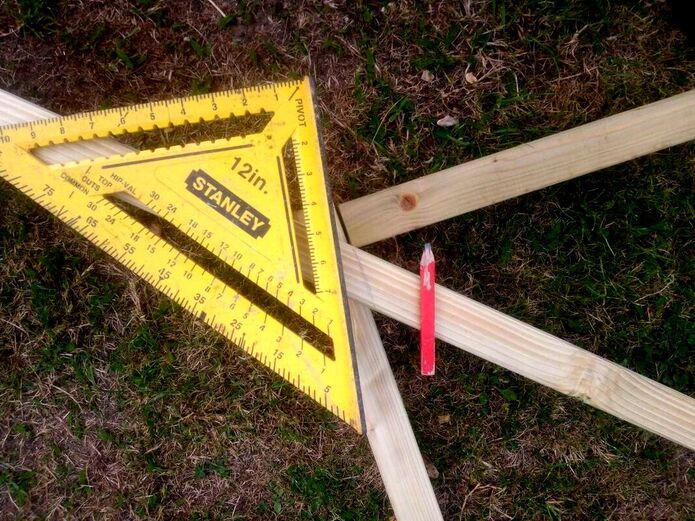
Step 8:
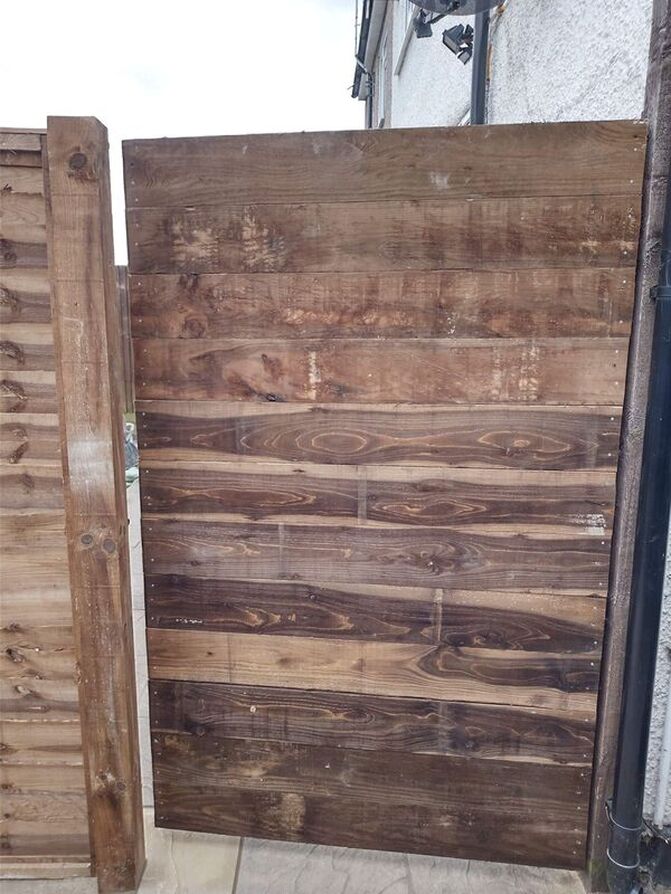
Cut your gravel boards perfectly in half squarely into 900mm sections using your wood saw. Using 50mm screws fix your gravel boards squarely onto your gates frame. Start at the top and fix them tightly and flush until you reach the bottom. You have now completed your strong timber gate. You may notice this gate is very heavy; this is why it must be hung with three large T hinges. Lean your gate up vertically on a warm and dry today to reduce its moisture content and hence its weight. 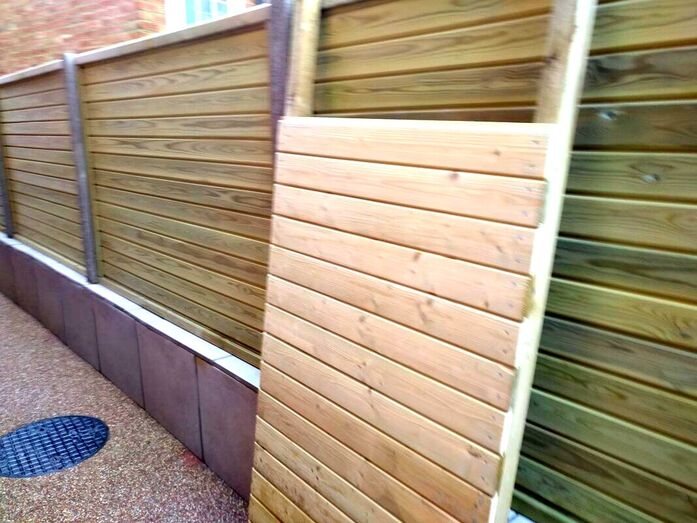
Step 9:Due to this gates robustness you will need to attach it to a strong post. Your posts must be a minimum of 100mm thick and be concreted into the ground 600mm. Wedge the gate into position and hang your gate using the T hinges. It is best to wedge the gate up off the ground and attach the hinges to the gate first. Try to fix the gate with a slight tilt towards the post at the top. This will allow the weight of the gate to pull it vertically plum when your release the wedges. 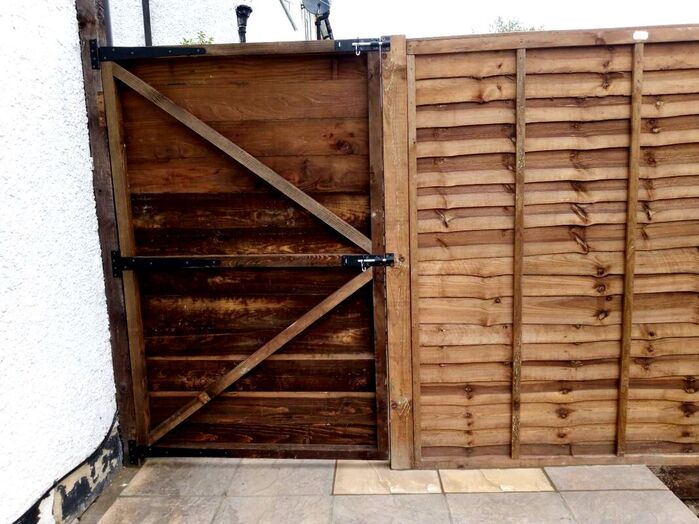
Step 10:
Fix your bolt lock to your gate where it meets the post, bolt locks normally come with shorter fixing screws.
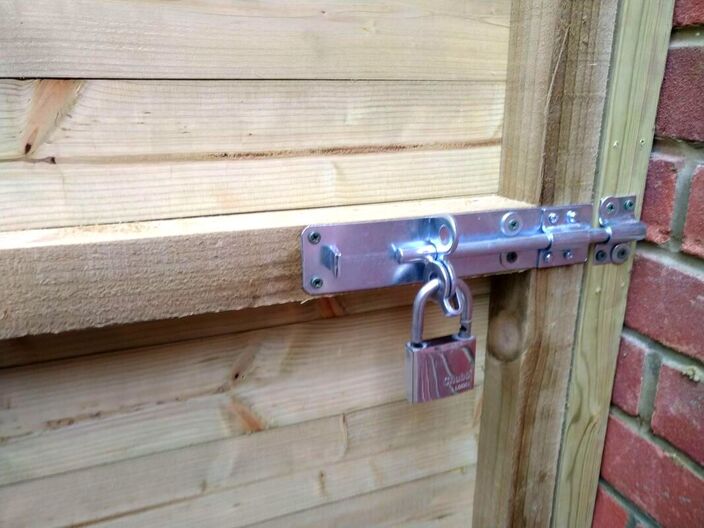
You have now completed your strong timber gate! Thank you for reading our step by step guide on how to make a strong timber gate.
If your project was a success or have any questions why not comment below?
If you found this article helpful why not help us by sharing it via the tabs below? Thank you!
'As an Amazon associate I earn from qualifying purchases'

This article contains affiliate links
Cold frames are a great way to raise young plants in a safe and warm growing environment.
These miniature greenhouses are particularly useful for hardening of plants during their transition from inside to outside. There are many different possible cold frame variations to build yourself or to buy on the market. Generally there are two typical flaws most cold frames have; being too static or lacking in height. Many cold frames have a heavy brick and concrete base, this makes it difficult move them. Secondly, as many cold frames are not that tall some plants soon outgrow them before the weather warms up. Consequently, in this article, I show you how to build a DIY coldframe with Polycarbonate which is both tall and mobile. The DIY cold frame has a 47mm timber frame for extra strength and durability. 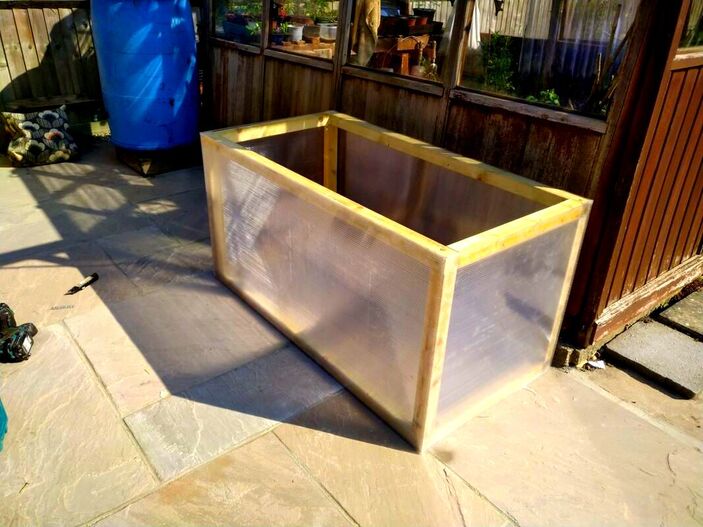
Shopping listTools you will need
How to build a DIY Cold frame step by stepStep 1: Measure and mark your timber
Your first step is to cut your timber into all the lengths you need. You will need 10 cuts at 500mm and 6 cuts at 1200mm.
Step 2: Cut your timber
Cut your timber into the desired lengths, when cutting; keep cuts as neat and as square as possible. This will allow your timber to fix together square and tight.
Step 3: Set out your frame
Set out your timbers to create your three main rectangles, you should have three rectangles and four side braces.
Step 4: Drill pilot holes
Drill pilot holes through your frame where your corners are going to attach. When drilling try to keep your drill as square on as possible. You pilot holes will guide your 80mm screws and prevent them from splitting the timber.

Step 5: Screw your corners
Place your corners on a flat surface so they are positioned tightly and square. Using a power drill screw your corners together with a single 80mm screw.
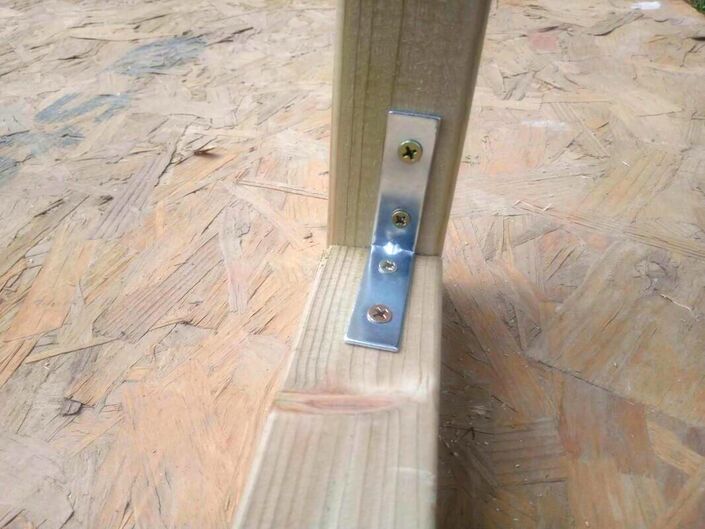
Step 6: Attach your brackets
When you have attached all your corners reinforce them by screwing in your corner brackets.
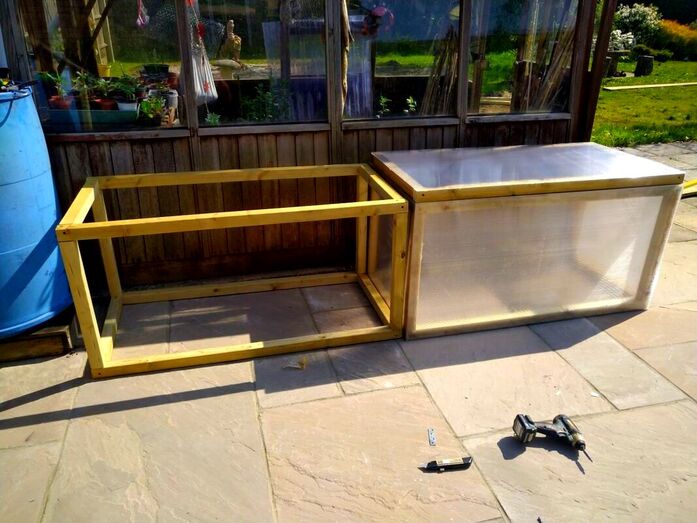
Step 7: Attach your connector braces
Using a drill fix together your connector braces to form the main body of the cold frame.

Step 8: Cut your polycarbonate
Cut your polycarbonate where necessary with a sharp Stanley knife and straight edge. This will really only apply to your 600mm x 600mm ends.
Step 9: Apply your adhesive
Using a sealant gun apply your adhesive to the outer frame; make sure you apply enough to form a good seal.
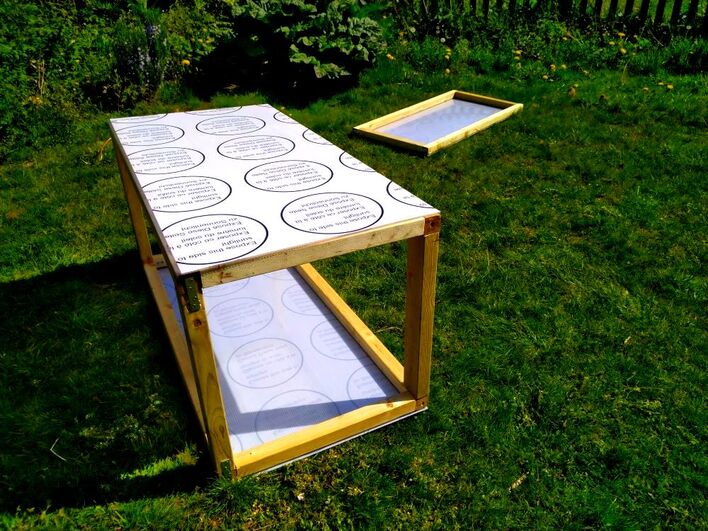
Step 10: Attach your polycarbonate
Place your polycarbonate sheets onto the frame; apply pressure around the edges to ensure a good grip. If you have sheltered garden with little wind the adhesive may be enough to hold your polycarbonate.
Step 11: Fix your polycarbonate
More often than not it is best to fix your sheets down with fixings. This can be achieved with timber beading, glazing bars or even screws and washers. 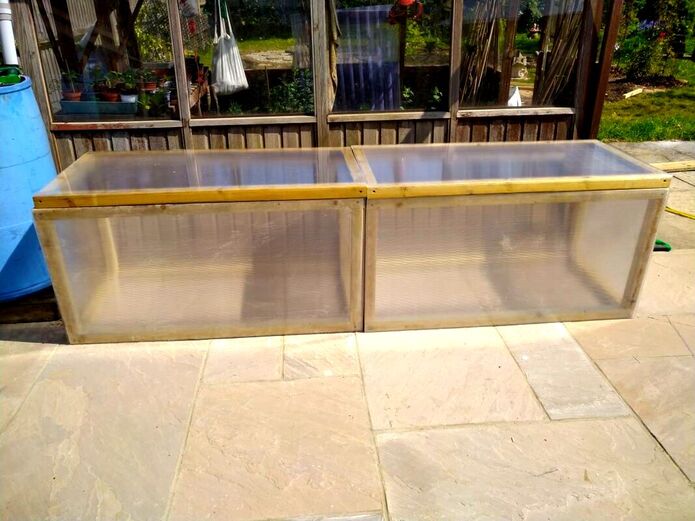
Thank you for reading my article on how to build a DIY cold frame with polycarbonate. If this article helped build your own cold frame you why not share it with your friends. Below I will include some other articles you may find relevant.
'As an Amazon associate I earn from qualifying purchases'
This article contains affiliate links
If you want to remove weeds from between pavers you are not alone. Weeds growing between the gaps of paving are one of the most frustrating garden foes.
Not only does removing weeds from paving take much time and effort it is also very awkward. The problem is once weeds have started to grow between pavers they are almost certain to return. This can make clearing driveways and patios an up hill battle which never ends. Weedy patios and driveways can really make your property look unkept and ugly. Consequently, here, I will explain the methods and steps you can take to get rid of weeds between pavers for good. Why do weeds grow between pavers?Many weeds are known as pioneer plants as they are able to colonise new areas quickly. Very often these weeds can colonise rather inhospitable environments such as rocky ground and paved surfaces. Pioneering weeds rarely require the same levels of nutrients and water as typical garden plants. The seeds of weeds can be blown great distances by the wind and can become lodged between gaps between pavers. 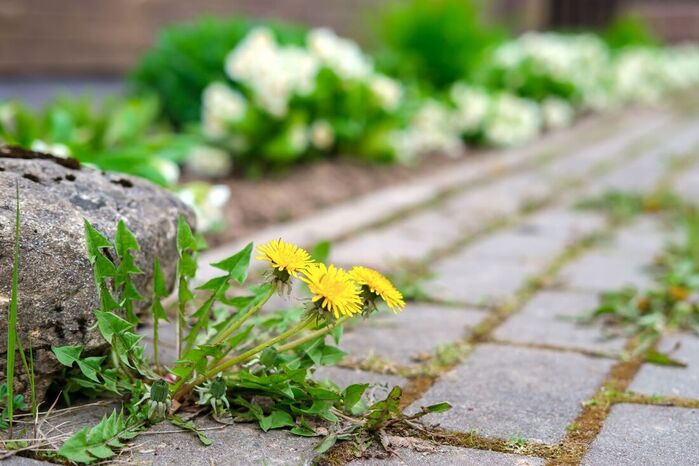
These crevices provide just enough moisture, nutrients and sunlight to germinate and become established.
most of the weeds you find growing between are particularly drought resistant and hardy. Some typical examples include the dandelion, sorrel and grasses. Such weeds have robust root systems and a low growing habit making them difficult to eradicate from paved surfaces. How to remove weeds from block pavingThe only sure way to remove weeds from block paving and stop them reoccurring is to replace the sand between the pavers. The reason the gaps between block pavers become full of weeds is because dirt has accumulated between the gaps over time. This provides enough nutrients for weeds to become established. Weeds will have to be manually levered out with a long and thin tool such as a patio weeding knife. Then you will have to pressure wash out all the remaining sand and dirt from between the pavers. Make sure this is done on a warm and dry period when the weather is fine. 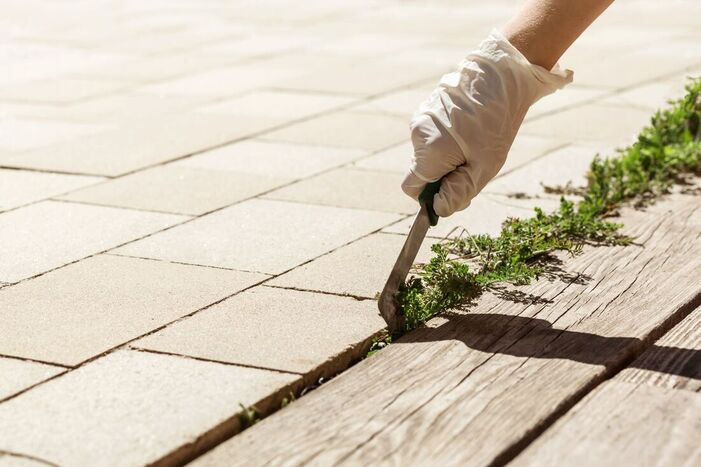
Remove the old sand from the surface and allow the driveway to dry out. The next day when the block paving gaps and surface are totally dry sweep in salt to all the gaps.
When the gaps are completely dry fill the gaps with block paving or sweeping in sand. This will rejuvenate the block paving and stop weeds from re-establishing themselves within the surface. Make sure you do not drive on the block paving when there is no sand between the gaps. This will stop the pavers from displacing and moving when there is no sand to lock them in place. 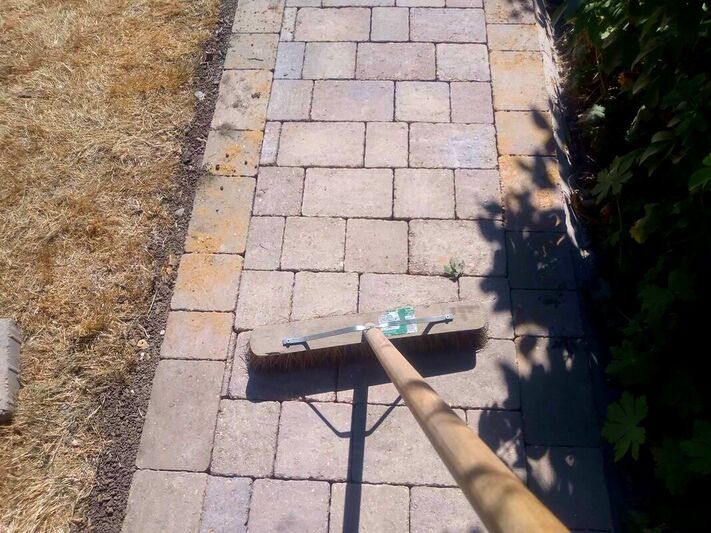
To kill weeds between block paving you can use other weed killer methods such as vinegar and chemicals. However to stop the weeds common back you will need to replace the sand between pavers as described.
How to remove weeds from between paving slabs
It is very typical for weeds to become established between paving slabs. This is especially so if the paving joints have not been mortar pointed. If your paving has been butted up then there is a chance weeds will establish in the fine gaps between pavers. Very often paving slabs are not laid onto a firm and solid base. this leads to pavers moving exacerbating gaps and cracked mortar between paving. 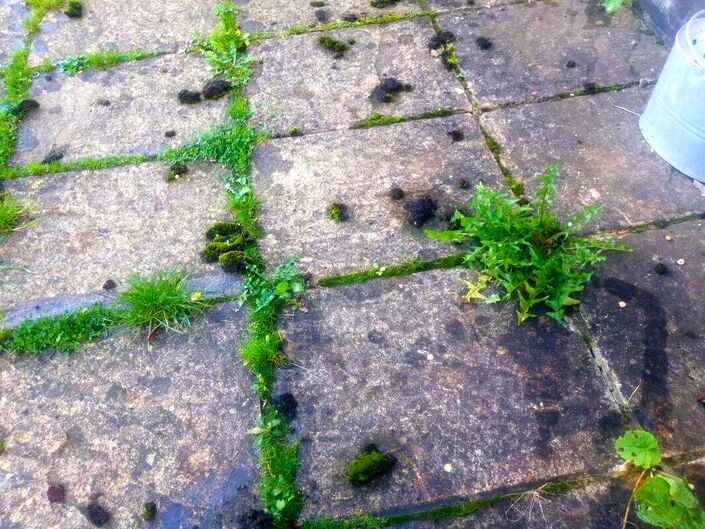
Consequently, the best way to get rid of weeds between paving slabs is to remove them and repoint the paving with mortar.
not only will this remove the weeds by the roots it will stop them re-establishing themselves. If you have slabs which rock or move around when walked upon they will need to be re-laid upon a solid mortar base. 4 Homemade solutions for getting rid of weeds in pavingThere are a few homemade solutions for killing weeds in between your pavers. Below I have listed four of these methods which are not too damaging to the environment. Bear in mind that weeds between paving can be more challenging to kill than weeds within gravel or soil. This is because the paving can create an impenetrable barrier between the roots and the surface. Consequently it is best to use these weed killer methods during the summer when the ground is dry. This will enable the substances to be drawn towards the roots of the weeds. 1. Rock salt
Rock salt is surprisingly effective at killing weeds down to the roots. Rock salt dehydrates the weed making them simply shrivel up and die. This method is more effective during the summer when there is less threat of moisture within the ground dissolving the salt. However most weeds can not withstand salty conditions and generally die within a few days. For block paving you may have to use a finer table salt so the granules sink down in between the pavers. 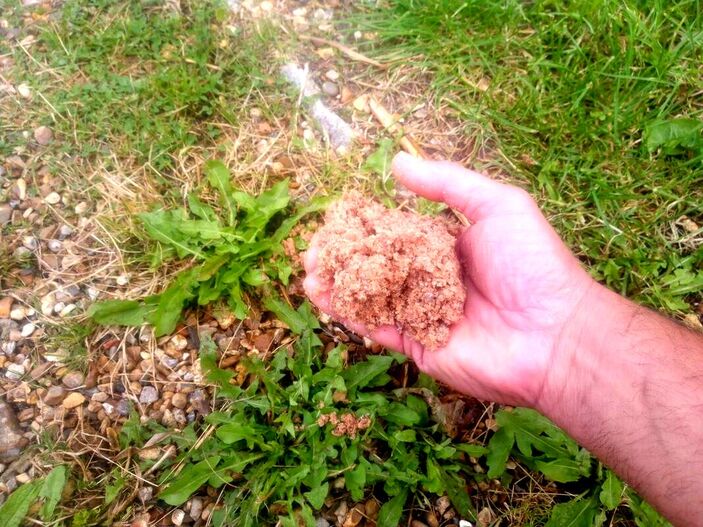
2. Vodka
As much as it is a shame to waste alcohol it is true that vodka is an effective weed killer. In fact any alcoholic drink around 40% and above alcohol works well. When using alcohol to kill weeds between pavers wait for a warm and dry day. Pour your vodka very slowly using a very thin trickle and make sure every drop sinks in around the weeds. You want to make sure enough is applied to saturate the weeds roots under the paving. Typically weeds treated this way will slowly die over the next few days. 
3. Boiling waterBoiling water is very effective at killing weeds right down to the roots. The great thing about using this method is you are not adding anything that can change the chemical composition of the surrounding ground. The main drawback however is water can cool down before it reaches the roots. This is especially so for weeds growing between paving that have extra protection from the paving slabs. However, it is certainly worth trying first before any more toxic options. Once again this method is much more effective during the summer months. 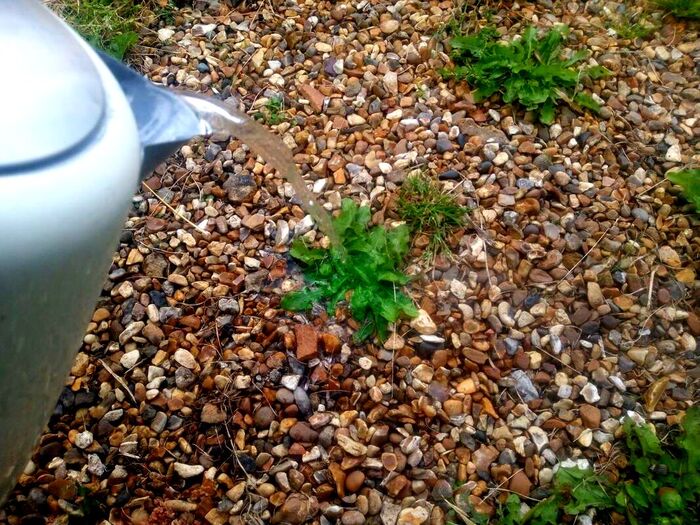
4. Vinegar
If you want to kill weeds between pavers without using chemicals then vinegar is a great option. The strong acids within vinegar break down the plant cells within weeds helping to kill them off. However you will need to apply enough so the vinegar reaches the roots. This can be challenging particularly if the roots are protected by pavers. Therefore it is better applied during warm and dry summer weather when the roots are more likely to be dry. Trickle the vinegar onto the centre of the plant slowly so it seeps down to the roots. 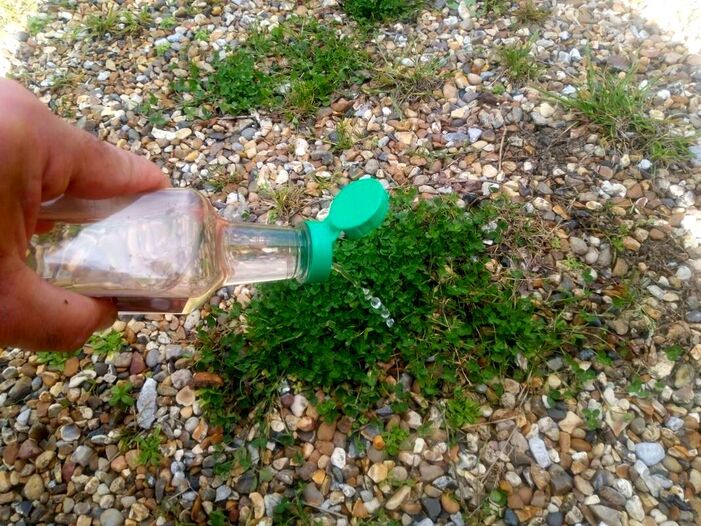
Weed killers for removing weeds from paving
Many people are moving away from chemical herbicides for managing garden weeds. Chemical weed killers used on paving mean toxins can be washed into drainage networks during times of heavy rain. Such drains can find their way into natural watercourses where they kill aquatic plants and wildlife. Furthermore such chemicals can remain within the hydraulic cycle which we ourselves may also consume. If you do need to use chemical on paving make sure it does not fall into local drainage networks. There are two main types or chemical weed killers used for paving on the market; spray weed killers and sweep in weed killers.  Spray weed killers
There are many brands of spray weed killers on the market today. These are mainly contact weed killers which when sprayed will kill the weeds down to the root. However, for robust, perennial weeds you may need a few treatments for stubborn subjects. I have linked to a popular brand below.  Sweep in weed killers
 are specifically designed to be swept in between pavers. these weed killers not only kill weeds on contact they also prevent weeds from growing back. These weed killers are especially useful for killing and supressing weeds between block paving pavers. I have below linked to a popular sweep in weed killer, No grow from Dansand.  Tools for removing weeds from block paving & slabs
Removing weeds from in between pavers is a rather specific exercise which requires specific tools. This is especially the case if you are weeding between block paving or paving slabs with broken mortar. Below I have listed 5 main weeding tools that are ideal for removing weeds from paving. Thermal weeders
Thermal weeders are electrical devices designed to kill off weeds with extreme heat. These weeding gadgets consist of a metal cup or heat mouth at the front which is placed over the top of the weeds. A pulse of heat up to 600 degrees Celsius blasts the weeds causing it to instantly shrivel and die. However thermal weeders may not be as effective on paving with large perennial weeds with deep tap roots.  Weed burners
 are gas powered devices very similar to blow torches which enable you to burn weeds to their death. These are very powerful weeders and can easily kill weeds down to their core. The only issue you may have is burning and scorching your paving. This can leave burn marks or in extreme cases fracturing to the edges of your paving. If you do need to use a burner for weeds in paving it would be better to experiment with an out of sight trial area first.  Weeding hook hoe
s are particularly efficient at removing weeds from between pavers. They consist of a long handle and sickle like hook which is perfect for picking and scraping weeds out of crevices by the roots. Hook hoes come in a variety of different shapes and styles.  Weeding brush
es are very efficient at removing stubborn weeds from gaps between paving and concrete. They are particularly effective at removing low growing weeds such as grasses and moss. The ridged wire brush easily blasts out tough weed roots as well as debris from the gaps between pavers. This makes it troublesome for weeds to become established once more.  Weeding knife
When it comes to removing weeds from paving you need a tool which is long and sharp. This enables you to penetrate the deepest gaps and lever out the weeds by the roots. One of the best tools for this is a weeding knife, these come in a range of styles and designs. I have included a good example of such below. 
Thank you for reading our article on how to remove weeds from between pavers. Below I have linked to some other articles you may find useful.
'As an Amazon associate I earn from qualifying purchases'
This article contains affiliate links
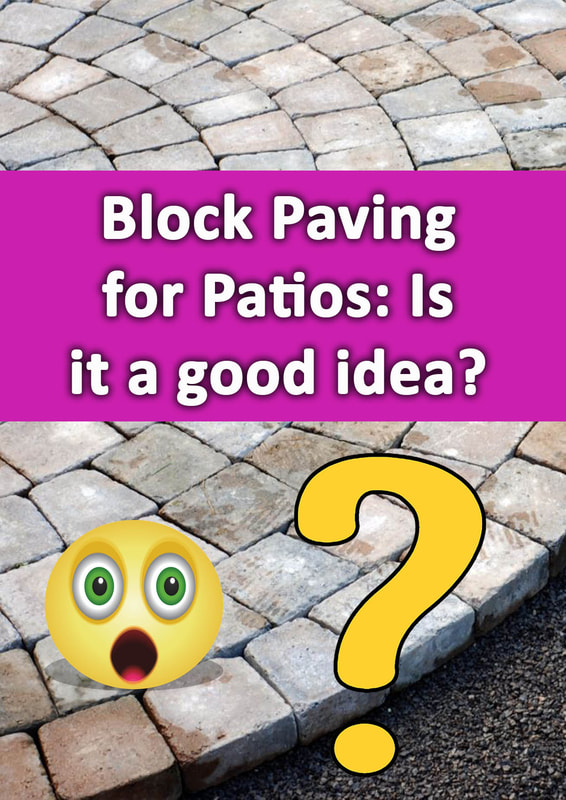
Block paving is one of the most versatile paving materials on the market. With block paving there is pretty much a product for every design style and personal taste. Traditionally block paving is more thought of as a driveway product and for good reason. Its slightly flexible construction enables it to take the heavy weight of cars without cracking. Many interlinking blocks create a tightly packed surface which can absorb heavy impacts and loads. However, is block paving suitable for patios? Is it as good as or even better than traditional paving slabs? Here I will summarise block paving’s suitability for patios and which type of block paving is best for patio use. Is block paving good for patios?
The real answer to this question is, it is a matter of choice! If you personally like the look and it suits your patio design then yes it is good for patios. In contrast to traditional paving slabs the multiple paving units create a more coarse visual texture. This can be more visually pleasing for smaller patios and pathways. The smaller units also provide the opportunities for circular patterns and curves. However I will say there are some distinct disadvantages for using block paving for patios. 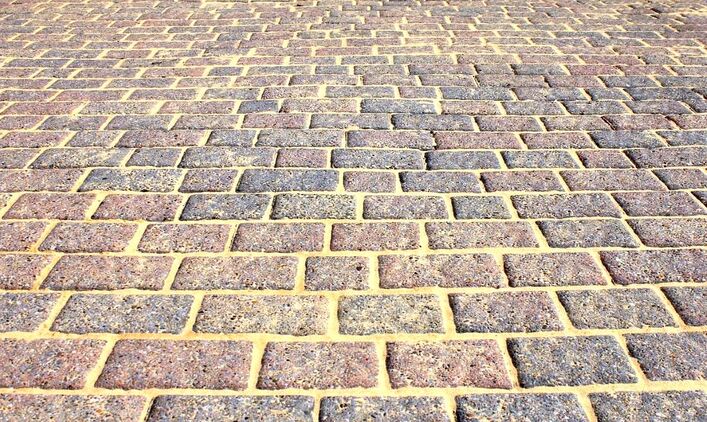
What are the disadvantages of using block paving for patios?Firstly block paving is susceptible to weed establishment and much more so than paving slabs. This is due to the great amount of sanded joins between the multiple blocks. As traditional slabs are bedded down on a ridged mortar bed the joints are sealed by mortar jointing. As block paving is laid upon compacted sand mortar pointing is not an option. This is because the flexibility of the compacted sand would lead joints to crack. This is why such flexible construction is typically best suited for driveways with disproportionately heavy loads. 
Consequently in respect to maintenance and weeding block paving is not the best option for patios.
You could lay individual blocks on solid mortar however such a patio would be challenging to level consistently. The multiple block units would also be extremely labour intensive to joint with mortar. Block paving unlike many natural stone and porcelain paving slabs are made from concrete. This means the colour dyes within the blocks will fade over time. This is because the suns UV rays bleach the colours within the blocks. The blocks subsequently fade in colour considerably after about a decade. This would also argue that natural stone paving and porcelain paving is better for patios than block paving. However it should be said that there are many concrete paving slabs with colour dyes which will also fade overtime. 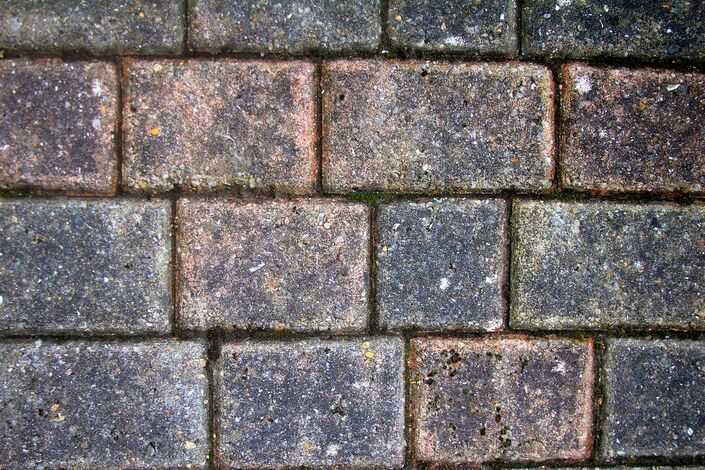
Block paving with worn colour dyes
If you decide to use either block paving or natural stone paving for patios comes down to personal choice. However I think the evidence is quite clear that block paving is not the best choice for a patio.
What is the best block paving for patios? 4 Great choices!Most of the time block paving is chosen for paving patios because it has a particular aesthetic. Many people love the multiple units and pleasant visual texture it provides. Consequently below I have listed the best types of block paving for patios. I have included options which are technically not block paving but cater to such an effect. These have been included because they provide the best visual alternative minus the discussed disadvantages of conventional block paving. I subsequently believe Clay pavers, natural setts, sandstone blocks and Tegula are the best block paving for patios. 1. Clay brick pavers
Clay brick pavers are not as commonly used today as they were in the past but are still available. These pavers are rather labour intensive to lay in large areas as they require jointing. However these brick paving are perfect for small courtyards and more traditional styles. The image below displays narrow brick pavers in a traditional English cottage garden. 
2. Tegula block paving
Tegula block pavers are conventional block paving and come in three main sizes. Also known by other names under different brands, a good example isBretts Alpha Trio range. These Block paving typically come in greyer colour tones. This means there is much less colour fading from UV radiation. Tegula block paving also has a much more attractive cobble effect than standard block paving. 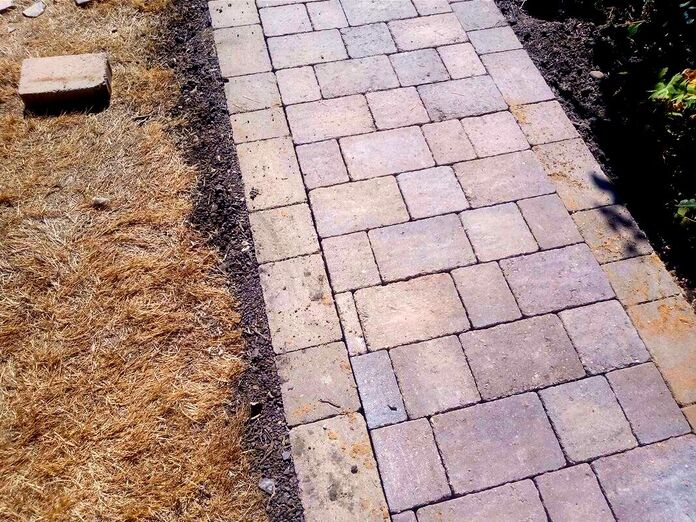
3. Natural setts
Technically not block paving at all but natural stone setts are probably the most robust block paving solution. These square blocks can create very attractive patio surfaces especially for a rustic effect. Natural stone sets however are very labour intensive and expensive to lay. Very often they can be laid with paving of a similar material. This makes them perfect for incorporating curved shaped patterns or bold borders to patios. 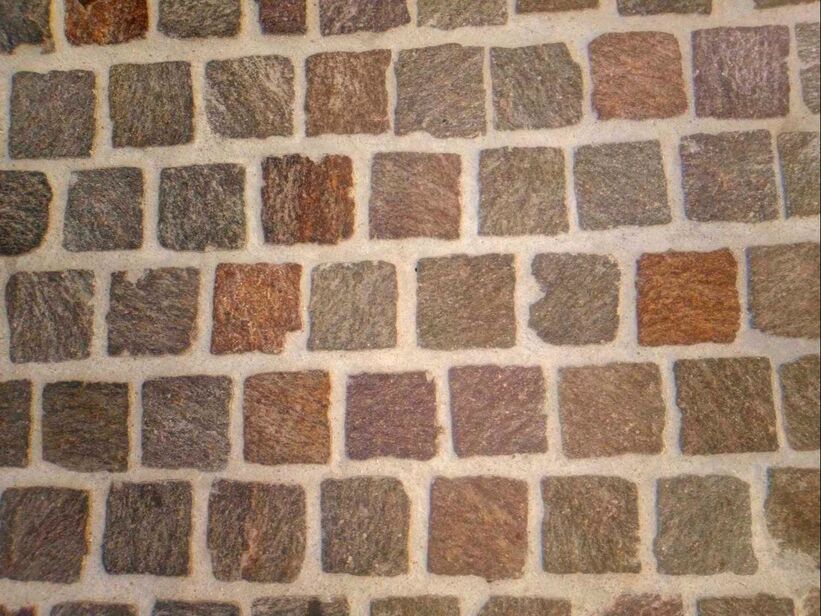
4. Sandstone blocks
Sandstone blocks are typically made from Indian sandstone and create a natural stone block paving alternative. These Have the shape of a chunky brick but are very effective for paving patios with a block effect. The size, shape and texture of these blocks can create a really pleasant effect in courtyards or rustic garden designs. Sandstone blocks typically come in warm colour tones and look so much more sophisticated than typical block paving. 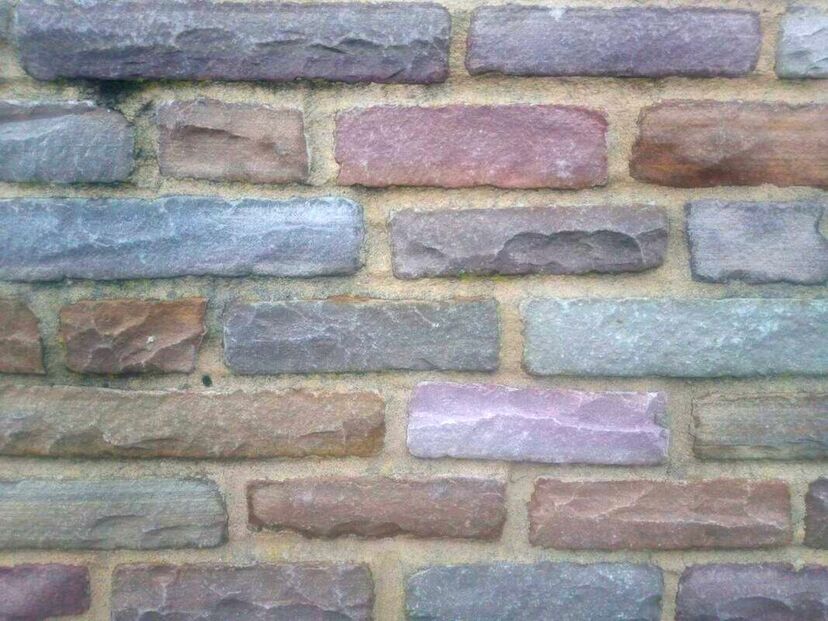
Thank you for reading our article on the best block paving for patios! Below I will link to some other paving articles you may find useful.
'As an Amazon Associate I earn from qualifying purchases'
Native landscaping, also known as natural landscaping, is becoming an ever popular concept within landscaping and gardening.
With a heightened awareness of environmental challenges many seek to regenerate natural landscapes historically altered by man. Past decades have brought a greater understanding of the vital interrelationships between landscapes and the organisms which live in them. Ecological systems which have taken millennia to evolve have kept food webs and landscapes healthy. However, these delicate interrelationships have been drastically altered and even eliminated entirely within a couple of centuries. Since the industrial revolution, mass habitat destruction and excessive combustion emissions has led to worrying warning signs. 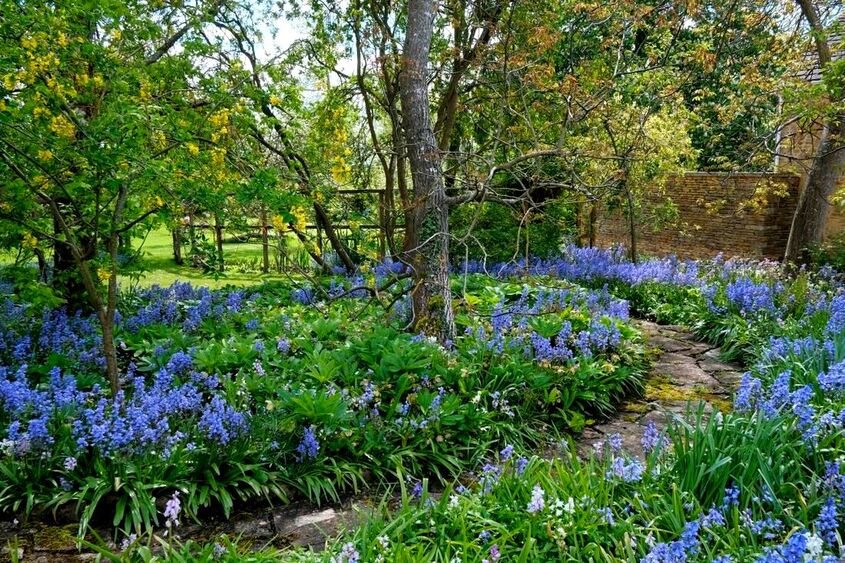
There is a growing understanding that reversing such damage will depend upon repairing mistakes of the past.
This will directly involve regenerating natural landscapes, wildlife habitats and ecological systems. Native landscaping very much brings this concept to life! Native and natural landscaping holds the first steps to solving the ecological crisis of the modern age. In this article I will explain what native landscaping is and what its benefits are. What is native landscaping?
Native landscaping is the creation of landscapes which implement naturally occurring landscapes and flora of a given region. This includes native plants as well as historical, geological and even micro-climatic elements of a given area. The objective of native landscaping is to replicate native landscape types and naturally occurring ecological systems. This consequently propagates self sustaining plant communities and food webs. Native landscapes therefore are more resilient and once established requiring almost no maintenance. 
This means they require less energy input, irrigation, pest control and cost to maintain. With an increased level of fauna and fauna native landscapes store more carbon and reduce herbicide and pesticide use.
Does native landscaping look nice?As with most Aesthetic admiration, what looks nice normally depends upon personal pre-conceived favourability, social ideals and learned behaviour. In the 17th century, wealthy Europeans loved formal landscaping with tightly clipped hedges and lawns. Such precise management of nature signified power and dominance over the natural world. It is no surprise Human civilisation spent the next three centuries decimating wild animal populations and natural habitats. Today however, such historical gardens are still admired for their order, geometry and beauty. It is recognised that many also find naturalistic landscapes beautiful. This can be seen with the popularity of dense forests, nature reserves and wetlands. Native landscaping may not cater for any one type of aesthetic garden design. However anyone who has an appreciation of natural ecology will think native and natural landscaping will look desirable. 
In the way some think wild meadows look fantastic while others think they look messy and unkempt. It is also important to remember native landscaping will look much different depending upon where in the world you live. If you live in Southern California your native garden may look more like an arid desert. However, if you are in Northern Europe you may have groups of small trees, meadows and dense, herbaceous, planting. It is important to remember there are many different ecological niches within whole countries or regions. For example, the mountains of Scotland will have different plant communities than Coastal England. Even smaller regions can have very diverse native fauna and flora depending upon local topography, geology and hydrology. Therefore, variations in native landscaping are not limited to a specific countries boundaries. This actually provides a huge range of landscape design potential for native landscaping. 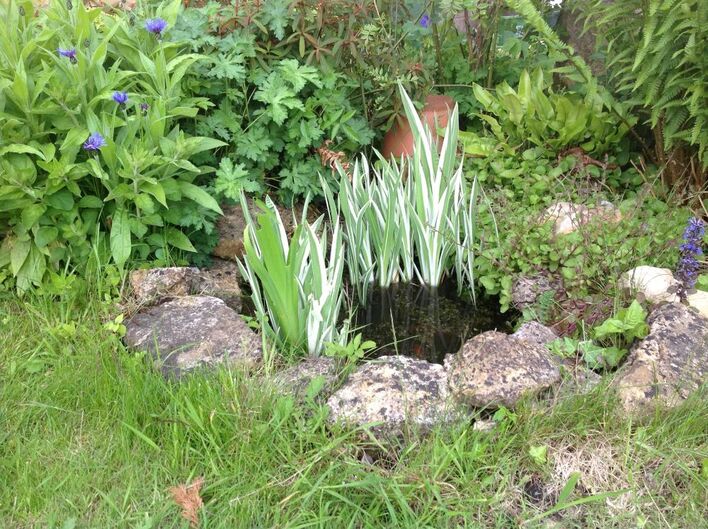
Well designed native landscaping will incorporate the best plant range for a particular site and soil type. It will also mix various planting and hard landscaping elements to make the design look as stunning as possible.
Native landscaping is not to simply to be desired from a solely aesthetic point of view. Such gardens are to be valued as living ecosystems and apart of the wider landscape. Native landscape schemes are also places to reconnect with nature and study local flora and fauna. Their beauty is derived from both an aesthetic and educational point of view. Why create a native landscape?
Native landscaping can be one of the best things you can do for the environment. Native landscape types and plants local to your area can help support natural ecosystems. This leads to a healthier environment with less pests and increased carbon sequestering from the atmosphere. This helps to improve air quality and reduce toxification of our atmosphere and climate change Native landscaping can also encourage the potential for wildlife habitat. This can add value to the landscape and encourage recreational pursuits and nature study. 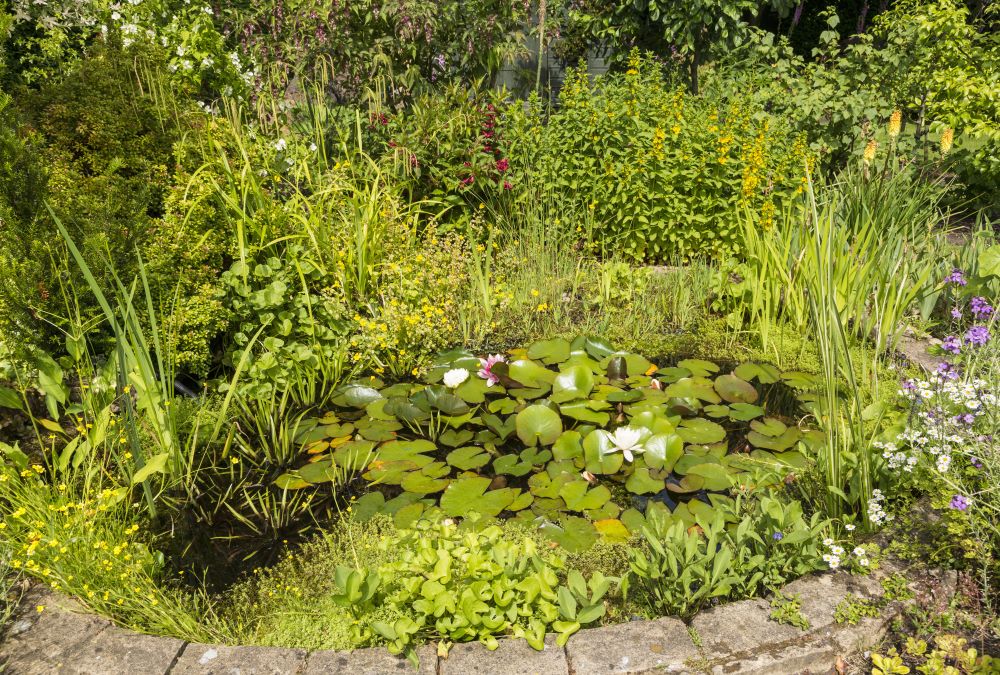
Native landscaping is more resilient to local climatic variations and requires less maintenance. This leads to less intensive energy input and costly maintenance regimes.
If designed well native landscapes can also look beautiful becoming a celebration of local landscape types and native flora. This can add an educational and cultural significance to outdoor spaces celebrating local and natural history. What are the benefits of native plants?
Native plants to a given region are far more adaptable to their surroundings and climatic conditions. Natives require less care, maintenance and water than plants not native to a specific region. Furthermore, native plants are much more likely to support local wildlife. This is because native fauna and flora have evolved together other many millennia. In some cases specific creatures will rely upon just a single plant species for food. 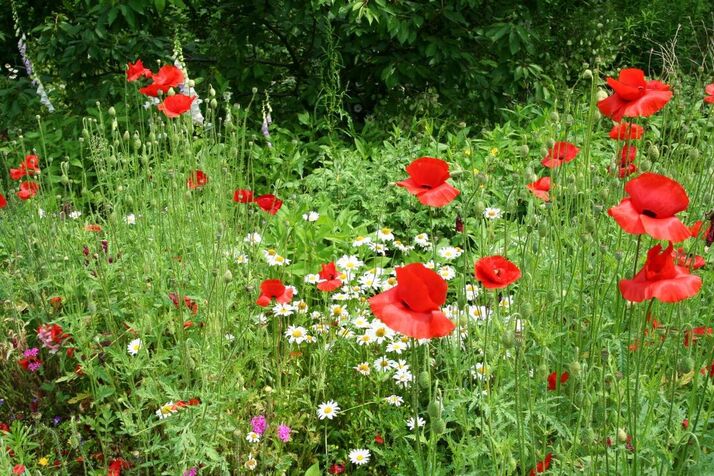
How to design a native garden
When designing a native garden you will go through the same problem solving process of any other landscape design. Think about how you want people to use and move around the space first. This will enable you to design a basic structure. Then you will have to identify what natural or native landscape your site is best suited too. Ask yourself the question, what kind of natural landscape would have existed here 8 thousand years ago? If it was broadleaf woodland you may wish to create a nativewoodland garden. Or you may wish to grow shade loving herbaceous flowering plants. 
Our design for Yeading school eco garden with native landscaping
Research the local natural history of the area, you may find your site used to be a wetland. In such a case you may decide to create a series of natural ponds with native wetland plants.
When you have decided what kind of native landscaping you want to implement put pen to paper. Experiment with different ideas and forms until you have a fully resolved design. Exaggerate your native landscapes attributes
You may discover there are many different landscape types and ecological niches relevant to your area. This may provide the opportunity to have multiple native habitats within one garden. For example you may want to have raised rocky gardens if you have local mountainous terrain. At the same time you can also have wetlands which mimic more lowland areas. You may also decide to include land art or sculptures which celebrate the historical culture of the area. Exaggerating natural landscape features is a great way to implement effective native landscaping design. 
Native landscaping & soil
When people think of native landscaping they typically focus more upon climate. However a regions specific soil type can greatly affect what landscape and planting types you propose. For example woodlands with alkaline soil with have mostly differing species from those within acid soil in the same climate. Therefore some research and a soil testing kit will provide you some good background knowledge on your site. Try to find a geological map of your particular area; this will give you a clue as to what type of soil you have. The better suited your plants are to your soil type the more effective your native landscaping will be. 
Native landscaping & water
One of the most vital elements of native landscaping is hydrology and the moisture content of the soil. This will normally go hand in hand with local meteorology factors such as annual rainfall totals. If your landscape has a high water table you will want to choose native wetland and marginal plants. You may wish to go a step further and create various wetland types. These could be large ponds, small ponds, marginal, seasonally flooded, wetland meadow or swampy habitat. 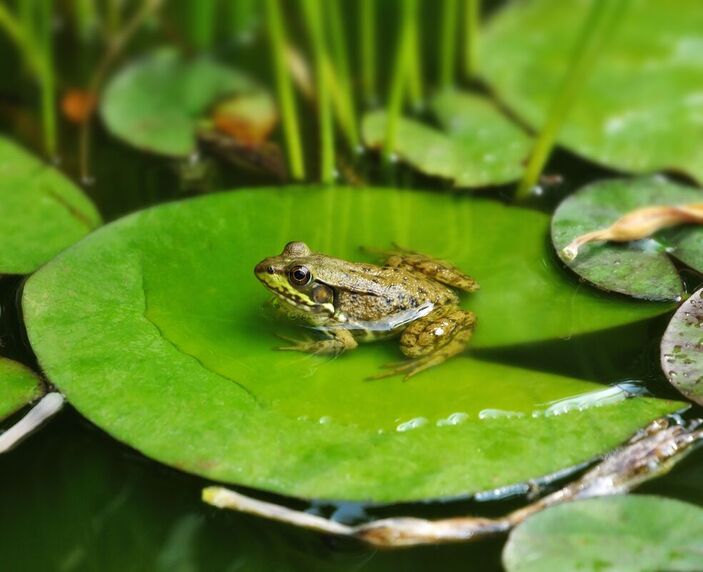
All regions will have specific plant and animal life endemic your particular location. You may wish to visit some local wetlands and take a note of which species are thriving there.
This rule also goes for dryer landscapes; get a feel for your sites seasonal hydrology and water table. This will guide both your landscape design and plant selection. Planting your native landscape
When planting your native landscaping scheme try to mimic nature as much as possible. It is very easy to try to plant native borders like traditional garden shrub borders. Plant in a way you would imagine a more natural habitat in your region would look. When specifying plants make sure your plants are not hybridised in any way. This can make them less useful to native creatures. There are now many specialised nurseries which specialise in wild native plants. It is never advised to take plants from the wild as this can be detrimental to the local environment. It is often also illegal. 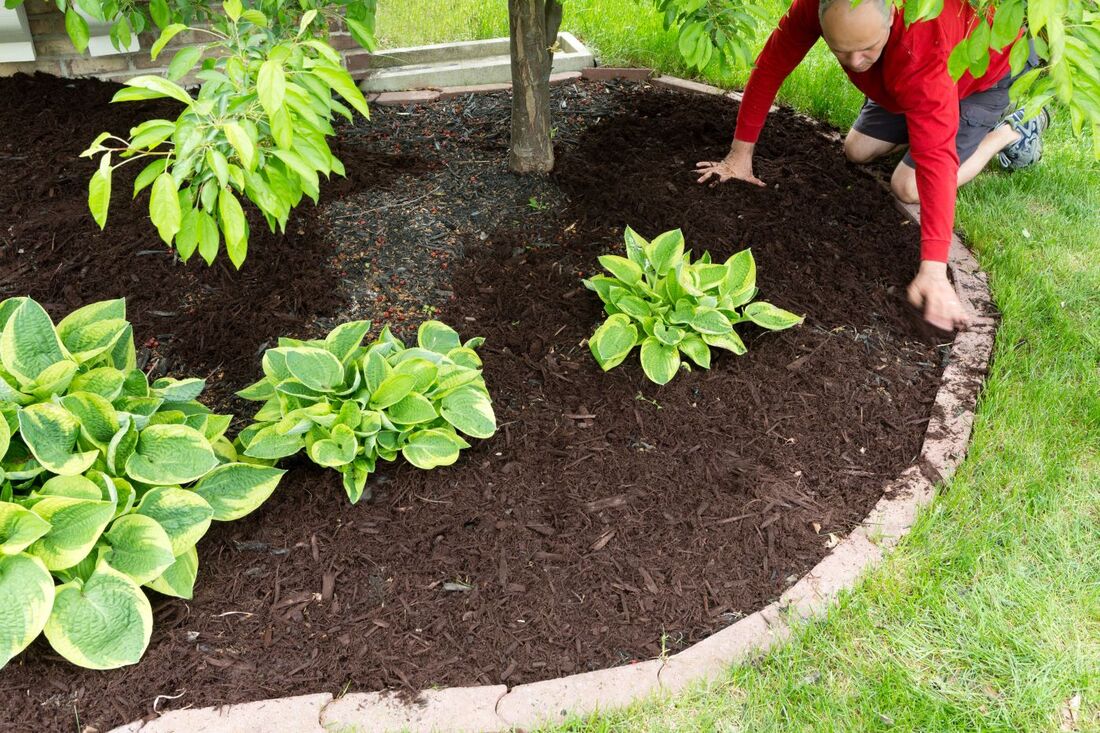
Create native habitats
One of the most interesting ways to implement native landscaping is to replicate native habitats within your region. Even in places with the same climate there are often many different ecological niches and habitats. These can be recreated in a garden form by manipulating microclimate, soil type and topography. A good idea is to also implement wildlife habitat and shelters such as log piles and nesting boxes. 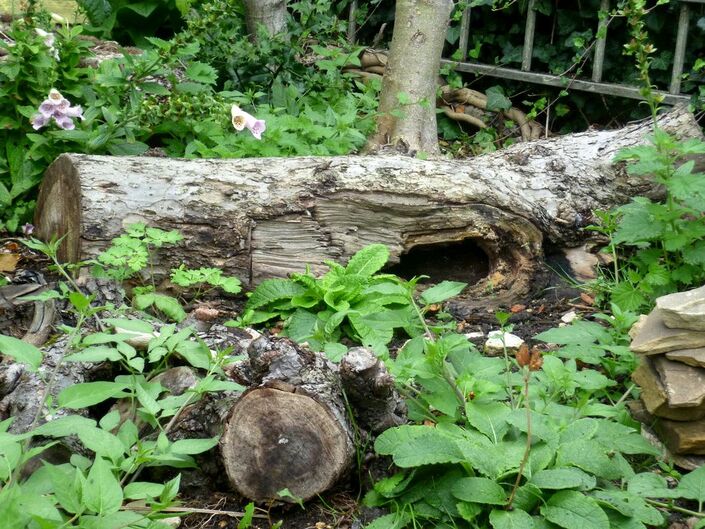
Maintenance and management
When it comes to native landscaping, you want as little intervention as possible. However, a level of maintenance at the beginning will allow plants to establish well. Soon after planting, aggressive weeds can try to dominate the area. Very often these pioneering weeds are not even native and will try to dominate cleared ground. Make sure your initial plantings are well maintained and weeded. These will typically gain strength and dominance the second year. It is good to keep a thorough management plan in place. This involves monitoring your plant communities to see what species adapt best. This process will help you reach a natural equilibrium between your native plants in their new habitat. Create an educational resource
Once you’re native landscaping project is up and running why not make it into an educational resource? You could put up information boards in front of various habitats and plant communities. Perhaps you could start a blog about your native garden and the species you have studied there! 
Studying your native garden
Now you have created your very own piece of natural history make sure you study it. You can learn so much by spending time managing and observing your project. After your native plants are planted observe what wildlife comes to visit. Maybe rare species will come and establish themselves in your ecological masterpiece! Thank you for reading our article on native landscaping, are you thinking of creating your own project? If so, why not tell us about it below in the comment section. Thank you! Useful native landscaping links

This article contains affiliate links
Drought tolerant landscaping is the creation of gardens and landscapes with a low water demand.
Contrary to common belief, drought tolerant gardens do not have to look like arid deserts. Even temperate regions such as northern North America and Europe can suffer long periods of drought during summer months. This results in many gallons of fresh drinking water being used for landscape irrigation every summer. Unknown to many, the planets fresh water is a fast declining resource! Of all the water on the entire globe only 2% is usable fresh drinking water. As the earth’s human population has doubled over the past 40 years fresh water demand is rapidly expanding! Furthermore average temperatures rising year on year demand for fresh water is continuing to increase. 
This has led to many environmentally conscious gardeners to reduce their water use.
Many millions of gallons of water is squandered on watering lawns and borders every year. This has accelerated a desire for more drought tolerant landscaping design. Not only can drought resistant gardens conserve water they can also reduce maintenance and look amazing. In this article I will summarise drought tolerant landscaping and offer some drought tolerant landscaping ideas for your own garden. What is drought tolerant landscaping?Drought tolerant landscaping is creating gardens and landscapes which require little or no irrigation. Primarily this involves planting drought tolerant plants or native plants adapted to your area. However, drought tolerant landscaping can also include water saving installations. Some of these can include water butts, mulching, drainage retention ponds and rain gardens. Many drought tolerant gardens are designed with an arid or desert design theme. This makes it easy to incorporate drought resistant planting types like succulents and Mediterranean planting. 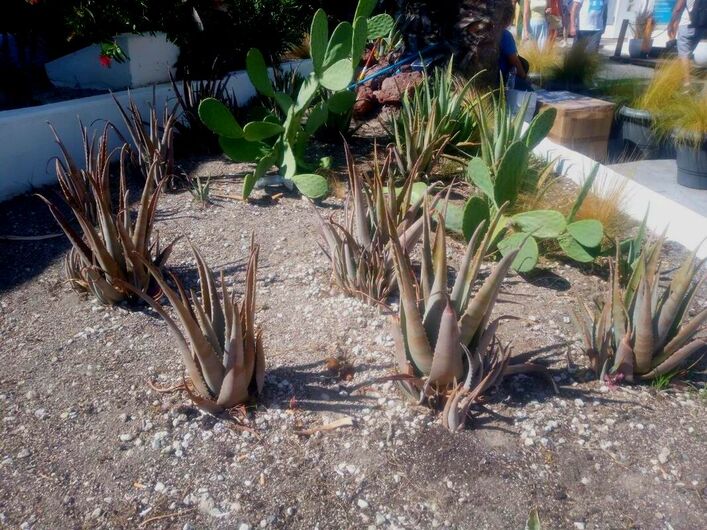
The extensive use of gravels and rocks reduce the need for lawns and defined flower borders. This dramatically reduces water consumption and lowers maintenance costs.
Such drought tolerant landscaping also helps to create warm microclimates and interesting visual textures. Why create a drought landscape?
The easy answer is they can be extremely low maintenance and still look amazing! If well designed drought tolerant landscaping requires less watering, weeding, cutting and pruning. By saving fresh drinking water you are also reducing your impact on the planet. Less use of mechanical gardening machinery such as mowers and clippers reduces energy consumption and consequently emissions. Dry and arid themed gardens also help to create warmer microclimates and increase usable space in your garden. Landscaping with rocks and gravels also means no walking mud and dirt around your backyard. 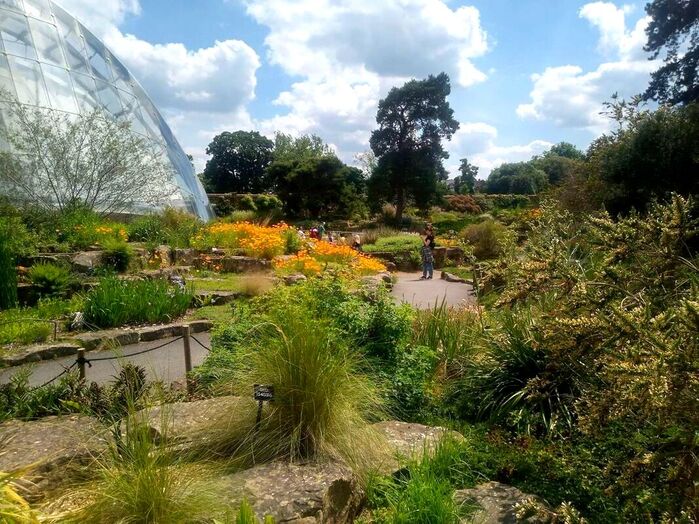
10 tips and ideas for drought tolerant landscaping
1. Create a Mediterranean garden
The Mediterranean region is well known for its warm weather and arid landscape. Nearly every plant adapted to these regions has a remarkable drought tolerance. This makes Mediterranean gardens an effective design theme for drought tolerant landscaping. Not only will plants thrive without water, an emphasis on rocks and gravels will add visual texture and interest. Such arid landscaping will also create an exciting holiday feel! 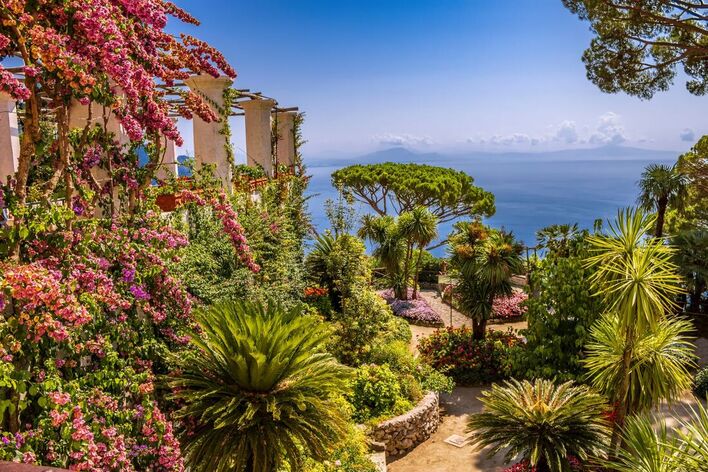
2. Harvest rain water run off
You may be creating a drought tolerant landscape to be eco-conscious or you may simply live within a dry climate. Either way, harvesting fresh rain water runoff can be an effective idea. This can enable you to store water for watering later when plants need it. Harvesting runoff from hard surfaces also stops water from running into flower beds. This can reduce excessive ground saturation in winter and drought resistant plants rotting. 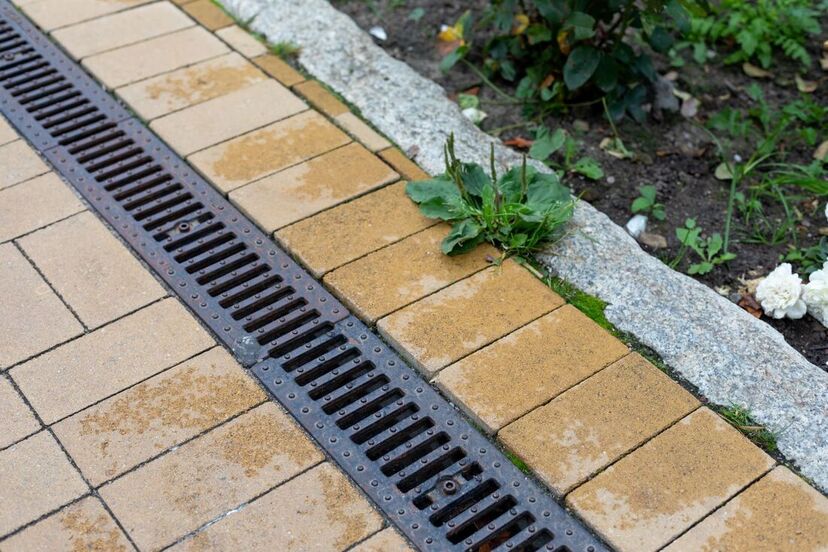
3. Create a succulent garden
Succulent gardens are becoming an increasingly popular way to plant drought tolerant landscaping schemes. These diverse group of plants have waxy coatings and fleshy leaves to store water in dry climates. Succulents come in a wide variety of interesting shapes, forms and colours. Their easy to look after nature and interesting shapes make them perfect for drought tolerant gardening. If you live in an area with substantial rainfall succulents can be grown in well drained soil in terracotta pots. 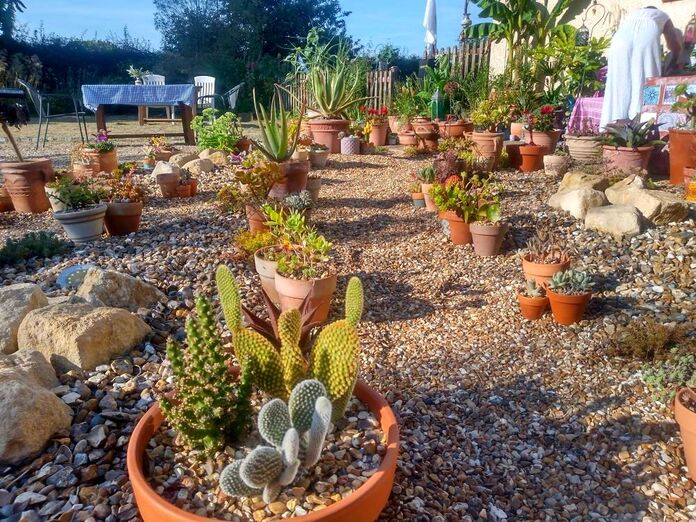
My drought resistant succulent garden at my home
4. Improve your soil structure
There are normally two main types of drought tolerant garden landscaping; gardens which receive heavy rain with a desire to grow drought resistant plants and naturally dry regions with hot summers.
Both scenarios will benefit from improving the soils structure. In areas with heavy rainfall in winter grit and coarse sand can improve soils drainage. This can prevent drought resistant plants roots from rotting during the winter. In areas with very dry weather mixing in plenty of organic matter to soil can help to retain moisture during hot summers. 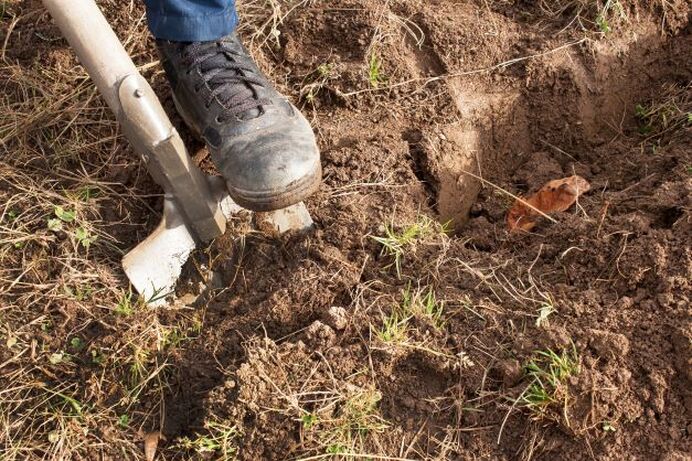
5. Plant at a high densityPlanting plants at a higher density means less sunlight gets to the soils surface. This reduces it from drying out so fast during hot summers. Such planting reduces the need for excessive watering during the growing season. Low growing groundcovers also have this protective effect on the soil making growing areas more drought resistant. 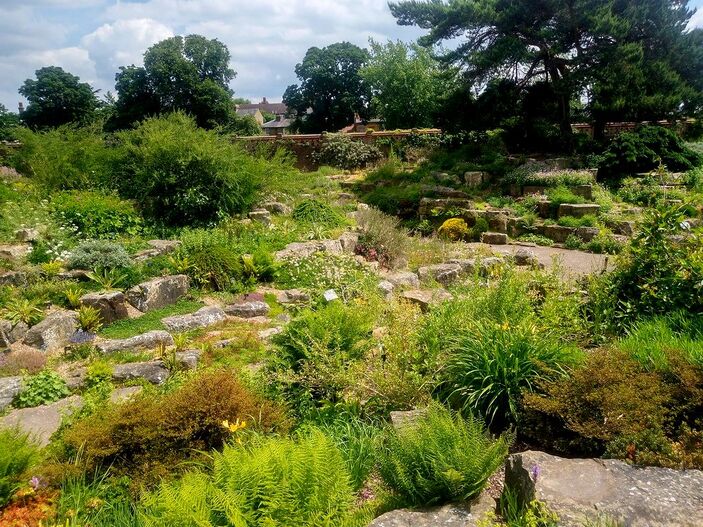
6. Create a rock gardenRock gardens and rockeries are also a great idea for drought tolerant landscaping. Rocks and stones allow more water to be diverted towards soil where plants are actually growing. Rocks also enable you to replicate landscapes that are typical of dry climates. Rocky alpine mountain sides and dry rocky deserts are an effective theme for drought resistant landscaping. Rockeries can be incorporated into mounds and raised beds around seating areas to create aesthetic displays. Why not visit our step by step guide on creating a raised alpine garden? 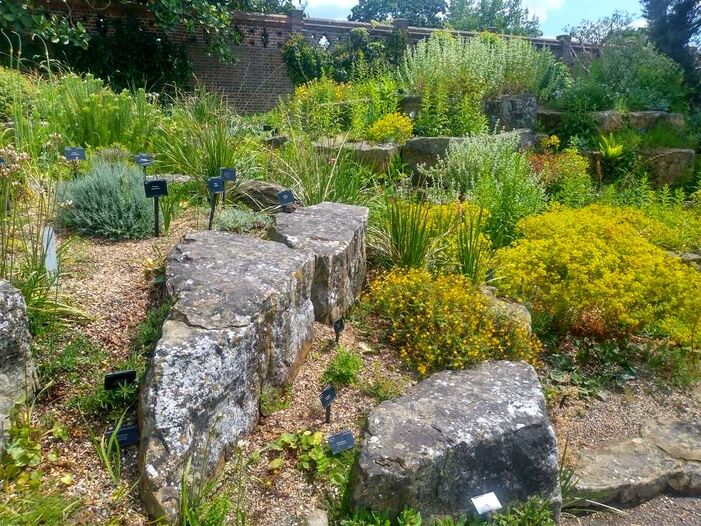
7. Mulch your soil
Mulching the soil has two main functions when it comes to drought tolerant landscaping. Firstly, it prevents excessive sunlight drying out the soil during hot summers. This can help reduce watering and make existing plants more drought resistant. Secondly mulch helps to retain moisture near the soils surface. This enables the roots of plants to easily access water during even the driest summers. Mulches such as gravels also help to create an arid feel to your landscaping. 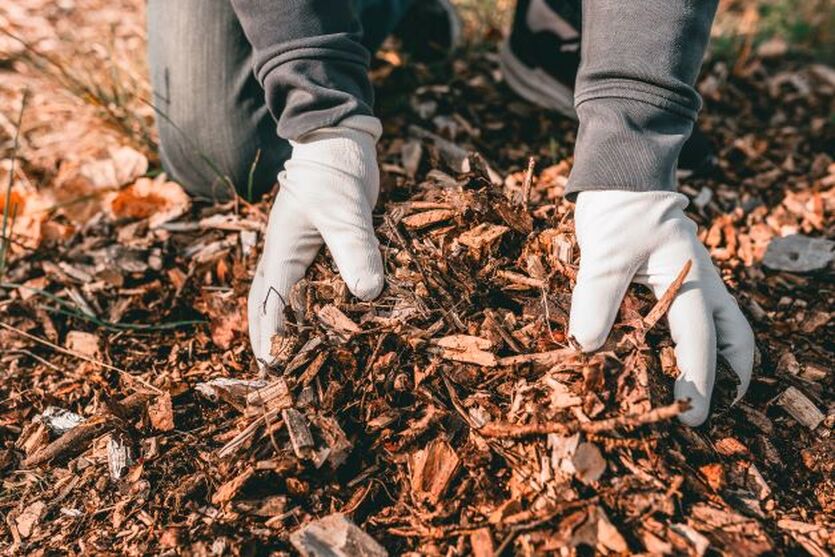
8. Create a desert garden
Desert gardens are a really exciting way to implement a drought resistant landscaping scheme. Many varieties of drought resistant plants have fleshy leaves with dry waxy leaves. This is to store available water and prevent it escaping from the plant. This gives the plants a cacti look and really benefitting a desert theme! Rocks and dry gravel areas planted with plants like Agaves and succulents can also form excellent desert gardens. Why not visit out full guide article on creating drought resistant desert gardens here. 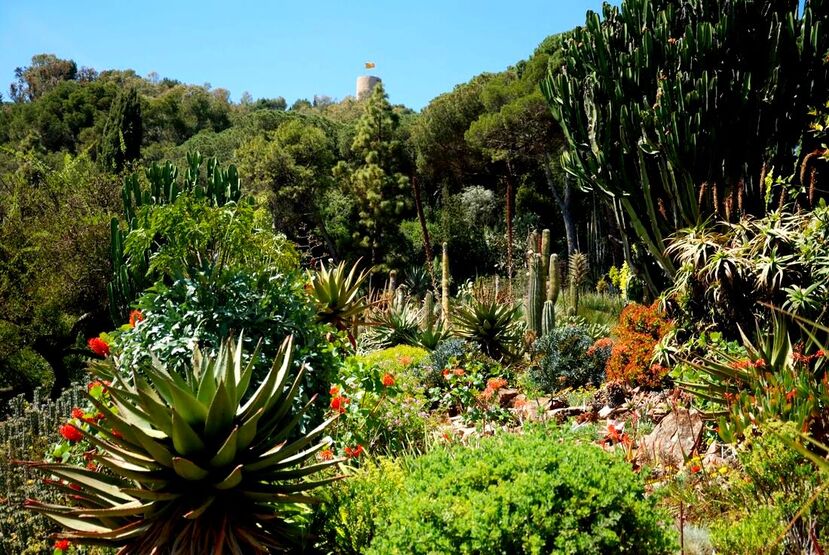
9. Plant perennialsWhen it comes to drought resistant landscaping, perennial plants are an effective choice. By their very nature perennials come up every year re-growing from thick roots systems or bulbs. Consequently, once established, they unlikely to be affected by long dry spells during the summer months. Some perennials are more drought resistant than others; we have included some good species examples at the end of this article. When selecting perennials for your drought tolerant garden, research individual species for their preferred climatic range and drought tolerance. 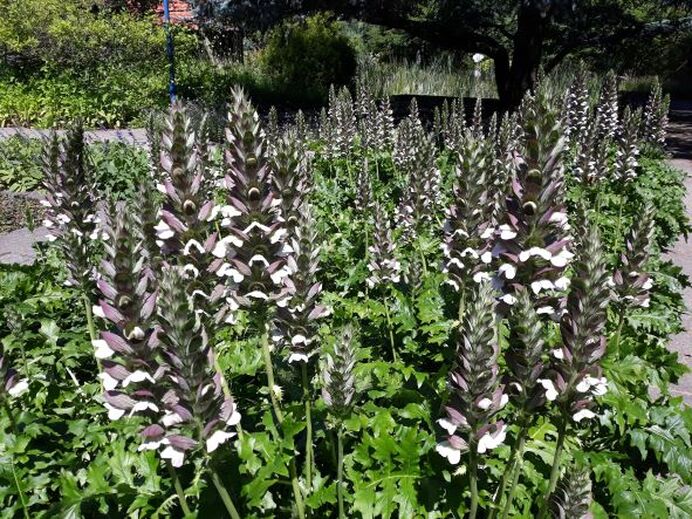
Bears breeches
10. Change your gardens levels
It’s surprising how moderate alterations to a gardens gradient can have a dramatic impact on ground moisture! By using falls and levels it is possible to manipulate where rain water flows too. This can be extremely advantageous when planning a drought tolerant landscape. If your garden suffers from severe droughts slope your levels down towards planting beds. If your site is saturated during the winter months, plant drought resistant plants to the top of slopes. Alternatively you can build raised beds which are too saturated during the winter. 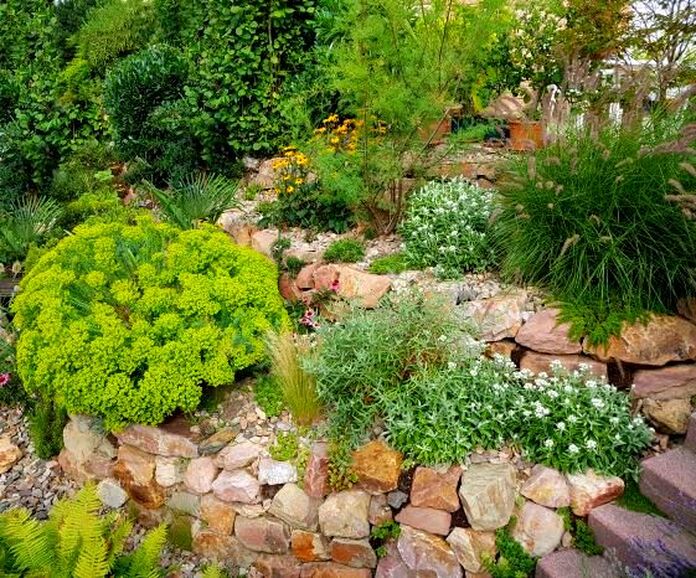
11. Add a drainage featureIt may seem counter intuitive to create a drainage or wetland feature within drought resistant landscaping. However, creating a drainage feature such as a swale or seasonally flooding pond can keep soil moisture more consistent. The problem with most gardens is their soil moisture fluctuates throughout the year. This is due to excessive surface run-off and underlying ground compaction. Consequently a drainage feature which helps soil to drain can be advantageous. This is especially so if drainage features fill retention ponds which can be tapped into during dry summers. 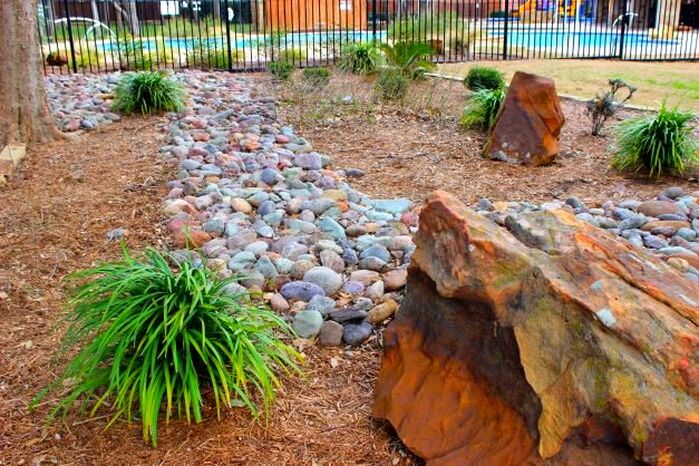
12. Create a herb gardenMany herbs have evolved over millennia to have aromatic aromas to their leaves. This was to repel browsing animals such as goats from eating them. Many herbs come from arid climates with sparse vegetation meaning death by grazing was a real risk. The fact that such aromas made herbs more desirable to people is quite ironic. The arid regions where many aromatic herbs originate are consequently quite drought resistant. This makes creating a herb garden a great idea for drought tolerant landscaping projects. 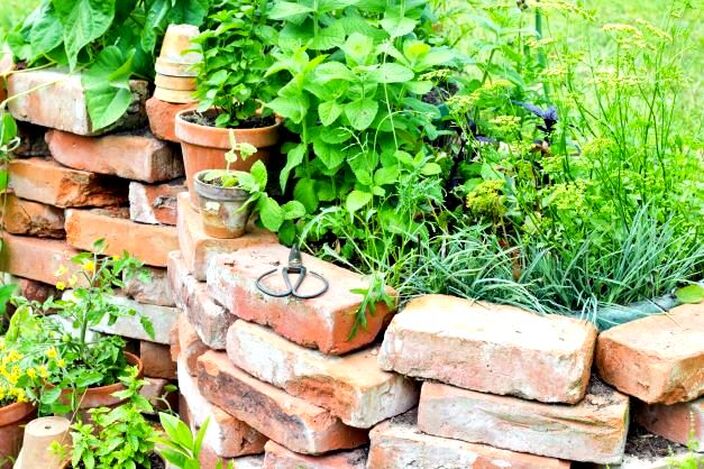
13. Plant drought resistant plants
Probably the most effective way to execute a drought resistant garden is to plant the correct plants. Drought resistant plants will enable you to have greenery and colour in the driest of summers. However, whether a plant is drought resistant or not will depend upon your climate and soil type. Just because a plant can tolerate drought in Greece doesn’t mean it will thrive in a boggy UK garden! Consequently you should analyse other features of drought resistant plant species. This includes soil type, climatic zones and minimum winter temperatures. Below I have listed 13 drought resistant plants for the UK and temperate climates! 
13 Drought resistant plants for the UK1. Sedum herbsfrude autumn joy
This perennial sedum is well known for its interesting foliage and attractive pink flowers during autumn. Sedumn herbsfrude re-sprouts from its base every spring creating plenty of seasonal change. Its leathery leaves have a waxy coating which prevents moisture loss. Like most sedums Herbsfrude stores water inside their fleshy leaves making them perfect for drought tolerant landscaping. This plant is extremely adaptable being able to tolerate many different climates and soil types. Autumn joy is also very low maintenance but will require the removal of the previous season’s foliage in winter. 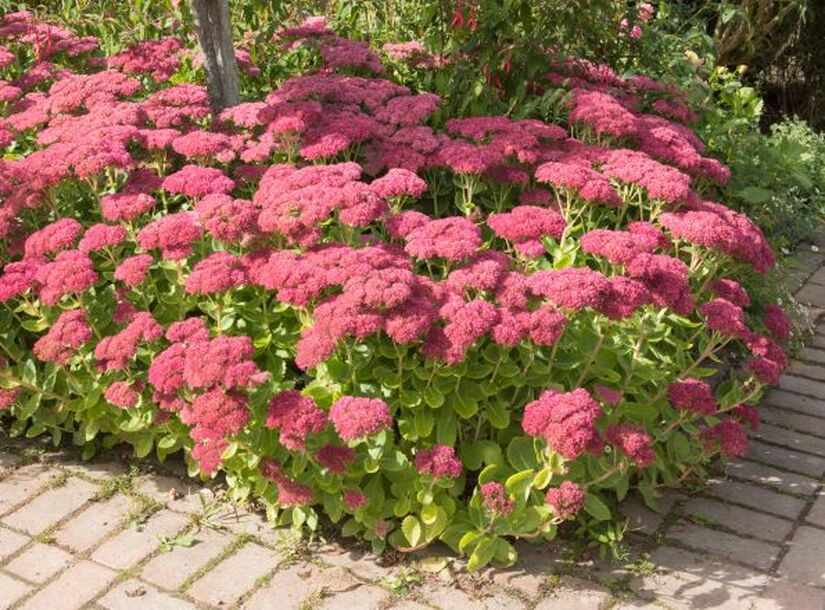
2. Agaves
Agaves are very impressive architectural plants which have very decorative and architectural foliage.
Originally from warm parts of Central America these cactus like plants are extremely drought tolerant. Their large, fleshy, leaves have sharp spines and in the correct conditions can grow to an impressive size. Agaves are also surprisingly hardy and tolerant of more temperate climates. As long as they are planted in well drained soil in a sunny sheltered position they often do well. These arid loving plants can make a real statement to a drought tolerant planting scheme. 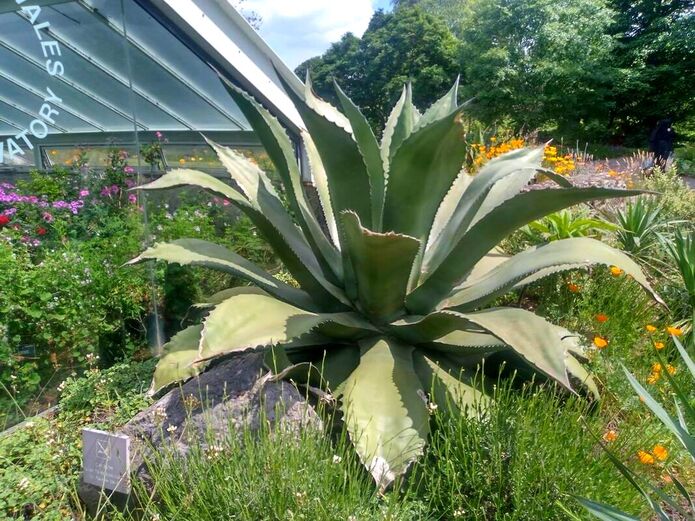
3. Rosemary
Rosemary is a very well herb and celebrated for its aromatic foliage often paired with meat dishes. However, Rosemary is also extremely underrated as a landscaping plant. This small to medium sized shrub has very course and dense foliage giving it a great visual texture. Being evergreen it can keep borders lush all year round and provide a real bounty for the kitchen. Rosemary can even be clipped into shapes, small hedges and even bonsai trees! This makes it one of the most versatile of plants for drought resistant gardens. Originally from the Mediterranean, once established, it can withstand any period of low rainfall and drought. 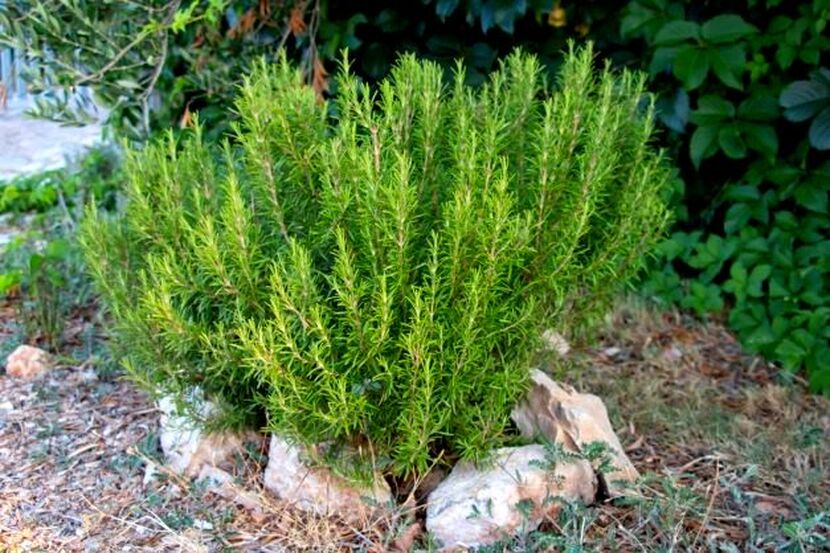
4. SucculentsSucculents are an extremely diverse group of plants well adapted to many dry parts of the world. These plants store water within their fleshy leaves and can go many months without water. Not only are succulents very drought resistant they also are also extremely aesthetic. They have a wide variety of striking shapes and forms being popular as both indoor and landscape plants. Even better, their drought tolerance and slow growing nature makes them very low maintenance. This makes them an easy choice for any type of drought resistant landscaping project. 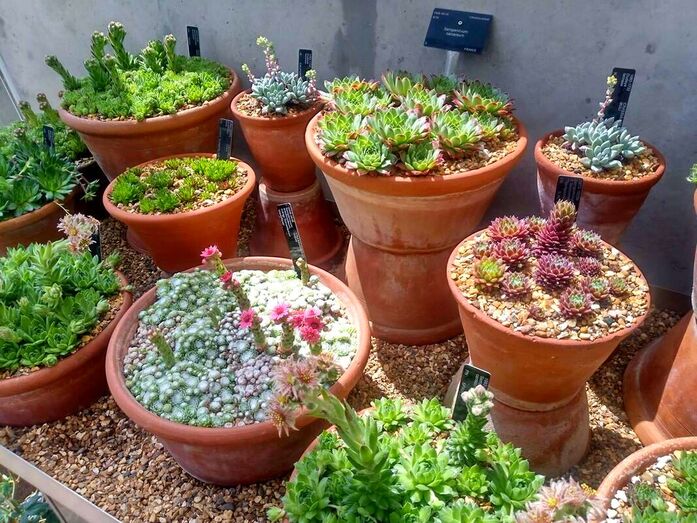
5. Yucca gloriosaYucca gloriosa is a type of yucca plant native to the South Eastern North America. This palm like plant has sharp, sword like evergreen foliage which is extremely decorative and architectural. Also known as the Spanish dagger, Yucca gloriosa is visually effective in Tropical, Mediterranean or even Desert garden schemes. During midsummer this yucca produces tall flower spikes with clusters of large bell shaped flowers. Being extremely drought tolerant this plant is perfect for sunny and well drained growing conditions. Due to its sharp leave tips you may wish to trim leaf tips if you have young children. 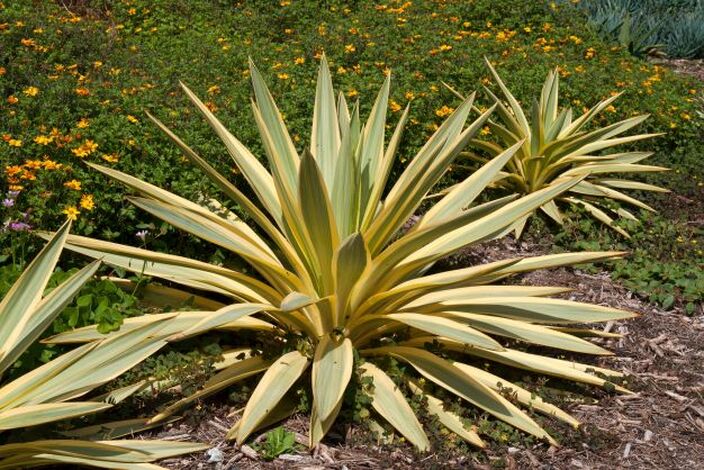
6. AgapanthusAgapanthus is a popular garden plant favoured for its rigid stems which support circular clusters of trumpet shaped blooms. Originally from South Africa it prefers a warm and sunny growing position. Due to them being a perennial from a warm climate they have good drought tolerance. This makes them a good choice for adding drama and surprise to drought resistant landscaping. If given a free draining soil and plenty of sunlight they are perfect for the front of borders, raised planters and pots. Agapanthus is also popular with pollinators making them good for local wildlife. 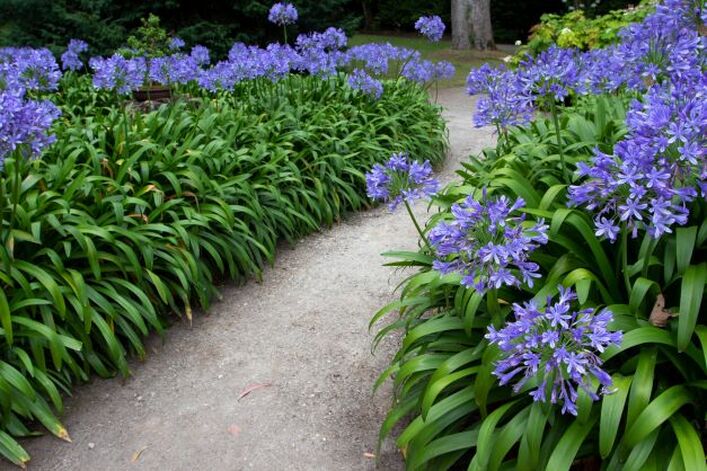
7. Verbena
Verbena is a genus of flowering plants which are loved for their attractive and scented flowers. Verbenas typically display small flower clusters white range in shades of white, pink, purple through to red. One of the most popular verbenas in fashion at the moment is Verbena Bonariensis. This plant has a typical verbena form and like many verbenas is perennial. Its clusters of flowers hover above planting borders throughout the summer months. The flowers of most verbenas are scented and are extremely attractive to wildlife. Verbenas are well known for their drought tolerance and can easily withstand periods of no rain or irrigation. 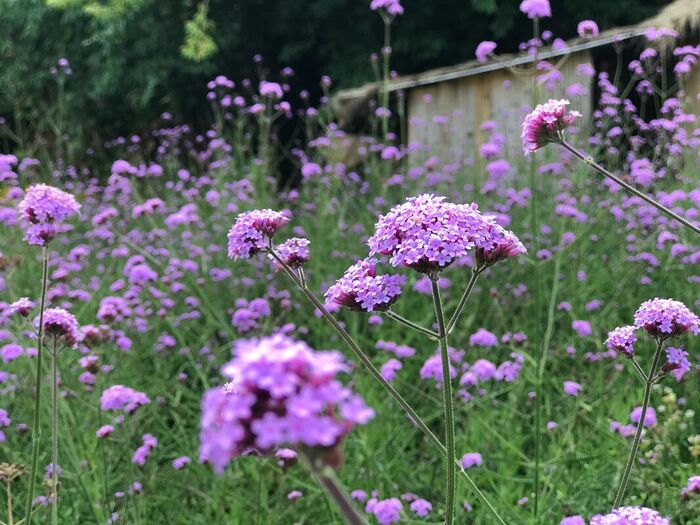
8. Lavender
Lavender is both a very much loved landscaping plant and aromatic herb. Originating from the Mediterranean region lavender has adapted to dry and arid environments. This has always made it very suitable for drought resistant borders and planting displays. Lavender has attractive blue grey foliage which forms a spreading clump. This makes it effective as a groundcover along paths and to the front of flowerbeds. During the summer it produces decorative purple flowers which are much loved by bees. This plant can give off a very pleasant scent during warm summer afternoons. 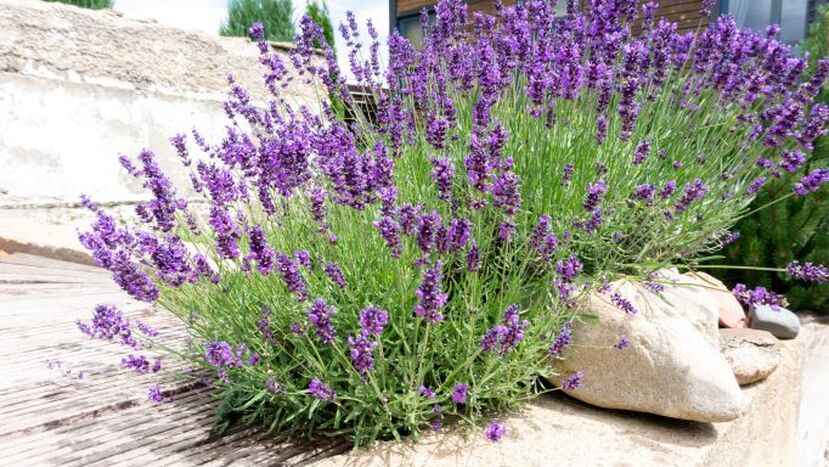
9. Lambs earLambs ear is a low growing herbaceous perennial that has light grey and fury leaves. This unusual looking plant can create dense groundcovers and looks very effective in block plantings. Native to the Middle East this plant has become adapted to hot and sunny conditions. This makes lamb’s ears a good choice for utilising within drought resistant planting designs. During summer it produces tall flower spikes bearing small pink or purple flowers. Its bold foliage and spreading habit makes this plant perfect for creating contrast within a drought resistant border. 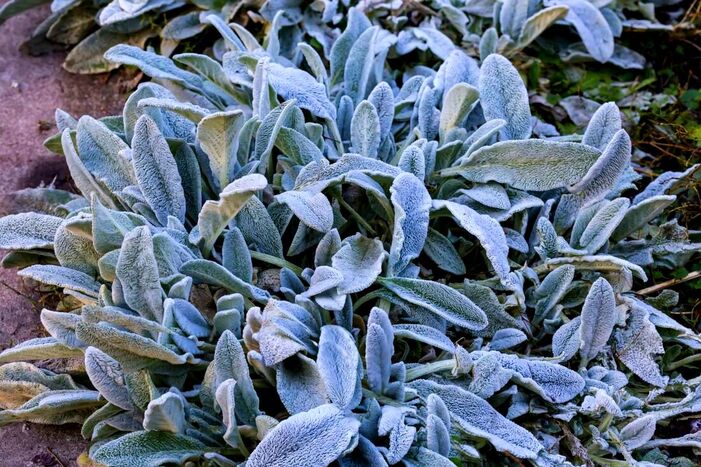
10. SalviasSalvias are an extremely diverse group of plants which are both aromatic and ornamental. Both their foliage and flowers come in a wide variety of colours and shapes. One of the most common salvias is 'common sage' which is regularly grown for its culinary uses. However I have found that 'Spanish sage' has a much more pungent aroma and better for cooking. On the other hand there are many attractive types of salvia which are appreciated for their beautiful flowers. These include plants like Salvia Fulgens and Splendens. Salvias not only look attractive they are also very tolerant of dry soil. 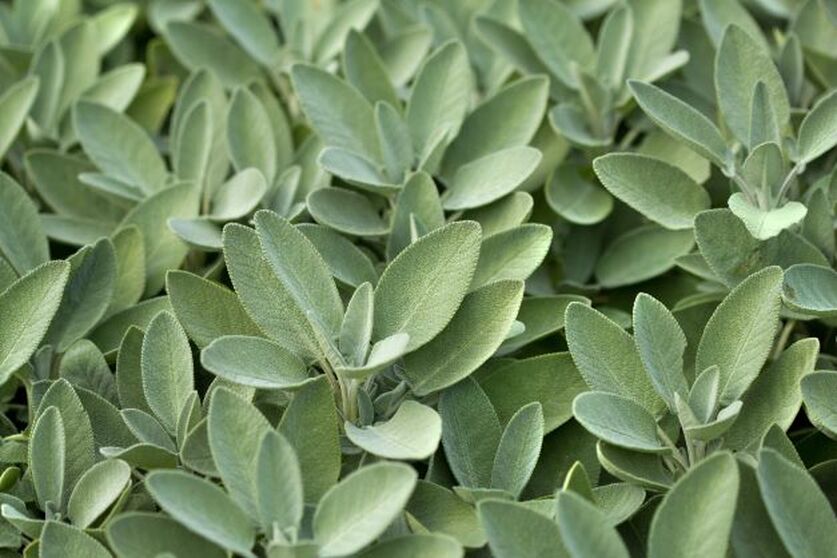
11. DaylilyDaylilies are attractive perennial plants which are extremely versatile and adaptable. With strap like leaves and large, Lilly like flowers they are a favourite for the flower border. Each flower lasts for a single day which explains their name. Typical flower colours include orange, yellow, red and even purple. The daylilies grow up from their crown and fibrous roots every spring. Their adaptability and perennial nature makes them quite drought resistant. Once established, Daylilies can make a suitable addition to drought resistant landscaping and planting schemes. 
12. Globe artichoke
Globe artichokes are a large perennial plants very closely related to the thistle. This plant is widely cultivated for its edible flower buds which are well known delicacy. Native to the Mediterranean, Globe artichokes are well adapted for warm and dry growing conditions. They have extremely long tap roots which enable them to tap into moisture well below the soils surface. This makes them extremely drought resistant and ideal for dry well drained soil. The globe artichoke also has very attractive silvery and architectural foliage. This makes it a perfect plant for dry gardens where it can look good and even provide a tasty crop! 
13. Rudbeckia
This perennial plant is favoured for its large daisy like flowers and hardy nature. Originally from North America, Rudbeckia can tolerate cold temperatures and can adapt to many various soil types. Also known as Black –eyed Susan or Coneflower they make a perfect addition to perennial meadows and flower borders. Not only do their large flowers look stunning they are also very popular with pollinating insects. Once established these herbaceous perennials are very drought tolerant during dry summers. 
Thank you for reading our article guide on drought tolerant landscaping. Below we have included some other articles you may find relevant.
'As an Amazon associate I earn from qualifying purchases'.
This article contains affiliate links
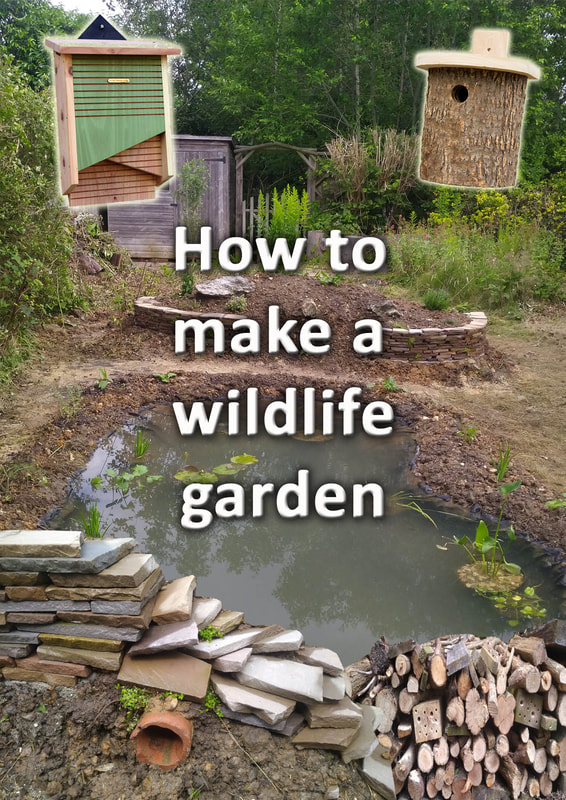
If you want to know how to make a wildlife garden you have come to the right place!
In this article I will list and summarise the top 16 things you should do in your garden to attract wildlife. These 16 elements include;
Contrary to common belief, wildlife gardens do not have to be an overgrown mess. Indeed some of the most effective wildlife gardens are those with plenty of diversity. This means gardens with various plant communities and different habitats. and spaces. The very best wildlife gardens are those which are great for both wildlife and people! 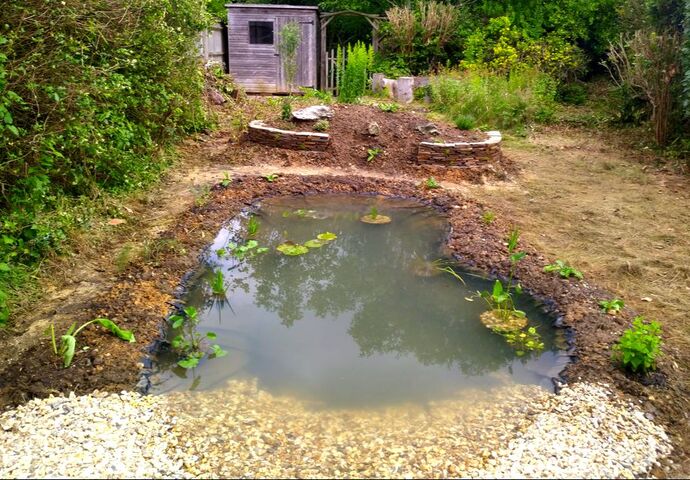
By combining natural habitats and good wildlife garden design, the outdoors can become place of natural discovery.
There is simply no better way to experience the sheer wonder of nature than on your back doorstep! In this article I will explain how to make our very own wildlife garden project. Creating a wildlife garden will be one of the most satisfying projects you ever undertake. Why make a wildlife garden?
In the past 100 years people’s lives have changed dramatically. From the industrial revolution onwards we have all flocked to work in towns and cities. Modern machinery and globalisation has changed how we farm and manage the landscape. Two major changes have occurred; Wildlife habitats have declined and people have had less access to nature. This has led to a dramatic number of valuable wildlife species being lost. Not coincidently people have also become less connected to nature. 
Continuous studies have demonstrated a link between improved mental health and wild gardens. Quite simply, nature is good for both our mental and physical health.
In today’s ever chaotic and stressful world wildlife gardens enable us to unwind. It has been found that people who live surrounded by plants and animals are generally more fulfilled. Consequently the past 100 year period of human history has some explaining to do! In our predominantly urban existence wildlife gardens are offering that a little injection of spiritual calm. Not only are wildlife gardens good for us they are pretty valuable for wildlife too. In the UK alone private gardens make up more land than all the national nature reserves combined. This means collectively we all have the ability boost national, wildlife habitats. 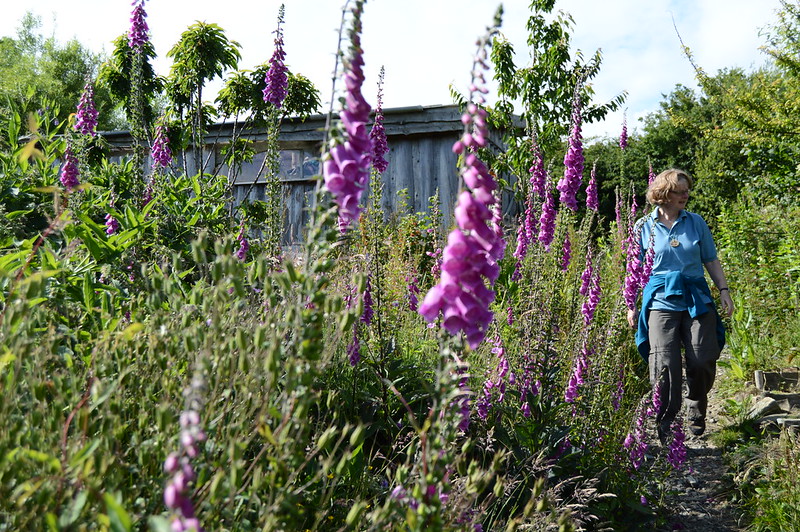
Private gardens have become a refuge for many wildlife species. An extensive adoption of mechanised agriculture has left most modern landscapes an ecological waste ground.
Therefore with some creativity, enthusiasm and work we all have the power to save and enjoy local wildlife. It is very clear that wildlife gardens are not just good for wildlife, they are also great for us. Wildlife garden design
A wildlife garden should be designed to incorporate various habitats, food, shelter and water. They should incorporate ecological landscaping and habitat creation to support and boost local ecosystems. However, the most successful wildlife garden designs are those where people and wildlife coexist harmoniously. This typically requires spaces with less people frequency in certain zones. Such spaces should be managed with no heavy machinery or significant human disturbance. 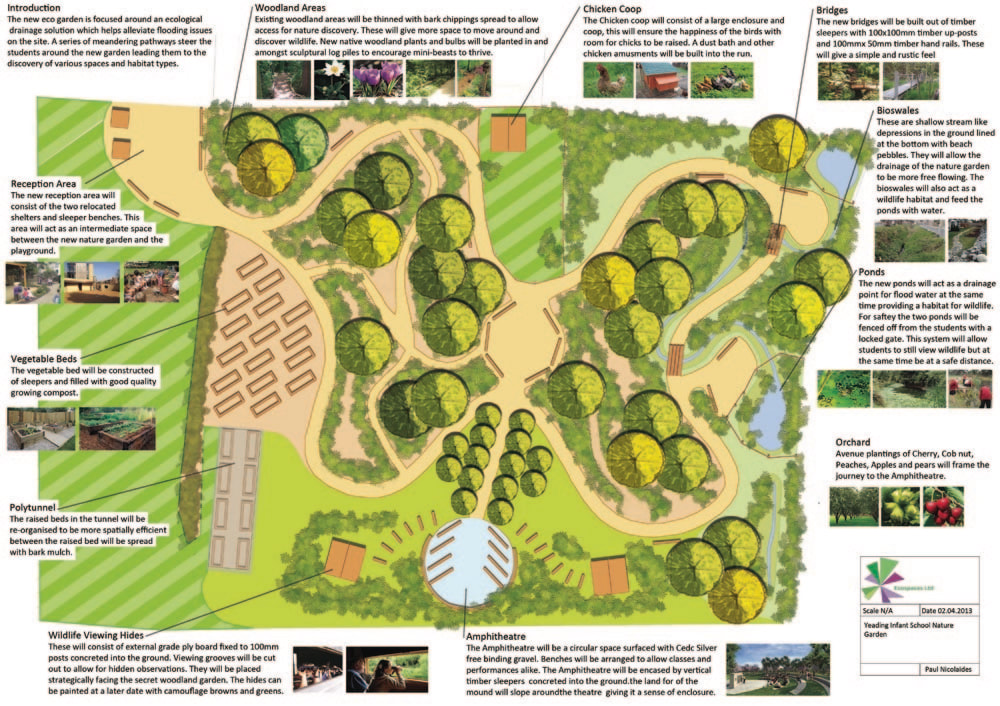
Designing for people and wildlife
In order for any wildlife garden to be successful it must still serve your family’s needs. If you will be undertaking any hard landscaping work its important the garden is still functional. Therefore you should approach your wildlife garden design like any other spatial remodelling. Firstly fundamental elements such as circulation and usage should be addressed first. The best way to do this is with a SWOT analysis. On a piece of paper draw out 4 separate columns. In each column write the separate headings; Strengths, Weaknesses, Opportunities and Constraints. Now in each column list all existing garden elements and issues which fall under each category. For example if you have a boggy garden you may put that under constraints. 
However, the same element may also go under opportunity if you want to create a bog garden. A good view may come under opportunity if you wish to enhance it in some way.
When you have listed your gardens particulars try to think of design solutions for each element. A great way to do this is with precedent images. Do an image search on the internet to find images of gardens you like. Start thinking about how such a design could work in your garden. At this point it is a good idea to draw out a scaled plan of your garden. Using tracing paper start to sketch out ideas, shapes and formats onto the site. Do not worry if you cannot resolve the design in one day, design is a process! Sometimes you may need to leave the process and come back to it later. Eventually you will start to resolve a design which reaches the best outcome for both you and local wildlife. Why not visit our step by step guide on how to design a wildlife garden here. 
Identifying existing ecologyThe next step in designing your wildlife garden is to identify existing ecology. This could be an existing part of the garden that already has habitat value or potential. For instance, if you have an Oak tree you may want to boost woodland habitats around it. This could be achieved by planting native woodland plants around the trees base. You could also incorporate woodland mulch and log piles to encourage insect life. 
Perhaps you already have a low lying part of the garden which floods in winter. If so, you already have a seasonally, flooding, wetland which is a rare habitat!
There are many specialised creatures which thrive in this transitory wetland habitat. You may wish to consider building a wildlife pond or bog garden next to it? It is very typical for some to already have valuable wildlife habitat present without even knowing. If you want to learn more about identifying specific habitats I recommend the Phase 1 Habitat Survey Handbook. 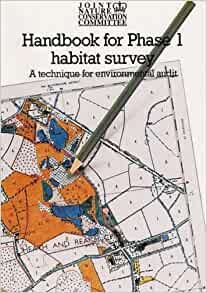
In the mean time do some detective work and have a close look around your garden. Look for the tell tale signs of wildlife; look under pots or in cluttered areas.
Is there burrowing under fences? If so this could be a sign of a visiting hedgehog. Do you have depressed lines in your lawn where animals have been walking? Why not install a digital wildlife camera for a few weeks to see what is moving around at night? This will provide you with a wider understanding of what wildlife you already have present. Going through this process will also give you insights on how existing habitats could be enhanced. If you see a hedgehog is cutting across you garden perhaps you could encourage it to stay? You could build a hibernation quarters or nesting burrow for it to raise young? 
Green corridors
When it comes to designing wildlife gardens you must remember your garden is not an island. It is very likely that wildlife in your garden will travel across many other gardens. Therefore, it is always beneficial to create travel openings to your boundaries. This could be a small hole at the bottom of your fence for creatures to past through. Try to identify the part of your garden boundary with the highest ecological value. For example, if your garden backs onto a stream try to create familiar habitat next to it. In such an example you could create a wildlife pond next to the boundary. This would allow wetland species to connect to the surrounding landscape. 
When deciding what habitats to encourage, think about what would naturally occur in your area. Do you have any information on the natural history of the area? Before your home was built was it a wetland, forest, or meadow?
Sometimes it is good to look at satellite images of your locality such as ‘Google Earth’. See if you can identify green corridors within the landscape and where they travel. Try to view your garden within the greater landscape and ecological food web. Even if this exercise seems more symbolic than practical it is worth undertaking. Understanding the surrounding landscape can provide a valuable insight into local ecology. This process will help you make better design decisions on the type of habitats you create. Wildlife buffers
Wildlife garden designers may wish nature to feel secure around people but in reality this is not always the case. Wildlife has a healthy fear of people and our nosy machines which roar loudly and potentially harm. Consequently, when designing nature gardens, wildlife buffers should be implemented into the design. Wildlife buffers are areas which are exclusively set aside for wildlife. These can be accessed for special wildlife study and habitat maintenance duties. This gives wildlife the extra security it needs to seek permanent residence in your garden. Such buffers can encourage a greater trust between you and your resident wildlife. If designed well, buffers can stage some of the most intimate wildlife encounters. For instance, a wildlife pond can be fenced off with a picket fence and a locked gate. 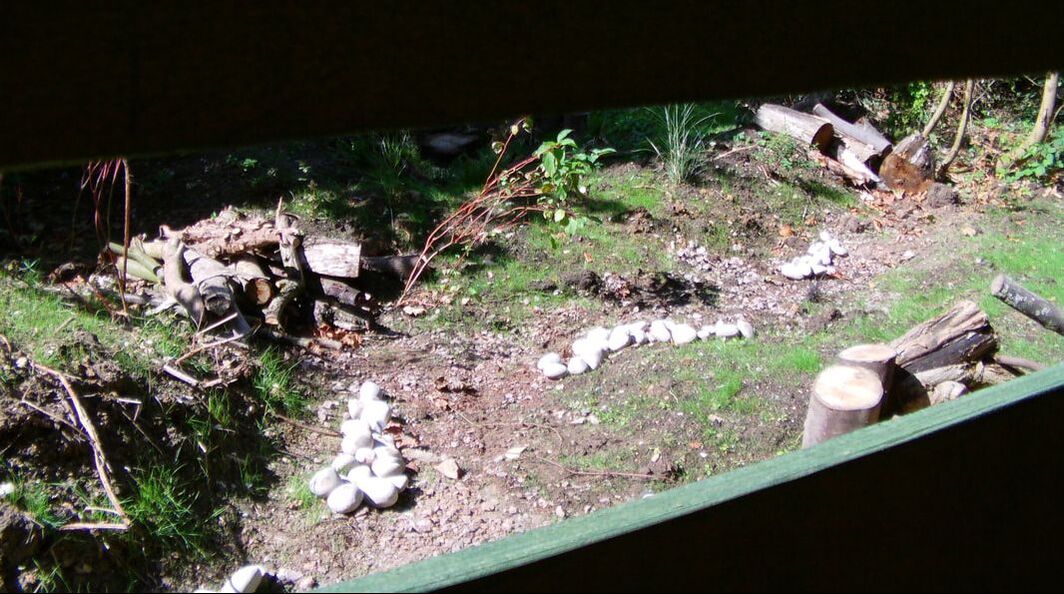
At the same time a raised deck can provide a commanding and intimate view of a pond or wetland area. This can lead to great encounters of birds bathing, mammals drinking and amphibians spawning.
Such buffers can be designed in a range of ingenious ways to maximise wildlife watching encounters. Such encounters can also be encouraged by building wildlife watching dens and screen hides. The aim of wildlife buffers is not to directly separate people from wildlife. They are used as a tool to provide wildlife security while developing a mutual trust. If well executed, buffers can lead to exciting encounters with more elusive wildlife garden species. Garden habitat creation
Effective wildlife garden design will attempt to recreate viable wildlife habitats. This is not always easy as most natural habitats have been formed by nature over time However it is possible to create natural habitats with ecological landscaping. This involves building the best possible landscape for wildlife and waiting for colonisation. Some great examples of garden, habitat, creation includes ponds, meadows, and woodland gardens. Such examples of wildlife garden habitats and habitat boosters will be explained below. 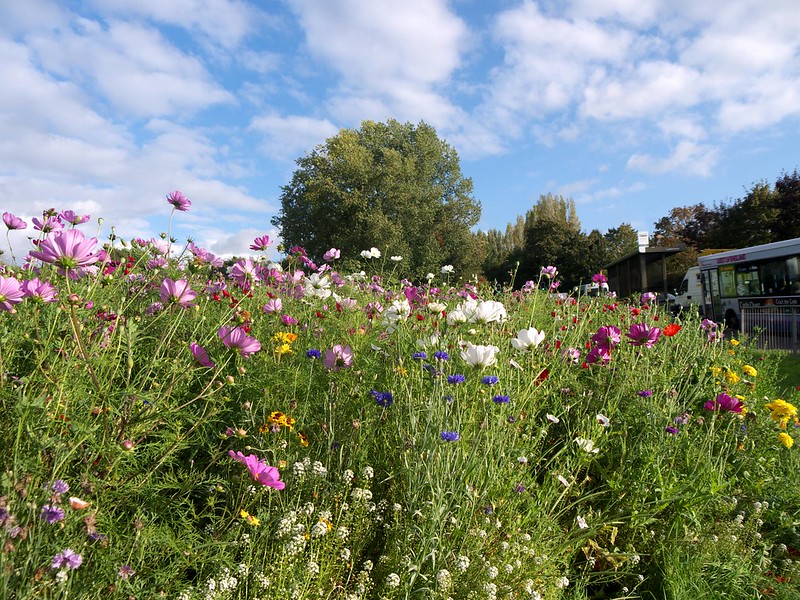
Wildlife garden plants
Garden plants are an important consideration for a successful wildlife garden design. Conventional gardens select plants more on their visual qualities than wildlife value. However in wildlife gardens, plants are recognised more as a part of an ecosystem. Plants will essentially provide food for pollinators and small herbivores within the food chain. Therefore there is typically an emphasis on including plants which are native to the area. Such plants will have the highest chance of supporting native wildlife species within your locality. Why not visit our article on the best plants for wildlife gardens here. 
Furthermore, plants acclimatised to local conditions will require less human intervention and care. As well as native planting, ecological planting can also be incorporated into habitats.
Ecological plants are those which provide food and shelter for wildlife but are not native. Wildlife garden planting is an extensive subject including many planting types and species. Consequently we have created a separatearticle explaining the 85 best plants for wildlife gardens here. 16 elements of a successful wildlife garden1. Wildlife Garden ponds
If there is one thing you can do to encourage wildlife to your garden its building a wildlife pond. Water is the most important element for hosting life in any environment. Not only do ponds and wetlands provide water to drink they also allow birds to bathe. Bathing is extremely important for wild birds to keep their feathers in perfect condition. 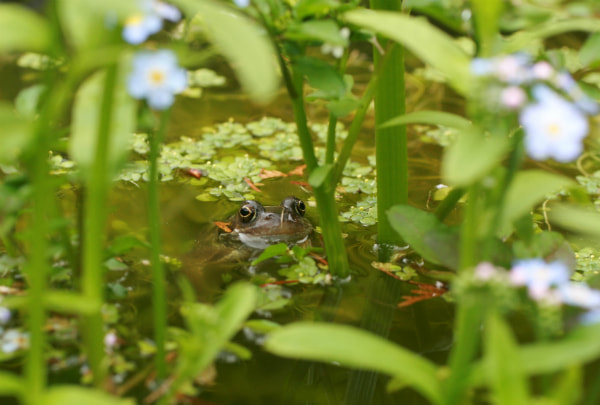
Wildlife ponds can also sustain whole ecosystems underneath the water’s surface. Many wildlife species complete some of their lifecycles in the depths and shallows
This is true for amphibians such as frogs and some insects such as dragon flies. When you first create a wildlife pond it is incredible just how fast aquatic species will colonise it. Read our article on the best plants for a wildlife pond and how much a wildlife garden costs here. 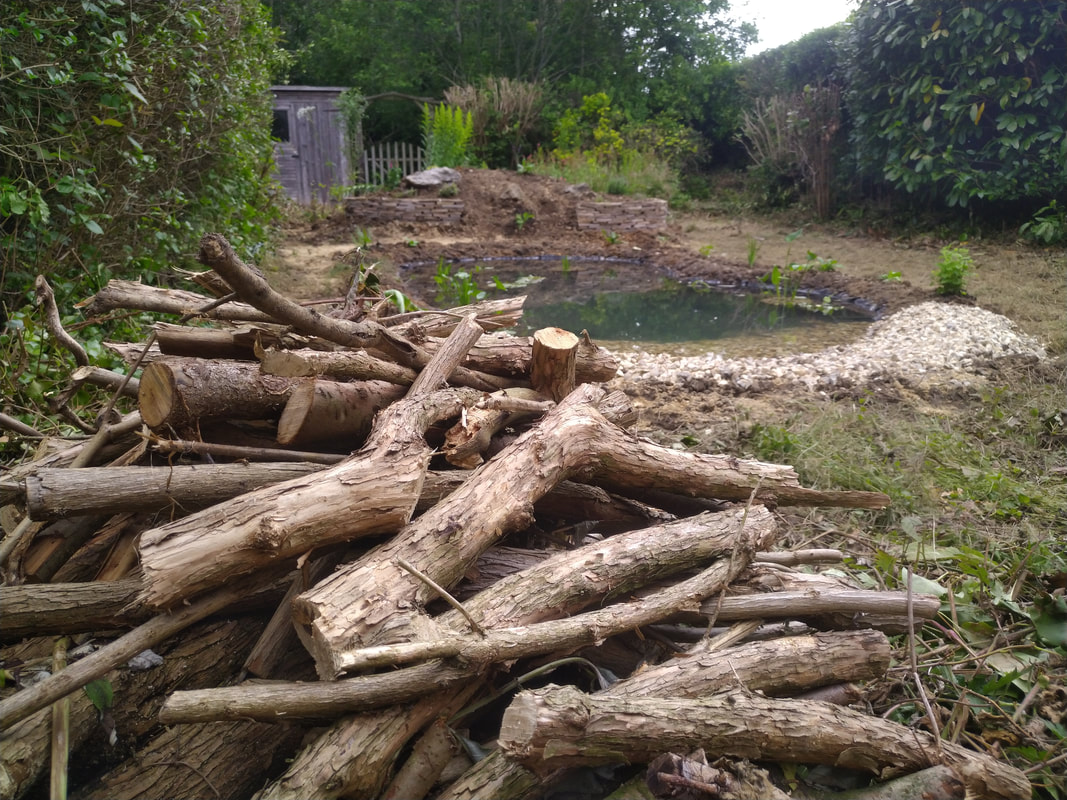
2. Wildflower meadows
Wildflower meadows were once common across the landscape for many centuries. Wild meadows were a rich tapestry of wildflowers and grasses traditionally harvested once a year. Historically the hay of such meadows was collected and used to feed livestock during the winter months. However modern, mechanised, agriculture eliminated the need for meadow harvesting about 70 years ago. 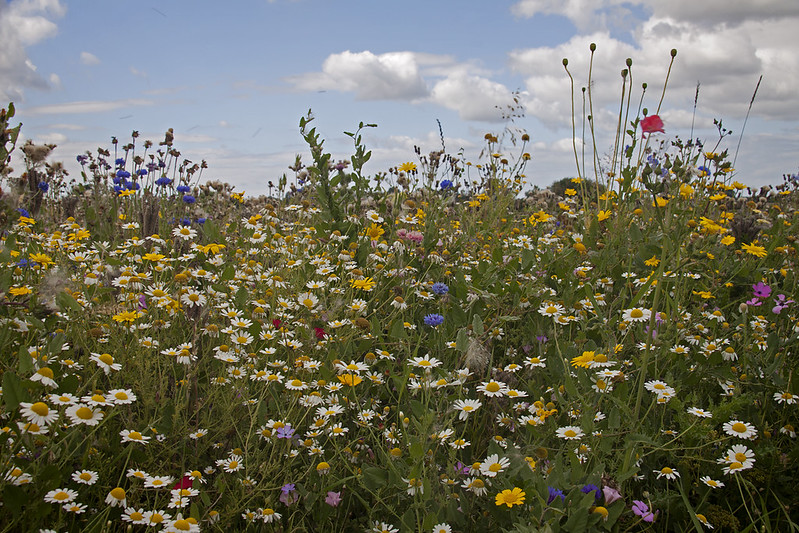
This led to a catastrophic decline in wildflowers and the millions of species which relied upon them. Many species of insects, reptiles, birds and small mammals fed and sheltered within the dense grasslands.
Wildflower meadows are extremely rich habitats and easy to create in gardens. Why not read our article on how to create a wildflower meadow from existing lawn here. Alternatively visit our article on how to lay wildflower meadow turf here. 3. Deadwood habitats
Dead and dying wood was once a common habitat across our woodlands and countryside. In a natural woodland dead trees litter the forest floor and canopy. However many woodlands particularly in Britain were originally plantations. This becomes obvious when noticing most trees present are all of a similar age and height. Today we have an emphasis on trying to keep the countryside too tidy. Safety paranoia has also led to an assault on standing, dead trees which is a rare and important habitat. 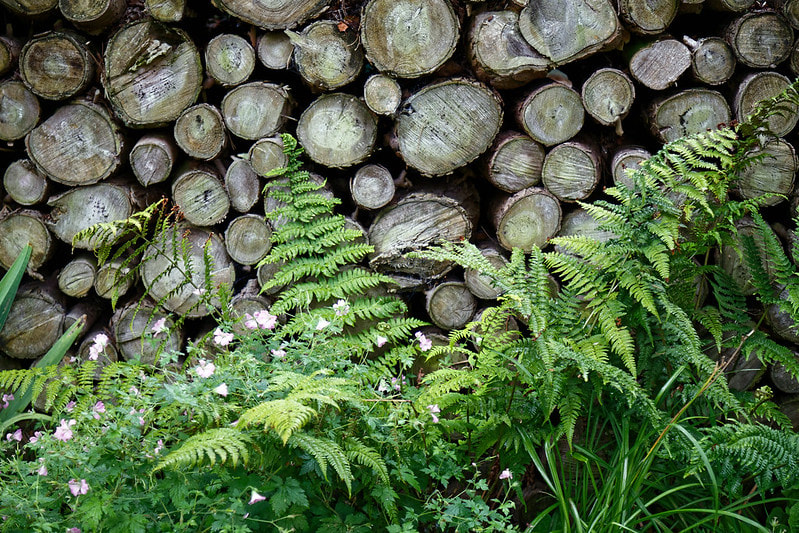
The Bialowieza forest in Poland is a great example of a deciduous forest which has never been cut down.
The forest is littered with dead and half fallen trees everywhere! The forest floor has a thick layer of breaking down wood which mulches the forest floor. Before the age of agriculture most landscapes were woodland. Therefore implementing dead wood habitats into a wildlife garden is very favourable. 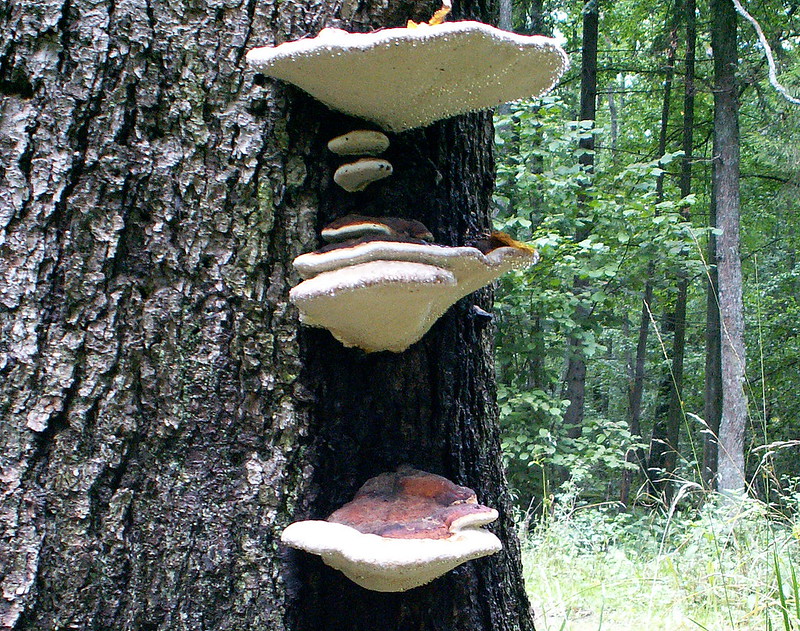
Buried deadwoodBurying old logs can be a great way to kick start soil and dead wood ecosystems. In such projects, It is best to bury native, deciduous, tree logs. Buried logs will provide the perfect habitat for the European stag beetle which is becoming an ever rarer insect. The larvae of this beetle will spend up to 7 years feeding on rotten wood. 
Log pilesOne of the fastest ways to incorporate dead wood into your wildlife garden is with log piles. Log piles can create hiding places for multiple species and will slowly decompose over time. This process directly feeds the species which feed on rotting trees. Log piles can also be arranged vertically in a firewood stack formation and then covered with soil. 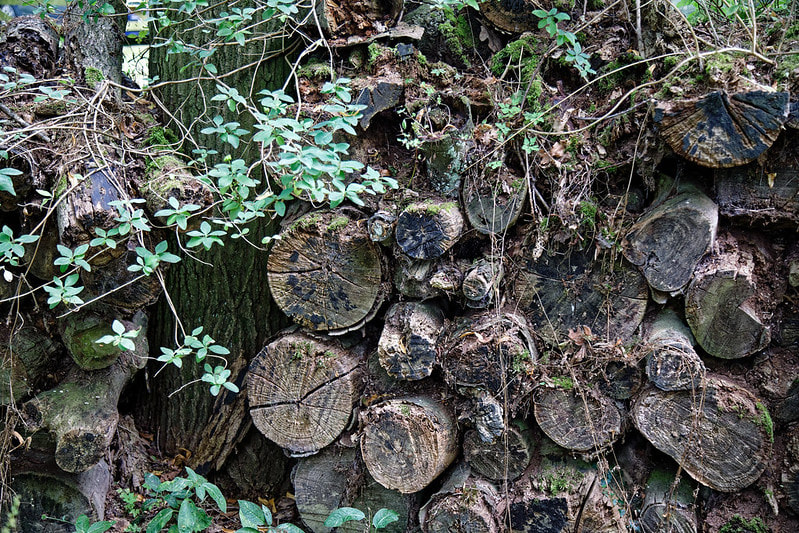
Standing deadwood
Standing deadwood is a very important habitat to a number of specialised, species. Such a habitat was once common in most forests across the planet. However, the now typical plantation woodlands have led to standing deadwood becoming a rarity. Large linear tree logs can be set deeply into the soil to create standing deadwood posts. These can become decorative landscape installations within wildlife garden designs. Make sure you drill some holes on these high up on the south side of the standing logs. This helps to provide shelter and nesting opportunities for numerous insects and invertebrates. 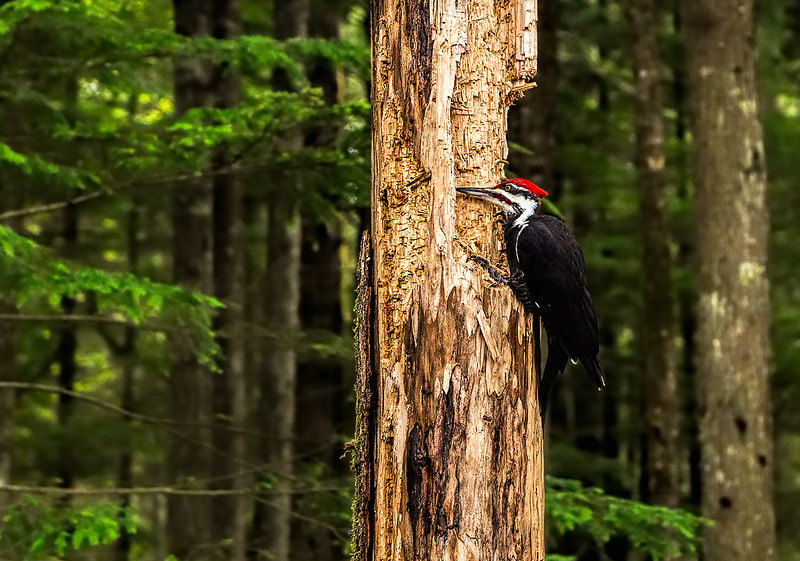
This is especially the case for for solitary wasps and bees, make the holes between 2 and 10 millimetres in diameter.
Deadwood is typically much undervalued when it comes to designing a wildlife garden. However such habitats are some of the most important for wildlife. Deadwood over time helps to evolve rich soil ecosystems. This process invigorates the lower part of the gardens ecosystem and food web. 4. Soil ecologyMost people are completely unaware that topsoil is a living organism. Soil is made up of billions of eroded rock particles, decomposed organic matter, bacteria, fungi and invertebrate life. Soil is responsible for the pretty much all animal life we see above the ocean. This amazing substance is a complex web of bacteria, fungi, and other microorganisms. This 'soil ecology' is what forms the very base of every land based food web. However, many soil ecosystems today are terribly under threat mainly from agriculture. Most farmland produces crops by feeding the soil with chemical fertilisers. This is leading to soil degradation where complex soil ecosystems slowly die. 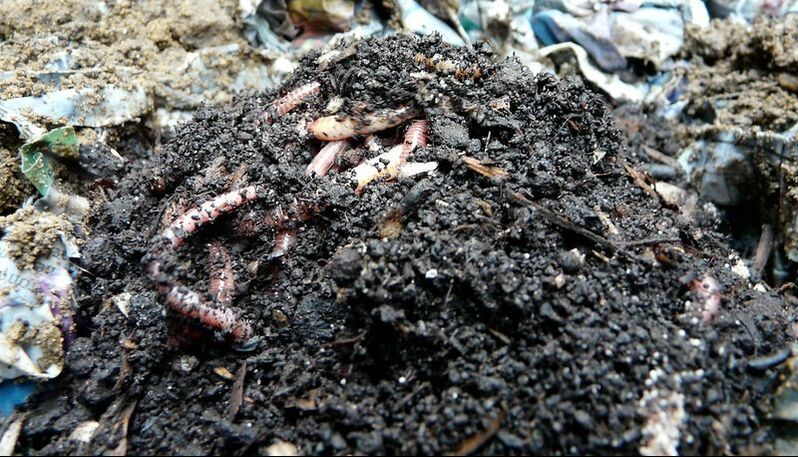
Such soil ecology has taken millions of years to evolve and is very important to all life. This is no less the case within wildlife gardens! In order to invigorate yours gardens soil ecology you must allow for organic matter to feed soil life.
However, this must be done naturally by mulching the soil. This can be achieved with organic, composted materials such as straw, hay or locally sourced woodchip. In nature microorganisms draw down the organic matter over time and break it down. The mulch forms a protective layer over the soil which keeps it moist and out of direct sunlight. Contrary to most gardening literature avoid digging the soil, this exposes it to sunlight which can kill microorganisms. You may wish to initially dig over your soil to alleviate compaction and then undertake planting. 
However once this is complete soil should be left undisturbed and mulched. Overtime your mulch layer will become alive with thousands of insects and invertebrate life!
This will kick start your wildlife gardens food web from the bottom up! 5. Woodland HabitatMany would assume that to create a woodland habitat in your garden you would need lots of space. However growing large trees is really not necessary to provide woodland habitat. Your wildlife garden may already be lucky enough to neighbour many native trees. You could already live in very close proximity to an ancient woodland! If not, don’t worry, there is a lot more to woodland habitats than the trees themselves. Most of the time it is the woodland plants, shrubs and transitional woodland habitats which are most rich in wildlife. 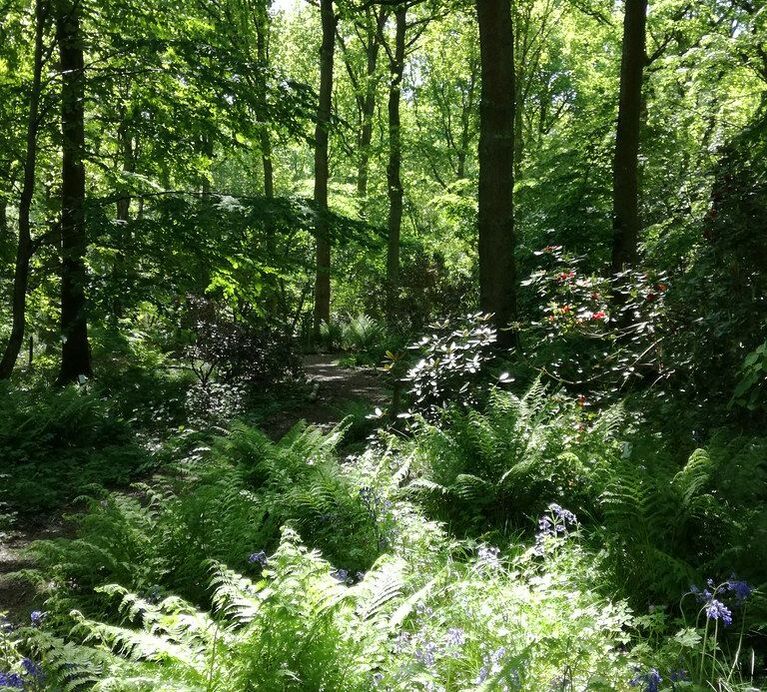
This is why most wildlife gardens create more ‘woodland edge’ habitats within the garden. These generally consist of shady areas with plenty of log piles and smaller, woodland plants.
You may already have a very shady part of the garden surrounded by trees! Such paces are the perfect places to start creating woodland habitats. One of the best ways to start a wildlife woodland garden is create a bark mulch area with loads of log piles. 
Woodland plants like wood anemone, foxglove and Solomon seal can then be planted. Shrubs like Elder, Guelder rose and crab apple can provide tasty fruits for birds and mammals.
Habitat boosters can then be added such as insect hotels, hedgehog homes, bird boxes and bat boxes. If you are planning on making a woodland garden habitat read our article on the subject here. Our article on 25 trees for small gardens may also be useful. 6. HedgerowsBefore the age of mechanised farming many fields were much smaller and bordered with hedgerows. Hedgerows are manmade boundaries created by growing resilient shrub and small tree species. Many old hedgerows can be centuries of years old and consist of many species. Overtime hedgerows can become colonised by other pioneering, native pants. In the early days of farming hedgerows provided some welcome habitat for woodland species. 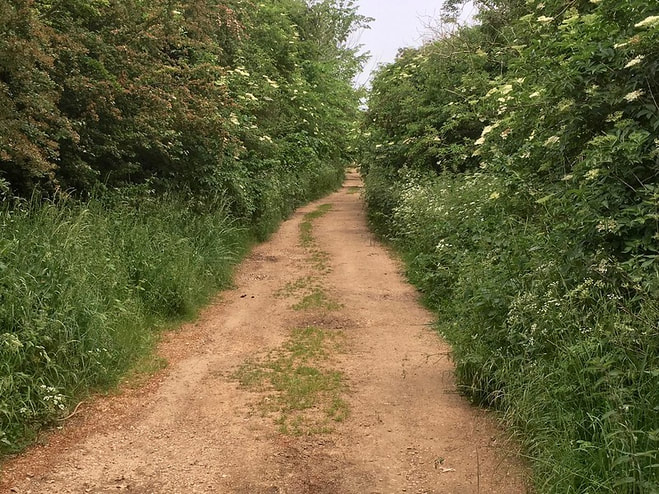
Species such as Hazel, Hawthorn, Buckthorn and Elder provided fruits and nuts for birds and mammals. More importantly hedgerows provided green corridors for wildlife to move around safely.
Typical hedgerows may be too large for most wildlife gardens however you can still provide hedgerow habitat. Boundaries can be planted with hedges containing beneficial wildlife species. You can plant smaller shrub species more suited to gardens which provide edible fruits and nuts. Some examples of these include; currants, plums, Cotoneaster, Berberis, and Medlar. 7. Plant fruit treesFruit trees are not only great for the kitchen they are great for wildlife too! Most fruit trees flower very early on in the spring. This is so the fruit has all growing season to swell and ripen before winter. These early flowers provide a rich source of pollen and nectar when hungry pollinators are emerging from hibernation. 
This early source of food is a life line for such insects and especially bees. As the growing season continues small fruits can be foraged by a whole range of wildlife species.
In autumn the bountiful supply of fruit and nuts allow wildlife to store up reserves for the winter. For smaller gardens many fruit trees come in dwarf form and can be contained by pruning. Fruits can be trained up walls and fences to save space and assist in ripening. 8. Green roofs
Green roofs are an effective way to add habitat value to elevated surfaces. These surfaces can include the roofs of garages, sheds and extensions. The great thing about green roofs is they offer a garden with no human interference. This can help to facilitate nesting birds and sheltering insects. The level of wildlife habitat you can create on green roofs is dictated by the substrate depth. Most green roofs however consist of a shallow depth of free draining substrates. However even basic green roof systems increase a conventional roofs wildlife value many times over. 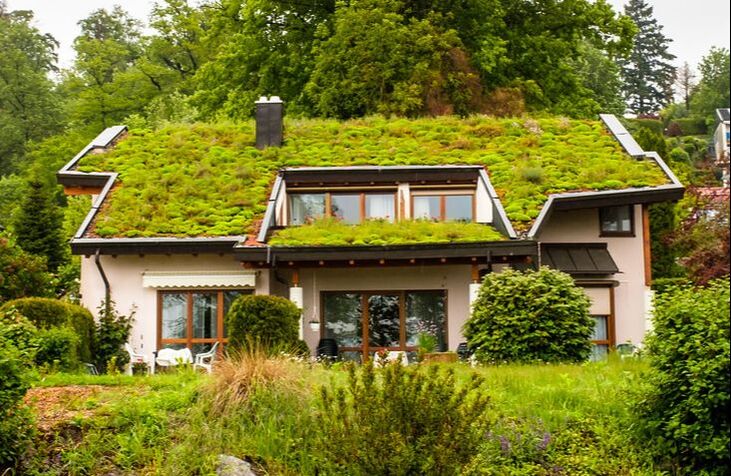
9. Dry stone walls
Dry stone walls are an absolutely fantastic installation to a wildlife garden. Historically these have been constructed in areas where there are naturally occurring rocks. Such locations such as the north of England have many miles of dry stone walling. These walls have plenty of warm crevices where wildlife can find shelter and raise young. This is so for many species of insects, small mammals and reptiles. 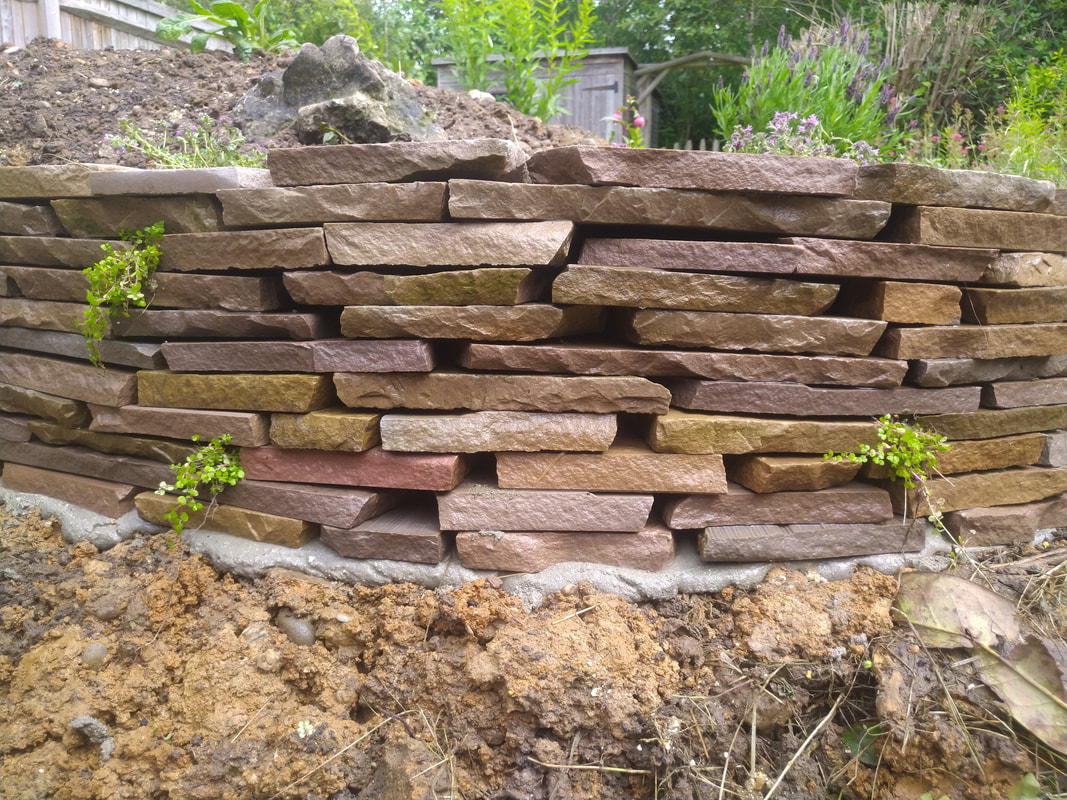
Dry stone walls also look very effective in wildlife gardens and can be built with broken paving or landscaping rocks.
These can be used to build raised beds or even clad existing structures. Such dry stone walls not only look great they replicate rocky outcrops in the landscape. 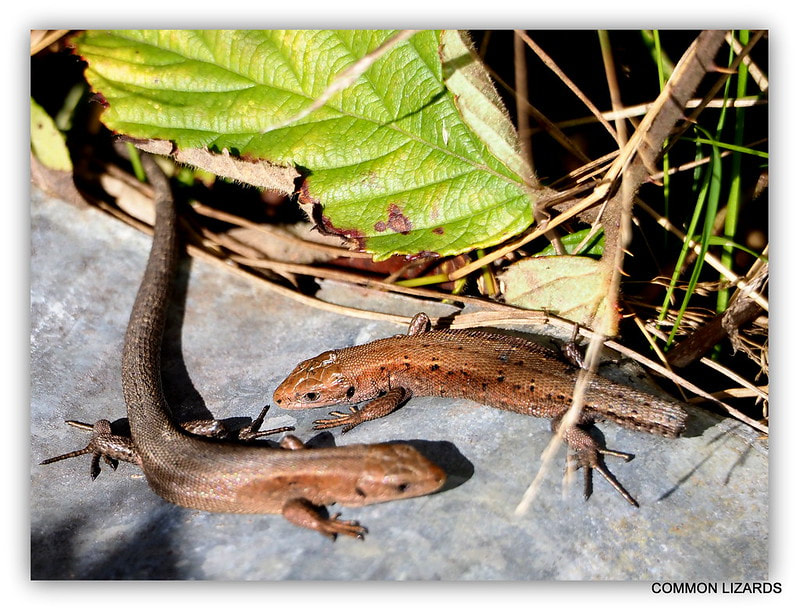
Such outcrops and rocky cliffs are used by some insects to warm up in the morning sun. These can also form dry hollows where reptiles can lay eggs and raise young.
10. Bat boxes
Bats are flying mammals which are extremely widespread but in many cases endangered. These amazing animals can be seen flying around at dawn and dusk hunting insects on the wing. Bats are extremely beneficial creatures as they control the number of flying insects around your home. Due to the modernisation of old buildings and less old trees bats struggle to find suitable roost sites. A general decline in good insect habitats has also seen their prey species decline dramatically. Bat boxes are a great way to attract bats to your wildlife garden. These boxes provide perfect places for them to roost, hibernate and raise young. 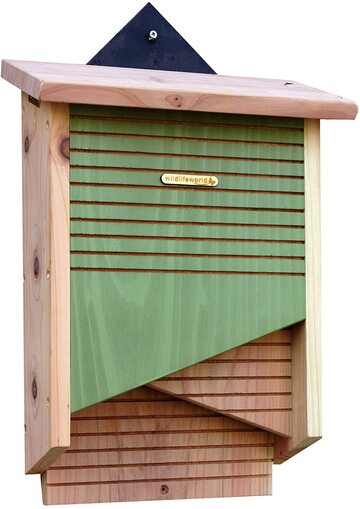
11. Man made burrowsIf you really want to make your wildlife garden perfect for wildlife create man made burrows! These can really make your garden a haven for many endangered wildlife species. Creatures like hedgehogs and reptiles need secure places to hide and raise young in safety. 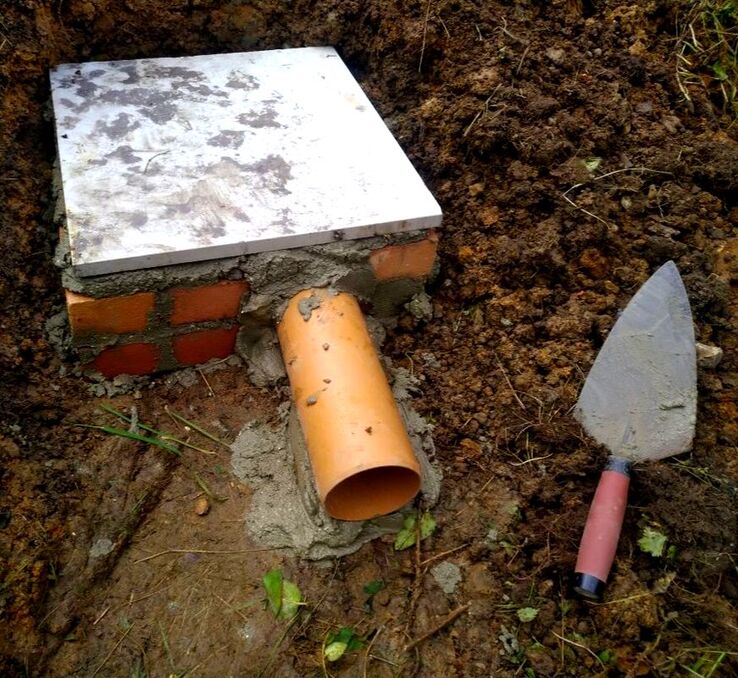
Custom building such wildlife shelter means you are offsetting the typical trend of minimalist gardening. Most modern gardens consist of flat lawns and patios which are very exposed for wildlife.
Burrows can be built of old building materials and brick laying mortar. Garden level changes can also provide the perfect opportunity to form such burrows. 
In our wildlife garden design above, hedgehog homes were built into a mound formed from wildlife pond excavations. Smaller, sandy, hollows can be built behind dry stone walls to create nesting sites for reptiles.
12. Bird boxesUnfortunately many once familiar bird species are now in rapid decline. Many have seen a noticeable drop in garden bird numbers in the past couple of decades. As with many other species a lack of habitat, suitable nest sites and food have led to substantial declines. One of the ways you can encourage birds into your wildlife garden is with bird boxes. 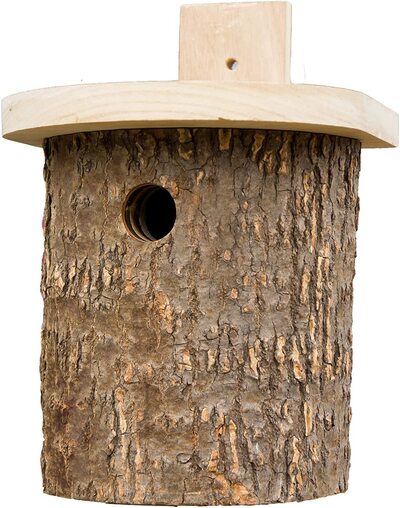
Bird boxes come in many different designs and styles and some are specifically designed for certain species. These can have different sized openings and have different height installation requirements.
For example, Robins prefer a more open box at a height of around 2 metres. Therefore before buying a bird box, think about the species you wish to attract and read the suppliers instructions. For more information on how to make your garden more bird friendly visit our article here. 13. Insect hotels
Insect hotels now come in a wide range of shapes and sizes and are effectively nest boxes for insects. These cater specifically for specialised insects which nest and shelter in specific sized holes. Many species of solitary wasps and bees lay their eggs in such holes and tubular crevices. Therefore many hotels on the market directly are directly put together with this in mind. 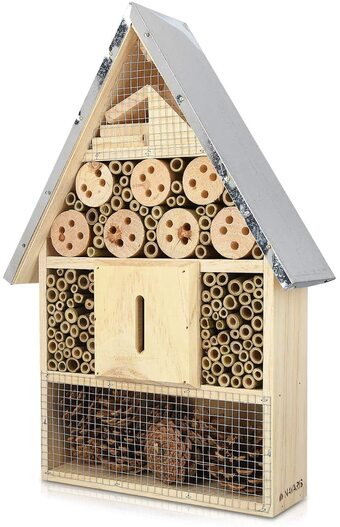
Solitary wasps are famous for their predation of garden pests like caterpillars. Solitary bees on the other hand are well known for their beneficial pollinating within gardens.
In addition to solitary bees and wasps these also provide nesting quarters for many other beneficial insects. These are a fun, educational and exciting installation when creating a wildlife garden. 14. HibernaculaHibernacula’s or hibernaculum’s are places where creatures can shelter or hibernate during harsh, winter, weather. In nature larger mammals may use caves and burrows but in wildlife gardens Hibernacula's are typically man made. Hibernacula’s are built with natural or recycled materials to create nooks, crannies and larger hollows and burrows. These can then be utilised by numerous species to seek refuge, nest and hibernate. There is no specific rule to building wildlife hibernacula’s but may vary depending on your target species. 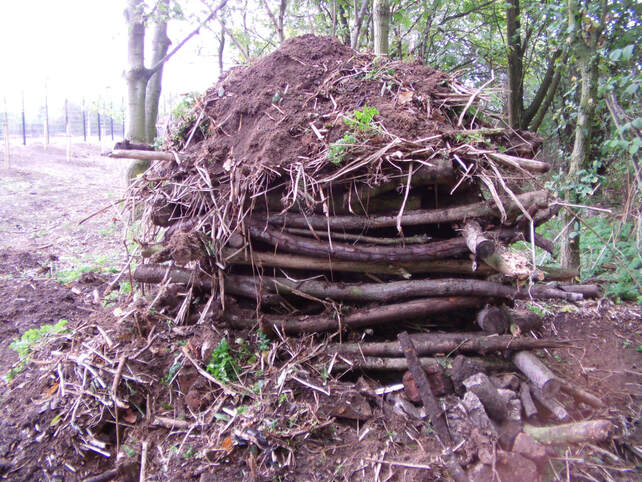
If perhaps you wish to focus on hedgehogs then you will construct larger cavities with access holes. For reptiles you may include more rocks and dry, sandy, hollows.
For insects however it is more likely that twiggy material will be layered up around rubble and soil. However, hibernacula’s in wildlife gardens are more of a general affair for many species. These can be simple mounds of old bricks, slabs, logs, sticks and then covered with soil. They can actually be worked into quite impressive examples of land art and become ecological focal points. 15. Hedgehog homesHedgehogs are small mammals which are native to Europe, Asia and North Africa. These spiny creatures are famous for their ability to roll into a perfect ball when threatened. In gardens hedgehogs are thought of as a very beneficial species eating pests like slugs and snails. 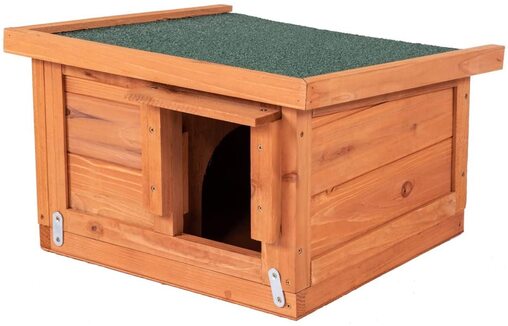
Unfortunately hedgehogs have seen dramatic declines in their populations of up to 90%. This is due to a lack of suitable habitat, food, shelter and population connectivity.
Therefore a great addition to a wildlife garden is a hedgehog home. These now come in a wide range of designs styles and materials. why not visit our article on how to attract hedgehogs to your garden here. 16. Wildlife hides
If you’re building a wildlife garden a hide can bring a whole new dimension to the design. These shed like, landscape features allow you to watch wildlife without being noticed. Once installed wildlife gets used to the structure meaning you can take advantage of being completely hidden. This is particularly useful for more secretive garden wildlife like foxes and hedgehogs. Wildlife hides can be large, permanent structures or more simply a garden screen with a viewing port. Once you have abundant creatures visiting, hides are effective to both photograph and study wildlife. 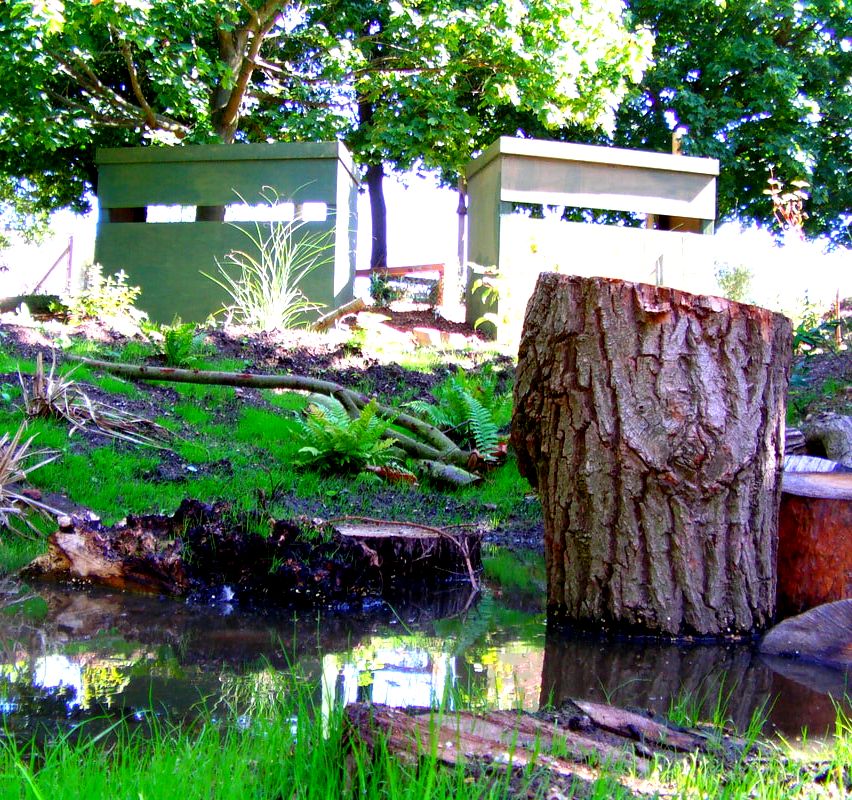
Studying garden wildlife
Once your new wildlife garden has been created it will continue to evolve over time. As new wildlife colonises you can choose to enhance some habitats while others may be less inhabited. The completion of the wildlife garden is just the beginning of the learning process. Learning what wildlife is present in your garden can be the most exciting part of this process. 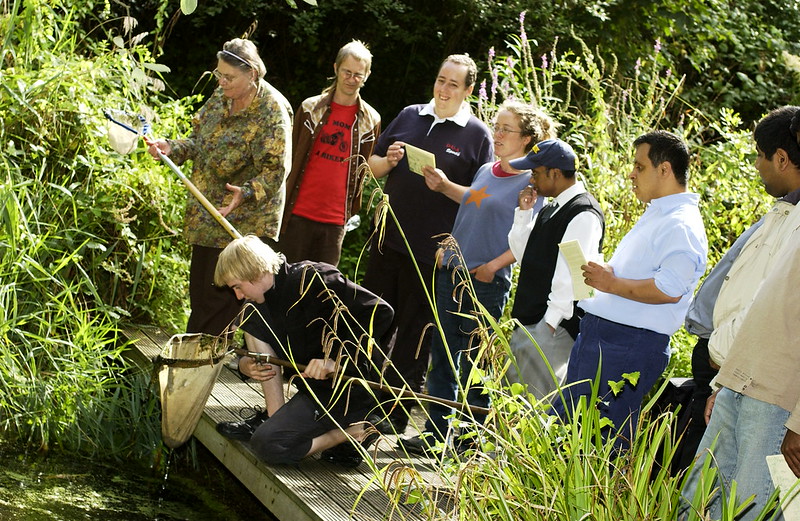
There are literally thousands of species right on our doorsteps thriving in our gardens. They are home to so many, different, wildlife species it would be impossible to identify them all.
In fact, many speculate there could even be undiscovered species living in our backyards. One thing is for sure! Creating a wildlife garden is the best way to start learning about the natural world! Wildlife garden design servicesOur company has decades of experience designing wildlife gardens and nature reserves. We have built multiple, ecological, landscape projects both in the public and private sector. If you require a wildlife garden design or biodiversity design services please feel free to contact us here.
Our wildlife garden services include:
Please view some of our wildlife and biodiversity landscape design projects below. 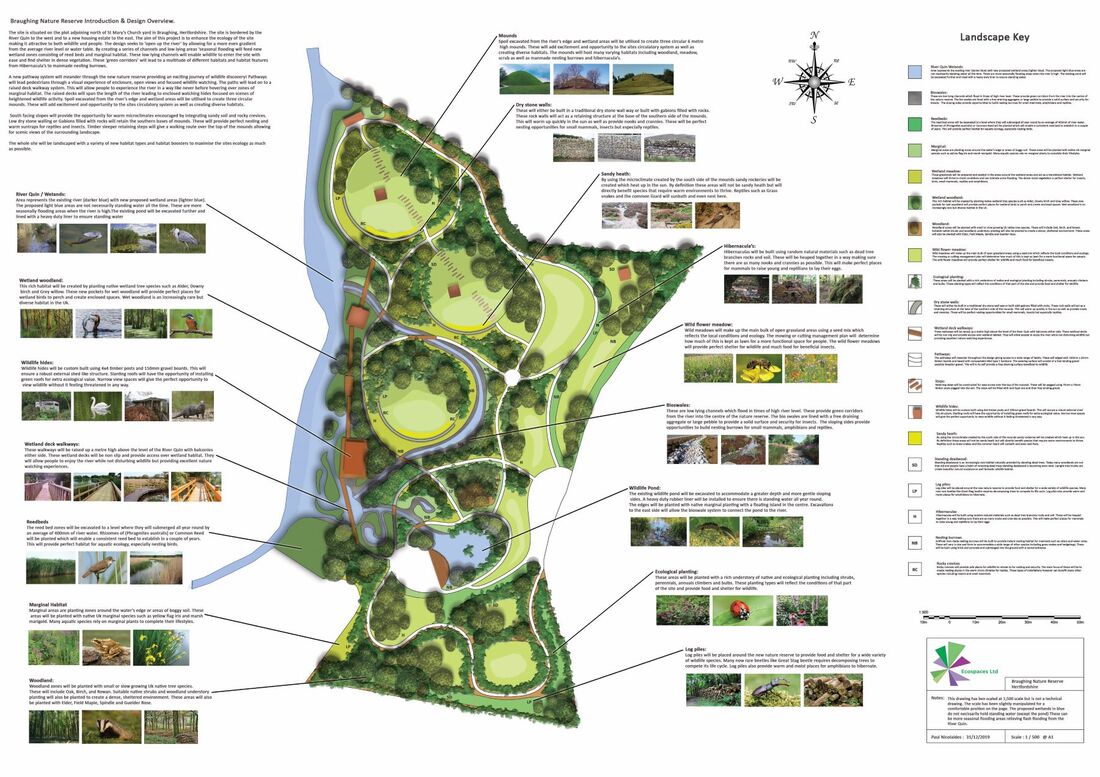
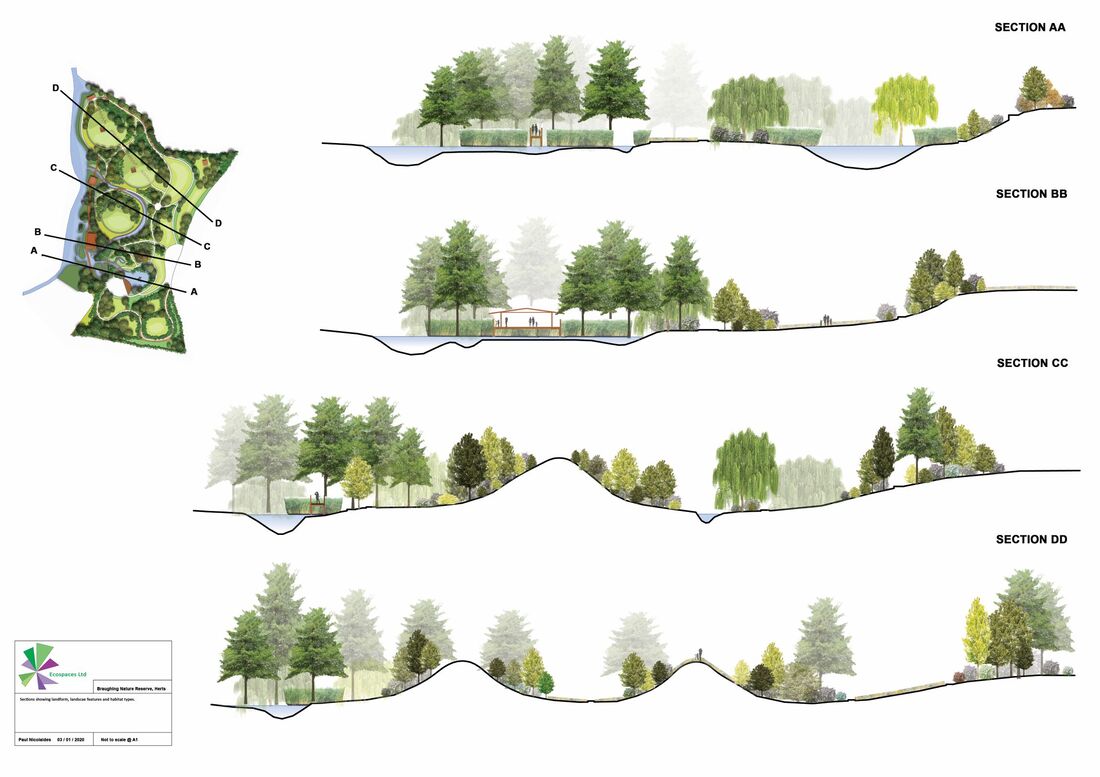
For our wildlife design and ecological planning servicesplease contact us here.
Further wildlife garden creation reading
'As an Amazon Associate I earn from qualifying purchases'

This article contains affiliate links
When it comes to creating any landscape there is one element which is essential for development.
Hardscaping is the physical placement and construction of hard materials which form a landscapes structure. This includes features such as groundwork’s, concrete, steel, rocks and hard surfaces. Hardscaping involves all external and landscape construction from new commercial highways to small garden patios. When it comes to sheer diversity, no other type of constriction is as varied as Hardscaping. Hardscaping involves more skills and range of scale than any other construction trade. In this article I will provide a full overview of Hardscaping and summarise the nine primary hardscaping categories. What is Hardscaping?In a nutshell, hardscaping is the physical construction of gardens and landscapes using hard building materials. These include: concrete, stone, steel, timber, aggregates, and soil. In Hardscaping or ‘hard landscaping’ these materials are worked to create, landform, foundations, hard surfacing, retaining walls, terraces, platforms, planters, water bodies and structures. Hardscaping is the mastery of forming physical landscapes using hard materials, natural elements, machinery and human skill. 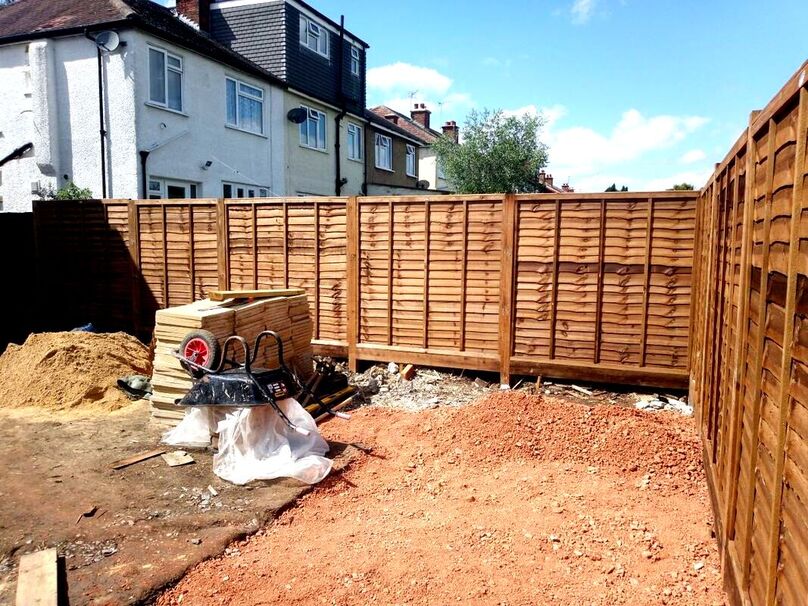
Is hardscaping the same as landscaping?There are two main distinctions and types of landscaping, soft landscaping and hard landscaping. Soft landscaping includes landscaping with softer, living elements such as plants and turf. Soft landscaping generally involves soil preparation, planting and landscape maintenance. However hard landscaping includes the physical construction of garden and landscapes using hard materials. Hardscaping and hard landscaping is basically the same thing so yes hardscaping is a type of landscaping. The hardscaping process
Most hardscaping falls within a construction process, the larger the landscaping project the more involved this process will be. Below I identify and summarise the main stages of the hardscaping process. Understanding technical landscape drawings
Most hard landscaping will be built to some sort of plan or hardscaping specification. This will either be done via landscape detailing provided by landscape architect or a contractors drawing. Most hardscapers will be able to either put together construction plans for clients or work off detailed specification. 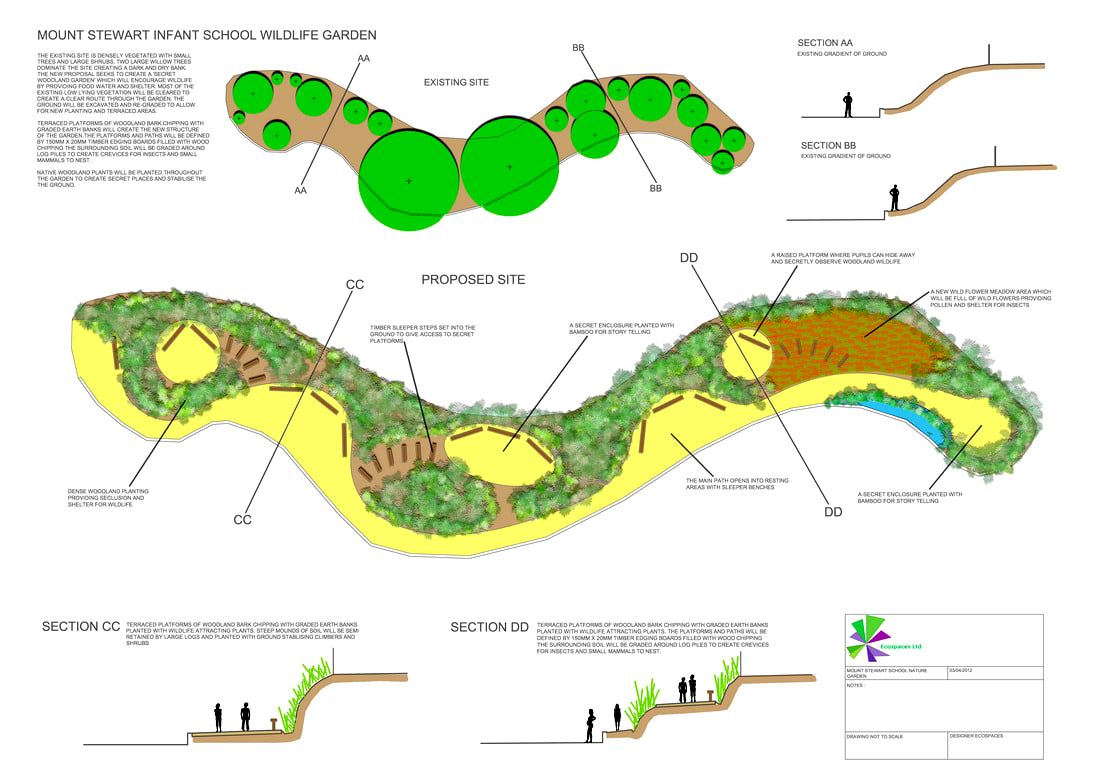
Setting out specification
One of the most crucial parts of hardscaping is implementing what is in plan onto the physical landscape. This becomes more logistical the larger the project is and the more intricate the design is. On such larger projects hard landscaping elements are marked out on a grid system. This makes marking out to scale much easier and will typically be carried out by surveyors. 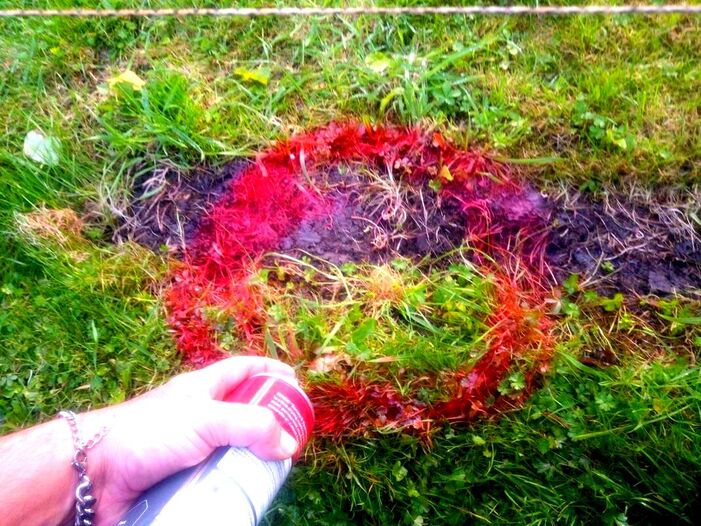
Working out levels
Working out levels is fundamentally one of the most important elements of hardscaping construction. Many find it easy to understand two dimensional plans but struggle when visualising in real life. Consequently understanding levels is a Hardscapers domain, a good hardscaper will even identify aspects of levels designers fail to account for during the design process. 
Ground works
There are very few hardscaping projects that do not have an element of ground working. Ground works involves activities such as excavating foundations, terracing and re-levelling. This kind of work is traditionally executed with excavators with smaller works undertaken by hand. Ground working is a skill within its own right demanding high levels of skill and an eye for levels. 
Construction
During the construction stage of any hard landscaping project could have multiple trades working on one project. Once the main ground works are completed, foundations can be laid and construction begins. Hardscaping construction can be extremely varied including, carpentry, shuttering, brickwork, rendering, cladding, electrical work, and numerous other activities. Once the main elements of the hardscaping are complete soft landscaping works can begin. These mainly include spreading soil, turfing and planting. 
Completion
The completion stage of any hard landscaping project will always see extra duties. Once walls are built and structures erected there is always fine tuning and the clearing of the site. It is very common for the soft landscaping works to add the final finishes to a hardscaping project. Planting turfing and mulching is normally a sight a project is nearing final completion. 9 Main types of Hardscaping
1. Ground working
Ground working is one of the most crucial and fundamental parts of all hardscaping. The excavation of foundations, level platforms and trenches form a crucial base for various structures surfaces and installations. For any hardscaping installation to be structurally sound the ground working stage of any project is very important. Activities such as landscape terracing and contour grading require precise measurements and a skilled eye. 
Moving large quantities of soil is expensive so hard landscapers must be masters of this skill. Ground working is not just restricted to the beginning of a landscaping project.
As retaining walls, raised beds and soft landscaping areas are completed they all need to be filled with new soil. Ground working always makes up the foundation of any landscape as well as the completion stage of any hardscaping project. 2. FoundationsFoundations play a pivotal role within most Hardscaping projects providing robust bases to numerous installations. Any landscape is vulnerable to natural outdoor forces of weather and ground movements. Consequently, hardscaping foundations must be robust and sturdy. In hardscaping, foundations involve providing solid bases for retaining walls, raised beds, hard surfacing, pergolas and other structures. Most landscaping foundations are formed with in-situ concrete laid and levelled into neat trenches. 
For more expansive level surfaces such as paving however, foundations and bases are formed by using compacted aggregates.
Hardscaping foundations can also be utilised for many other landscape installations. Some of these include soil stabilisation and anti erosion controls. Some drainage projects also create foundation structures to secure water channels and form flood defences. No matter what type of hardscaping project is undertaken foundations form a robust base for any hard landscaping installation. 3. Retaining structuresRetaining structures provide a functional way to retain a landscapes contours and landform. Such are regularly utilised in terracing and levelling undulating groundworks. Retaining structures can also become just as aesthetic as functional in any landscape design. Retaining structures can often end up feature walls creating privacy and enhancing microclimates. The most common retaining walls in landscaping are raised beds and retaining walls. The four most popular material methods of building these; Sleepers, Gabions, Blocks and bricks. 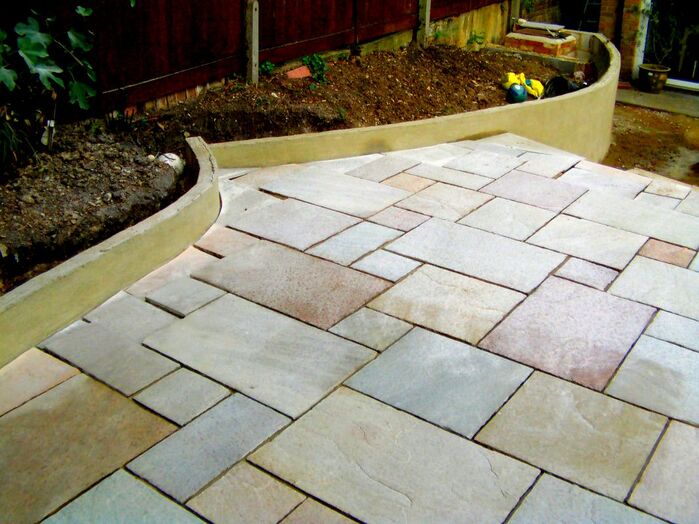
4. Block work
Blockwork typically in the form of dense, concrete blocks is a favoured building material for retaining walls. Blocks can be laid both upright or laid on their side to form stronger retaining structures. Concrete blocks are extremely versatile and can be cut into any shape including curves. They are fast to lay and provide multiple choices for decoration including cladding, tilling and render. 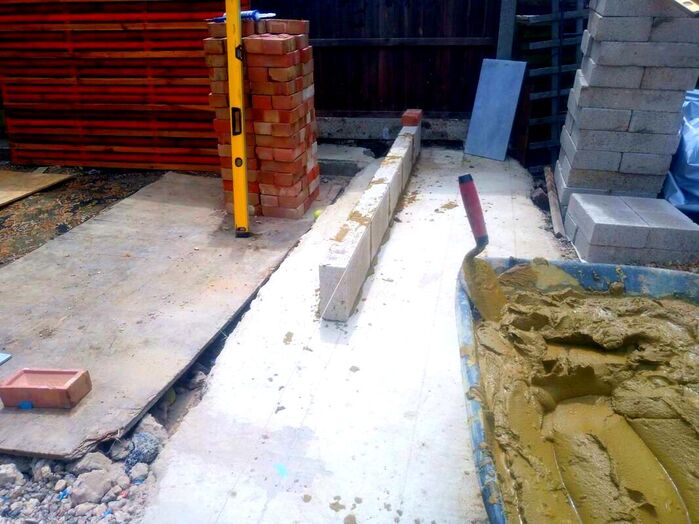
5. Brickwork
Brickwork is another popular masonry material for building retaining walls. The great benefit of using bricks is they come in a wide variety of natural colour tones. Made from natural clays these fired units have interesting tonal contrasts and blotches. This combined with multiple 10mm joints create and interesting visual texture within hardscaping projects. 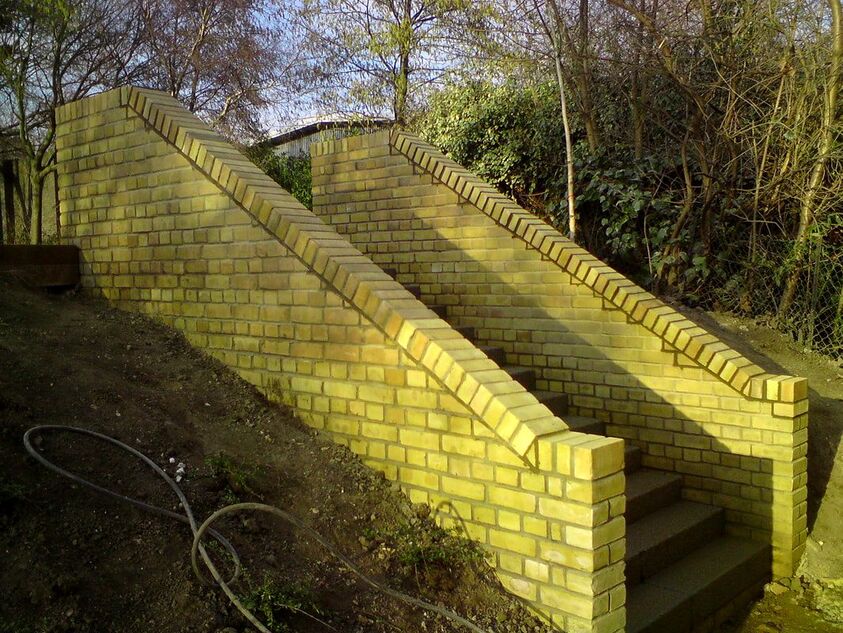
6. SleepersSleepers are large sections of timber which were traditionally utilised for basing railway lines. The typical dimensions of sleepers are 100mm x 200mm x 2.4 metres. This makes them the perfect building material for raised beds and retaining walls. Sleepers can easily be cut to any size or shape and planed and painted to any finish. Like blocks they can be on edge or on their side for stronger retaining features. Timber sleepers can also be set vertically in concrete to form curved retaining edging. 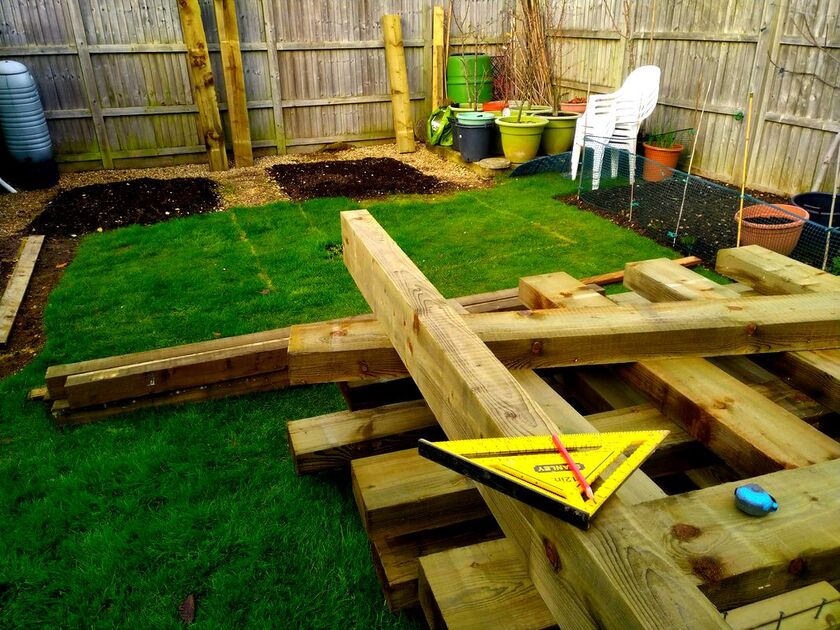
7. Gabions
Gabions consist of strong and ridged steel wire cages which can be filled with heavy masonry. These typically consist of natural stone rocks tightly packs within the structure. This can create an extremely aesthetic appeal and natural texture within the landscape. The advantage with gabions is the cages can be fixed to any size or width. The multiple gaps within the rocks allow water to drain freely and provide shelter opportunities for wildlife. 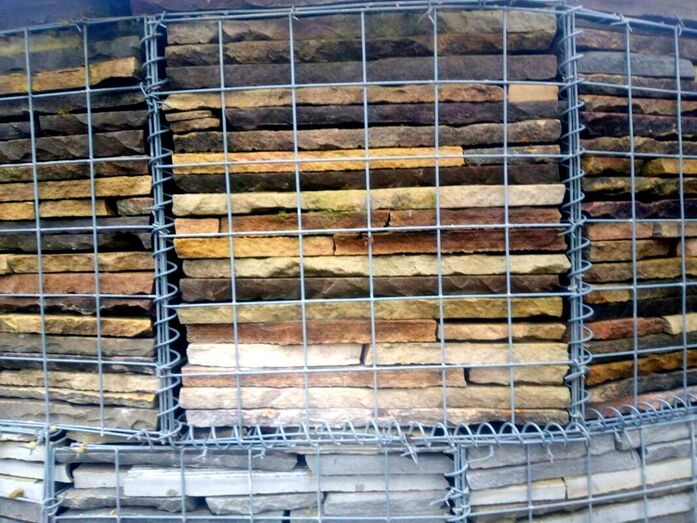
8. SurfacingHard surfaces make up the vast majority of usable space in any outdoor space. Pathways, seating areas, loading areas and car parks are vitally important part of any landscape. The particular type of hard surfacing implemented will depend upon its use and load placed upon it. For example, seating areas are more likely to be surfaced with decorative natural stone. Meanwhile service roads and driveways are more likely to be surfaced with more functional load bearing surfaces. Surfacing is one of the most functional parts of any hardscaping project; I have listed some of the main types below. Driveways
Driveways are primarily designed to take heavier loads than conventional hard surfaces. Consequently they require more excavation and thicker sub-bases. Such surfaces are also commonly surfaced with surfaces which provide a slight level of flexibility. Driveway surfaces such as tarmac and block paving have a very slight flexibility which prevents cracking under heavy loads. Such surfaces are regularly installed by hardscaping professionals. 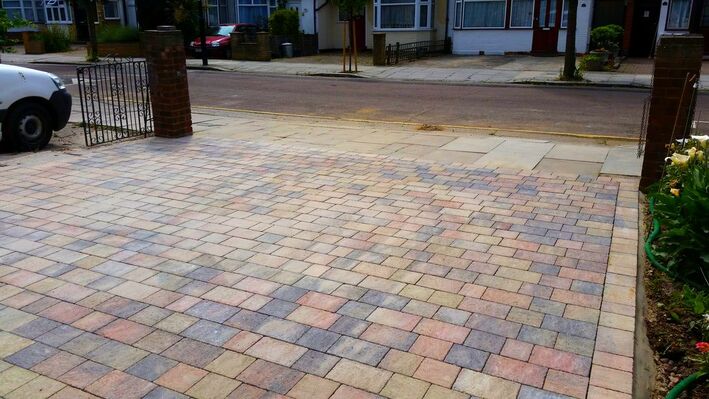
Patios
Patios are traditionally primary, outdoor, seating areas used for dining and relaxation. Such surfaces are normally compact and located functionally to serve as an extension of the home. Patios are typically paved with attractive natural stone or manufactured paving products such as porcelain. Patio paving is normally built upon a compacted sub-base on a strong and consistent mortar bed. 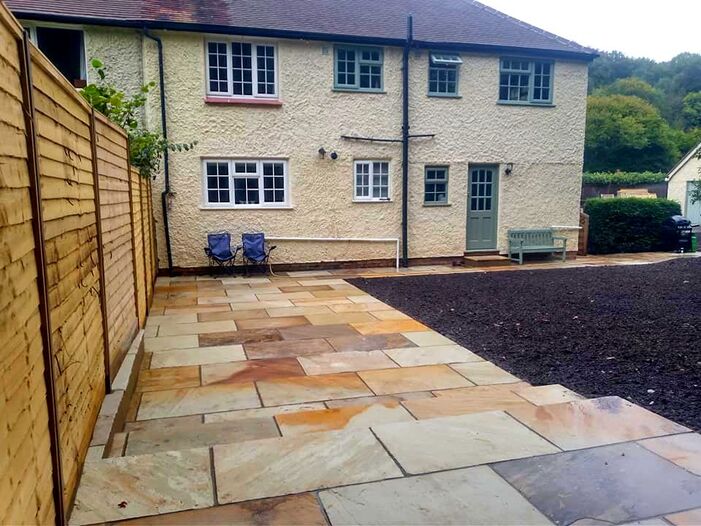
Tarmac
Tarmac may not be desired for its environmental and aesthetic qualities but it is nonetheless a very functional surface. It is no accident it is one of the most dominant methods of surfacing across the globe. Tarmac offers a robust and durable surface which can mould and flex to absorb heavy loads or fluctuations in ground movement. Not all hard landscapers will lay tarmac themselves however many hardscaping projects will require some tarmac surfaces. Concrete aggregates
Like tarmac, concrete is not always thought of as a desirable surfacing material. However like tarmac, concrete has many characteristics other materials do not. Firstly, concrete has a very high compressive strength and very good at creating large slabs of ridged surfacing. This is extremely advantageous if you are surfacing over landscape voids, low spots or boggy ground. On an aesthetic level concrete can be mixed with various aggregates even recycled materials. It can then be sand blasted or polished to leave an exposed aggregate surface which is extremely effective. 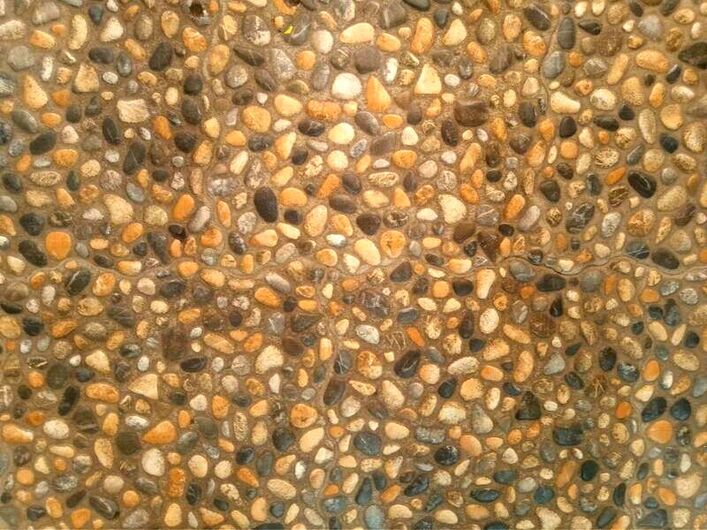
Loose gravels
Loose gravel aggregates are one of the most cost effective and ecological landscaping surfaces available. Spreading gravel requires much less skilled labour than other types of surfacing and is fast to lay. This makes it easy and affordable to surface large expansive areas quickly. Loose gravels allow rain water to permeate into the underlying soil reducing storm water runoff. This reduces pollutants running into drainage networks and natural watercourses. Loose gravels come in a wide variety of materials and are extremely versatile and decorative. 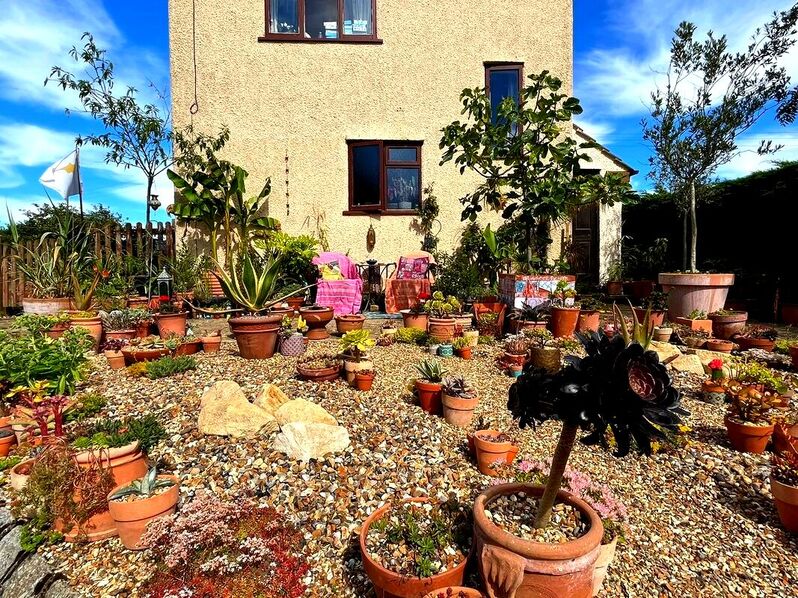
Free binding gravel
Free binding gravel is a loose gravel surface which particles bind together tightly when compacted. This gravel is made up of a combination of crushed rock sands and clays which set hard when laid. These gravels come in a wide variety of materials and colours making them easy to fit into any design. Free binding gravel has a smooth but textured appearance with an earthy aesthetic. This has made it very popular with nature gardens and sustainable landscaping projects. 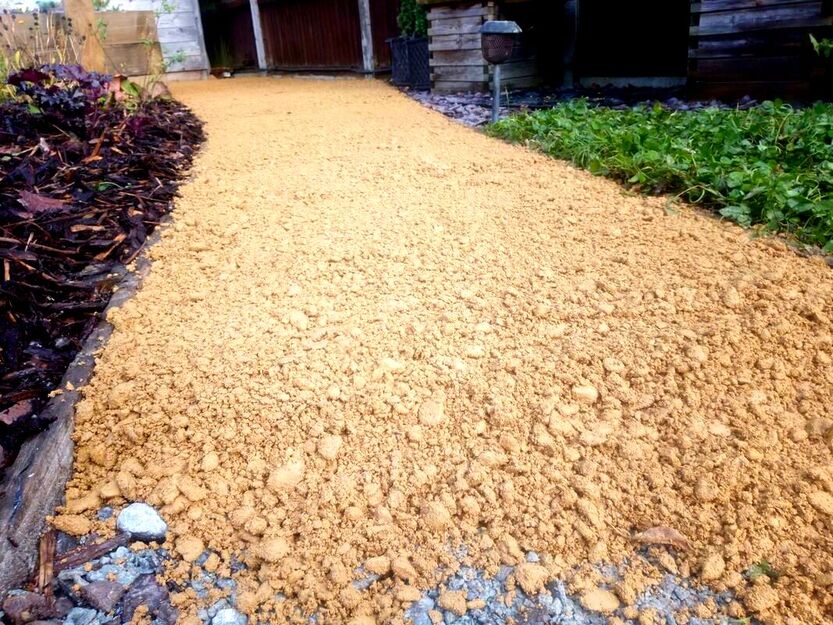
9. Timber work
Timber is one of the most versatile and organic building materials used within landscape construction. It is strong, easy to work and flexible providing vast potential for a multitude of hardscaping installations. The most common hardscaping installations created from timber are decks, retaining edging, raised beds, retaining walls, pergolas, shelters, and outbuildings. 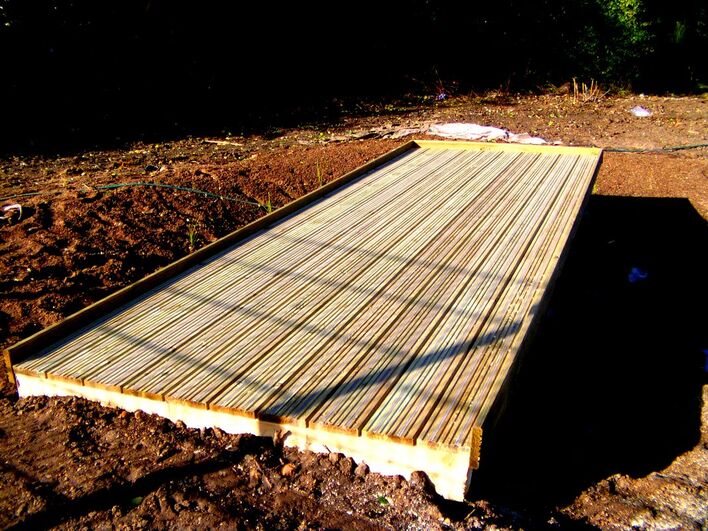
Decks
Decks come in a wide variety of timbers, sizes and colours and offer stylish seating areas and walkways. One of the most convenient aspects installing decks is they require much less excavation than other surfaces. Decks can also be raised up over obstacles’ or boggy ground. The ability to raise decks up also provides the opportunity to incorporate storage space underneath. 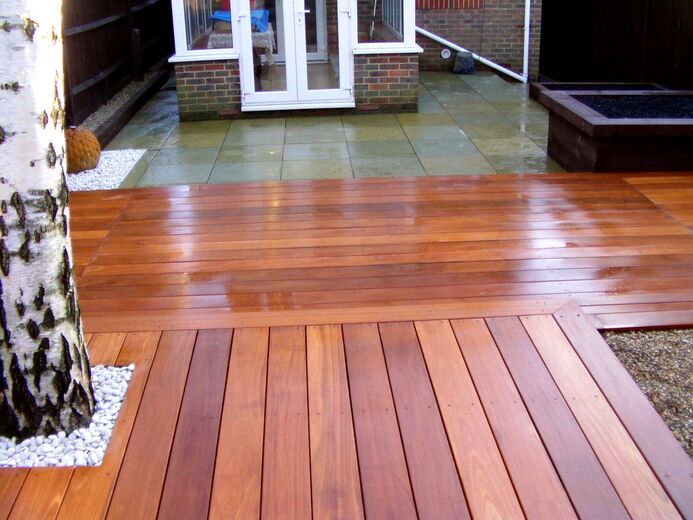
Raised planters
A very common use for timber within hardscaping is the construction of raised beds. These can either be built as holding vessels for waterproof planters or physically retain the soil. Raised timber planters which physically retain soil require a much thicker grade of timber. This is why timber sleepers are most commonly implemented in this way. 
Retaining edging
Timber can also form very effective timber edging within hardscaping. The most typical application takes advantage of timbers flexible qualities. Timber gravel boards are perfect for forming organic shapes and curves when used as edging. These can also be used to edge paths which retain gravel and other types of surfacing. Treated timber gravel boards typically come in 150x 22mm x 1.8 metre lengths. Pergolas
Pergolas come in a variety of various shapes and sizes and constructed for climbing plants to ramble over. Climbers can provide ample amounts of shade, colour and scent during the summer months depending what is planted. Deciduous climbers can let in sunlight during the winter and radiant colour in the autumn. Pergolas are also ideal for growing fruiting vines such as Kiwi, squash and Grapes. 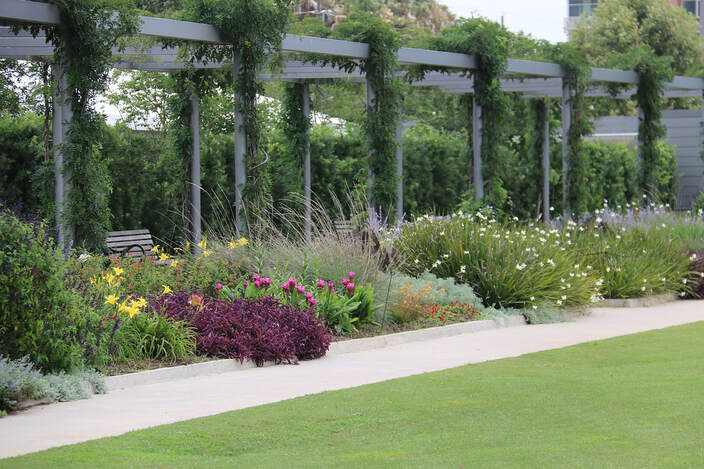
Shelters
Shelters come in a wide variety of structures and are primarily constructed to keep off rain. Very often pergolas are built with transparent polycarbonate sheets to double up as rain shelters. Timber shelters are often built to house bicycles and for seasoning wood fuel. Shelters also make great open ended sheds bars and outdoor kitchens. 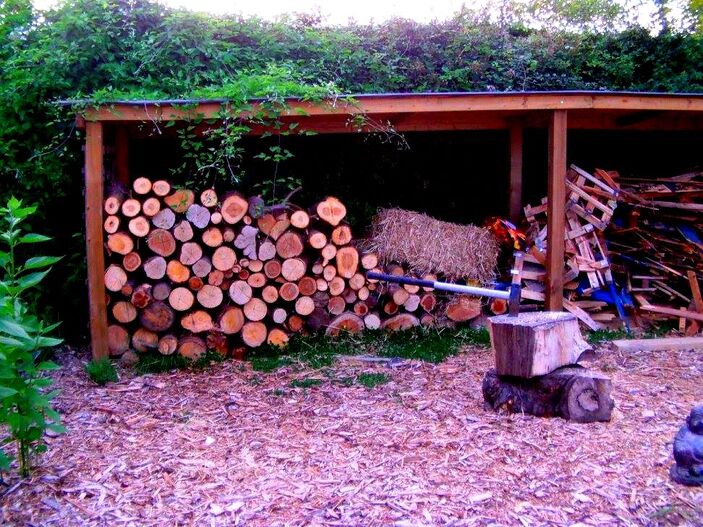
Outbuildings
Timber outbuildings typically come in the form of pre-made sheds which can be put together on site. However, in hardscaping, it is also common to build custom sheds and outbuildings where necessary. This can be implemented on awkward sites or outbuildings which need to adhere to a specific style. 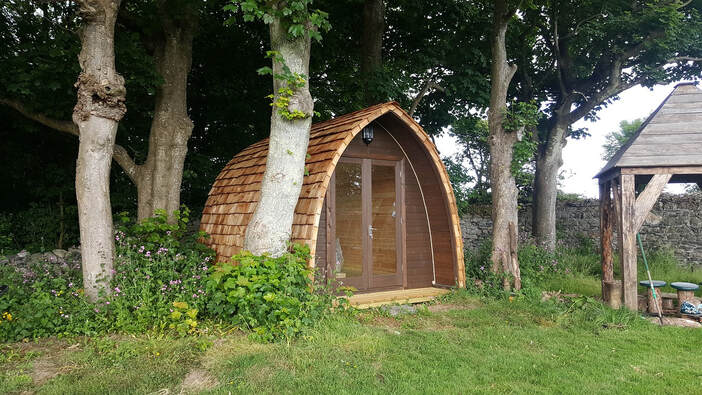
10. Raised Planters
Installing raised beds is a typical activity with hardscaping projects. Raised beds not only allow for adding good quality soil they also reduce bending and improve drainage. Raised beds can also help to add enclosure and seating to patios and other seating areas. Combined with evergreen planting the can also be used for shelter and screening. Such planters are a staple hardscaping installation for vegetable and kitchen garden projects. Raised beds can be built to any size, depth or shape most typically built using sleepers, concrete or brick. For extra stylisation timber sleepers can be painted and concrete block can be clad, tiled or rendered. 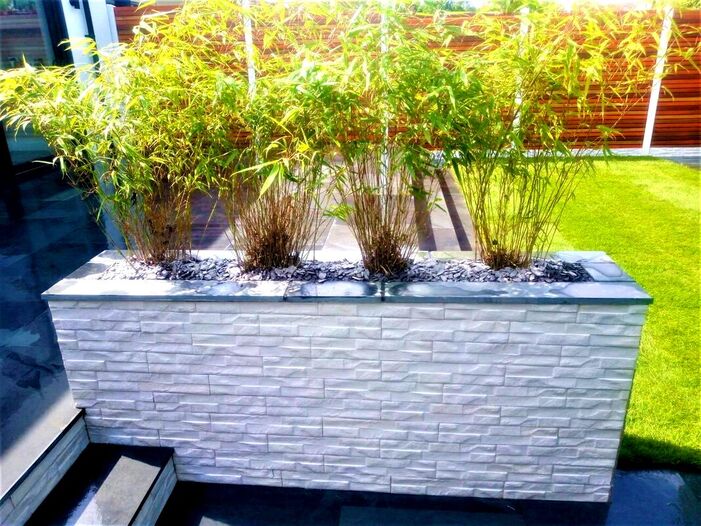
11. Cladding
Very often, old walls or even new masonry structures which need to be covered with a different facing material. This is known as cladding and typically comes under three main forms; External cladding, tiling and rendering. Below I have summarised each of these common hardscape coverings. External cladding
External cladding comes in a wide variety of products and styles. Some are fixed to existing walls via metal fixings and others are stuck to masonry using adhesive. The image below displays a type of stack cladding we used to cover patio steps built with concrete blocks 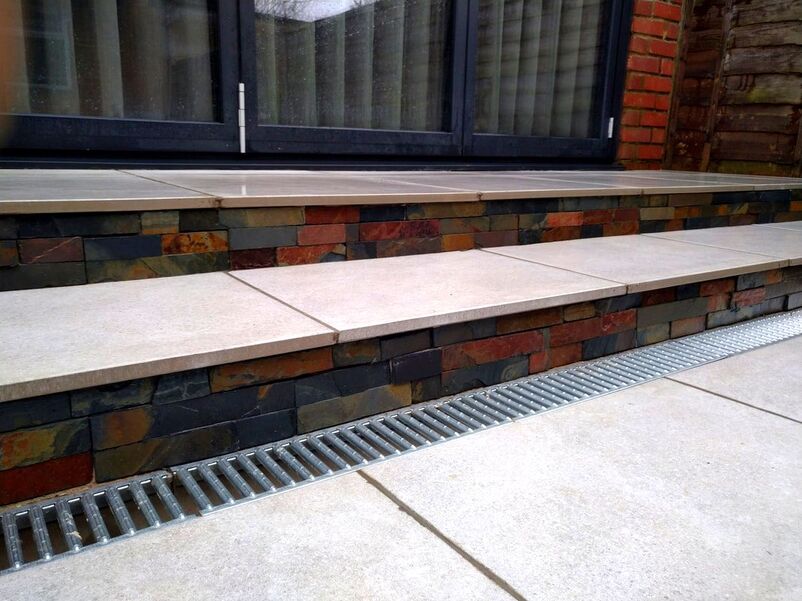
Tiling
External tiling is a great way to cover over existing vertical walls and structures. Tiles come in a broad variety of materials, sizes and colours. In Hardscaping natural stone tiles such as slate, granite and sandstone look most effective. These can be applied to masonry with a high strength external grade adhesive. Rendering
Rendering is a fast and cost effective way to cover over large areas of external masonry. This usually consists of a 1:5 cement to plastering sand mortar mix applied in two coats to walls. Bonding, weather-seal and workability admixtures are usually added to the mix. The advantage with rendering is it can then be painted any colour. 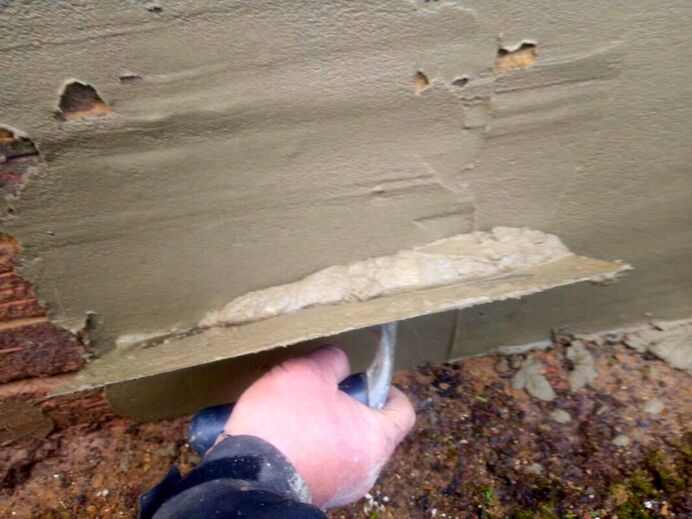
12. Drainage
Drainage is not always thought of as hardscaping, however, it is very commonly undertaken by landscape professionals. Boggy ad saturated sites will need to have drainage installed before hard landscaping takes place. This is because wet ground is much more volatile and vulnerable to ground movement. This makes basing hardscaping and landscape structures challenging. Landscape drainage typically comes in the form of working surface levels, drainage channels and soakaway systems. This requires moving large amounts of soils and free drainage aggregates For more information onlandscape drainage visit our article here. 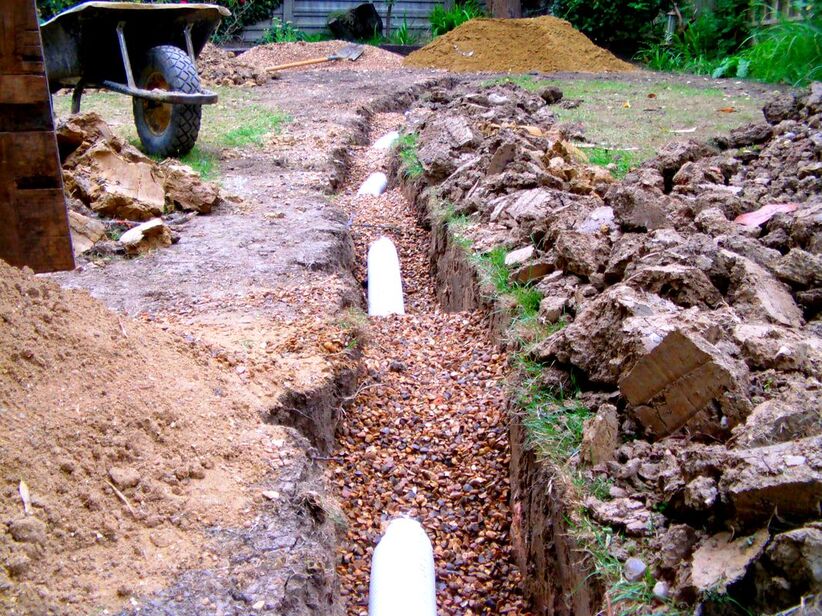
13. Water featuresWater features can come in an extremely diverse range of type’s and styles within hardscaping projects. These can range from small lakes to small garden water fountains. Water features can have traditional, historical, contemporary or ecological significance to a landscape. Water has been used within landscaping for centuries to create focal points, movement, drama, tranquillity and wildlife value. 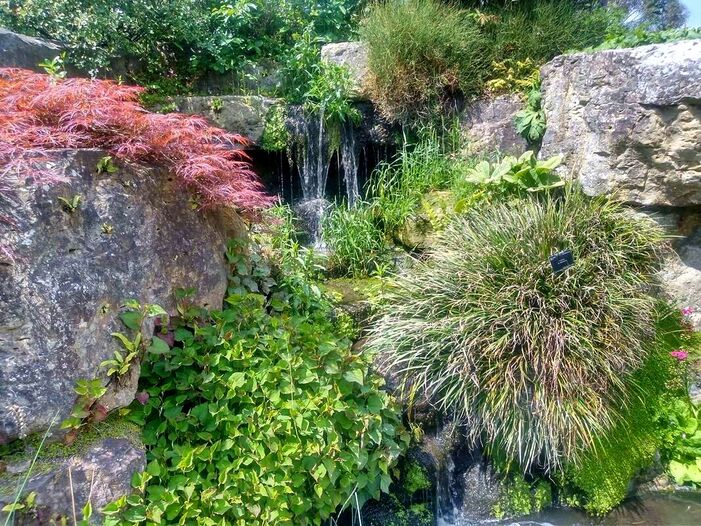
Some of the most common water features are garden ponds. These can be contemporary formal or more naturalistic to attract wildlife.
Smaller more compact water feature type fountains are also used to create landscape focal points. These typically include electric pumps lighting and some sort of circulating water display.
Thank you for reading our article on ‘Hardscaping the full guide to building landscapes'. If you would like more information on any of the topics discovered why not email us.
Below we have linked to some other hardscaping and landscaping article you may find informative. Thank you! Hardscaping servicesIf you require Hardscaping services and are located in the Southeast or East midlands of the UK, why not contact us. We serve West London, Buckinghamshire, Hertfordshire and Oxfordshire. We have also now opened our East Anglia branch covering Norfolk and Suffolk. We also provide free hardscaping advice over email, please contact us via the button below.
Useful inks about Hardscaping
'As an Amazon Associate I earn from qualifying purchases'

This article contains affiliate links
Gravel is one of the most versatile of surfaces for landscaping outdoor spaces. Not only does it come in a range of sizes it also comes in various materials and colour tones.
Gravel is fast and affordable to lay and allows water to permeate through its surface easily. However one of the biggest draw backs to using gravel is it is susceptible to weed establishment. Weeds can find it relatively easy to penetrate gravels and loose aggregates with their robust root systems. Furthermore, over time, dust, dirt and debris can build up within the gaps of gravel surfaces. This provides enough nutrients for persistent weeds such as grasses and dandelions to flourish. The question is; how do you get rid of weeds growing in gravel? There are plenty of effective methods to get rid of weeds from gravel patios and driveways. In this article, I will list and explain all the best ways to get rid of weeds from gravel surfaces. Why are weeds growing in my gravel?There are five main reasons why weeds are growing in your gravel: 1. Lack of sufficient baseVery often people decide to lay gravel straight onto soil with no sub-base. This leads to gravel eventually sinking into the surrounding soil and becoming compacted and silted. With a lack or displacement and plenty of moisture weeds find it easy to become established. Even with a robust weed membrane separating soil from gravel weeds can still become established. Weeds can spread their roots along the moist surface of the membrane searching for moisture and nutrients. 
2. Inadequate depth of gravel
A very rarely mentioned element of weed establishment within gravel is displacement. If gravel has been laid too shallow the gravel particles will not move and grind together under pressure. This displacement and grinding action helps to crush young weeds before they develop. Consequently, you should try to spread a reasonable depth of aggregate to your gravel surface. I recommend a depth or around 40mm to prevent weed establishment. 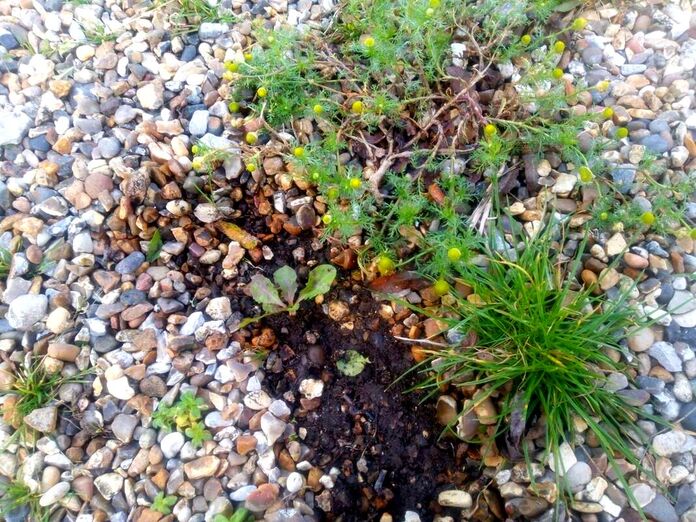
3. Leaching of nutrients into gravel
If you have weeds establishing in a gravel surface or driveway you may notice a pattern. Weeds in gravel generally have greater densities around the edges near lawns and flower borders. This is because nutrients and organic matter from soft landscaping often leach into neighbouring gravel. Stay fragments of dirt, cut grass, dead plants and compost can find their way onto nearby gravel. This eventually sinks between the aggregate creating nutrient rich slurry. Consequently in times of heavy rain nutrients from lawns and borders dilute and leach onto gravel surfaces. The result is a fertile, warm and moist environment for weeds to thrive. 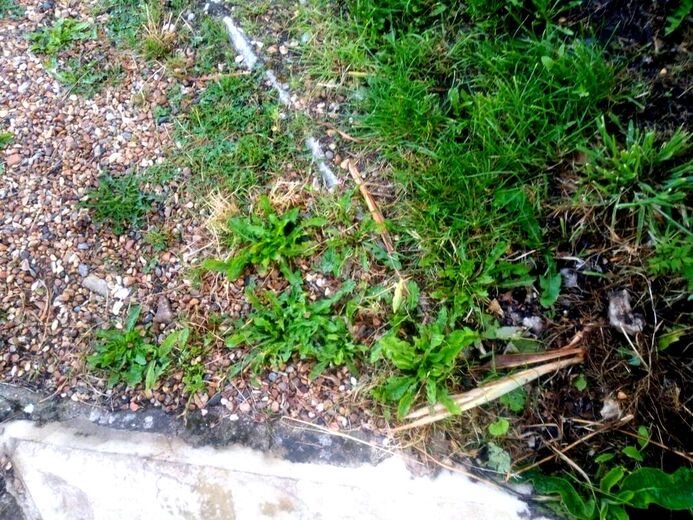
4. No weed proof membraneA common issue with gravel surfaces with many weeds is they have no weed proof membrane. Robust weed proof membranes will prevent underlying soil mixing with gravel and allowing weeds roots to penetrate the underling soil. However, many weed membranes I have encountered are far too weak and flimsy to do the job effectively. An effective weed membrane will not be able to be ripped or torn by hand and will allow water to permeate. The best weed proof membrane is Terram or Spudulica GeoTextile Membrane Fleece. Bear in mind for the best weed protection do not lay the membrane on bare soil. Try to base all gravel areas with at least a 50mm layer of compactable mot type 1 sub-base. 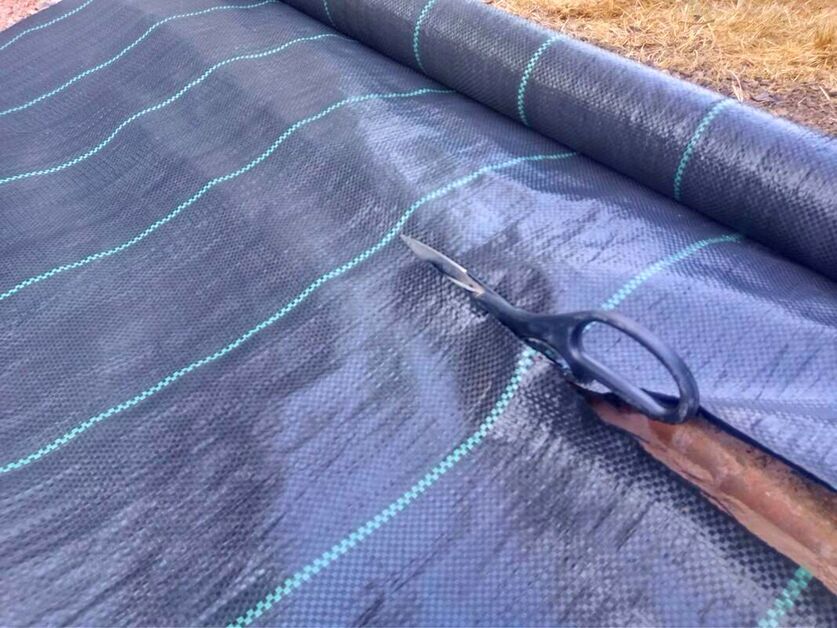
5. Build up of dirt and debrisIt is amazing just how much dust and debris can build up over time especially in garden environments. Small particles of dust, ash, sand and soil can be present in both the air and in rain. Over time this builds up within gravel surfaces providing the perfect substrate for weeds to take hold. Eventually there is so much build up that gravel fails to displace and prevent weeds from establishing. 
How to stop weeds growing through membrane?
You may wonder why weeds are growing through your membrane. However it is a common misconception that weeds are actually growing through a membrane. Most of the time, it is actually weeds establishing on top of the membrane. They can do this because there is a layer of dirt and nutrients on top of the membranes surface. 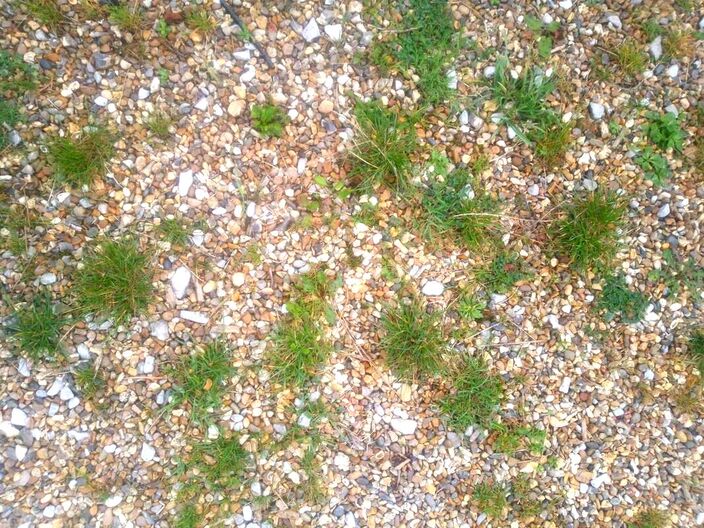
The best way to combat this is to add more gravel and clean the underlying membrane.
Only very strong, woody, perennials such as brambles and bamboo can grow up through membranes. This is however extremely unlikely and barely possible if you have a robustly compacted sub-base under the membrane. When installing your gravel make sure you remove all visible woody roots and rhizomes. Does vinegar kill weeds in gravel?
Vinegar is very acidic and will break down the cell walls of most weeds. However multiple treatments will be needed to actually kill deep rooted weeds. This is particularly the case with gravel, where deep rooted weeds draw up water and nutrients from deep taproots. You may find that vinegar kills the leaves only for the weeds to eventually grow back. 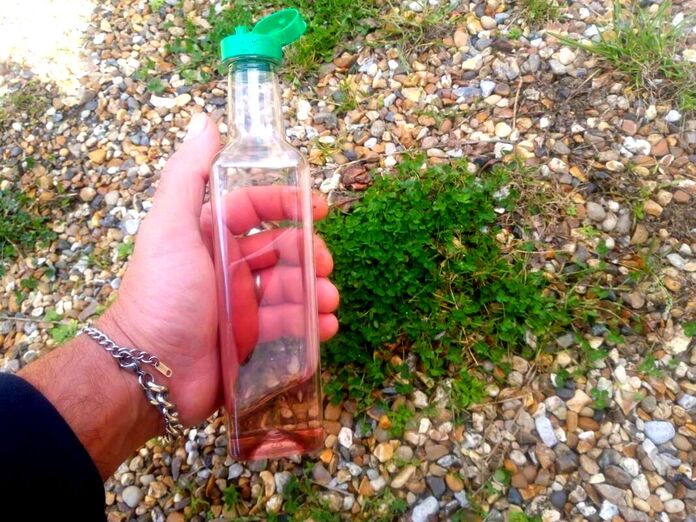
To kill deep rooted weeds in gravel you must wait for hot and dry summer weather. You must then apply a continuous drip of vinegar to each weed so it penetrates to the taproot.
This process must be repeated at least three times to eventually kill stubborn deep rooted weeds in gravel. Very often you will need to purchase a large, 5 Litre bottle of white vinegar for this method to be effective. 11 ways to stop weeds growing in gravelWhen it comes to removing weeds in gravel there are many substances and methods which can work. Some of these are more effective than others however a multipronged approach is probably best. Consequently I have listed and summarised the 11 best ways to remove and stop weeds growing in gravel. 1. Hand weedBy far the most effective way to remove weeds from gravel is by hand using a long bladed trowel. This way you can normally leaver up and remove the whole taproot from the base. Only by using the dexterity of the human hand and brain can you guarantee to remove the whole weed. This is however a rather time and labour intensive method. If there is a lot of dirt within your gravel weeds are sure to grow back. This is especially so if you have failed membrane, no sub-base or a shallow layer of gravel. If so you may wish to remove the gavel surface and install it with a correct base and membrane. I show how to do this step by step with pictures at the very end of the article. 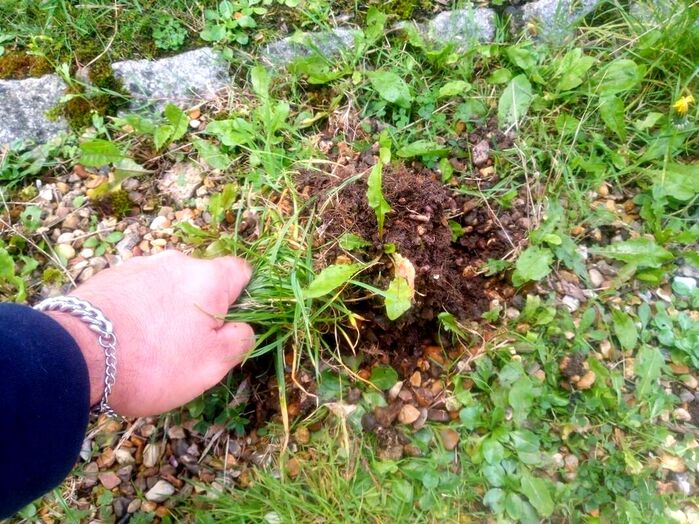
2. Use a hoeA hoe is a gardening tool designed to cut weeds roots off deep under the surface and dislodge them. There are variations of weeding hoes but the most common are theDutch and push and pull hoes. These have long handles and blades which scour deeply under gravel dislodging weeds by the roots. This can be quite hard work but can clear large areas relatively quickly. 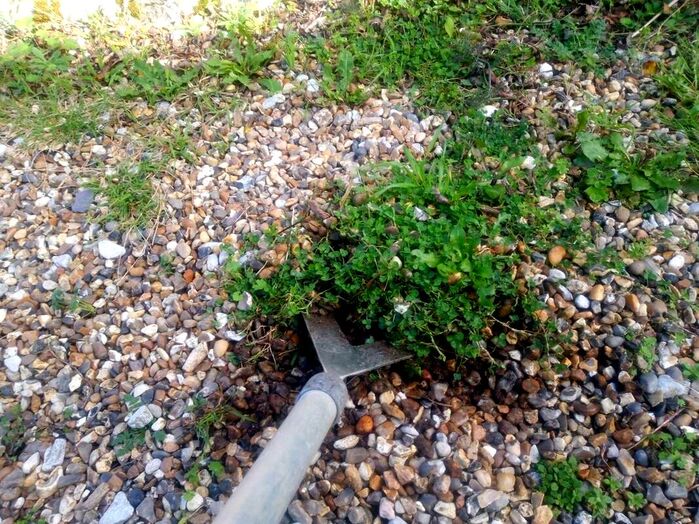
3. Weed killer
There are many types and brands of household weed killers on the market. Due to their chemical mixtures they are an almost certain way to get rid of weeds within gravel. However, the correct application will need to be adhered to in order to be successful. I have found some deep rooted perennial weeds will need multiple applications. Bear in mind that weed killers are toxic to the environment. It is best not to use them if you can especially if your gravel surface slopes onto a pavement or road. Such substances can pollute drainage networks and natural watercourses. 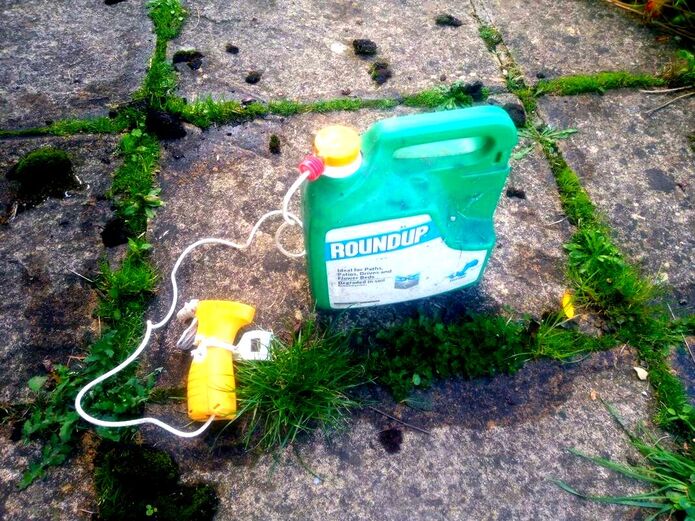
4. Homemade vinegar solution
Although vinegar can kill weeds using the correct application it is more effective mixed with salt. Mix your vinegar with a generous amount of salt and washing up liquid. Make sure you stir the solution well so the salt becomes fully diluted. Then add the homemade weed killer to a spray bottle and spray your weeds. This is best done on a warm and dry day when there is no risk of rain in the forecast. However this method will require multiple applications to be successful and may not work on established perennial weeds. 5. Rock salt
Rock salt can be a very effective method of removing weeds from gravel. The salt will slowly dehydrate moisture from the weeds roots and foliage eventually killing them. As rock salt will slowly dissolve in rain it can act as a slow release weed killer. However like vinegar, multiple applications may need to be applied and may fail to shift deep rooted perennials. 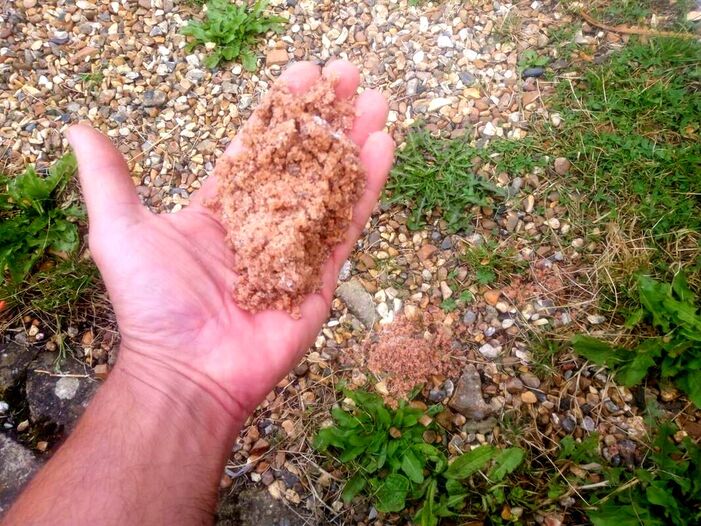
6. Vodka
Vodka and other strong alcohol blends can help to kill weeds in gravel effectively. The alcohol not only dehydrates the weeds it also removes their ability to deal with the suns radiation. This leads to weeds shrivelling up and dying back. However it is important to remember this should be done in hot, dry weather and to weeds in full sunlight. Very much the same as vinegar this will rarely work permanently for established perennial weeds. 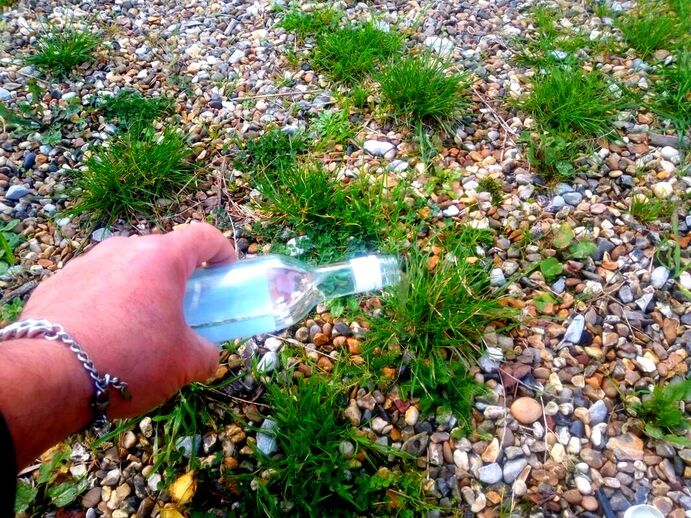
7. Boiling water
Pouring boiling water onto weeds is most effective in gravel as it’s easier for water to percolate to the roots. As gravel is free draining the boiling water can strike to the very core of the weed. However once again for very established weeds with long taproots it can be ineffective. For small, less established weeds however, a good dosage of boiling water should be enough to kill. 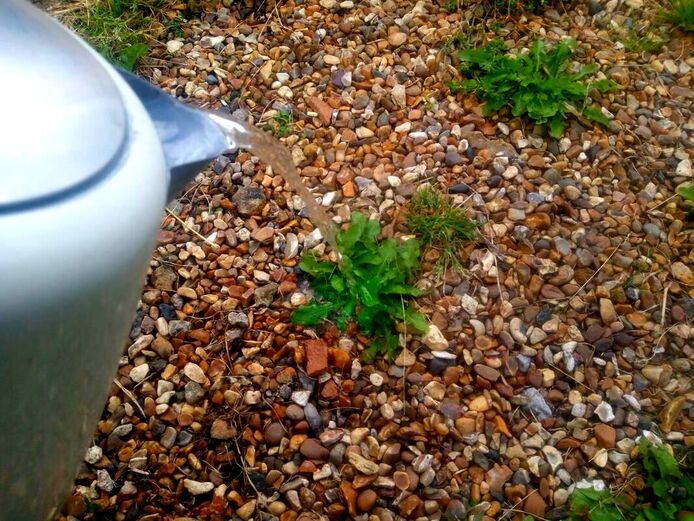
8. Flame weeders
Flame weeders are a type of blow torch specifically designed to kill weeds. These are typically fed with gas canisters to provide an adjustable flame to the plant. The effectiveness of flame weeders do vary depending on the type of weeding you undertake. They are particularly good at killing young weeds that are not yet established. They are not so good at killing established weeds especially in paving joints and concrete cracks. Flame weeders are more effective when the flame can reach just under the plant and around the roots. Weed burners remove weeds from gravel very effectively especially if the gravel is brushed away from the plant. This enables the flames to cook the weed and its surrounding root mass. 9. Thermal weeders
The great thing about thermal weeders is they send a pulse of extreme heat to the weeds core. This burst of heat reaches temperatures of 1200 degrees Fahrenheit. The extreme heat will typically be enough to kill most weeds and their roots. For more persistent weeds with deep roots, multiple, longer duration, treatments may be necessary.  10. Top up more gravel
A very common reason for weeds establishing within gravel is an insufficient depth of aggregate. When gravel is laid too thinly there is not enough depth for the particles to move and displace. This enables weeds to get a foothold with no disturbance from movement and footfall. A greater depth of gravel also makes it troublesome for weeds o get enough moisture and sunlight. Weed seedlings quickly become spindly and weak leading to an early death. Once you have weeded your surface it is beneficial to top up with more gravel aggregate. 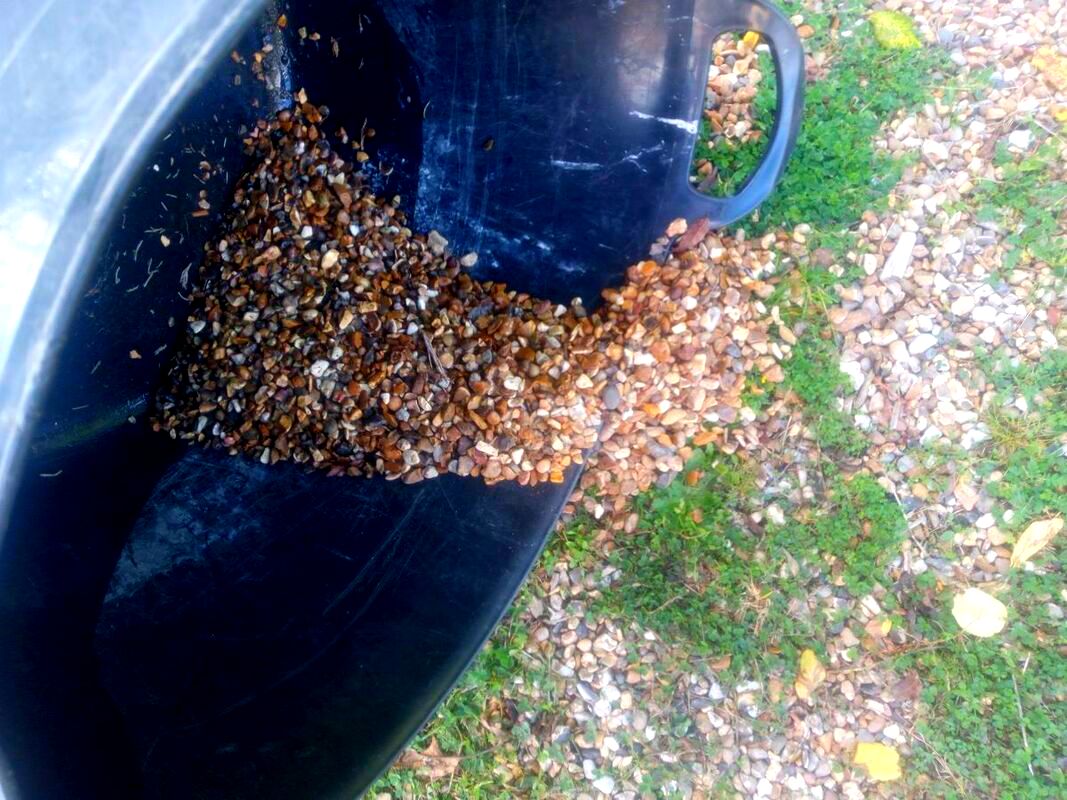
11. Re-base the gravel areaIf your gravel is so infiltrated with muck and weeds it may be time to think about drastic action. This is especially so if the original surface was not based properly to begin with. If membrane and gravel was originally laid straight onto soil it will never be fully weed proof! In such a case rather than fight a losing battle it is best to re-base the gravel area. This involves removing the old surface, excavating down around 100mm and laying a compactable sub-base. Then a new robust membrane can be laid and new gravel spread over the area. We will provide a step by step guide on how to do this below with pictures. 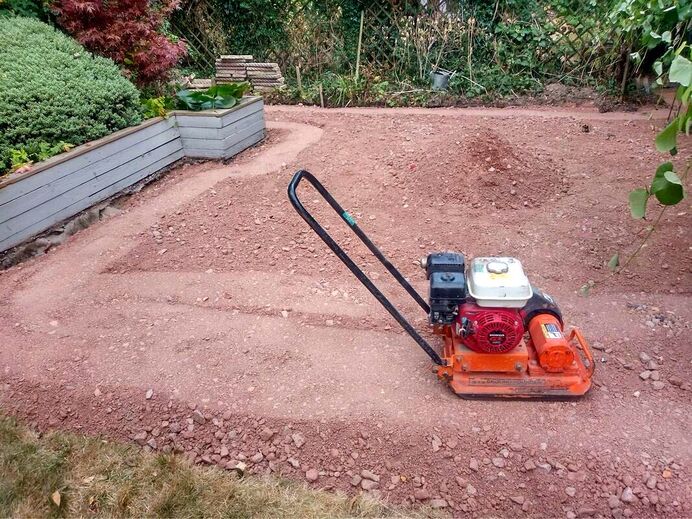
What is the best tool for weeding gravel?
The two best tools for weeding gravel are Dutch or push pull hoes and long bladed trowels.   Best homemade weed killer for gravel? A case study.
I thought it would be a good idea to put some homemade weed killers to the test to get some definitive results! I found a gravel driveway with plenty of established weeds including perennial grasses, dandelions, sorrel and clover. I will be treating the weeds with six of the most popular homemade weed killer methods. These will include; Vodka, white spirit, rocksalt, tablesalt, white vinegar and boiling water. The weeds will be monitored for a month to see if they die back or re-grow. The test was carried out during August with the weather being mainly dry with some showers. Vodka
Personally I was very sceptical that vodka would kill any weeds, I was however mistaken. Weeds treated with vodka slowly curled up and died over the course of a week. After a whole month there was no sign of recovery or re-sprouting.
White spirit
It is not really advised to use white spirit as a homemade weed killer as it is petroleum based. However many sources say it will kill weeds quickly! We used white spirit on weeds in a gravel driveway and it was very effective. The weeds curled up and died within about 24 hours.
Rock salt
Rock salt has been put forward as one of the most effective homemade weed killers for gravel surfaces. We sprinkled a small heap of rock salt on top of driveway weeds to see what happened. We found weeds slowly started to wilt and die within around three days after application. We also found that deep rooted perennial weeds such as dandelions also did not grow back.
Table salt
Although rock salt is often stated the best natural weed killer for gravel it can be difficult to source. Consequently, we decided to also use regular table salt on gravel weeds. We heaped up the fine salt on top of weeds and monitored them to see what happened. Like the rock salt the weeds died and did not re-grow. However as table salt dissolves in water more easily it may not be as effective in wet weather.
White vinegar
White vinegar has been well popularised as being one of the best organic weed killers. However there are mixed reviews online regarding its actual effectiveness. We poured about two table spoons of vinegar on each weed on our gravel drive. We found both dandelions and grasses died after 24 hours and did not grow back within a month.
Boiling water
Boiling water seemed like an effective way to kill weeds on a gravel driveway. The question was; would the boiling water seep deep enough into the gravels surface to kill the roots. We poured about 500ml of boiling water straight from the kettle slowly onto established dandelions in gravel. We were not surprised to see the weeds die pretty much instantly above the surface. However we were surprised that there was still no re-growth within a month after pouring the water. Consequently it seems boiling water is an effective way to kill deep rooted weeds in gravel.
|
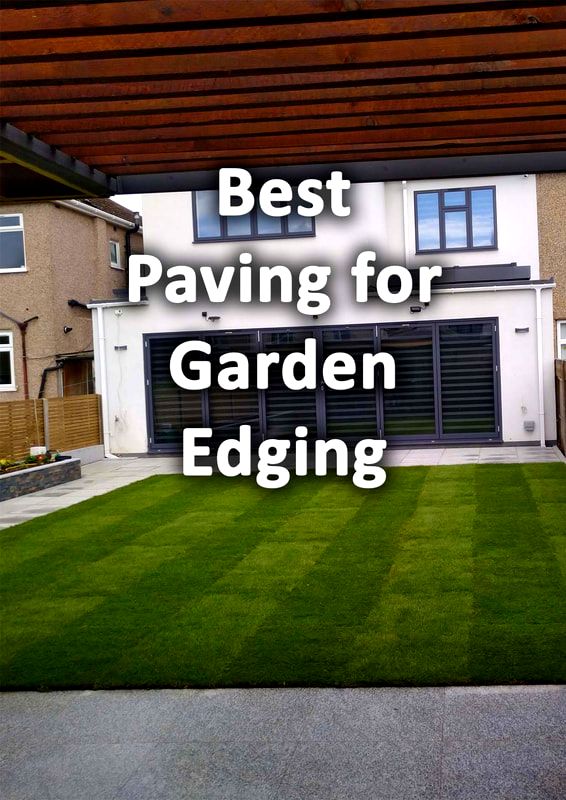
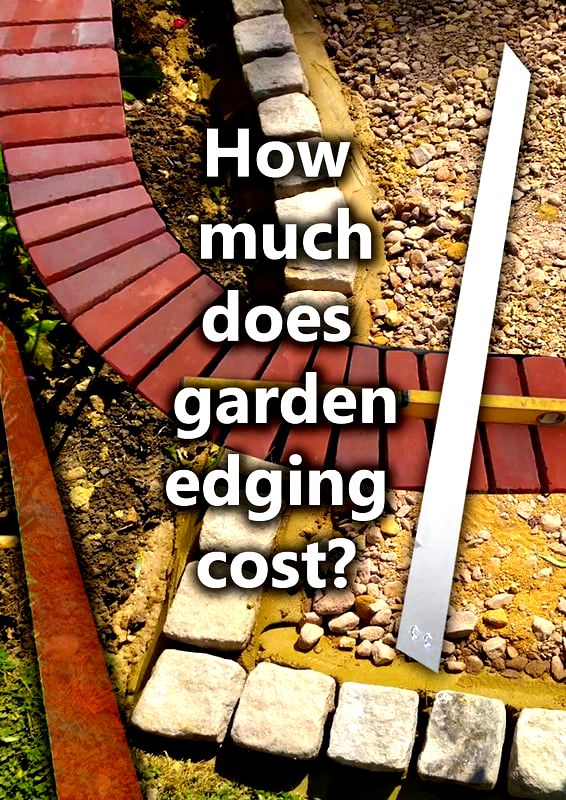
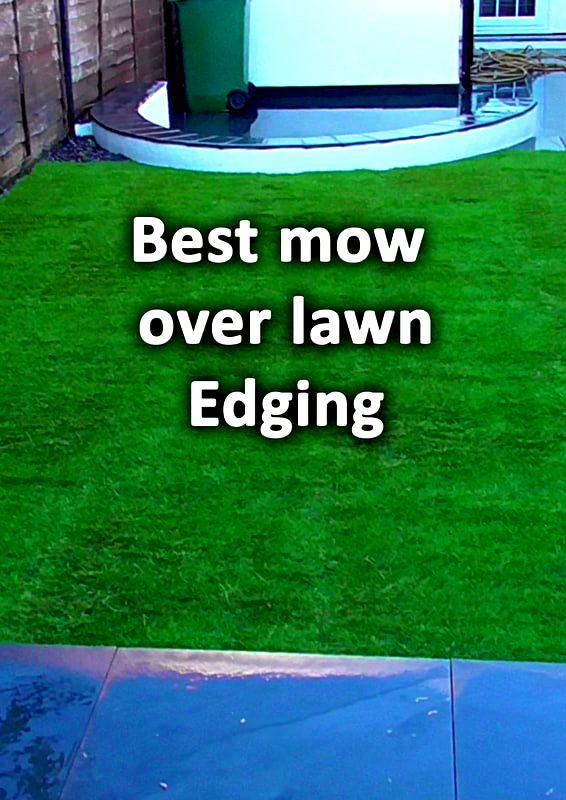
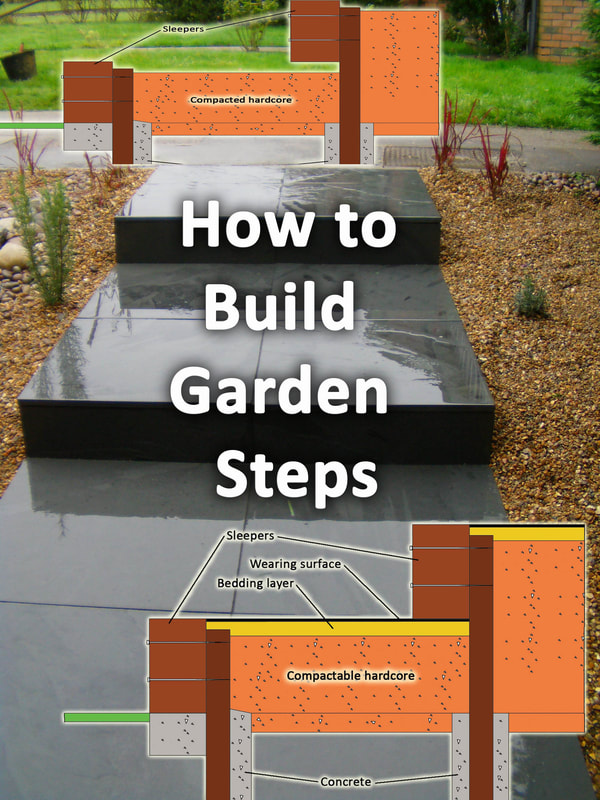

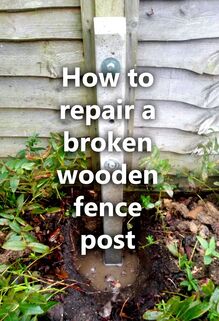
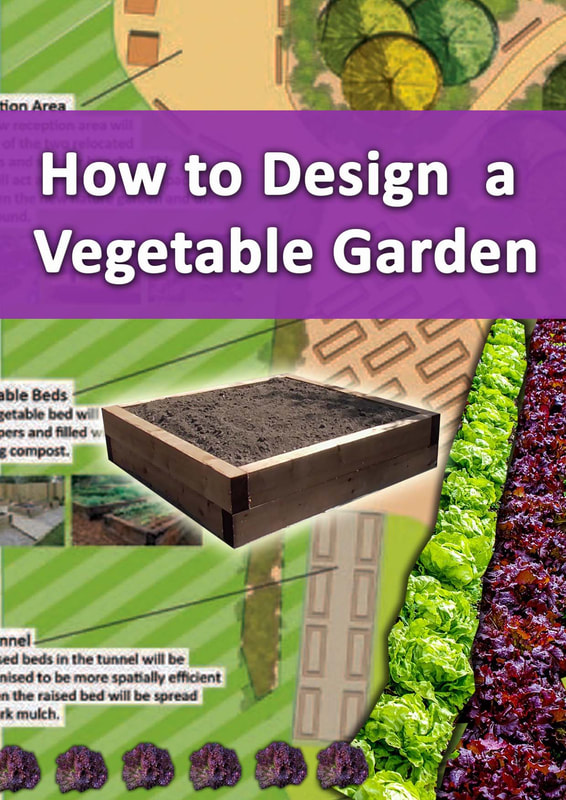


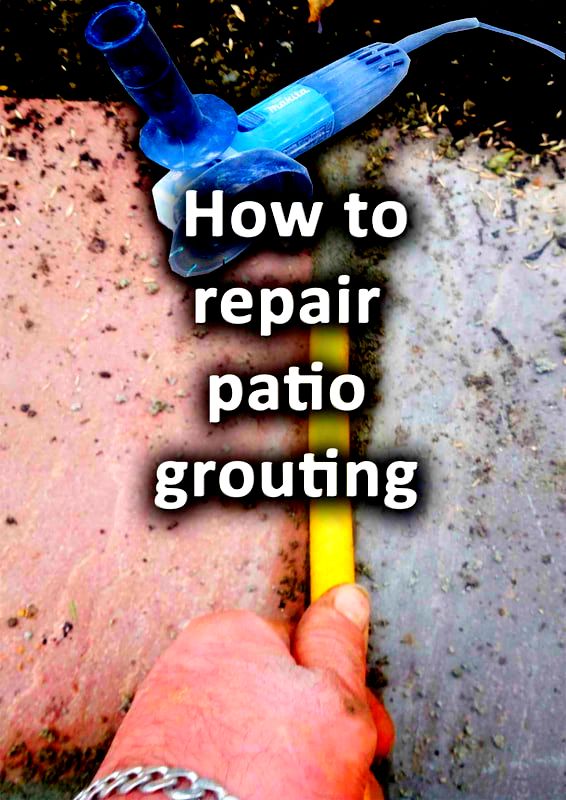
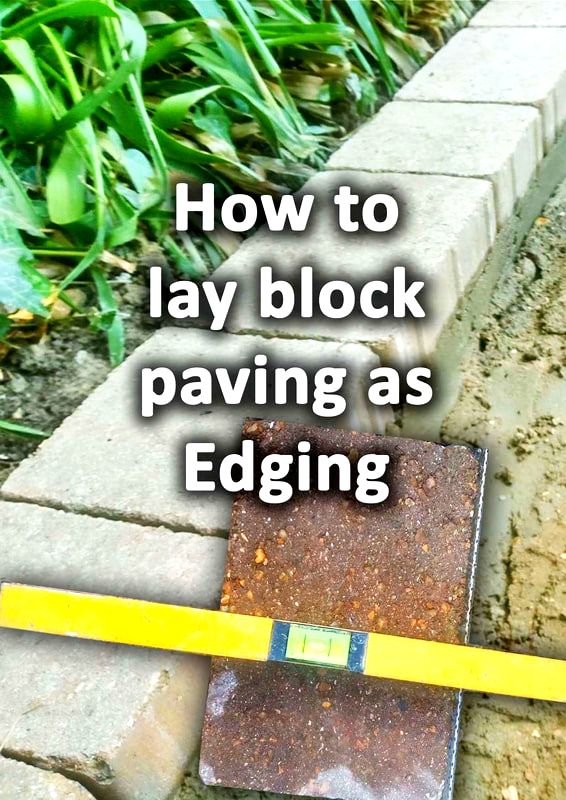

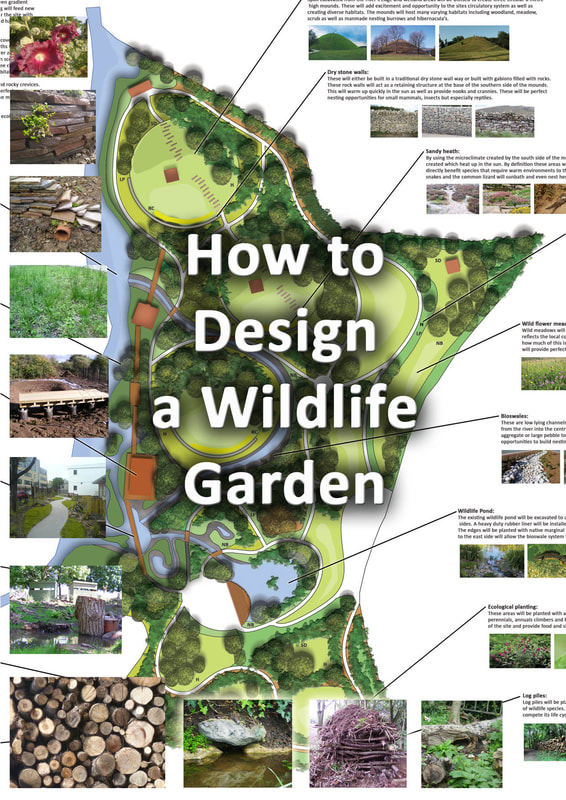
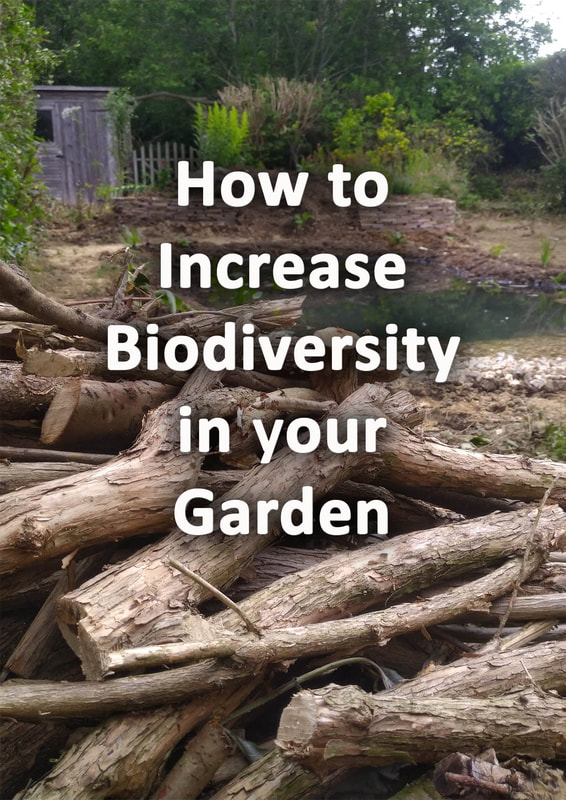

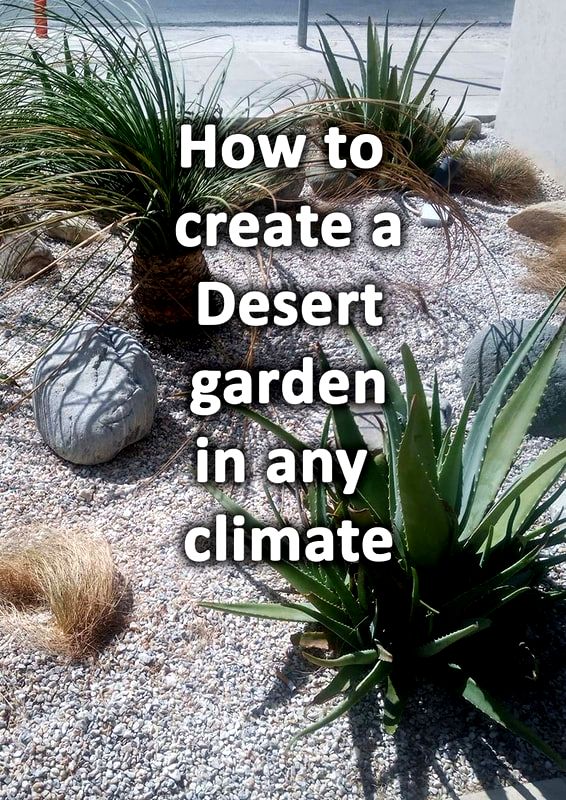
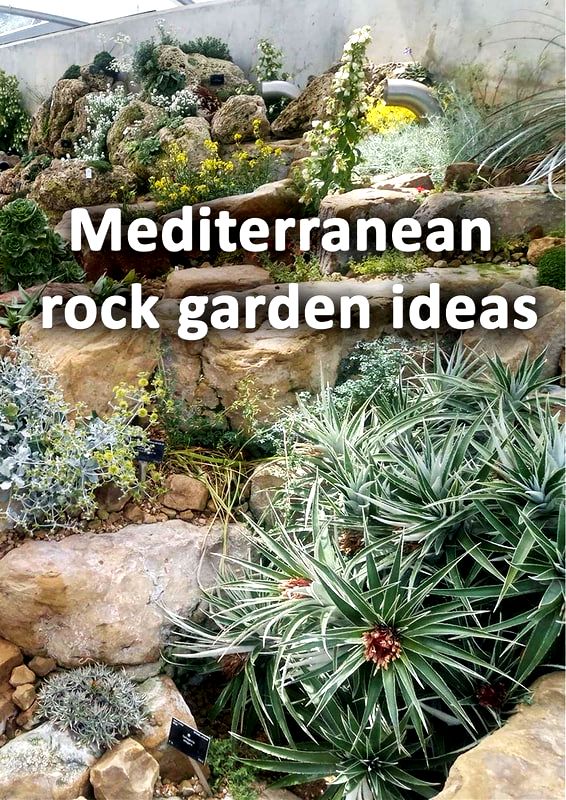


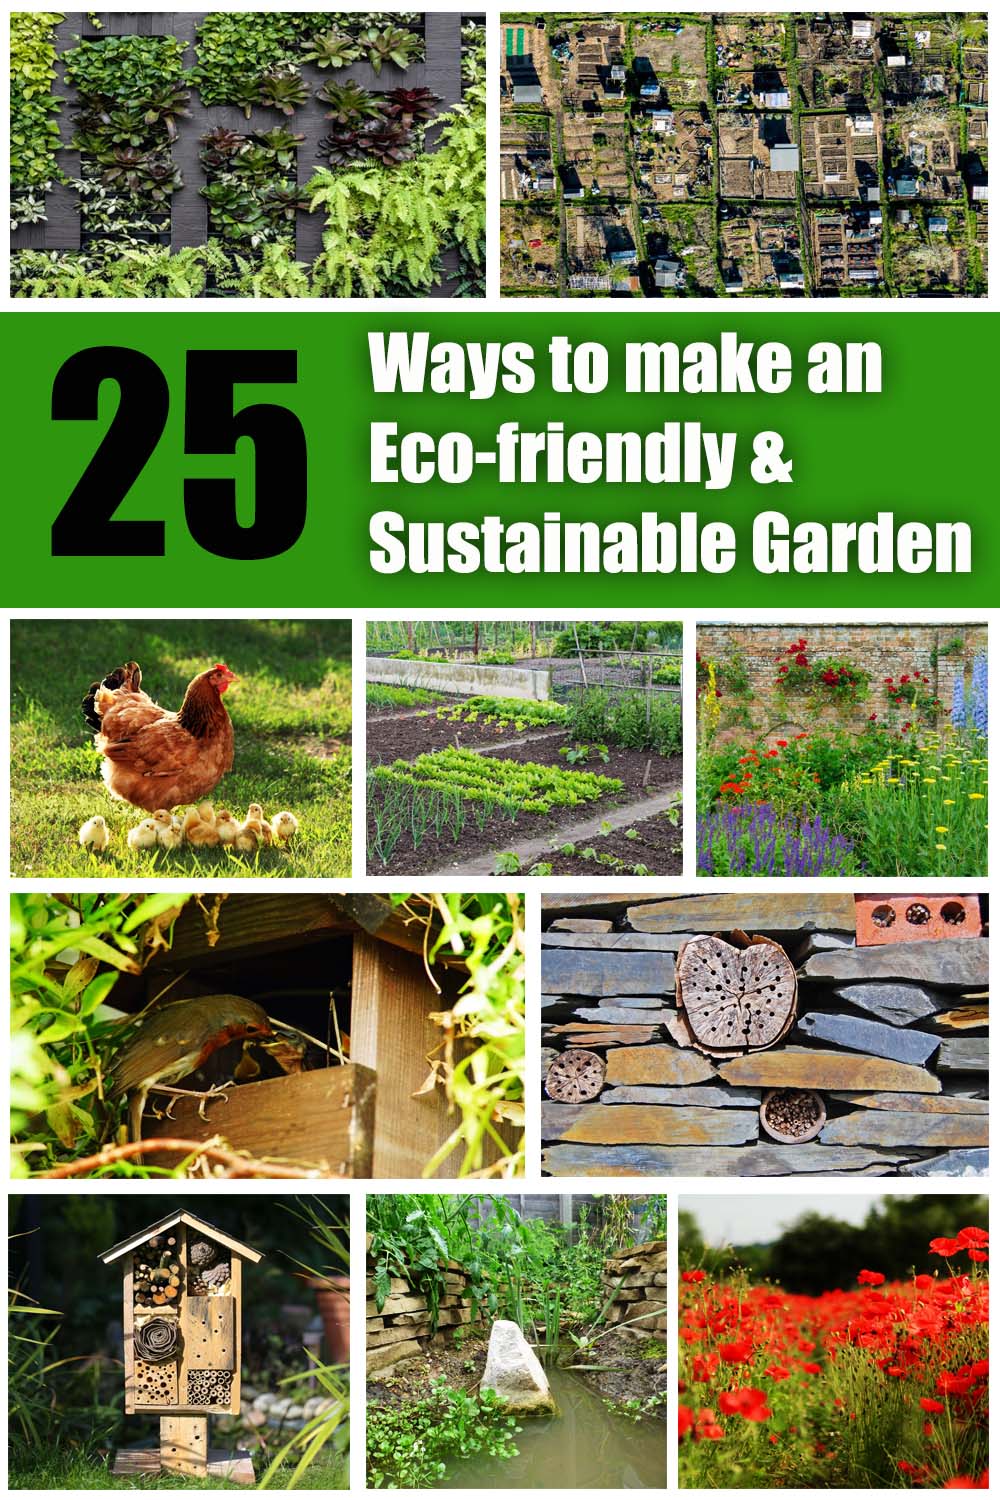

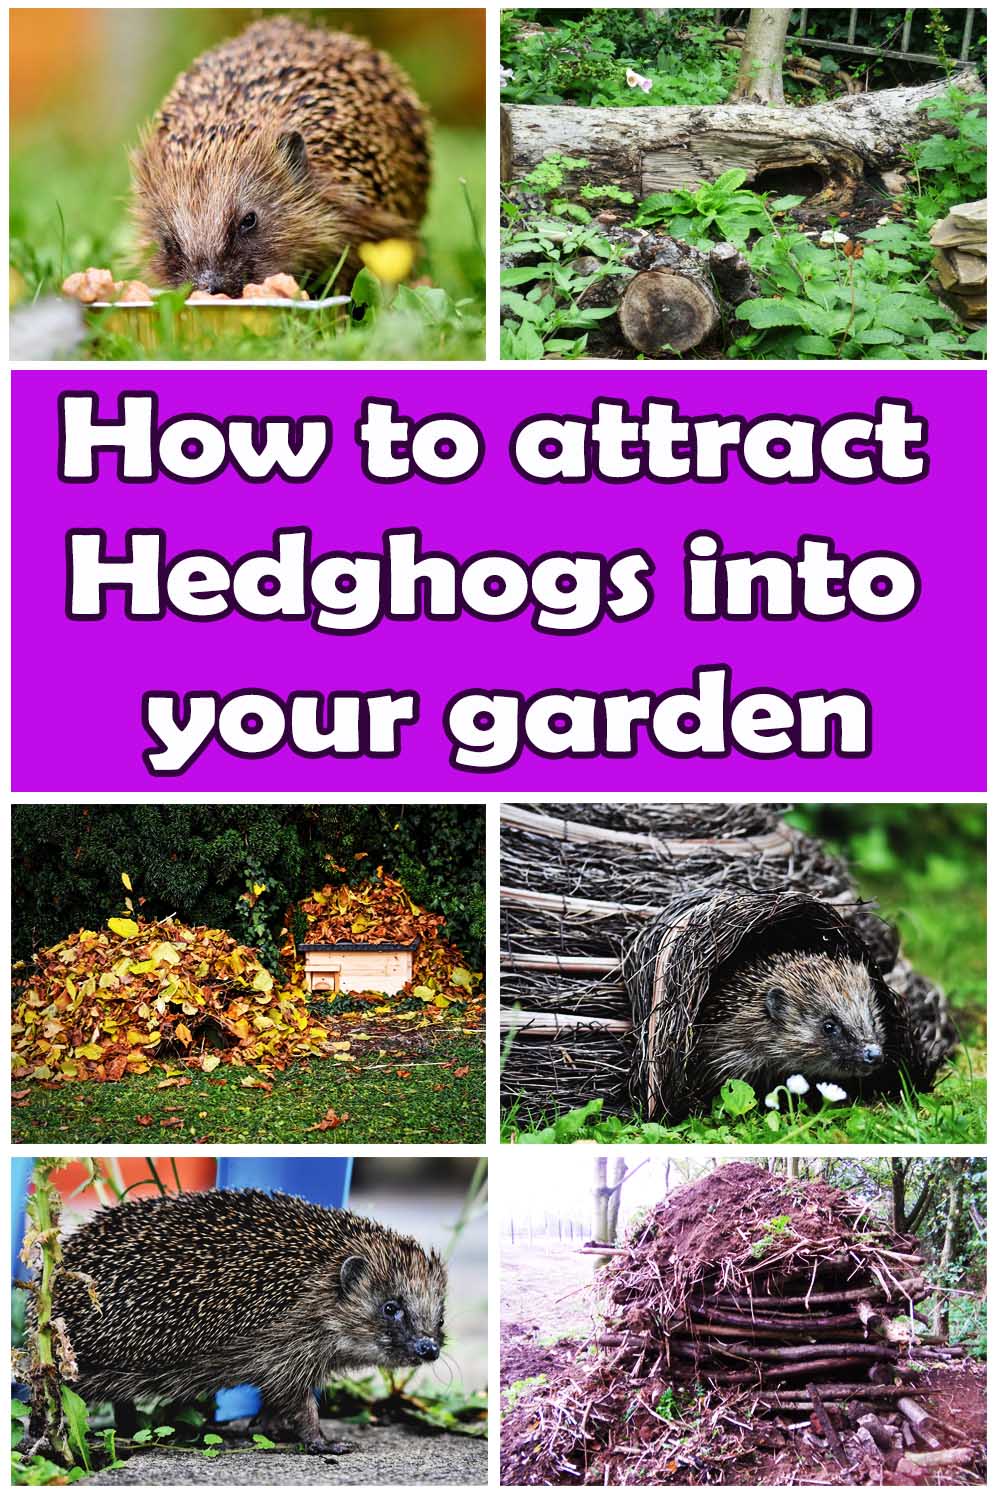
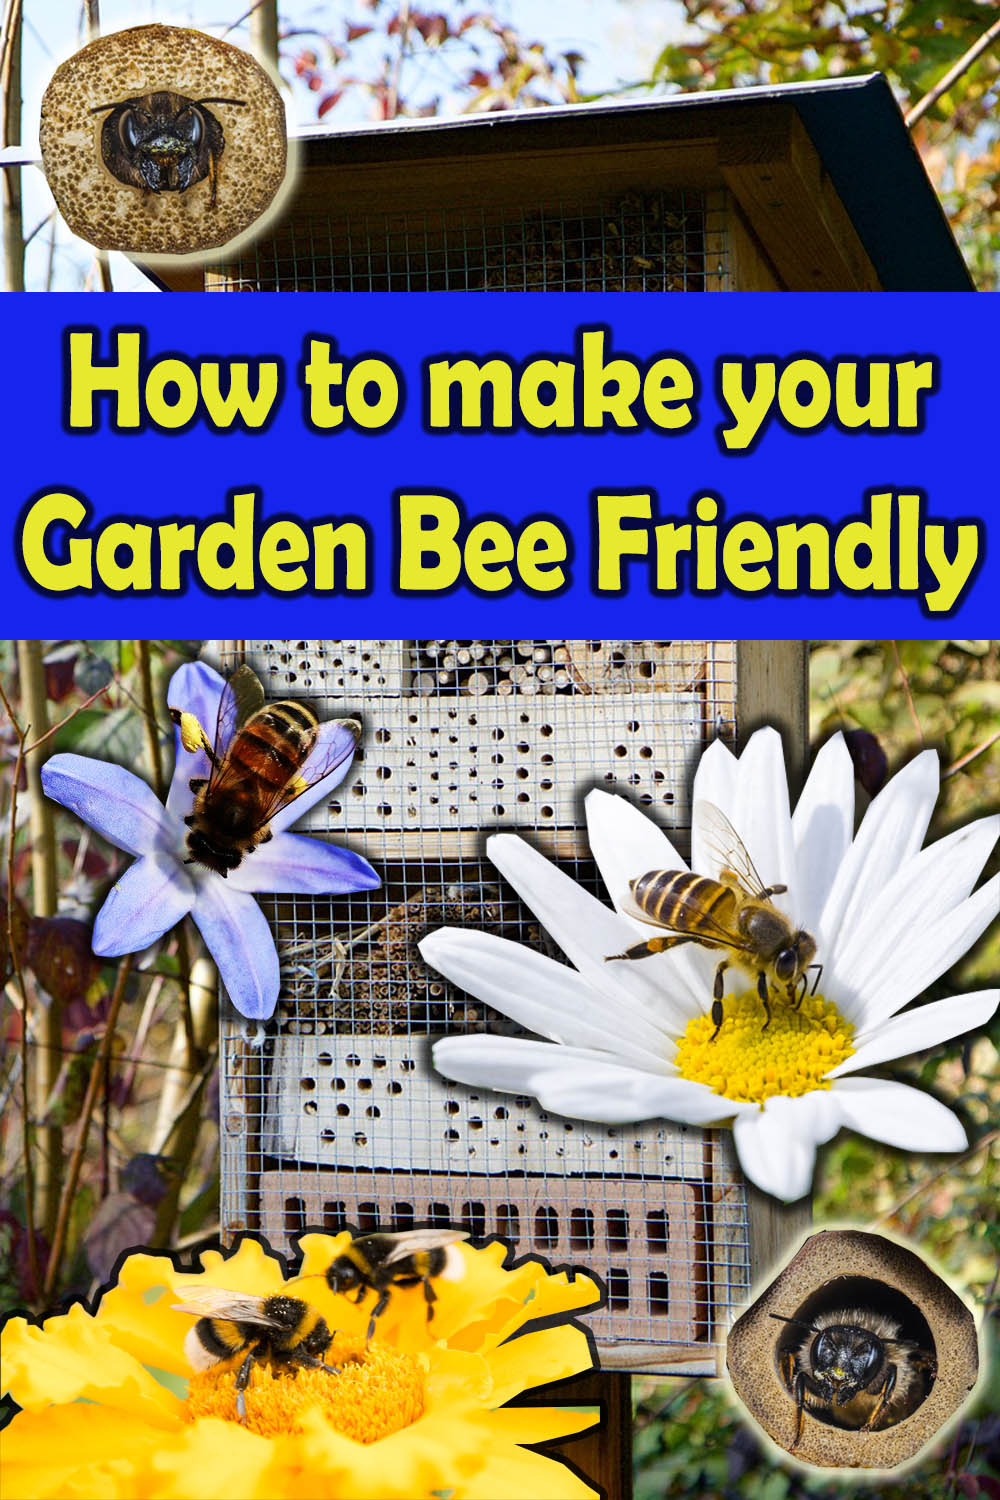
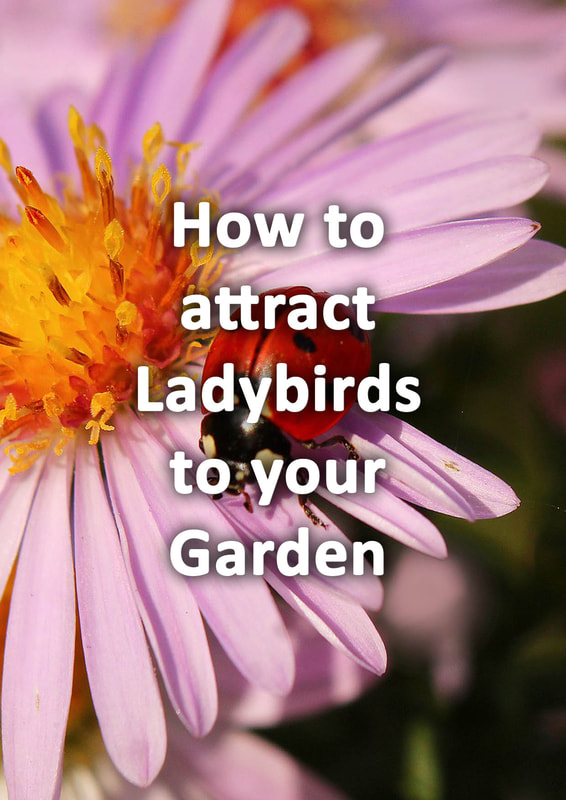
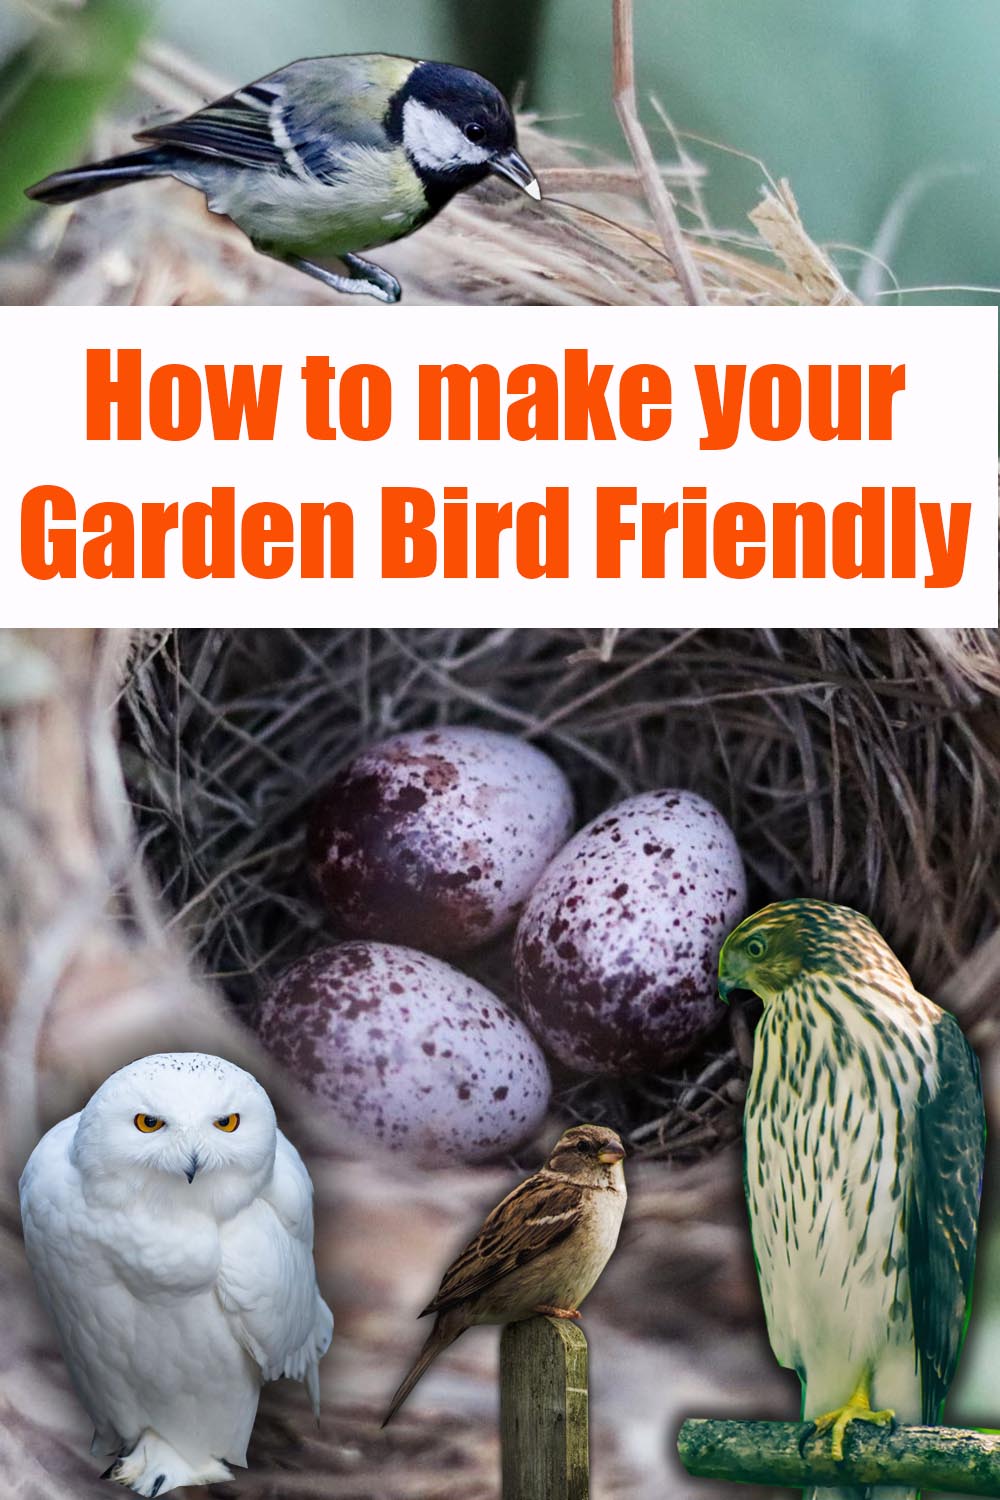
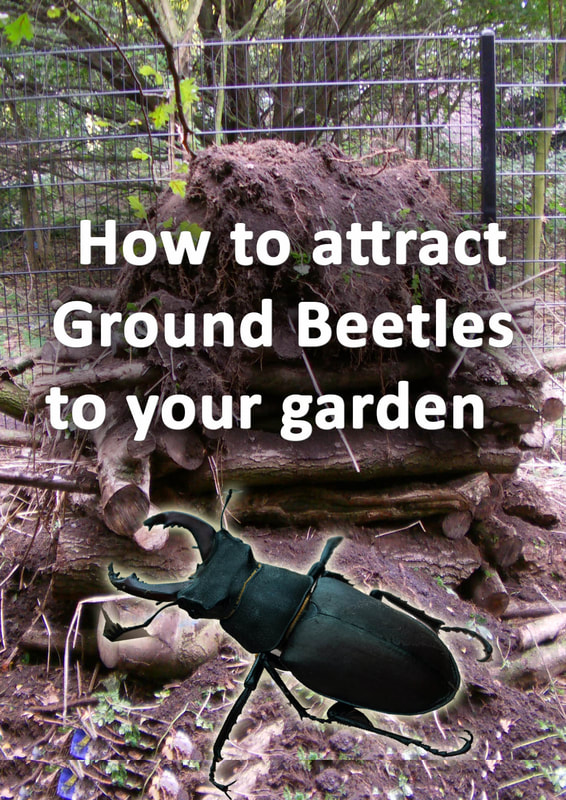
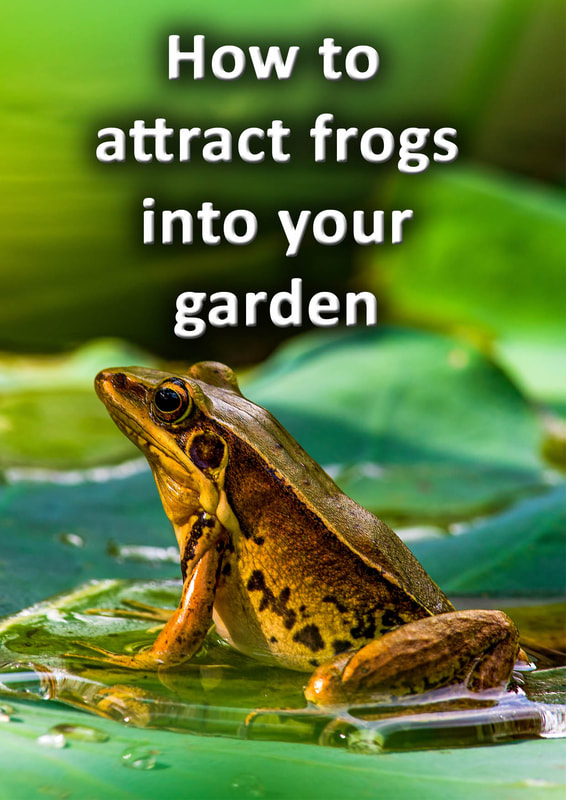
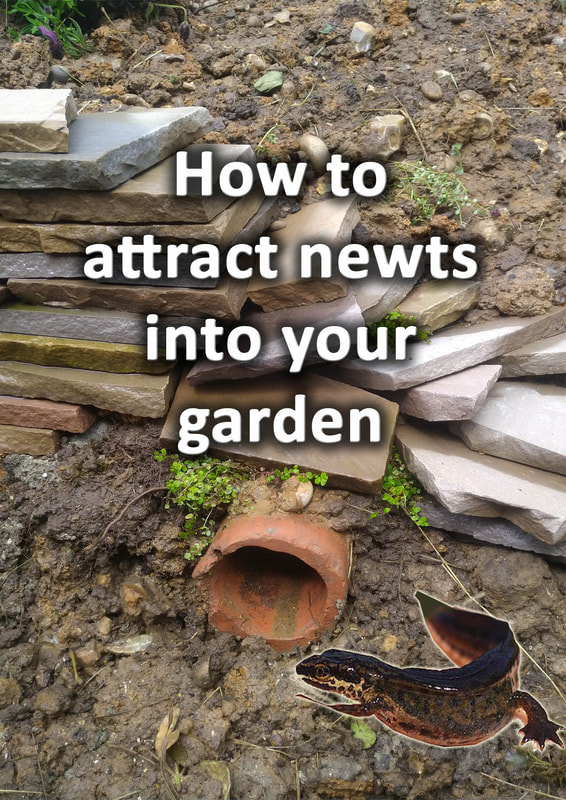
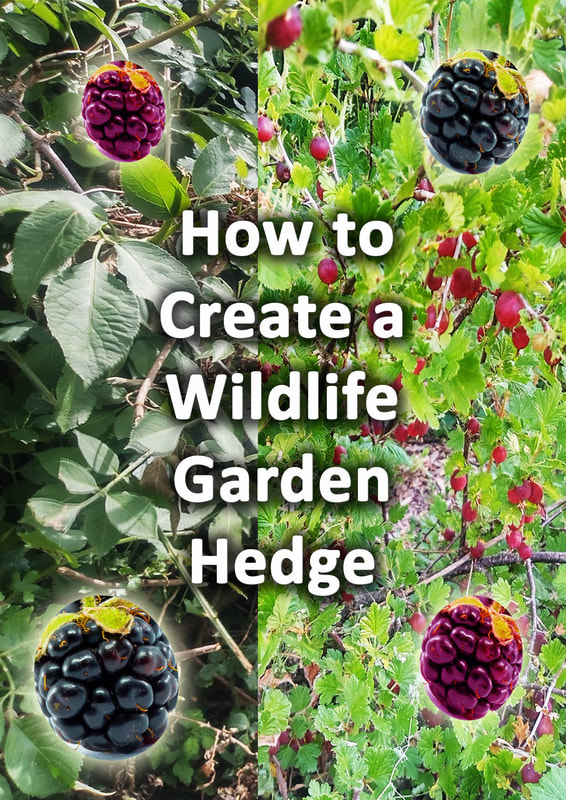
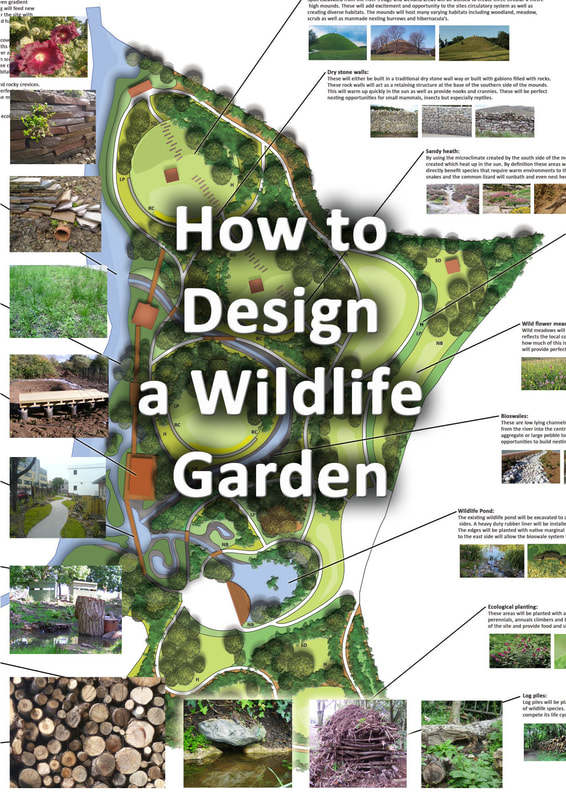
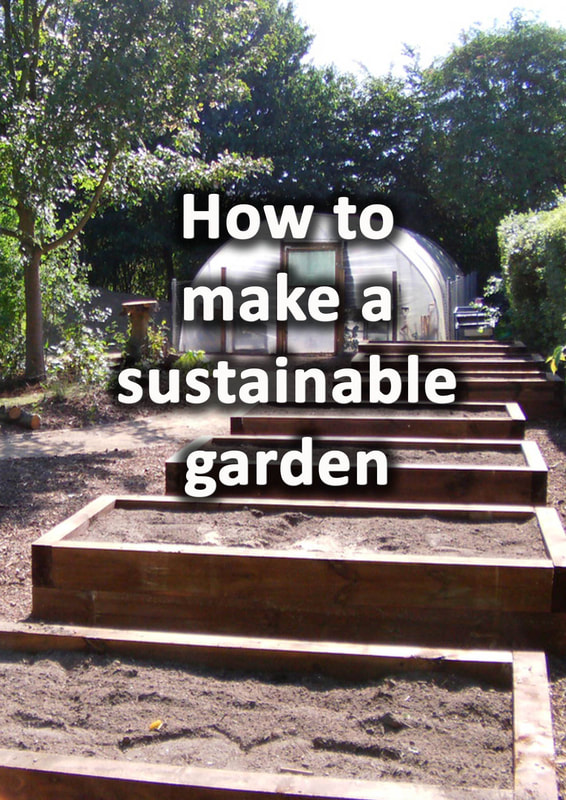
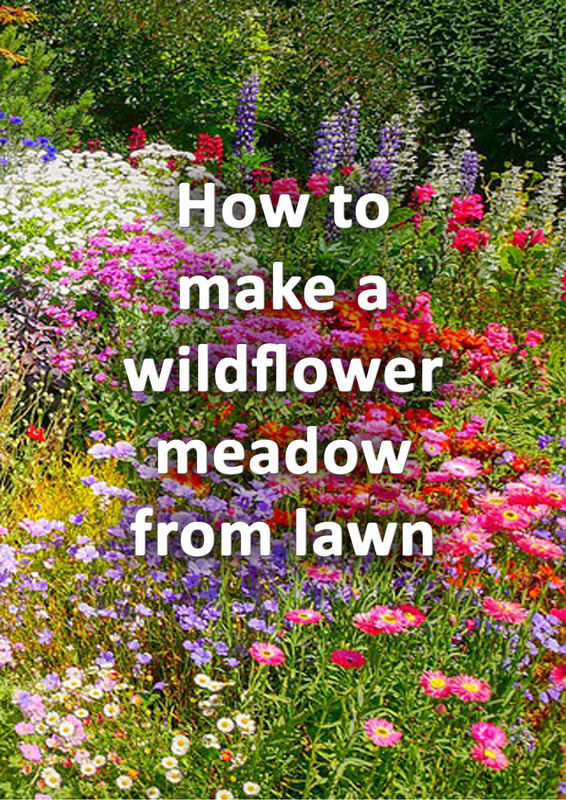
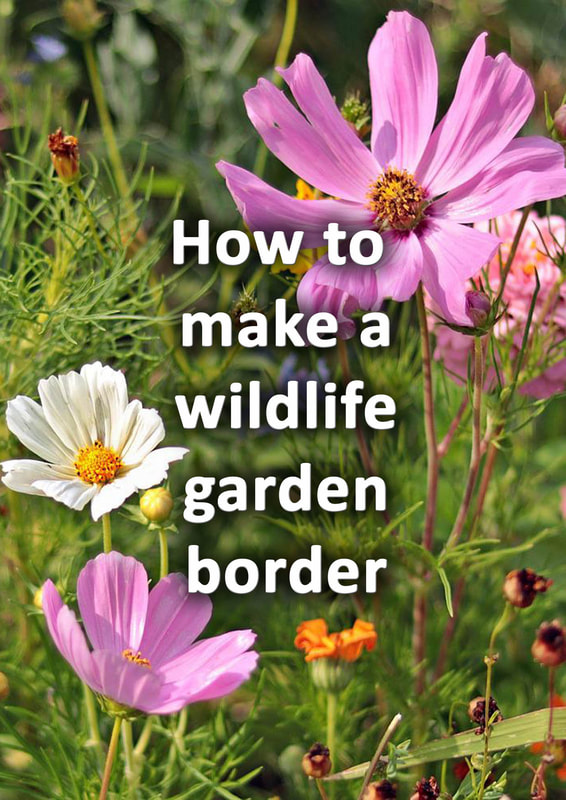

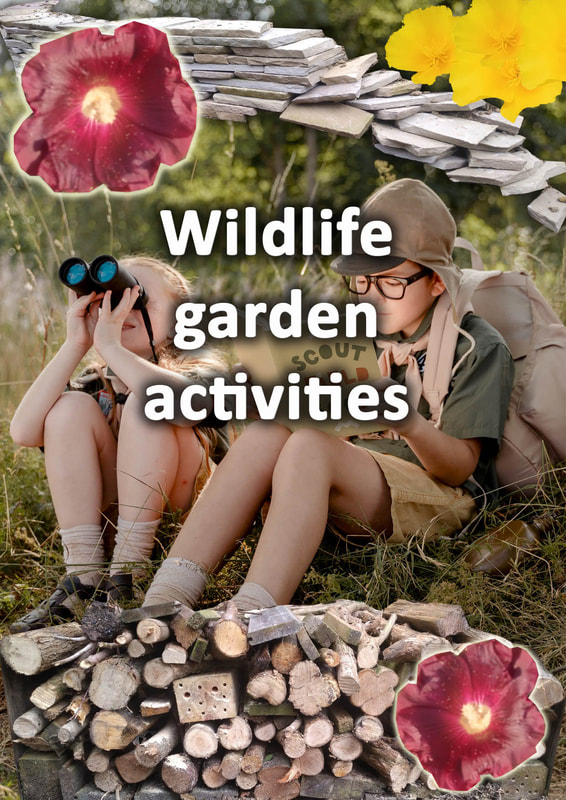
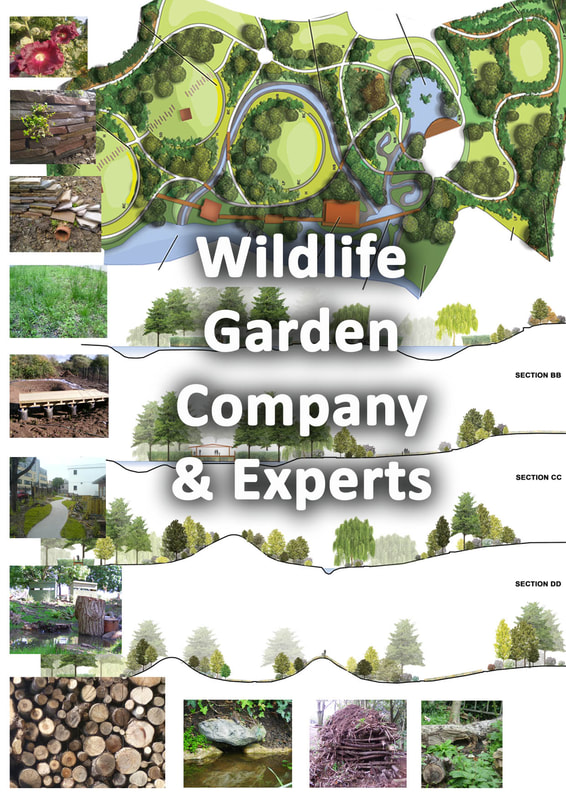
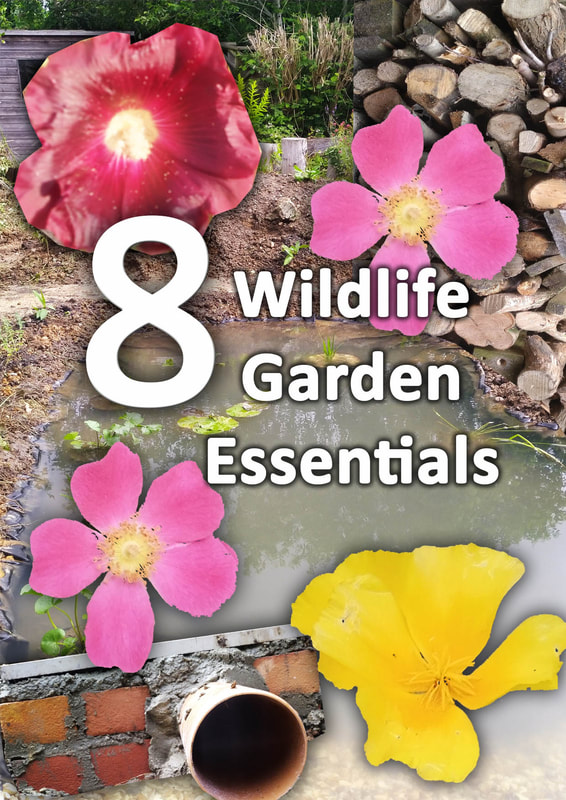
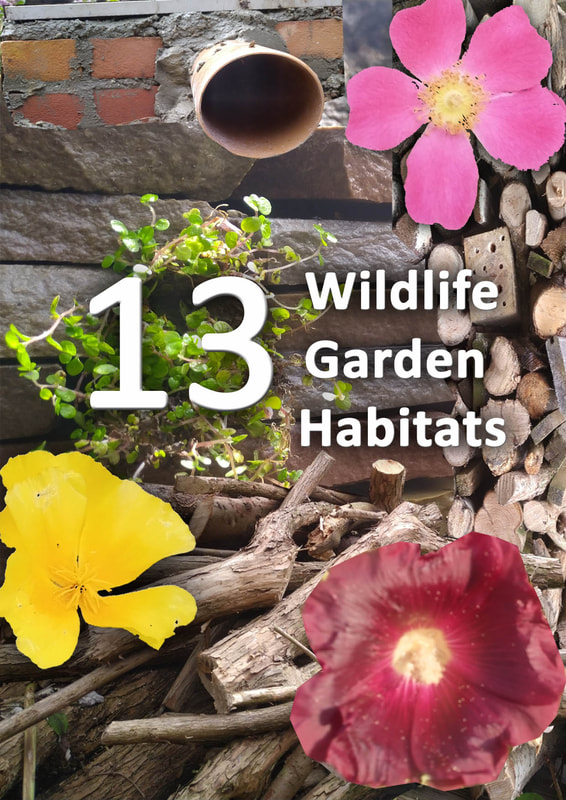

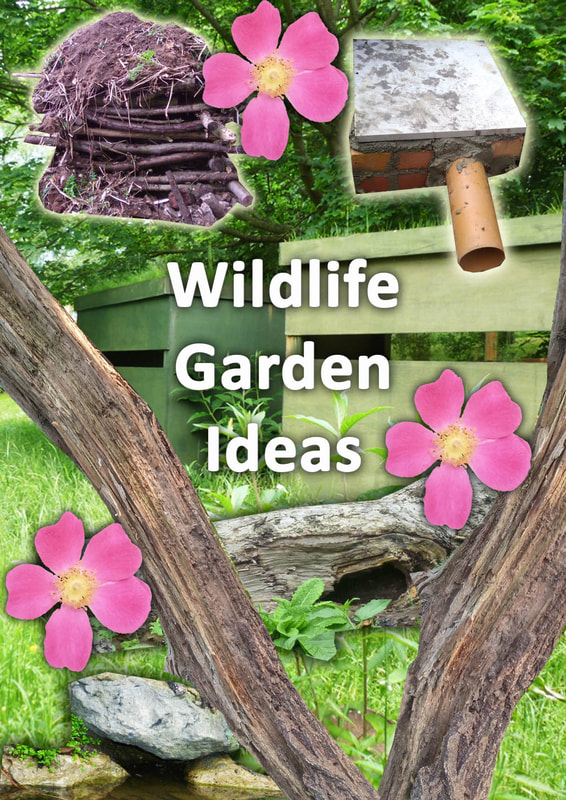

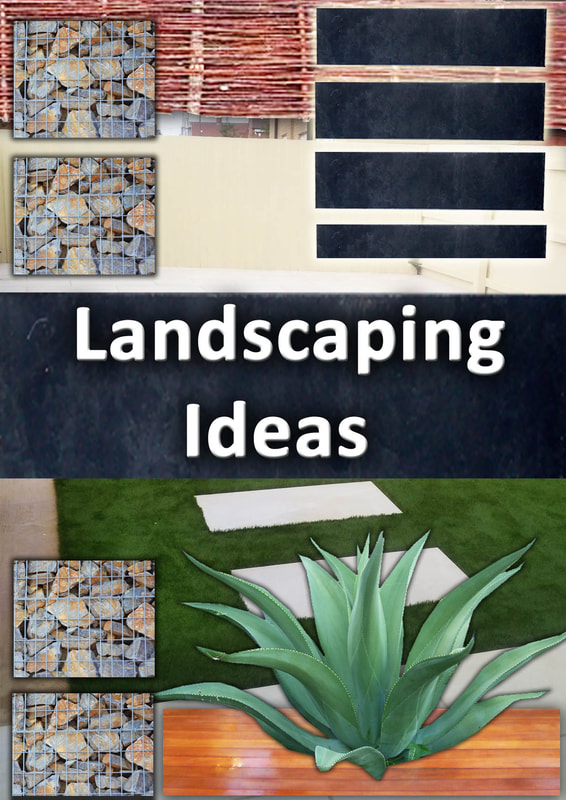


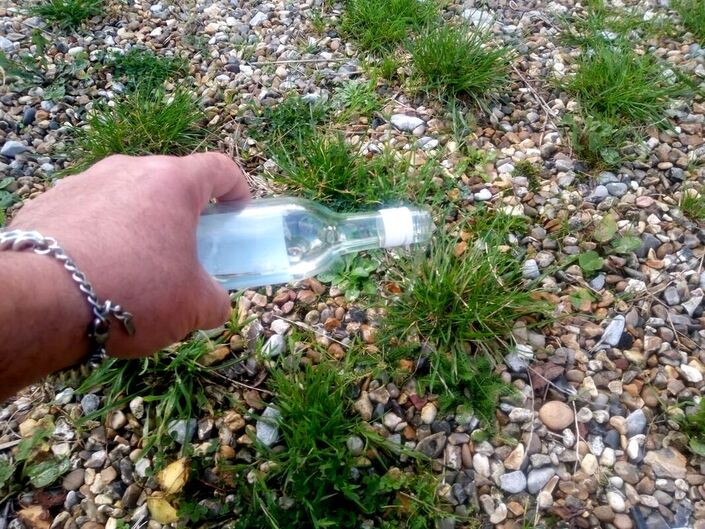
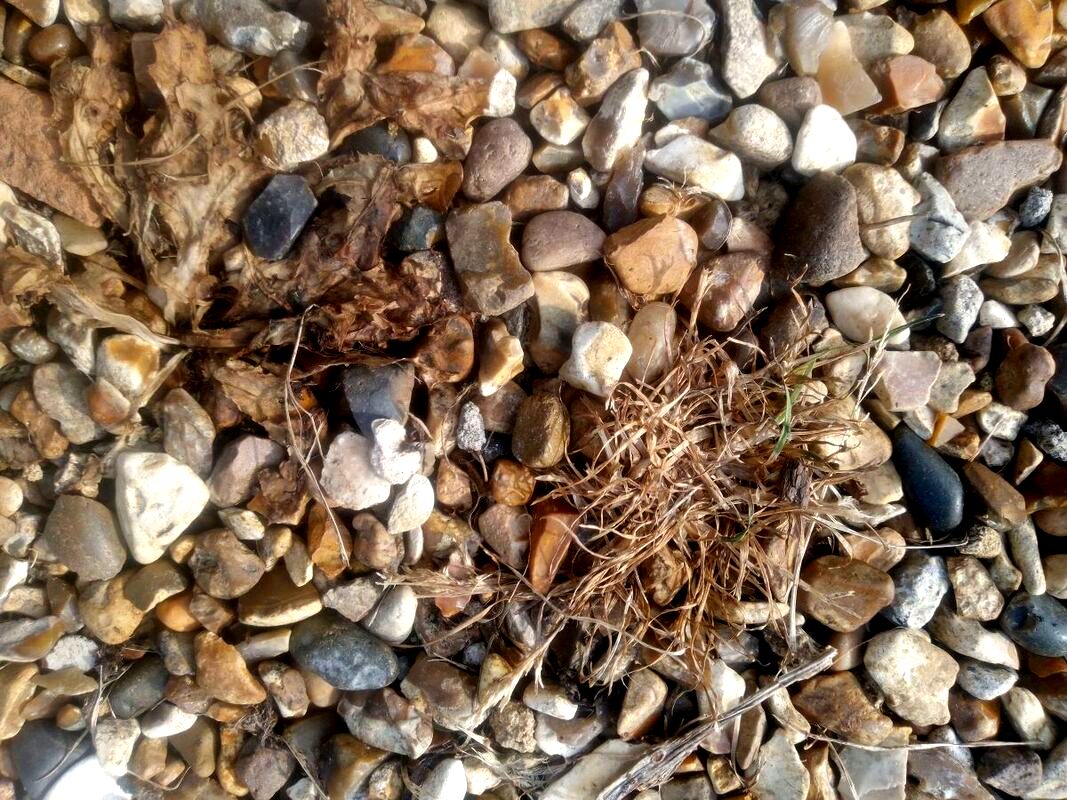
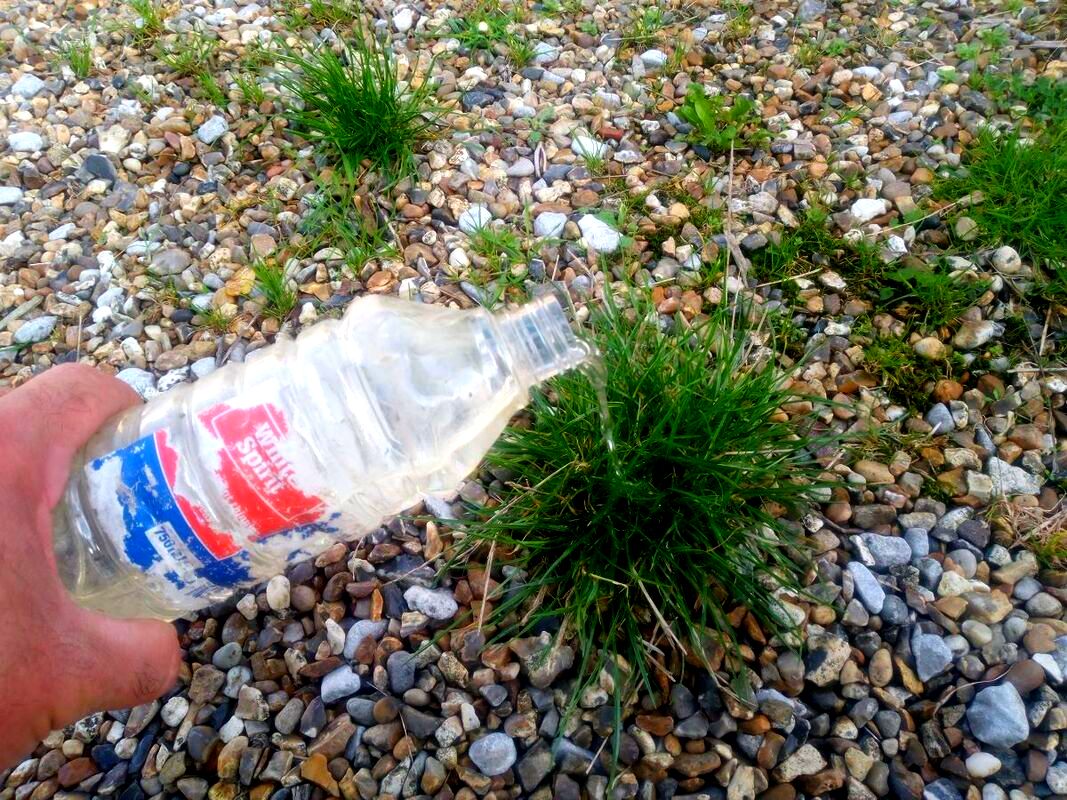
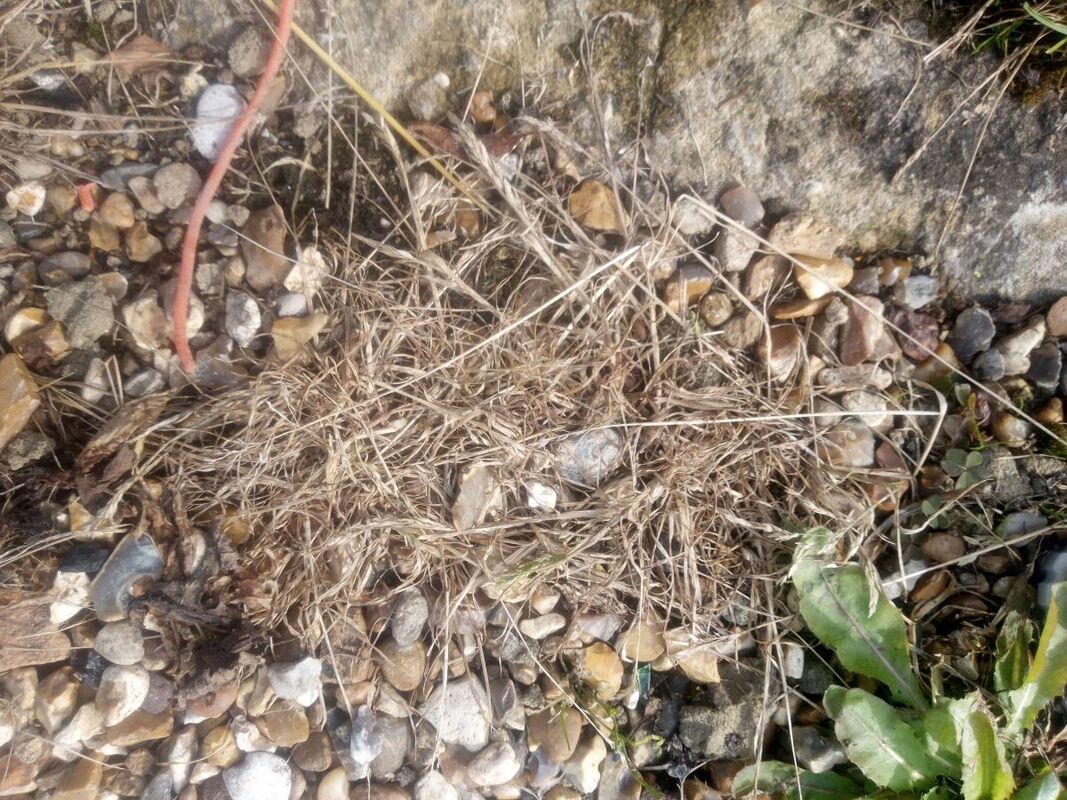
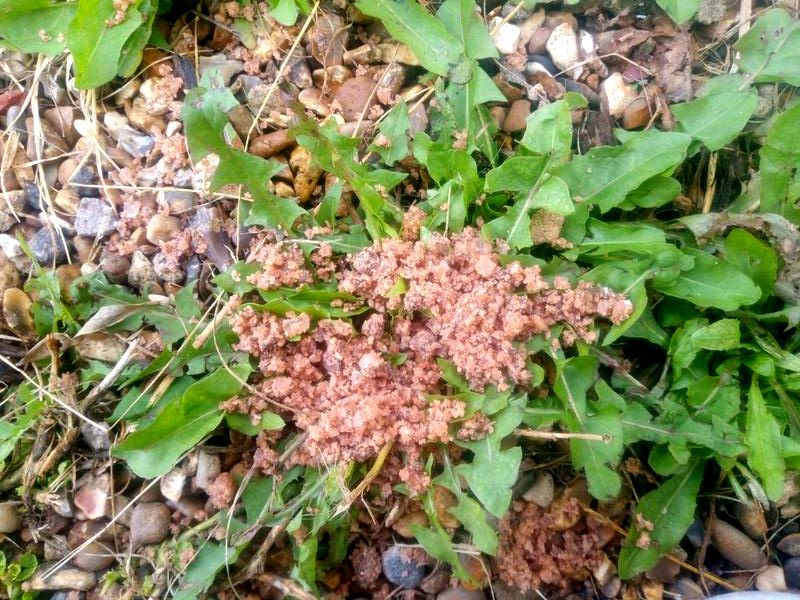
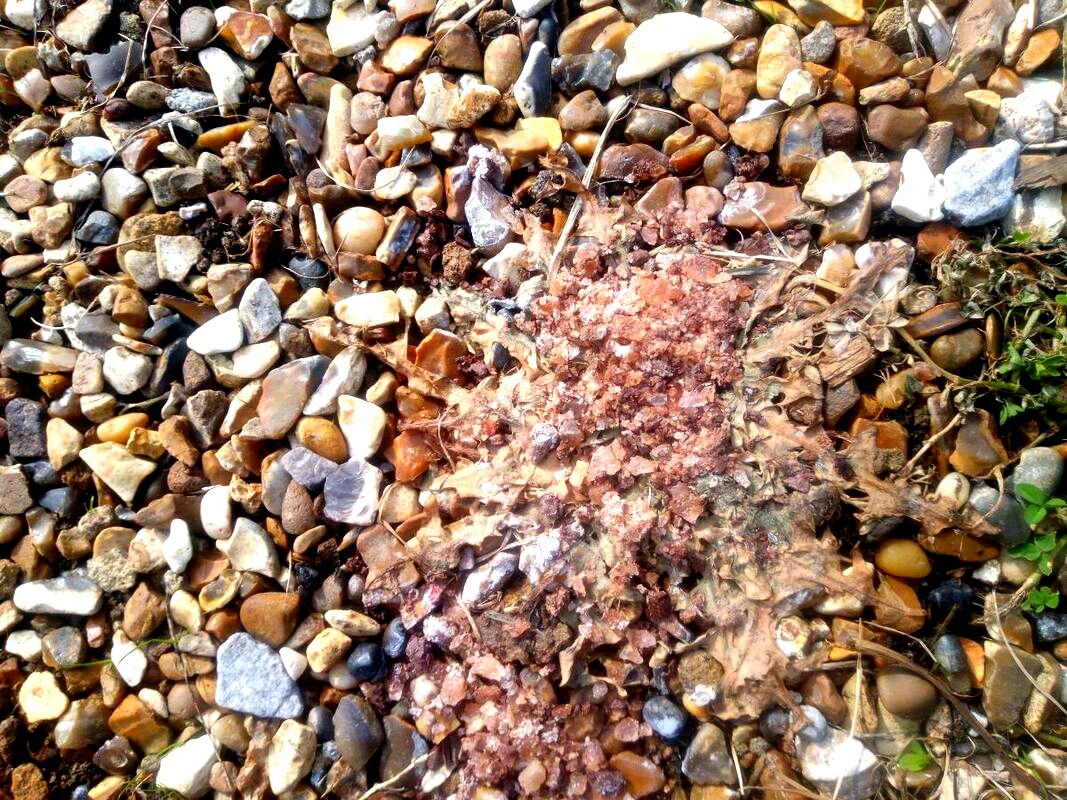
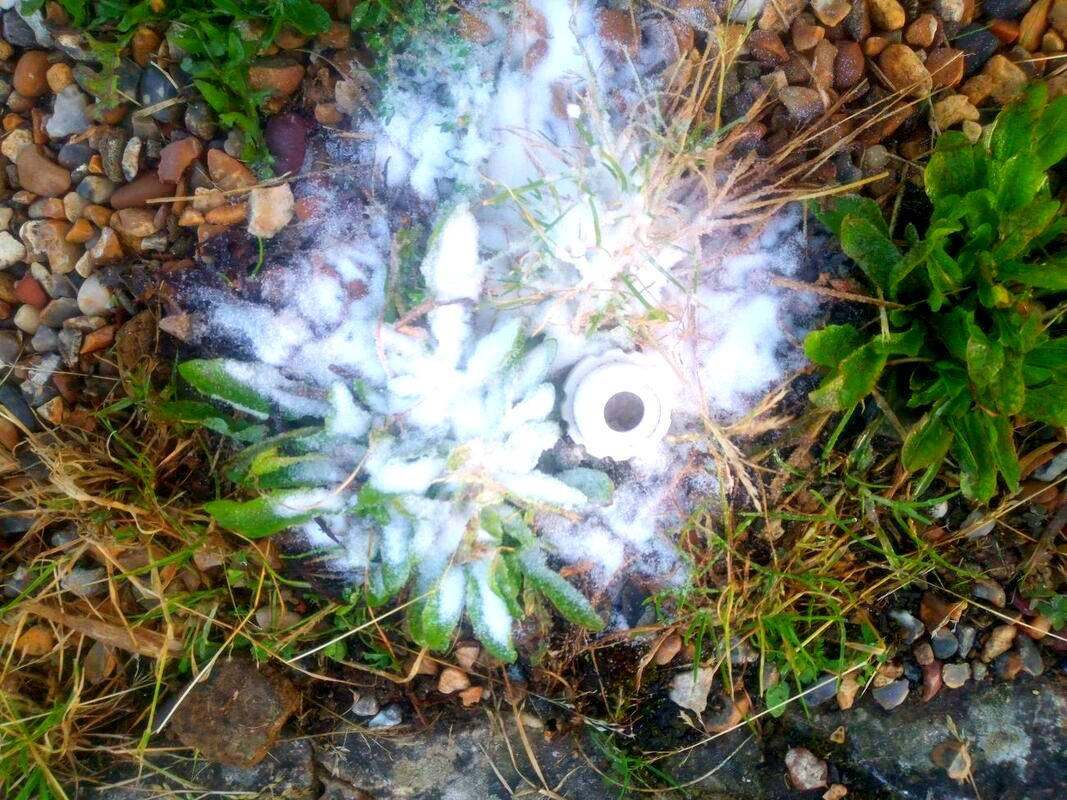
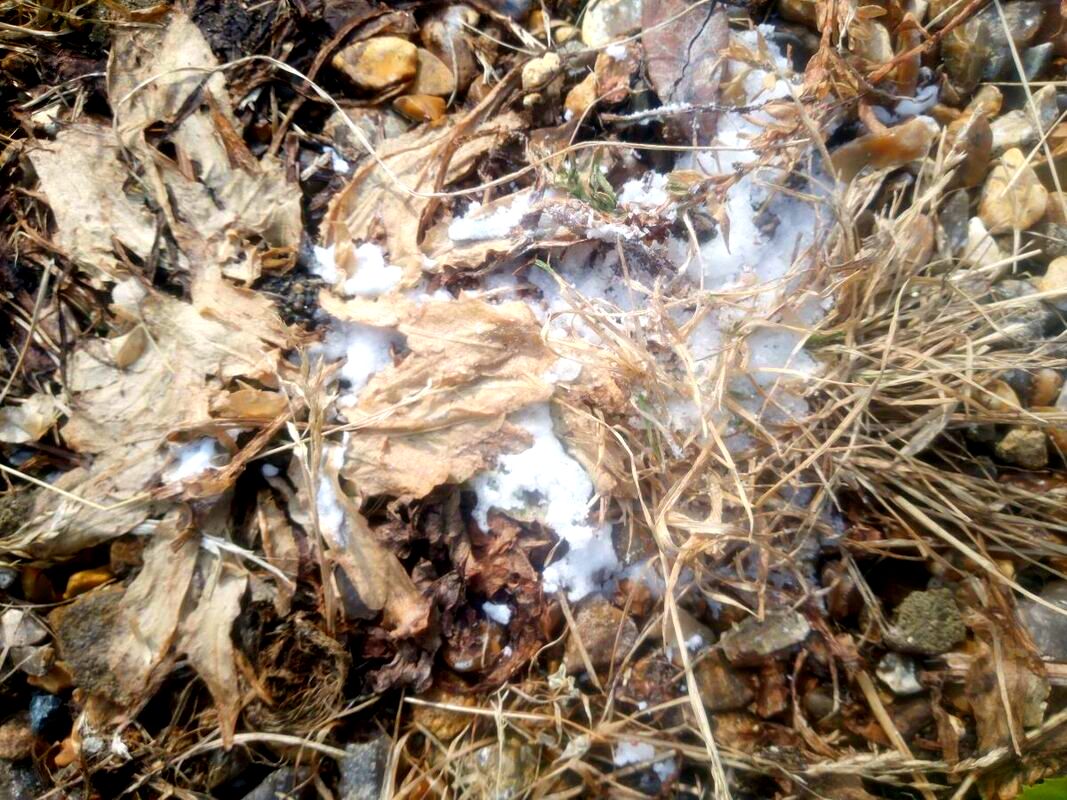

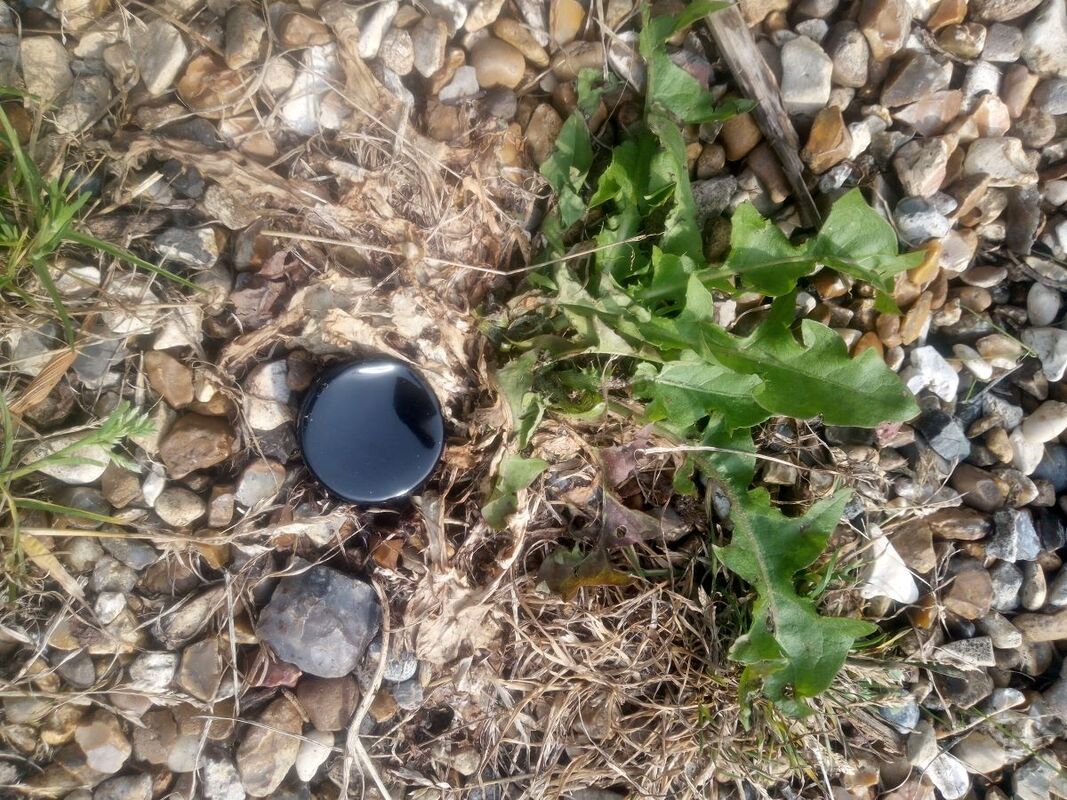
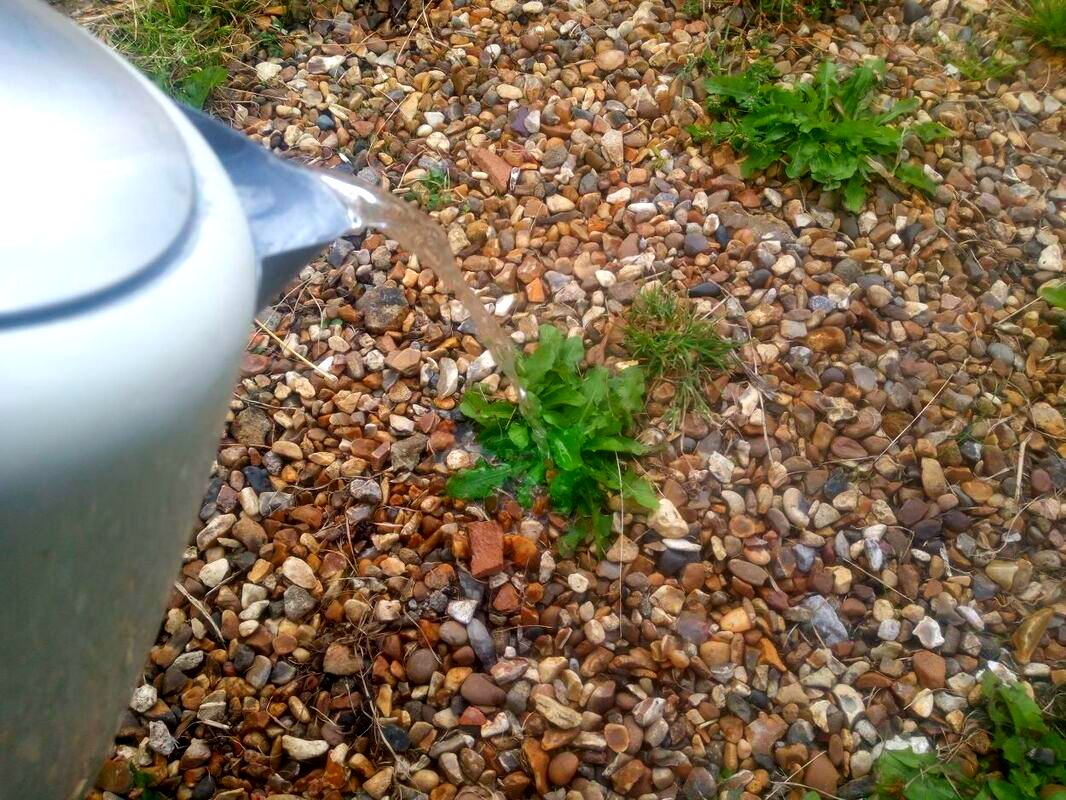

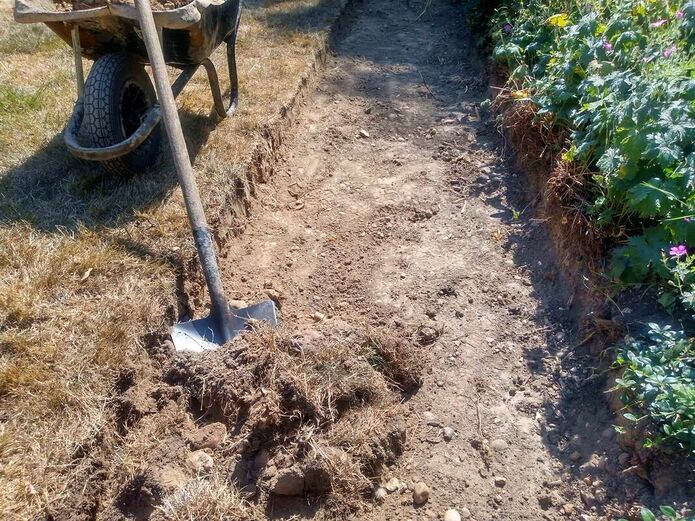
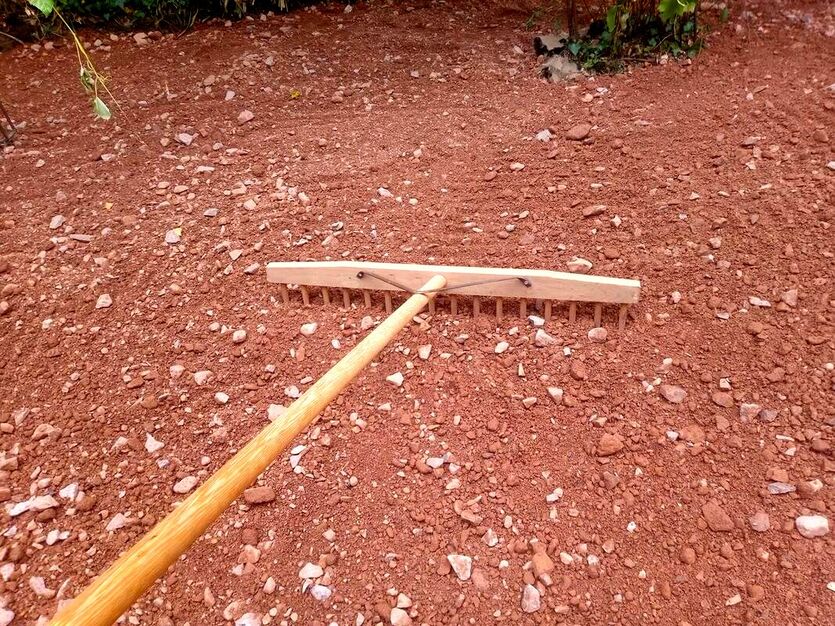
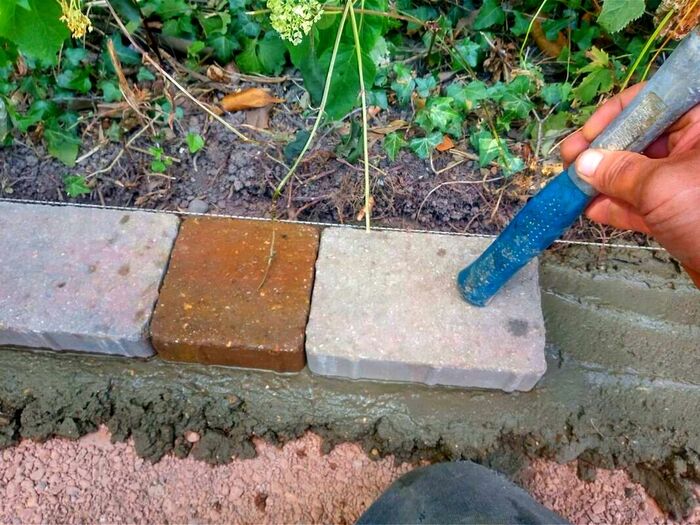
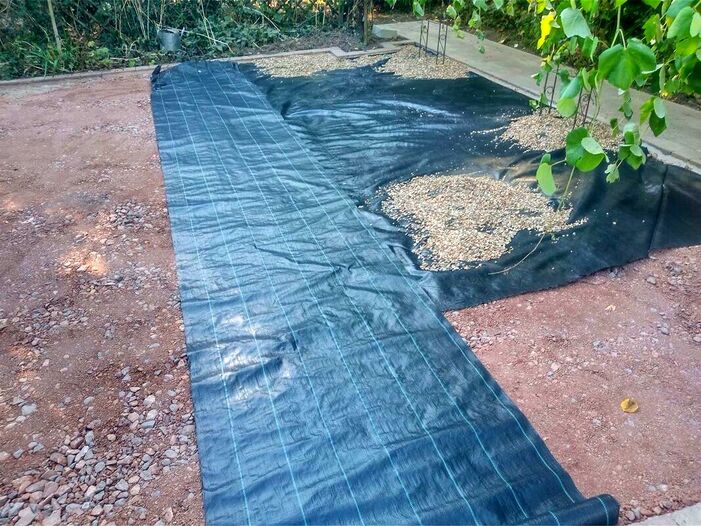
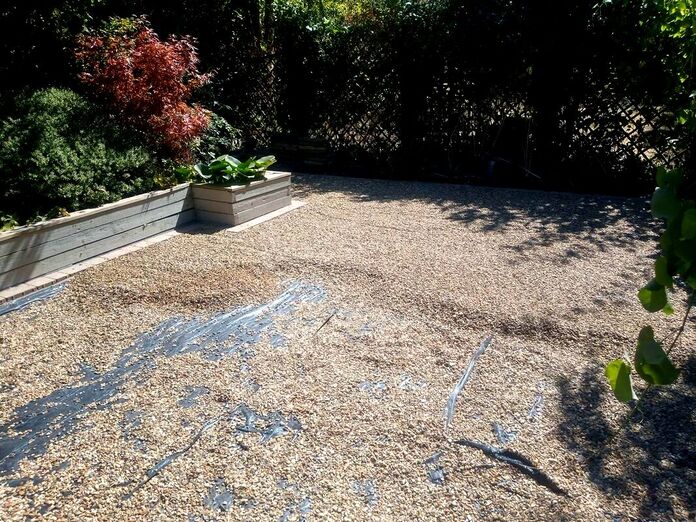
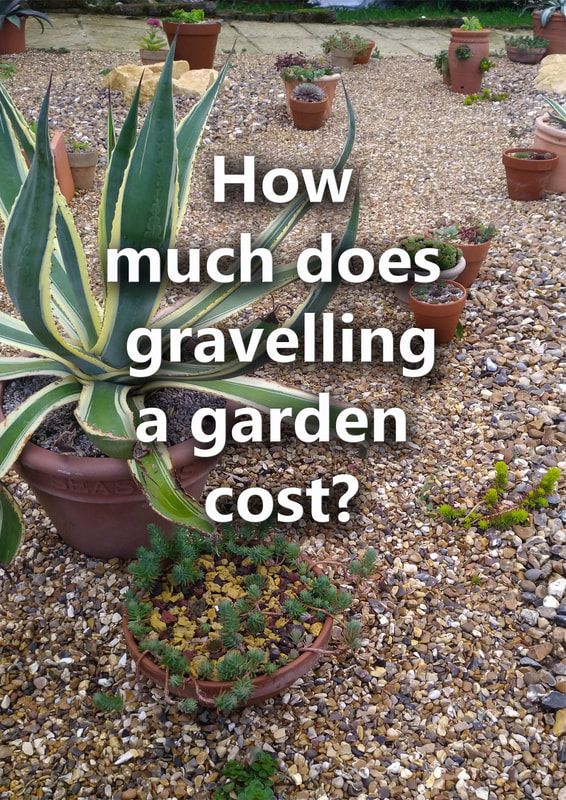
|
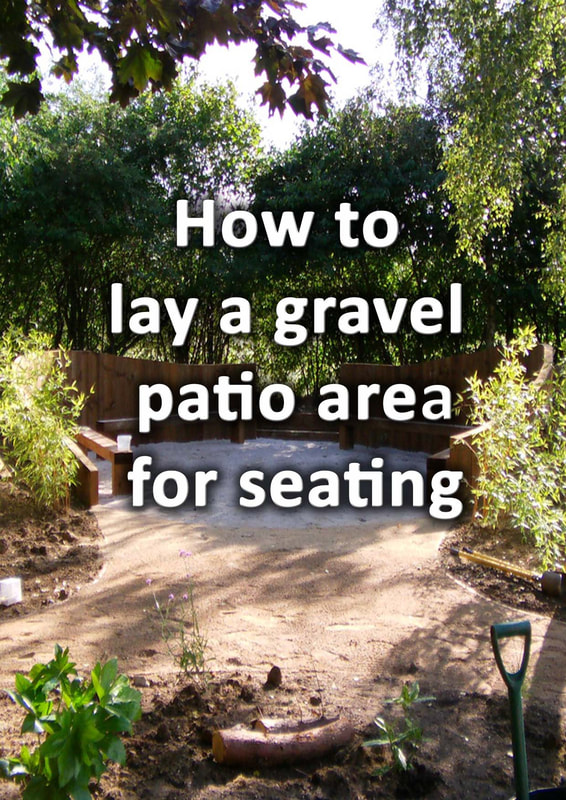
|
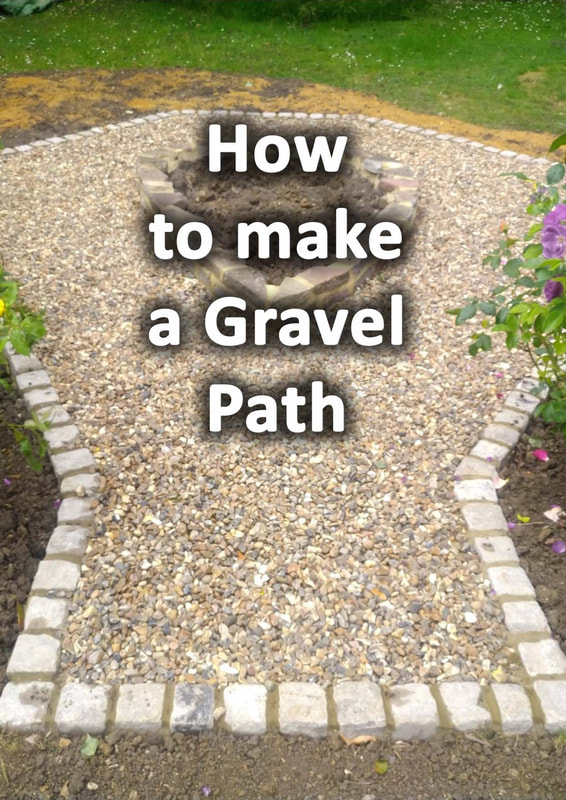
|
'As an Amazon associate I earn from qualifying purchases'

|
The Author
Paul Nicolaides
BA (Hons) Dip
Paul Nicolaides has over 30 years of recreational gardening and 20 years of professional landscaping experience. He has worked for landscape contractors including design and build practices across London and the South East. In 2006 he qualified with a BA Hons degree and post graduate diploma in Landscape Architecture. In 2009 he founded Ecospaces an ecological landscaping practice which aims to improve social cohesion and reduce climate change through landscaping. In 2016 he founded Buckinghamshire Landscape Gardeners which designs and builds gardens across Buckinghamshire and the South East. This blog aims to provide easy problem solving information to its audience and encourage others to take up the joy of landscaping and gardening.