This article contains affiliate links
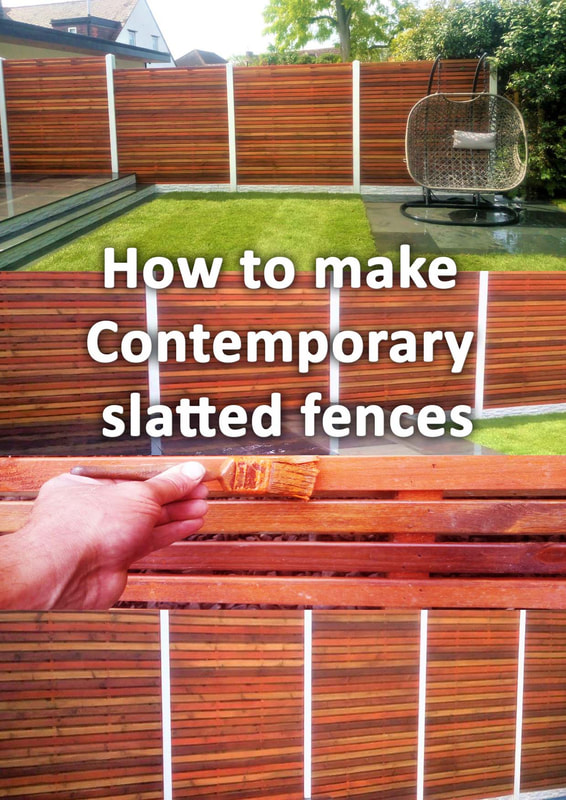
If you want to make your garden or outdoor walls look contemporary, you have come to the right place.
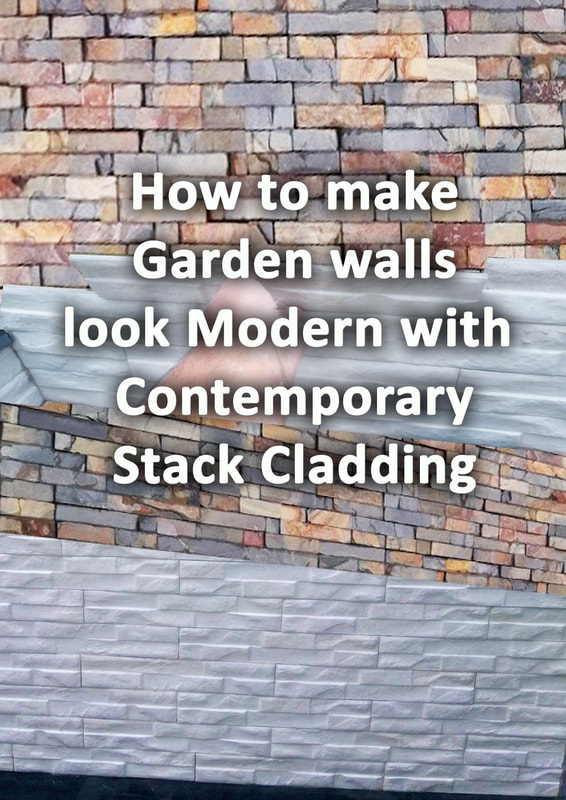
Many resources online list multiple quirky ways to create modern garden walls but few look that effective. Consequently here, I draw your attention to the very best way to make outdoor look modern, stack cladding! This cool and contemporary cladding is not just a way of masking walls cleanly, no! Modern garden stack cladding can actually make your outdoor or garden walls become a central feature. Contemporary stack cladding can be used to cover sheds, outbuildings, raised beds and even boundaries. As images from our projects display in this article, stack cladding really is the best modern outdoor wall solution. Benefits of cladding outdoor walls
Cladding can really be a fast and effective way to make walls look modern. Furthermore, unlike traditional brick and rendering stack cladding is less likely to stain.
Stack cladding especially creates interesting visual textures and tiny shadows which are more exciting to the eye. This makes stack cladding one of the most effective solutions for contemporary garden or outdoor walls. 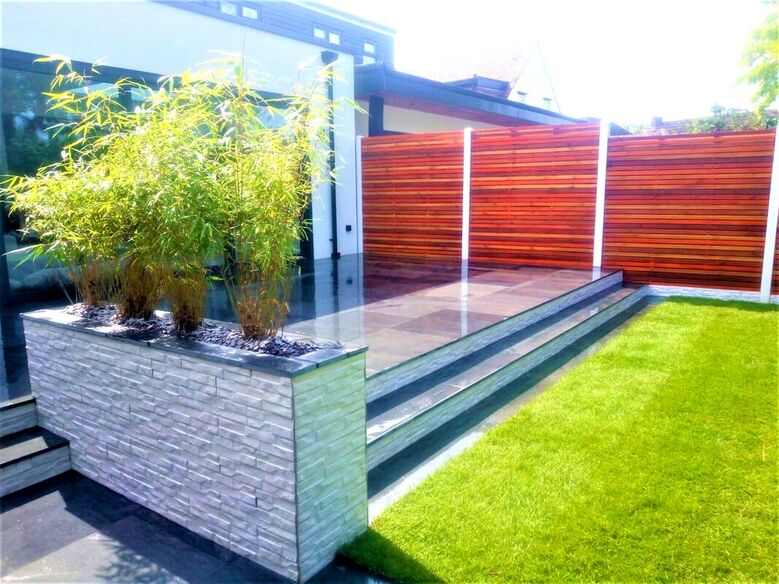
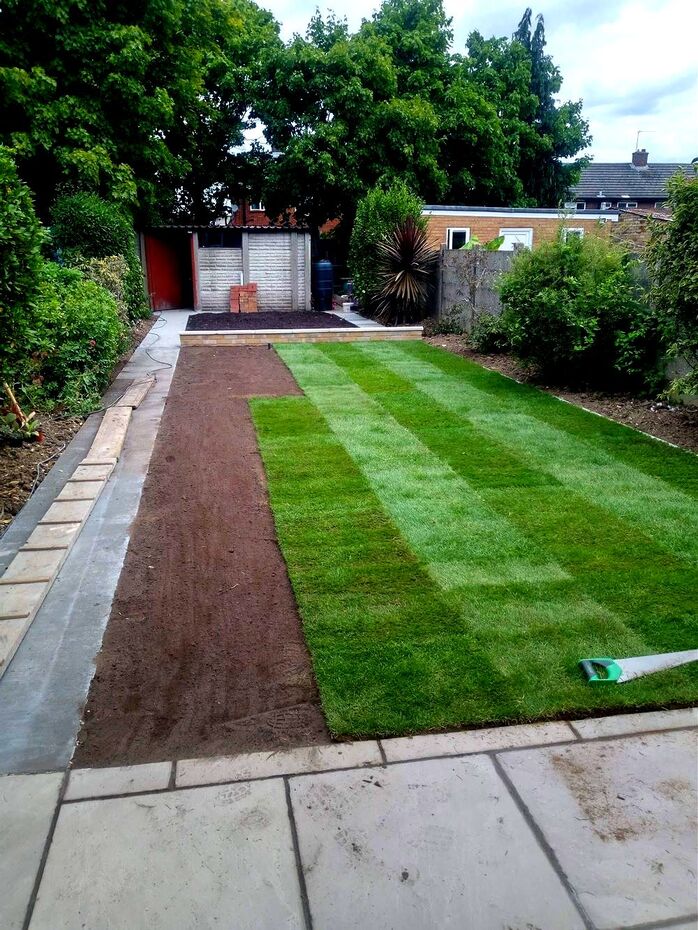
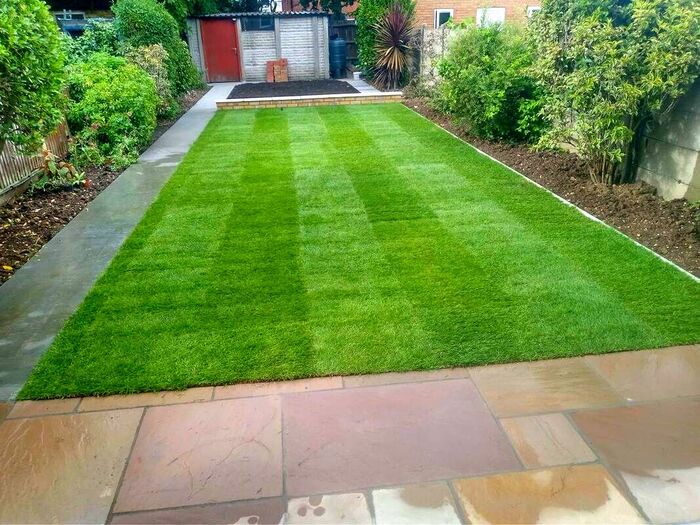
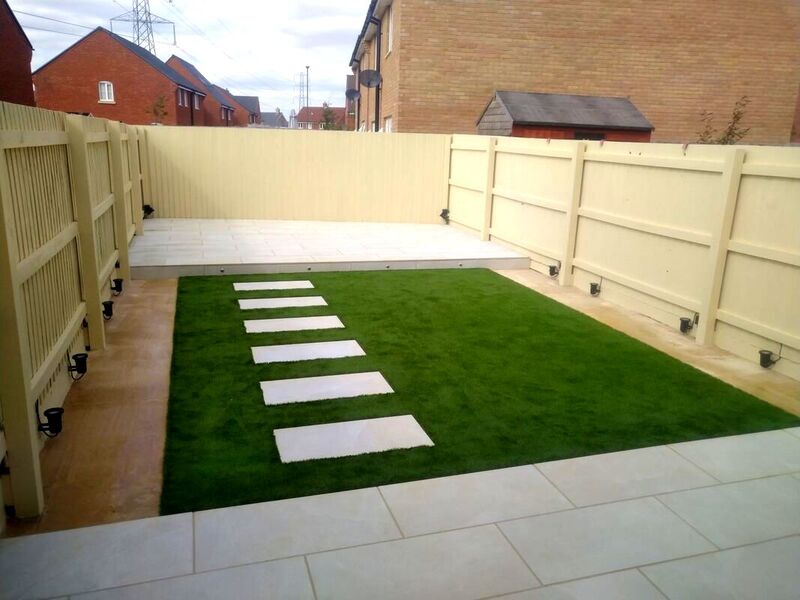
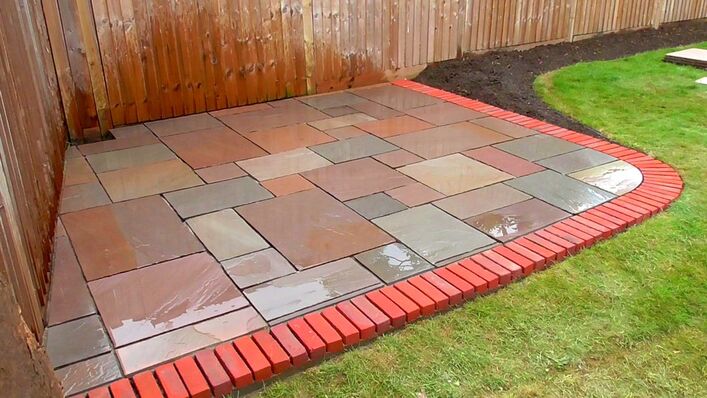
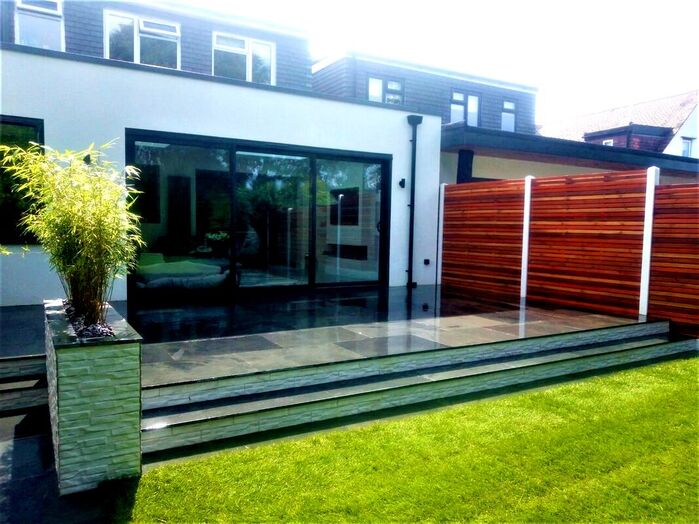
Porcelain Rock Stack cladding in one of our contemporary gardens
Is stack cladding expensive?
Depending on what type you buy stack cladding costs between £50 and £100 a square metre. Your labour costs will depend on how many cuts and awkward spaces need to be accommodated. A large square wall is much easier and faster to clad than around steps. As an average, allow about £50 for adhesive and labour. Therefore, allow for an average cost of around £125 per square meter including materials and labour. 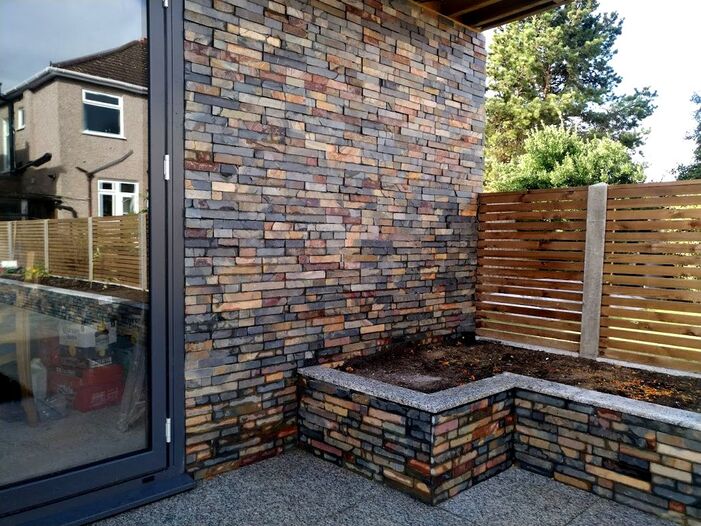
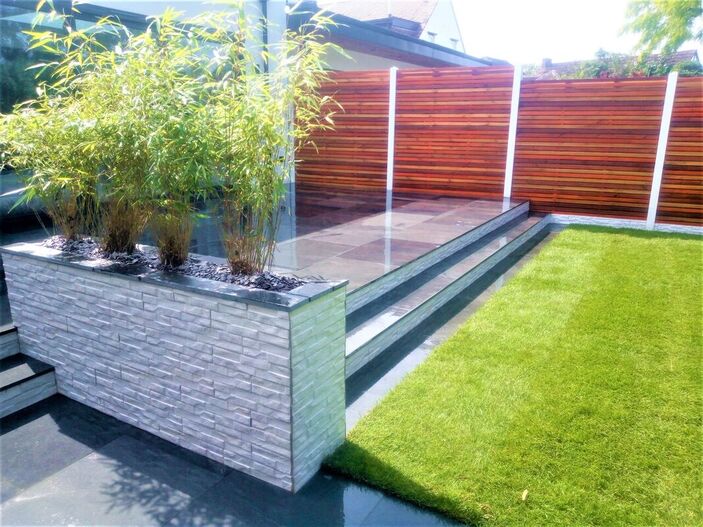
Slate Stack cladding in one of our contemporary gardens
Best ways to make garden walls look modern
When considering ways to make garden and outdoor walls look modern there are three main strategies. I believe the only real effective methods are painting, large tiles or stack cladding.
Paint
Depending upon what style you wish to create painting provides a few options. The most refined option is to render brick and concrete walls before the paint. This will create a moth and contemporary feel. However, painting straight over brickwork can also create a more rustic modern effect. 
Large tiles
Conventional tiles for bathrooms and kitchens are of a smaller size and do not look as effective outdoors. If you want to make garden walls look contemporary with tiles consider larger units. Natural stone such as rustic slate is a good choice for modern garden designs.
Stack claddingStack cladding now comes in a range of products including a range of textures and materials. For smaller scale features like raised beds narrower stacks can be more effective. For larger, expansive walls thicker grades will provide a better visual texture. 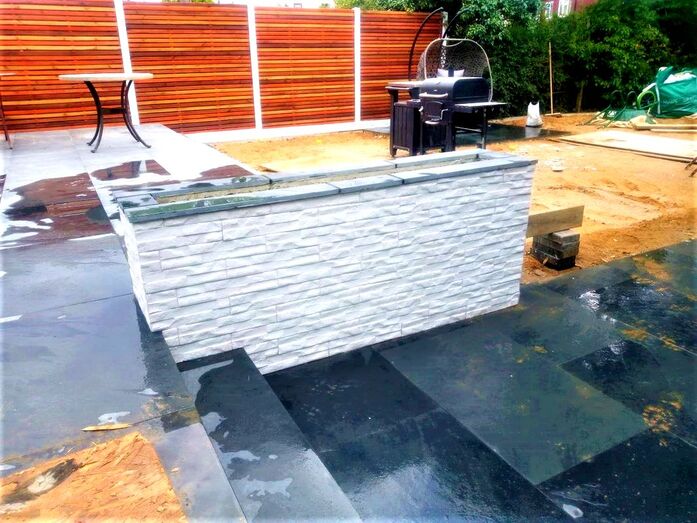
How to tile outdoor walls with stack cladding step by step
Shopping list
Tools needed for outdoor cladding
How to lay stack cladding outdoors in 10 stepsStep 1: Wall preparation
Make sure your walls are in a good condition with no crumbly bricks or mortar. The walls should also be dry with a reasonable surface texture for adhesive to key into. Make sure your walls are free of dust and debris; give them a go over with a stiff brush. It is even better to give the wall a pressure wash a couple of days before. 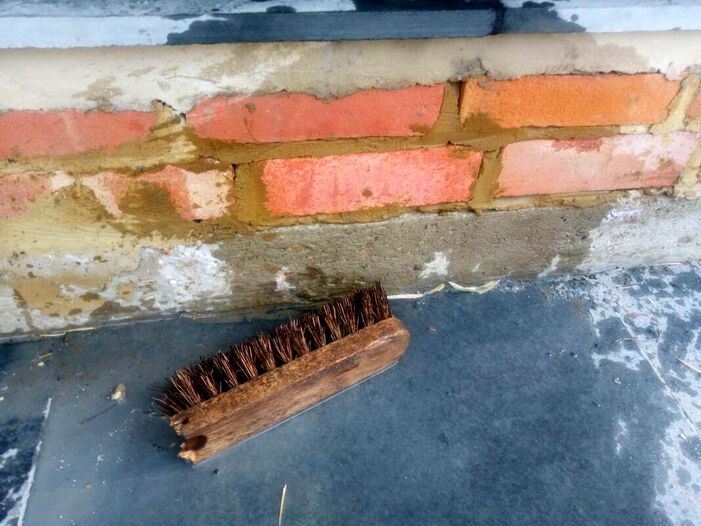
Step 2: Setting out your cladding
Before you start cladding it can be effective to set out some cladding against the wall first. This will enable you to identify the size of cuts you will need. These can be pre-cut before you lay to make the laying process much faster. Step 3: Setting up your work space
It is always important to have everything to hand when you are laying cladding. Tile adhesives, once applied can start to go off if left upon the wall for too long. Therefore you should set up an efficient work area with everything to hand. Try to set up mixing zones a little further from laying areas, this prevents unwanted splattering when mixing adhesive. 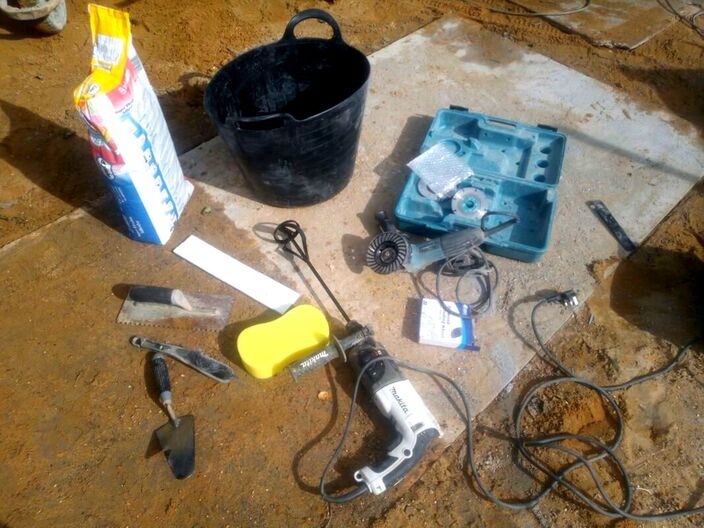
Step 4: Planning your mixing
It is important to thoroughly read the specific instructions for your adhesive before you begin. There are many different external grade adhesives on the market today. Some of these include more flexible and faster setting types. All of these have varying work times and water mixing ratios. Make sure you have a laying plan before you start mixing. I personally always mix up a small ratio first and lay a test area. This will enable you to gauge how fast laying will be and how much adhesive to mix. 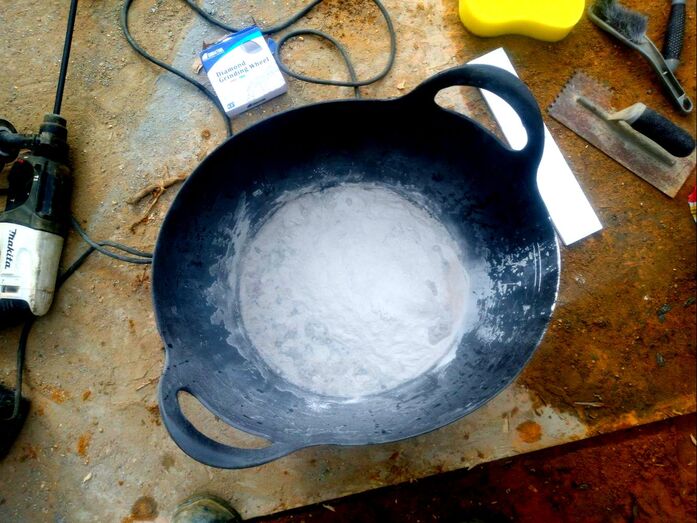
Step 5: Mixing your adhesive
Fix your mixing paddle to your power drill, have your mixing tub, water and adhesive to hand. Empty the correct amount of adhesive into your water and start to whisk in a circular motion. Whisk well for two to three minutes until there is no lumps! 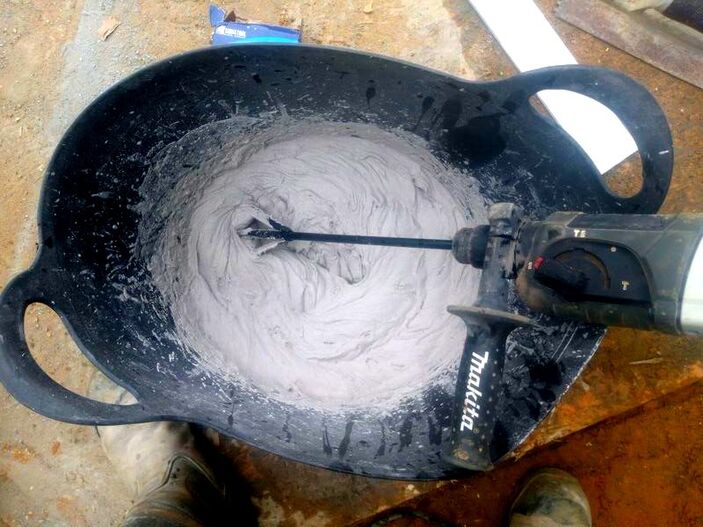
Step 6: Apply your adhesive
Apply your adhesive to the wall with your tiling trowel, if your cladding units are large you can paste them individually. 
Step 7: Laying your cladding
Push your units onto the wall with a gentle rocking motion to ensure thorough bonding. Lay your units as tightly as possible to prevent gaps. Some natural stone stack cladding can vary slightly in width. This means you may want to level the tops of your rows as you lay. Cladding with thinner sides can be propped up with thin nails 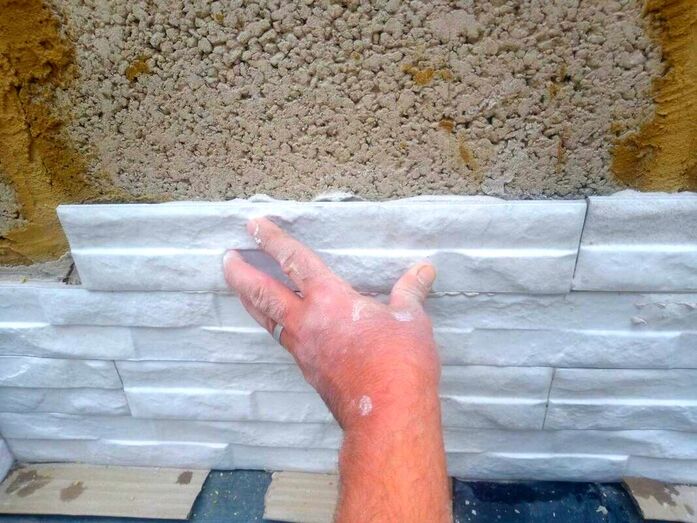
Step 8: Cutting in your cladding
Some stack cladding is easier to cut neatly than others. Slate stack cladding can be a little tricky to cut into small sections as it fragments easily. You will need to rest the cladding onto a surface which absorbs vibration to prevent fracturing. Some cladding cuts well with 4 inch grinders and some cut better with 9 inch grinding discs. You may want to ask the specific supplier for specific cutting preferences. Measure and cut your stack cladding so they fit as tightly as possible. 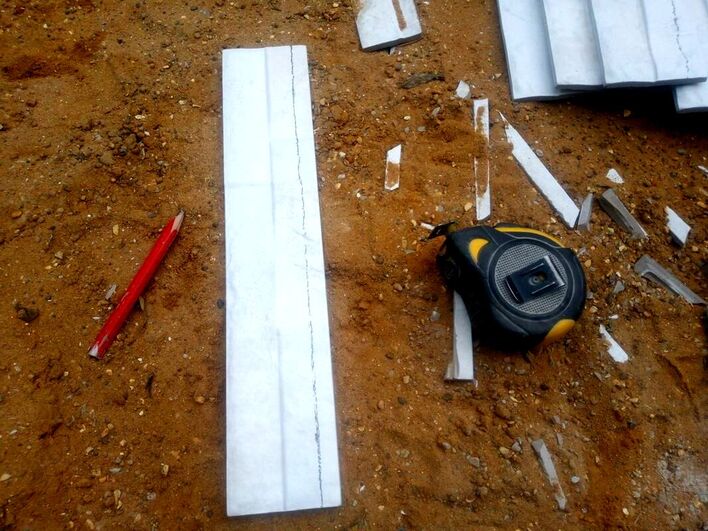
Step 9: Applying external grouts
When your cladding has gone of hard the next day, apply external grout to any larger gaps or cuts. The colour of the grout you use will obviously depend upon the colour of your cladding. Due to the tight positioning of stack cladding you will not need much grout if any at all. Therefore, a small ready mixed external grade grout is best. Apply the grout to any gaps and remove any excess with a damp sponge. 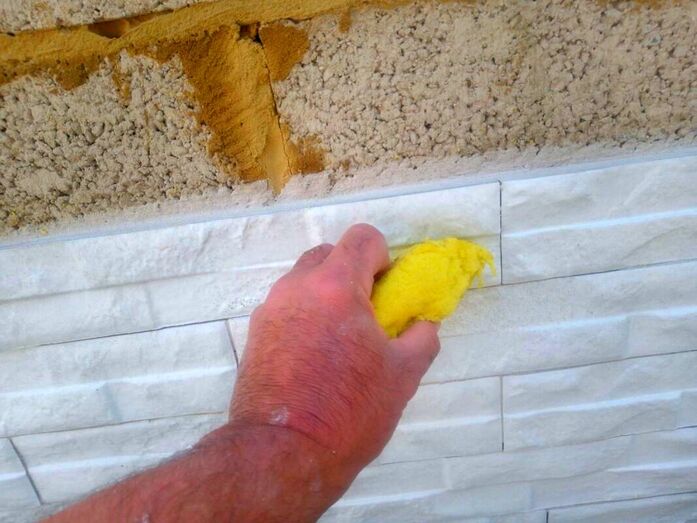
Step 10: Cleaning the area
When you have completed your stack cladding, clean up the immediate area and put your tools away. You can now admire your masterpiece! 
Thank you for reading out article on how to make garden walls look modern with stack cladding! If you require a stack cladding installer why not contact us.
Below I will include some images of a landscaping project where we used stack cladding. 

'As an Amazon Associate I earn from qualifying purchases'
0 Comments
This article contains affiliate links
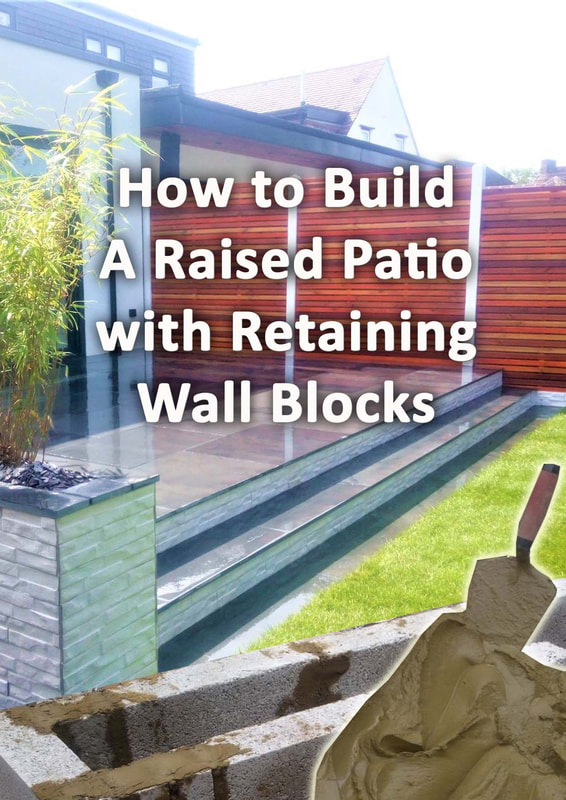
There are multiple scenarios where you may wish to build a garden wall. You may need a robust wall to retain soil or you simply may wish to create a feature.
Whatever your reason for installing a wall in your yard, it is very typical to choose concrete as the primary material. In this article I will explain some of the benefits of building outdoor walls with concrete. I will also show you how to build a garden wall using concrete blocks step by step. Benefits of using concrete for garden walls
Concrete is an extremely dense and durable material with a high compressive strength. This makes it perfect for creating strong bases and retaining structures. Concrete blocks can be laid to create any shape or form, you can also create concrete walls using wet concrete. In such a case you will need to construct some formwork or shuttering to retain and shape the concrete. Such versatile construction means concrete can be formed to fit every scenario. This makes it extremely popular for creating unconventional forms such as curves. Concrete walls are extremely fast to create and cost effective. Once concrete has cured you then have a blank canvas to decorate it how you wish. Concrete garden walls can be rendered, painted, tiled or clad. 
How deep should foundations be for a retaining wall?
The depth of your walls foundations will depend upon a few factors. The most important are the height and width of the wall.
A greater mass of concrete will require a more robust foundation. Generally, I always prefer to have a minimum depth of at least 400mm depth for garden wall foundations. If your wall is 200mm thick and over 800mm high then 600mm depth is a better depth. This will also depend upon how stable your sites sub-soil is and how saturated it becomes in winter. 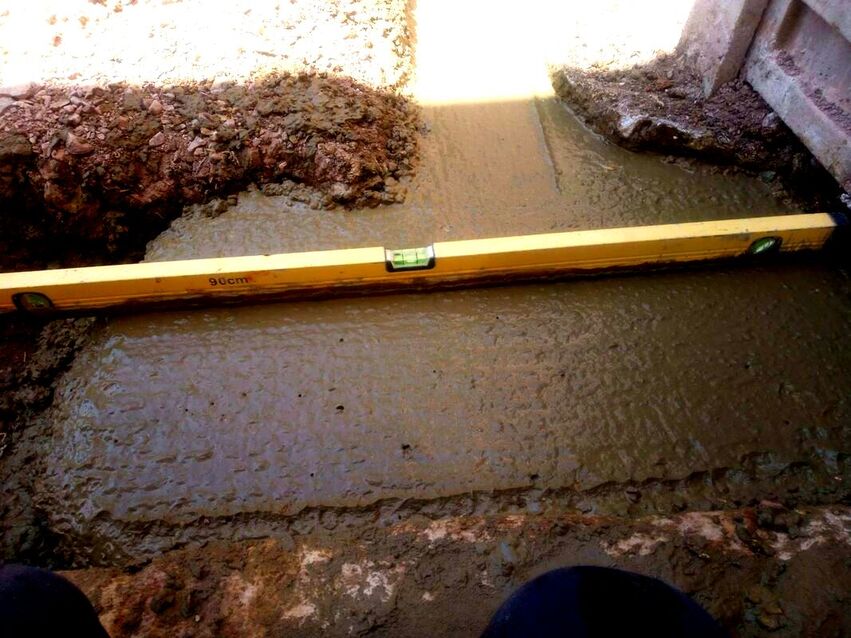
In terms of the foundation width you will want it to be at least three times the width of the wall itself. For retaining walls holding back volumes of soil it is best to have a broad foundation. This will allow the retained load to push down upon the foundation further strengthening the wall. 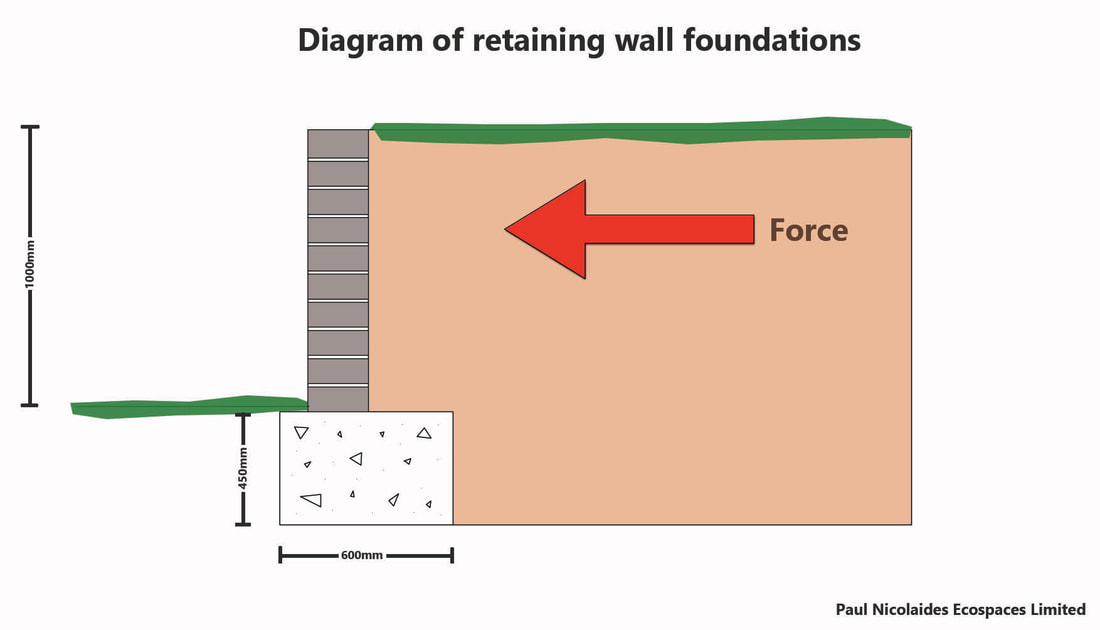
What is the best concrete mix for a garden wall?
You will need to mix up 1 part cement to 5 parts ballast in a cement mixer with water. Make sure the concrete is well mixed and reaches the consistency of porridge. How to build a garden wall with concrete blocks
Step 1: Mark out your walls position
Mark out where you want your wall to be located. Not only will you need to mark out for the wall itself but also the foundation. Mark out your walls foundation with marker paint so you know where to excavate. Step 2: Excavate your foundation
Excavate for your walls foundation, you are best excavating to a minimum depth of 400mm for a small wall. You will have to excavate out much more for taller and thicker concrete garden walls. Try to make your foundations at least three times the width of the wall itself and make sure there is no soft or loose earth left inside the trench 
Step 3: Mix and pour the concrete foundation
Mix one part cement to five parts ballast with water inside a cement mixer until it reaches the consistency of porridge. Pour your wet concrete into your excavation and tamp it smooth to your desired level. Remember, gravity will naturally want to pull your concrete level! However, use a trowel and spirit level to move your mix around and work it until perfectly level. The best job you do of levelling your foundation will make laying your blocks level much easier. 
Step 4: Set up your working area
Set up a working area where you have all your materials and tools for laying blocks to hand. Try to set up your mortar mixing area away from your block work. This will prevent your wall becoming splashed with mortar stains. 
Step 5: Set out your blocks
Set out your blocks in equal stacks around your working area so you have them to hand when building. Try to keep your blocks back from the wall slightly to create a working corridor. This will enable you to get a wheelbarrow of mortar along your wall as you lay. Step 6: Mix up your mortar
Mix up 1 part cement to 5 parts soft or building sand with water and a little plasticiser. Mix well until you have a consistent and workable mortar that is not to stiff but not too runny. When your mix is ready load it into a wheelbarrow. Step 7: Lay your first blocks
Mark the line of your wall onto your concrete and start laying your blocks. Lay a long fillet of mortar along your line as consistently as you can with little bedding ripples. Concrete blocks are much heavier than bricks so bed them onto the mortar slowly. One of the best ways to lay a straight and level run is to set up a string line. 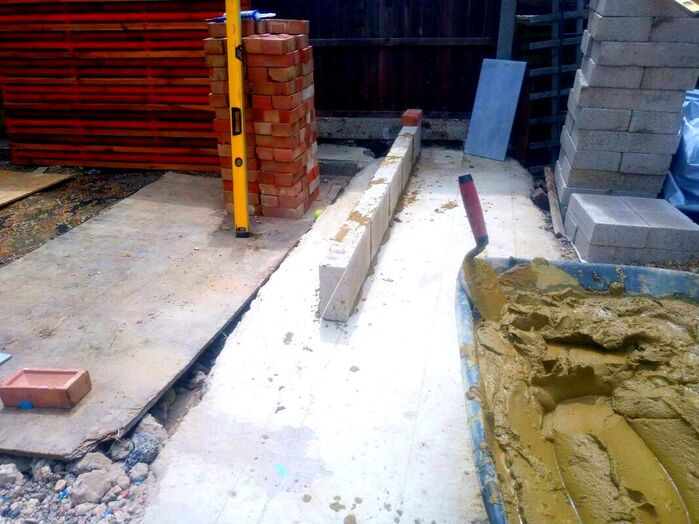
Step 8: Keep your corners plumb
An efficient way to lay concrete blocks straight is build up your corners first. Build them up as high as your garden wall is and make sure they are vertically level or ‘plumb’. Place your spirit level vertically onto your wall and make sure your bubble falls within the two lines. 
Step 9: Keep your lines straight
When your corners are built up level and plumb, run a tight string line from the top of blocks at each end. Now all you have to do is tap the top of your blocks flush with your string. This will enable your wall to remain straight and plumb, all the way up. Step 10: Core out any drainage holes
If your wall is retaining any ground levels or soil make sure to core out some drainage holes. This can be done using a circular diamond cutting drill attachment. Core out your holes with a minimum diameter of 30mm, place your holes at the bottom of the wall. To prevent drainage holes from clogging, place a fine wire mesh with filtration fabric at the rear of the hole. 
Step 11: Waterproof if necessary
If your concrete garden wall is retaining soil it is a good idea to waterproof it on the soil side. This can be achieved with bituminous paint or a damp proof membrane. Step 12: Lay cappings or copings
Most concrete garden walls will require some sort of coping or capping. This is to protect the top of the wall from weathering and finish it aesthetically. Lay your copings or cappings on a strong mortar bed with an overlap over the wall. Visit our article on how to make copings from paving here. 
Step 13: Clad your blockwork
There are numerous ways of surfacing your bare concrete wall when it is completed. Some of the most popular ways include rendering, painting, tiling and cladding. In my example below I used contemporary style, porcelain, stack cladding. 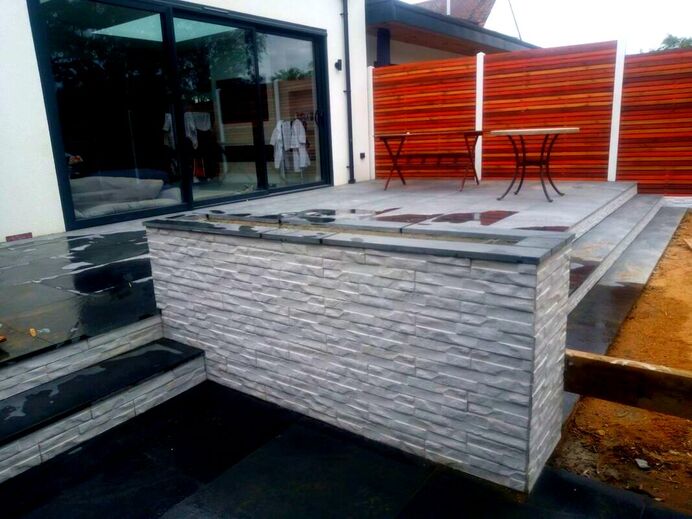
How to build a garden concrete wall using shuttering
Step 1: Mark out your walls position
Mark out where you want your wall to be located. Not only will you need to mark out for the wall itself but also the foundation. Mark out your walls foundation with marker paint so you know where to excavate. Step 2: Excavate your foundation
Excavate for your walls foundation, you are best excavating to a minimum depth of 400mm for a small wall. You will have to excavate out much more for taller and thicker concrete garden walls. Try to make your foundations at least three times the width of the wall itself. 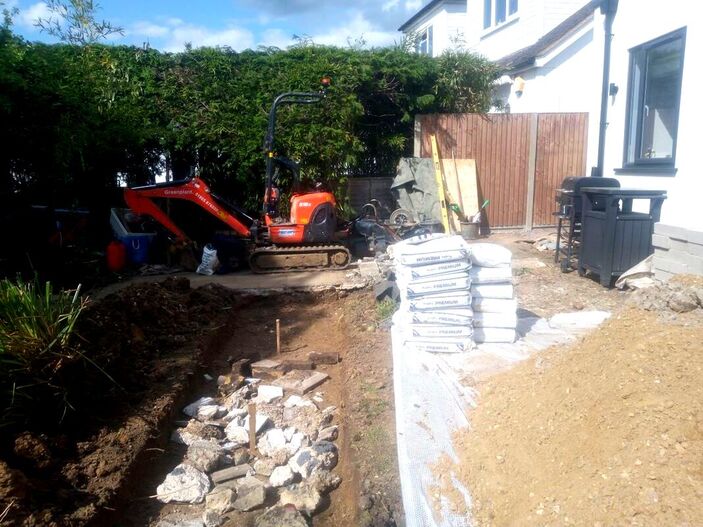
Step 3: Mix and pour the concrete foundation
Mix one part cement to five parts ballast with water inside a cement mixer until it reaches the consistency of porridge. Pour your wet concrete into your excavation and tamp it smooth to your desired level. Remember, gravity will naturally want to pull your concrete level! However, use a trowel and spirit level to move your mix around and work it perfectly level. The better job you do of levelling your foundation will make your laying your blocks level so much easier. 
Step 4: Set up your walls shuttering
Set up your in-situ concrete wall formwork and shuttering. This can be undertaken using rigid timber boards for straight walls and flexible boards for curves. Curved walls are normally formed using thin but durable shuttering ply and ridged timber pegs. 
Step 4: Set up your working area
Set up a working area where you have all your materials and tools for laying blocks to hand. Try to set up your mortar mixing area away from your block work. This will prevent your wall becoming splashed with mortar stains. 
Step 5: Mix up your concrete
Mix one part cement to five parts ballast with water inside a cement mixer until it reaches the consistency of porridge. You can make concrete a little bit runnier and stronger if it is filling up shuttering. This encourages air bubbles to rise up to the top of the wall and escape from the edges. 
Step 6: Apply shuttering grease
Apply shuttering grease or strike release oil to the inside of your shuttering before you pour your concrete. This creates a waterproof barrier between the concrete and the formwork. This prevents the risk of concrete fracturing when the shuttering is removed. Step 7: Lay reinforcing bars
If your concrete wall is spanning for a long and continuous length, you may wish to add some reinforcing. This is because concrete has very low flexible strength, consequently long and narrow lengths could crack in time. Metal reinforcing bars and mesh can be incorporated into the central portion of your concrete. This will add a slight flexibility to the structure and help prevent cracking. Step 8: pour your concrete
Pour your concrete into the shuttering and spread it around to reach a level layer. Step 9: Work out air bubbles
As you pour in your wet concrete work, the mix with a rake to help work out air bubbles. Plunge your rake in and out of the concrete to help the bubbles to rise and settle the aggregates. Step 10: Tamp concrete level
Using a straight edge or long spirit level, tamp the top of your concrete level. If you have made your concrete a little more on the runny side this will be much easier. 
Step 11: Core out any drainage holes
If your wall is retaining any ground levels or soil make sure to core out some drainage holes. This can be done using a circular diamond cutting drill attachment. Core out your holes with a minimum diameter of 30mm, place your holes at the bottom of the wall. To prevent drainage holes from clogging, place a fine wire mesh with filtration fabric at the rear of the hole. 
Step 12: Waterproof if necessary
If your concrete garden wall is retaining soil it is a good idea to waterproof it on the soil side. This can be achieved with bituminous paint or a damp proof membrane. Step 13: Lay cappings or copings
Most concrete garden walls will require some sort of coping or capping. This is to protect the top of the wall from weathering and finish it aesthetically. Lay your copings or cappings on a strong mortar bed with an overlap over the wall. 
Step 14: Clad your concrete
|

|
|
|
'As an Amazon associate I earn from qualifying purchases'
This article contains affiliate links
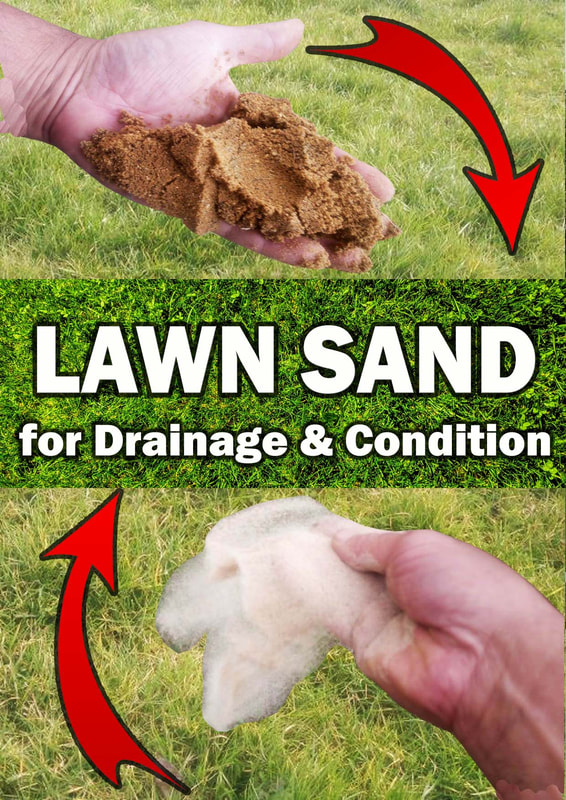
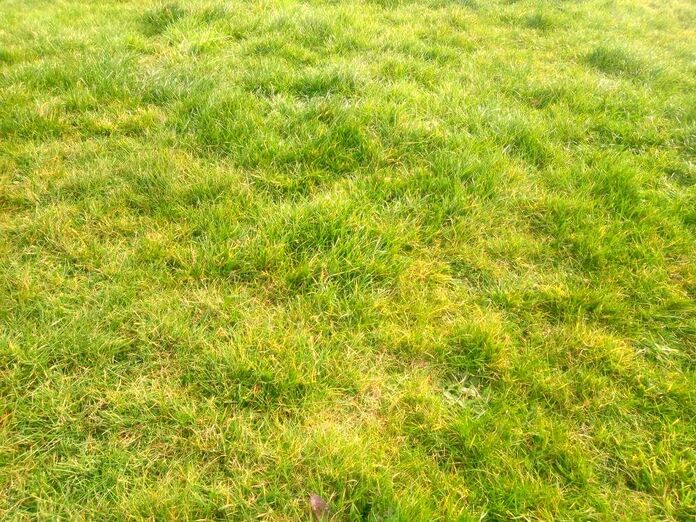
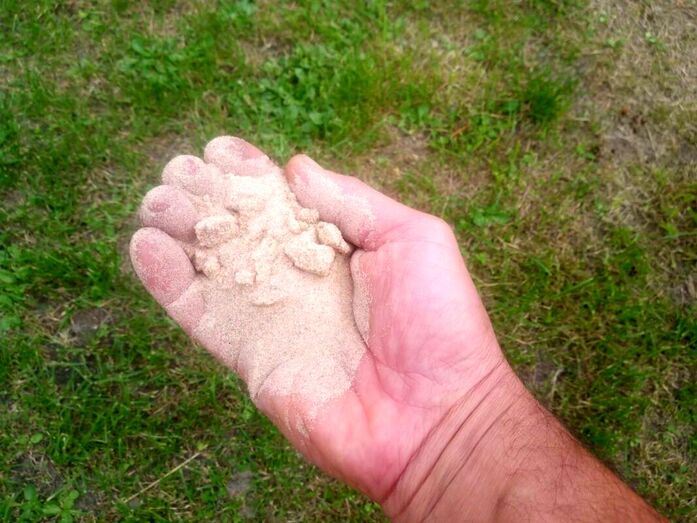
Improving the quality of your lawn has long been a pursuit of many. Not only does a lush green look good it provides a versatile and multifunctional surface.
However, improving your lawns quality has never been an exact science. Some gardens have specific circumstances which can hinder the optimal conditions for the perfect grass.
However, no matter what condition your existing lawn is in, adding lawn sand is generally a benefit in some form. In this article I will identify the benefits of adding sand to your lawn.
I will also discuss the varying circumstances where using sand can improve your lawns condition. I will then summarise the primary scenarios of lawn improvement using lawn sand explaining when and how to implement it
Should I put sand on my lawn?
If you should put sand onto your lawn or not really depends upon your existing soil type. If you have compacted, sticky soil which does not drain well sand can have many benefits.
If you already have well drained, sandy soil, sand is less likely to improve your lawn. The latter would benefit from adding more organic, humus rich material such as compost.
However, what sand you apply, how you apply it and in what amounts depends upon your specific goals and circumstances.
Types of lawn sand treatment
There are two main types of lawn sanding processes; drainage interventions and top dressing.
Drainage interventions will typically involve adding sharp sand both within and under your turf. Top dressing however involves spreading sand directly onto the lawns surface.
Top dressing lawn sand is normally less coarse than drainage sand with medium sized or more uniform particles. Such dressing can help to irradiate moss, level dips and create an open texture to the lawns surface.
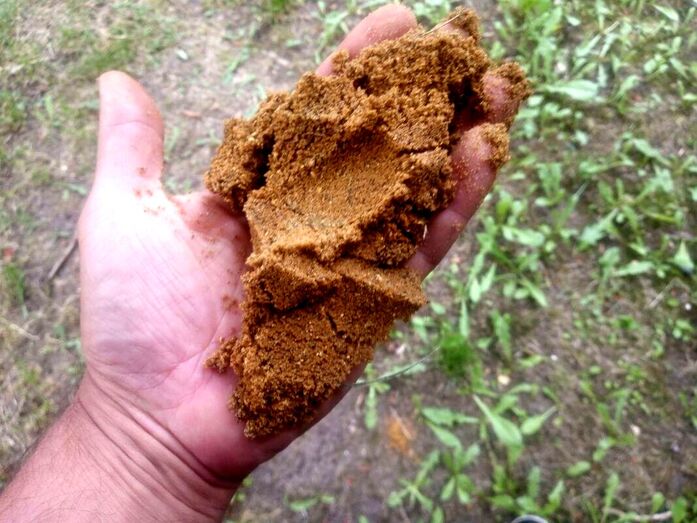
Lawn sand for drainage
If you have a very boggy or clay soil you may wish to add sharp sand. This can added to an existing lawn by filling aeration holes created by and aerator.
If you are laying a new lawn, sharp sand can be mixed into your soils surface with a tiller. A free drainage layer of around 25mm-35mm of sharp sand can spread under the whole surface of your lawn.
This is then covered with around 30mm of good quality topsoil loam. Such sharp sand use within lawn drainage is often incorporated after more substantial drainage works.
These include lawn drainage grids, drainage channels and soakaways.
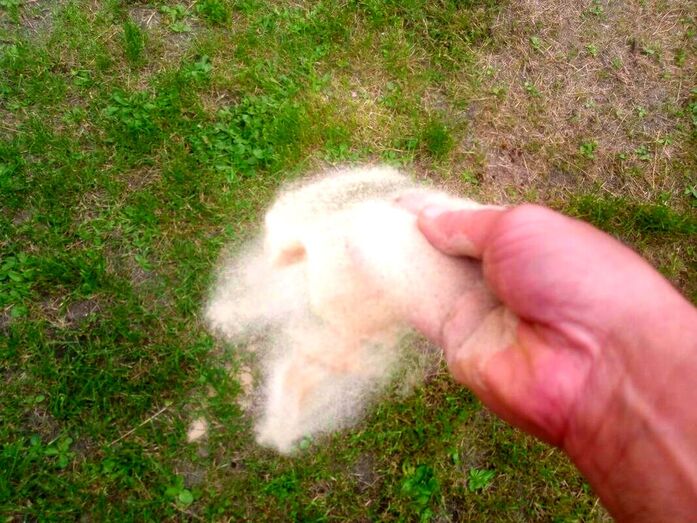
Lawn sand for top dressing
Lawn sand for top dressing is less coarse with medium sized particles and less silt. A good example of this sand is silver sand orplay sand. This evenly graded sand finds it easy to sink into the soils surface creating an open texture.
Being less coarse means it is not so abrasive to grass stems and roots when walked upon. As worms naturally mix and aerate soil under your lawn the sand easily blends into the top layer.
This leads to less compaction, better aeration, less moss and improved drainage. To fasten up this improvement process top dressing lawn sand is often spread after scarification.
Scarifying typically involves intensive raking and slitting of the lawns surface.
This removes lawn thatch including mosses and dead grass from the surface. At the same time fine blades slit and churn up small holes within the lawns surface.
This provides opportunity to spread top dressing sand and occasionally humus rich loams. Such a mix does not only improve the lawns structure it also feeds grass essential nutrients.
A good way to combine top dressing and such feeding is with lawn care sand.
This provides opportunity to spread top dressing sand and occasionally humus rich loams. Such a mix does not only improve the lawns structure it also feeds grass essential nutrients.
A good way to combine top dressing and such feeding is with lawn care sand.
Lawn care sand
Lawn care sand is a top dressing grade of sand which improves lawn structure and feeds grass. Its application combined with scarification can lead to better quality lawns.
Lawn care top dressing sand products such as Elixir contain ferrous sulphate which kills moss. It also contains Nitrogen and Iron to feed your grass essential nutrients.

Benefits of putting sand on my lawn?
- Increasing drainage
- Improving soil structure
- Adding oxygen
- Relieving compaction
- Filling voids
- Re-levelling
- Killing moss
Lawn sand spurs
My people’s goals lie somewhere between the outcomes of topdressing, conditioning and improving a lawns surface drainage.
One of the most effective ways of doing this is with Lawn sand spurs. These lawn care foot spikes enable you to casually walk around your lawn inserting hundreds of narrow holes.
Simply strap them to your shoes and walk up and down in a tight formation. Lawn care sand can then be brushed into the surface improving drainage and lawn quality.

Levelling your lawn with sand
One of the best ways to improve your lawns appearance is to reach a consistently flush surface. The most typical way of doing this is by relaying a whole new lawn.
However, you can also level up existing dips and undulations with sand. This can be achieved by mixing sand and topsoil by spreading it gradually to low spots.
This is best done thinly in layers overtime by allowing grass to re-establish itself through each layer.
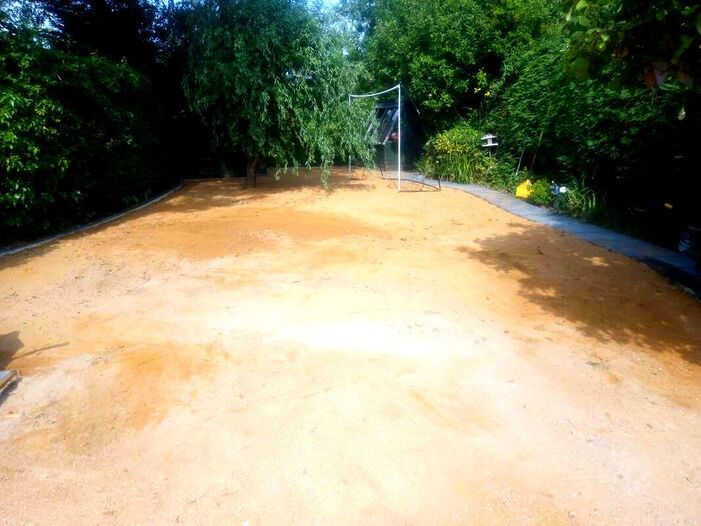
A free draining lawn sand layer under a new lawn
How to make a lawn sand drainage layer step by step
One of the best was to improve your lawns drainage with sand is to incorporate a free drainage layer.
This involves laying a new lawn with a 30mm sharp sand layer underneath your new topsoil. As well as forming underlying drainage, this also provides separation between your new topsoil and your underlying soil.
This can be extremely advantageous if your existing lawn is on heavy clay. The sharp sand layer prevents clay from mixing with new topsoil keeping your lawn soft and bouncy.
Below I show you how to lay a free drainage sand layer to your lawn step by step
Step1: Remove existing turf
Strip off your existing grass by removing the top 25mm of the turfs roots. This can be achieved with a turf cutter or a sharp bladed spade. You can sharpen the blade of a blunt metal spade using a diamond disk and an angle grinder (make sure you use safety goggles). Chip off the turf and remove the waste from site.
Strip off your existing grass by removing the top 25mm of the turfs roots. This can be achieved with a turf cutter or a sharp bladed spade. You can sharpen the blade of a blunt metal spade using a diamond disk and an angle grinder (make sure you use safety goggles). Chip off the turf and remove the waste from site.

Step 2: Work out your levels
Work out where you want the level of your new lawn to be. You may want to raise your existing lawns level to help improve drainage! You also may wish to reach a more consistently flush and level surface. This will also aid better drainage and look more attractive. A consistent level can be achieved by setting up a tight string line when working your soil.
Work out where you want the level of your new lawn to be. You may want to raise your existing lawns level to help improve drainage! You also may wish to reach a more consistently flush and level surface. This will also aid better drainage and look more attractive. A consistent level can be achieved by setting up a tight string line when working your soil.
Step 3: Alleviate compacted ground
Dig over your existing soil and alleviate any compaction, this will help to add oxygen and ease compaction. The best way to do this is with a tiller, if your ground is very compacted you may have to hand dig it first.
Dig over your existing soil and alleviate any compaction, this will help to add oxygen and ease compaction. The best way to do this is with a tiller, if your ground is very compacted you may have to hand dig it first.

Step 4: Break up clods & level
Break up any clods or lumps of soil working the ground to a fine tilth. This is much easier during a warm day and with the assistance of a mechanical tiller. These can be hired from any good hire shop.
Break up any clods or lumps of soil working the ground to a fine tilth. This is much easier during a warm day and with the assistance of a mechanical tiller. These can be hired from any good hire shop.
Step 5: Consolidate
During the breaking up and tilling process the soil will spring up and take on a fluffy texture.
Nature will eventually settle the ground back to its lower level. Consequently you should consolidate the surface to bring the round to a firmer footing.
It is important to remember the term consolidate not compact! You do not want to compact the soil just firm up its surface.
This can be achieved by gently walking over its surface lightly once raking level as you go. This will prevent too much settlement of levels after the lawn is laid.
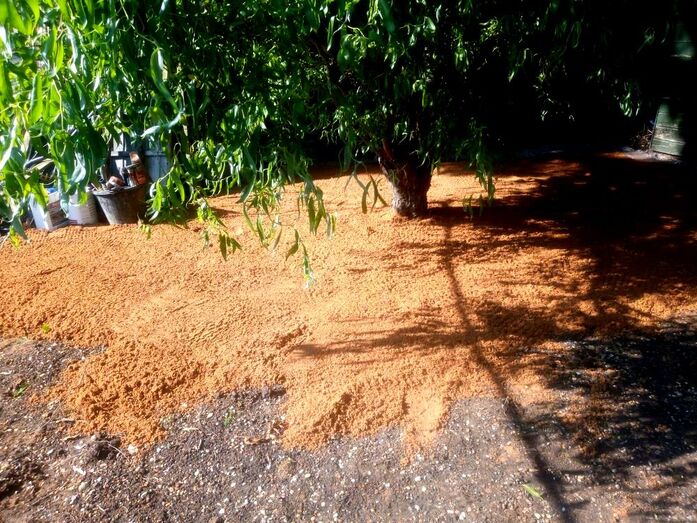
Step 6: Spread your sharp sand
Spread your sharp sand in a consistent layer of around 30mm all over the lawns surface. Using a landscaping rake, grade the sand as level as possible.
Spread your sharp sand in a consistent layer of around 30mm all over the lawns surface. Using a landscaping rake, grade the sand as level as possible.
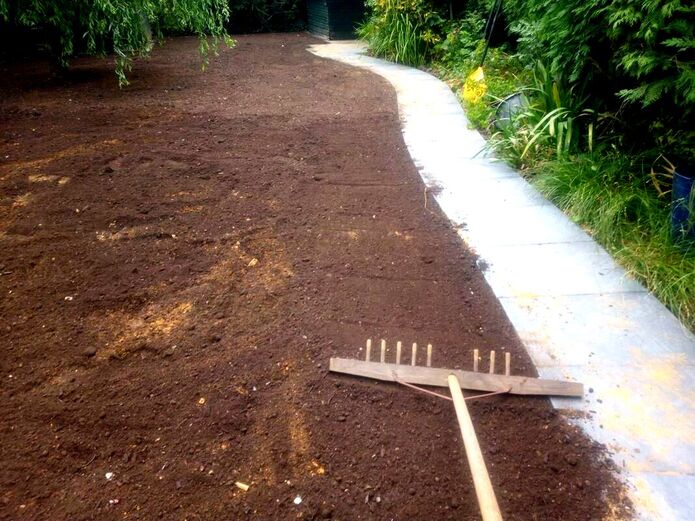
Step 7: Spread your topsoil
In the same way as you levelled your sand, wheelbarrow in your soil and start to levelling it. It is best to dump your soil in half wheelbarrow piles to make it easier to rake.
If you are new to levelling soil utilise a long timber straight edge to help screed the soil.
In the same way as you levelled your sand, wheelbarrow in your soil and start to levelling it. It is best to dump your soil in half wheelbarrow piles to make it easier to rake.
If you are new to levelling soil utilise a long timber straight edge to help screed the soil.
Step 8: Lay your turf
You should ideally lay your turf the day it arrives to prevent it heating up. Lay your turf as tightly and as neatly as possible. Try to bunch it up as close as possible as it can shrink in hot weather as it establishes.
You should ideally lay your turf the day it arrives to prevent it heating up. Lay your turf as tightly and as neatly as possible. Try to bunch it up as close as possible as it can shrink in hot weather as it establishes.
Step 9: Cut in edges
Cut the edges of your turf as neatly as you can, this is best done with an old wood saw. Try to avoid cutting sections which are very small as they can dry out quickly and perish.
Cut the edges of your turf as neatly as you can, this is best done with an old wood saw. Try to avoid cutting sections which are very small as they can dry out quickly and perish.
Step10: Water your turf
When you have laid a section make sure you water it in thoroughly! You cannot water it enough at this stage the turf and the underlying topsoil must be saturated. When you are watering gently lift the edge of one turf to make sure it is wet underneath.
When you have laid a section make sure you water it in thoroughly! You cannot water it enough at this stage the turf and the underlying topsoil must be saturated. When you are watering gently lift the edge of one turf to make sure it is wet underneath.
Step 11: Board down
Walk up and down the lawn using long scaffold boards or long, ridged, 6x2 planks. This will help level the lawn further and allow the turf and soil to make good contact.
Walk up and down the lawn using long scaffold boards or long, ridged, 6x2 planks. This will help level the lawn further and allow the turf and soil to make good contact.
Step 12: Maintenance
Water the new lawn every other day when it is first laid for the first week if the weather is dry. If it is raining substantially over the first 14 days and not too hot it should be ok.
Check the edges around the lawn during this time to make sure it doesn’t dry out. Do not walk on the lawn during the first two weeks to help the roots establish.
The new lawn can be mowed little and often after three weeks it is growing well. Lawns laid in late autumn may not require cutting until spring.

Thank you for reading our article on how to improve your lawns appearance and drainage with sand.
Below I will link to some other lawn articles you may find useful. If you have found this article helpful why not share it via the tabs below. Thank you!
Below I will link to some other lawn articles you may find useful. If you have found this article helpful why not share it via the tabs below. Thank you!
|

|
|
'As an Amazon associate I earn from qualifying purchases'
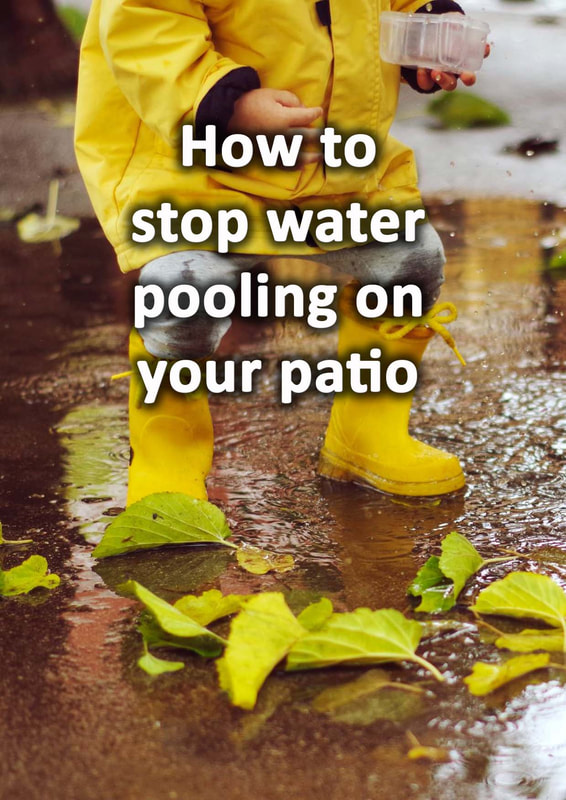
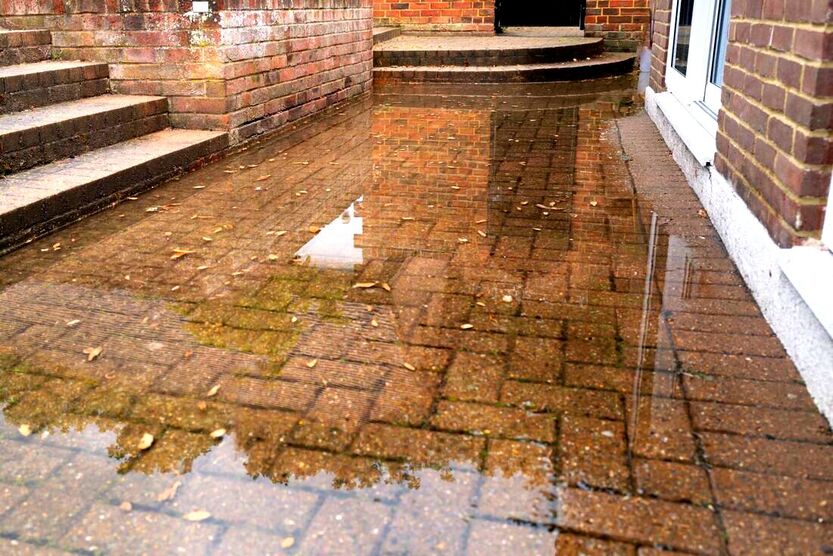
This article contains affiliate links
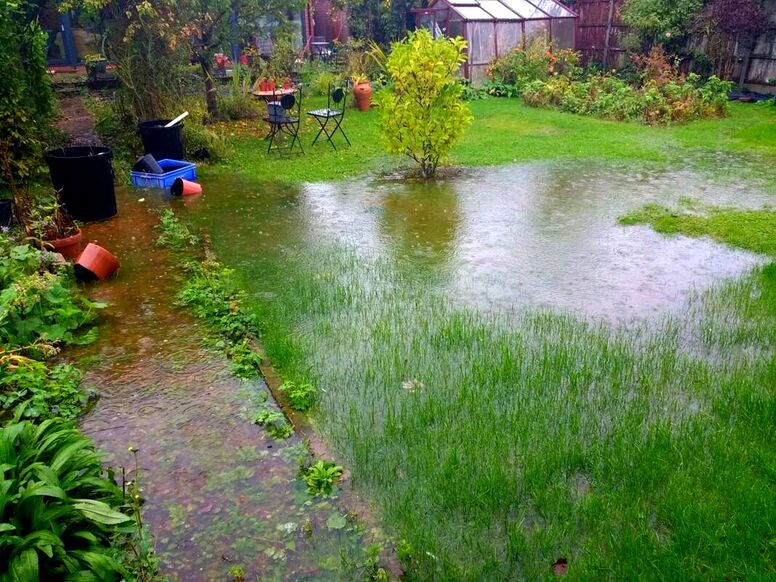
There is nothing more frustrating than having puddles on your patio. When the rain stops and the sun comes out puddles and damp spots can really ruin your outdoor space.
Unfortunately water pooling on patios is one of the most common garden problems. Not only can it affect old patios but new patios which were not installed correctly.
Rainwater pooling on patios can take the shape of localised puddles or substantial flooding events.
In this article I will explain the disadvantages of standing water on patios and other hard surfaces. I will explain the common causes of water pooling on paving and how these can be resolved.
Why is standing water on your patio bad?
- Looks unsightly
- Can cause discolouration
- Can lead to bad smells
- Can cause damp in walls
- Can facilitate freeze and thaw action
- Can cause slips and falls
- Increases the need for maintenance
Why is water pooling on my patio?
There are actually a few reasons why water could be pooling on your patio. Some of these may actually have nothing to do with the patio itself.
A change in the surrounding garden or surrounding landscape can occasionally be to blame. However, most of the time puddles on patios are more to do with the patio itself.
Either individual low spots are collecting water or the patio drainage strategy as a whole has failed. Below I will list and summarise some of the most common reasons for surface water pooling on patios.
Broken paving
If a paving slab becomes broken it often will not maintain the same level as it did before. This can lead to water becoming trapped and pooling within a certain area. If a few slabs are broken, this can lead to even more water pooling on your patios surface.
Sinking paving
Sinking paving is typically a symptom of patios having been laid with an insufficient base. During a shock or impact event paving can occasionally sump into a low spot.
As the low area collects more water the underlying ground becomes more saturated. This leads to further sinking and more water pooling on the patio over time.
Incorrect paving falls
It is very typical for patio builders to lay paving to a fall or very slight gradient. This is to help divert rainwater to a drainage feature or away from potential entrapments. Occasionally patios can be laid with incorrect falls leading to trapped and pooling water.
It is very typical for patio builders to lay paving to a fall or very slight gradient. This is to help divert rainwater to a drainage feature or away from potential entrapments. Occasionally patios can be laid with incorrect falls leading to trapped and pooling water.

Lack of a patio drainage strategy
If patio drainage hasn’t been conceived or planned for from the very beginning it can lead to pooling water.
It is very common for inexperienced pavers to underestimate the importance of a patio drainage strategy. Consequently such patios and end up with excessive trapped surface water with nowhere to escape. For a full guide and overview of patio drainage visit our resource here.

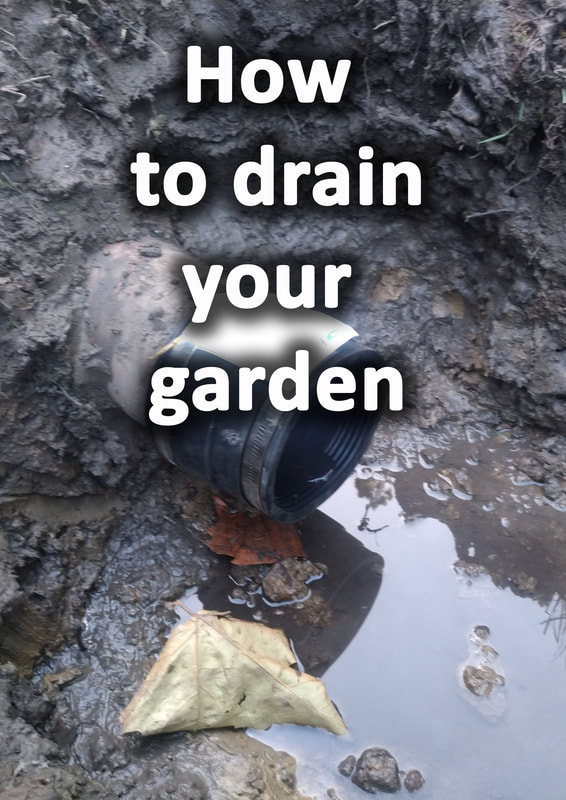
Silted or blocked drains
Many patios are built with a drainage strategy in place but over time they have failed. This can be due to old soak ways silting, channel drains becoming blocked or blocked sump drains.
Consequently, it is always good to investigate if there is a drainage system which has become blocked. Why not visit our article onhow to unblock a garden drain.
Ground movement
It is sometimes the case that ground movement can cause subsidence under a patio. This may not be due to incorrect construction but simply natural ground movement.
Although rare, these events can occur in areas with calcium rich or sandy subsoil. Ground movement can also happen in areas with undulating topography.
Recent building work
Although rare it can sometimes be the case that nearby construction has led to water pooling on your patio.
New extensions, out-buildings and hard surfacing can increase surface run off around your property. If the surrounding ground cannot absorb the new water runoff this can lead to flooding.
Not only can this cause water pooling on your patio it can also lead to boggy lawns and flower borders.
A new lawn
A new lawn may seem like an unusual reason for water pooling on a patio. However, it is commonplace for many patios to run water onto existing lawn areas.
Normally such lawns are ever so slightly lower than the existing patios level. This allows water to escape from the paving and be absorbed by the grass.
It is common for new lawns to be laid completely flush and level with existing patios. This can lead to a damping effect where water becomes trapped onto the patio with nowhere to escape.
Artificial lawn installation
Artificial lawns have become an increasingly popular, low maintenance trend in back gardens. Few are aware however of the unintended drainage consequences of installing artificial grass.
If you are removing a traditional lawn, an artificial lawn will not absorb rain water as it did before. Artificial lawns typically are based on aggregates like patios.
When topsoil is removed you are taking away your soils natural ability to absorb water. If you have installed artificial grass and now have water pooling on your patio, you must install drainage.
This could be either a drainage chamber, drainage channel or soak away system.
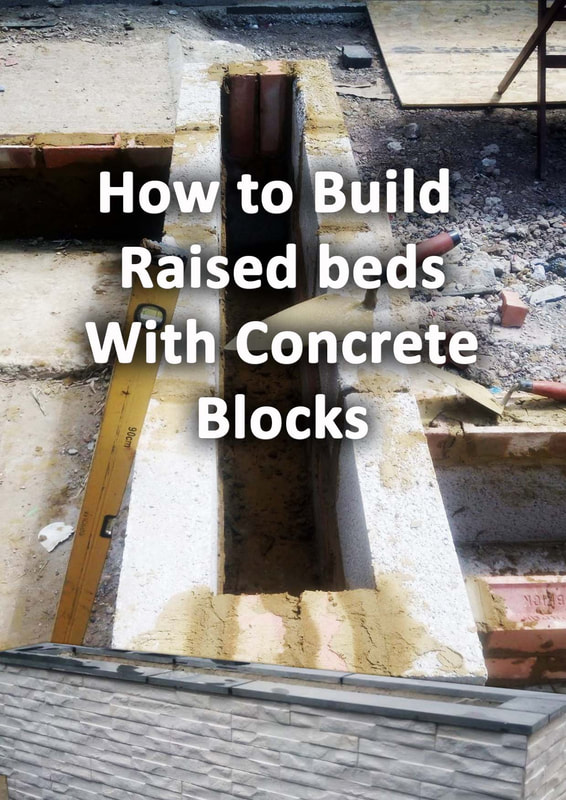
Raised bed installation
Many don’t assume that building a raised bed could cause pooling water on a patio. However, it is very possible to unintentionally dam surface run off with new raised beds.
It is a common desire to encompass patio areas with raised planters. This can help to provide enclosure, shelter and privacy. Occasionally however, such structures block patio run-off from reaching its drainage destination.
Furthermore, drainage water from raised beds will slowly ooze from weep holes onto paving. This can lead to a steady stream of pooling water on patios.
In such scenarios its best to install gravel traps or channel drains along the raised beds edge.
Failed permeable paving
Permeable paving allows water to pass through reducing surface run off and the risk of flash flooding.
Materials such as permeable block paving, resin bound aggregate and gravel enable runoff water to seep into the paving's surface. Permeable paving’s ability to reduce flash flooding and runoff into watercourses has earned a reputation for sustainability.
However, in times of heavy rain permeable paving can become overwhelmed. This results in water pooling on the surface with the threat of localised flooding.
How to divert water away from my patio
If surface water is running towards your patio, you will need to divert the water away. The most typical scenario here is when a garden slopes towards your paving.
In such a case you will want to collect the water and divert it away from your paving. This can be achieved by installing either a channel drain or drainage channel.
These will need to direct water towards a drainage feature such as a soak-away or swale. Why not read our articles on garden drainage, drainage channels and channel drains for more information.
How to stop water pooling on your patio
Re-level your paving
The most common reason for water pooling on your patios surface is insufficient level falls. This is where water cannot escape from the patios surface.
Dips and low spots result in water pooling with no means of escape. The only real way to remedy this is to re-level your paving. Low areas should be re-laid to a flush and consistent level to prevent pooling.
An assessment of the existing patios levels should also be undertaken. If falls do not allow water to run away then the levels will need to be changed.
This could involve re-laying the whole patio.
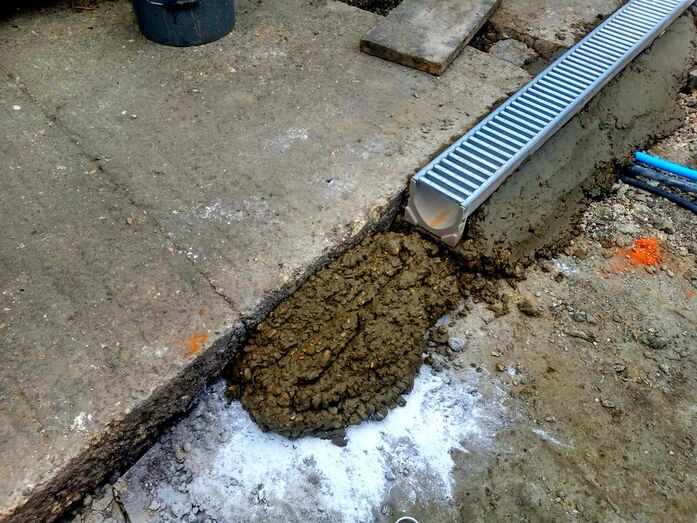
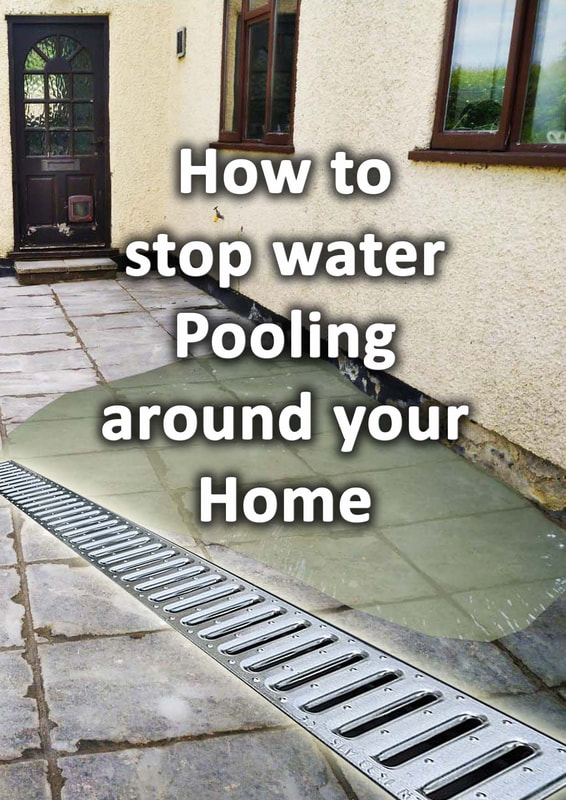
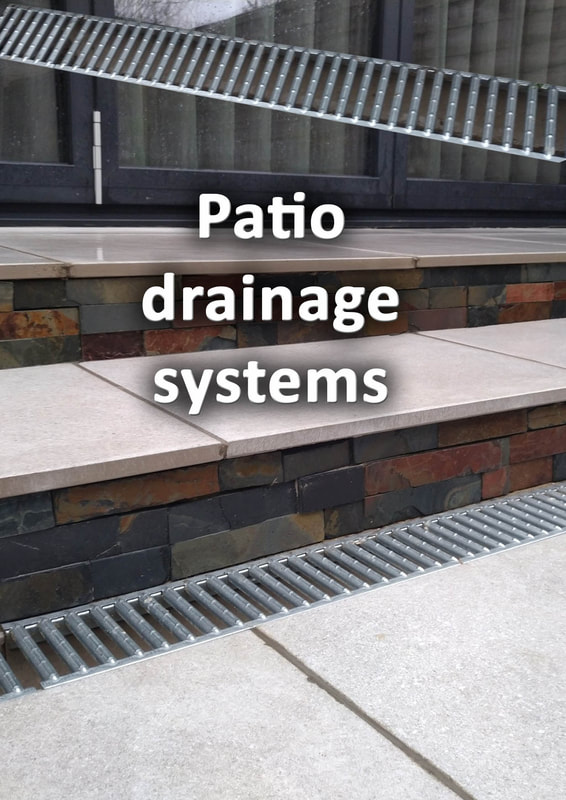
Install a grated channel drain
An effective way of draining away pooling water is to install a grated channel drain. You will need to neatly cut and excavate a channel within the paving itself.
This can be a tricky process and may require skilled labour in order execute properly. If a channel drain will be the correct solution for you will depend upon your specific pooling problem.
Channel drains work best when the run along the edge of a patio. If you have a single low spot of pooling water it would be best to re-lay this area level.
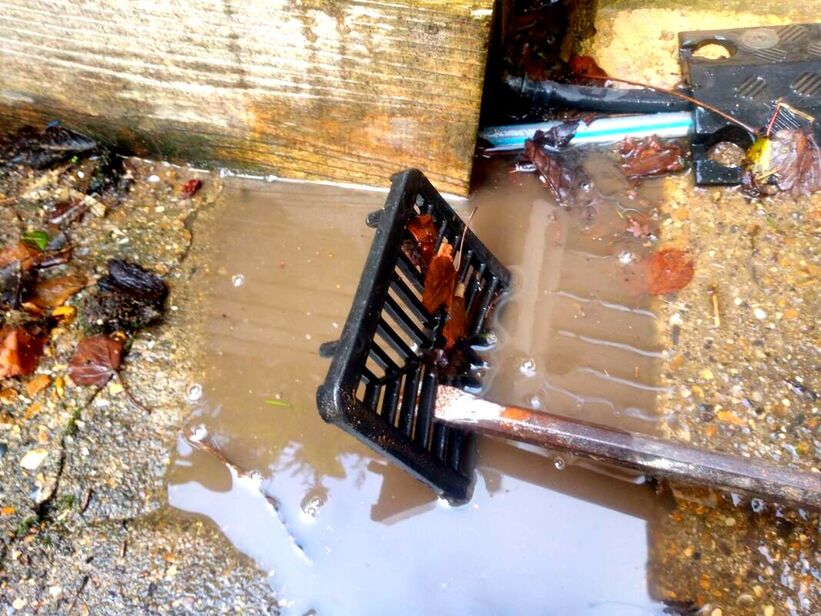
Install a sump drain
Sump drains typically take the form of a small square drain installed to low spots in hard surfacing.
These are more common within concrete surfaces with concrete laid with a fall towards the drain. Sump drains can be plumbed into a small soak away of drainage network. These drains can look a little unsightly but can help to drain away pooling water in patios.
Create a new holistic garden drainage strategy
Very often, water pooling on a patio can be linked to other garden drainage problems. If your garden has existing drainage issues there is more chance of your patio flooding.
Consequently it is always effective to assess your gardens wider drainage problems. This will enable you to create a new holistic garden drainage strategy.
This could involve installing drainage channels which feed directly into a soak away system. For a more comprehensive resource on garden drainage visit our in-depth article on the subject here.
Thank you for reading our article on how to stop water pooling on your patios surface. If you are having problems with water pooling on a patio reach out to me.
Send me images of the problem from varying angles and I will try to diagnose the problem via email. Below I will link to some other articles you may also find useful.
Send me images of the problem from varying angles and I will try to diagnose the problem via email. Below I will link to some other articles you may also find useful.
|
|
|
'As an Amazon associate I earn from qualifying purchases'

This article contains affiliate links
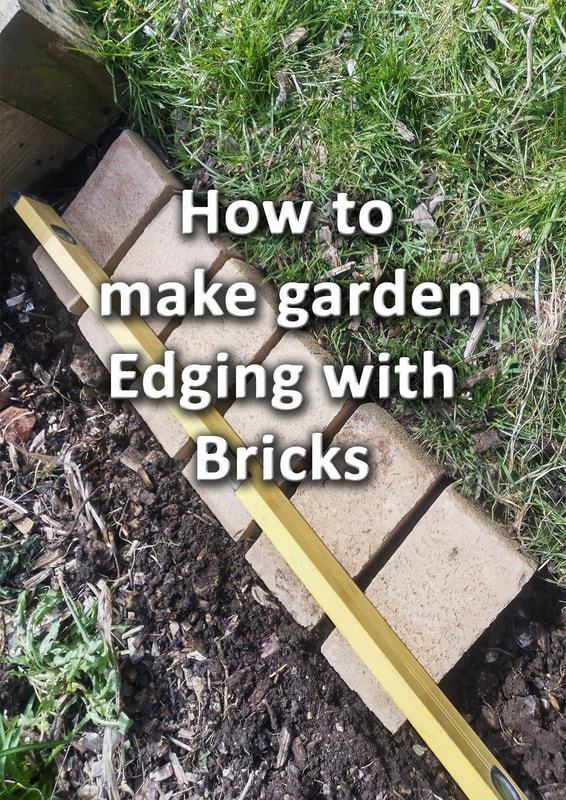
When it comes to garden landscaping, bricks are one of the most versatile and decorative building materials.
Not only can bricks be used for building walls but also raised beds, patio borders, pathways, mowing strips, patio and garden edging. One of the biggest advantages of using bricks in garden landscaping is they are made from natural, materials.
This is means their colours are less likely to fade in sunlight like concrete substitutes. Bricks also offer a pleasant visual texture representing a variation of natural tones and shades.
These not only can look attractive close up but also at a distance. In this article I will answer common questions about garden and landscaping bricks.
I will also explain which bricks are suitable for various garden and landscaping installations.
What bricks can you use for garden landscaping?
Almost all bricks are manufactured to construct buildings or outdoor facing structures of some kind.
Therefore all bricks can be used for garden or hard landscaping projects. However, depending on the type of landscaping you intend some bricks may be better than others.
Some soft and absorbent bricks may not be the best option for saturated soil. Such bricks in damp conditions could be vulnerable to frost damage in time.
On the whole however bricks are a robust and durable material suitable for garden landscaping use.
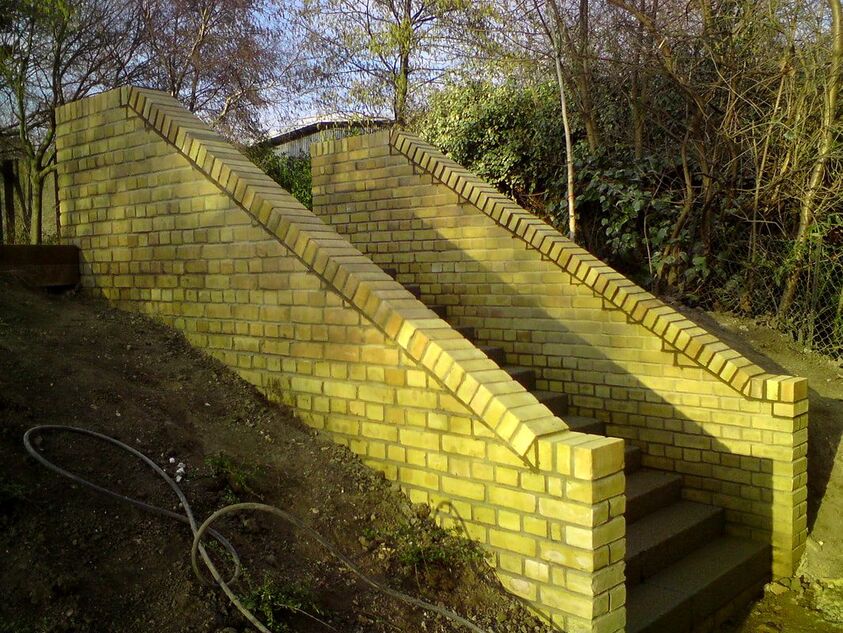
Brick steps I built in Kilburn, London, using Sevenoaks Yellows Bricks
What are the best bricks for a garden wall?
Even though most bricks are suitable for garden walls and general landscaping not all look the best.
The best bricks for garden landscaping have deep, multi-tonal, variations which compliment surrounding garden landscaping. Small blotches and imperfections during firing process provide more visual texture, rusticity and interest.
Such bricks normally compliment many types of paving and planting well. Unlike indoor materials landscaping bricks are subject to numerous staining threats.
Bird poop, tannins from plants, mud and microscopic plants can all blemish external surfaces.
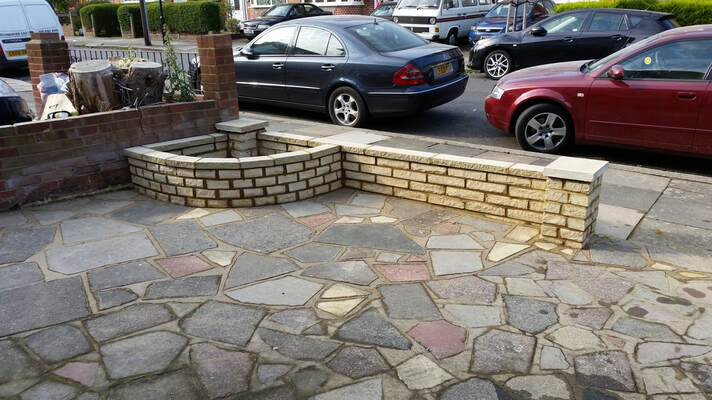
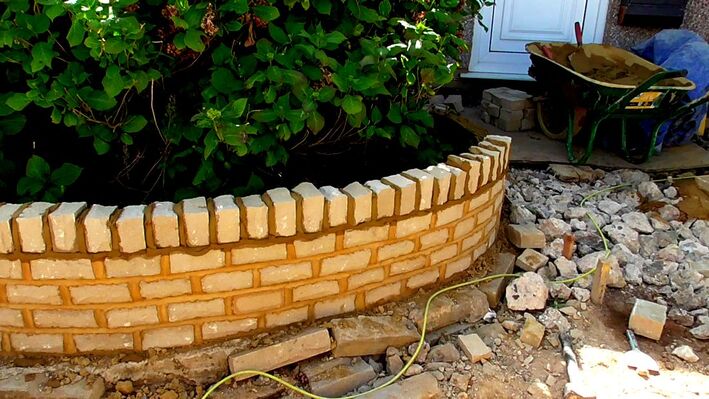
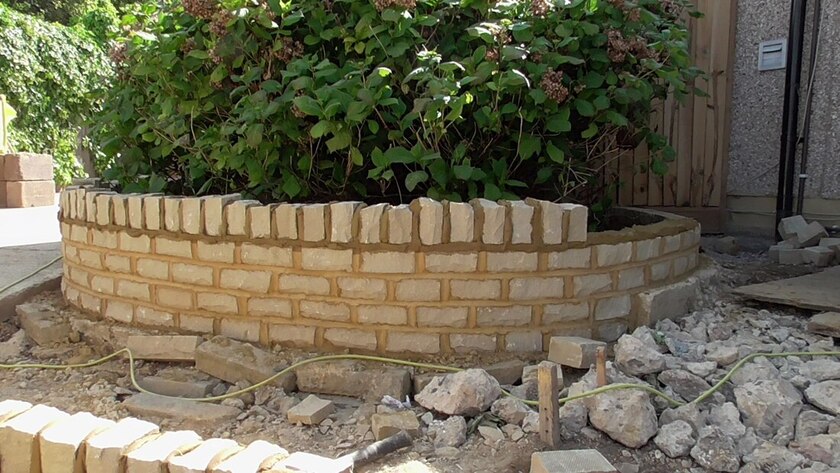
Garden wall in Eailing, London, I built using Marshalite walling bricks
Therefore a garden brick should have some variation and speckling to counter slight discolouration.
The best garden bricks for modern style landscaping can have consistent colours but must be sealed or have a glazed finish. A good example of these would be engineering bricks or glazed bricks.
The best garden bricks for modern style landscaping can have consistent colours but must be sealed or have a glazed finish. A good example of these would be engineering bricks or glazed bricks.
8 of the best landscaping bricks for garden walls
Throughout the years many clients have asked what bricks are the best for specific garden landscaping. I have found that for the vast majority of landscaping scenarios there are eight preferred garden bricks.
These eight include;
Ashdown bricks, Chailey rustic bricks, Thames yellows, Old stocks, Blue engineering bricks, Marshalite walling bricks, Tegula walling blocks and Sandstone walling.
These were chosen based on their aesthetic qualities and being able to easily integrate into any landscaping theme.
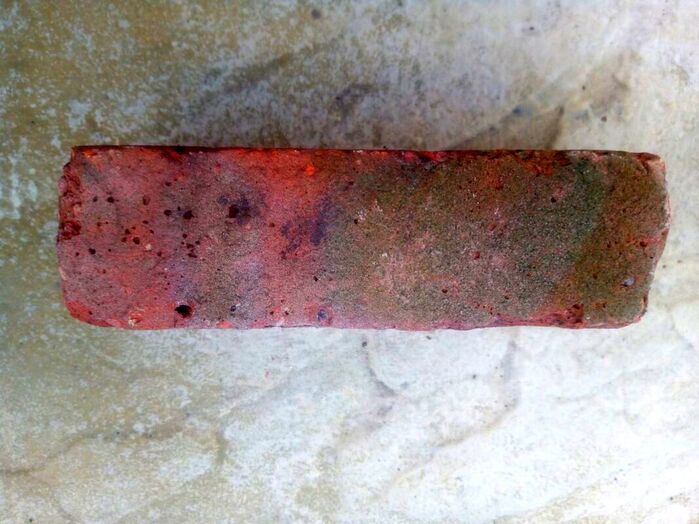
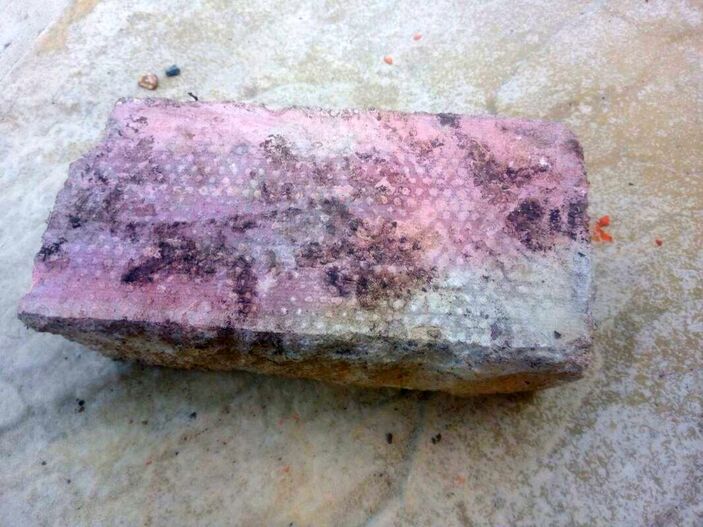
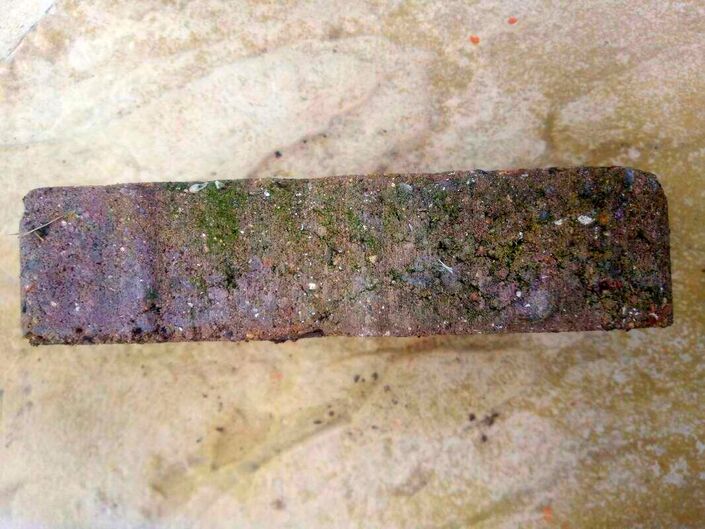
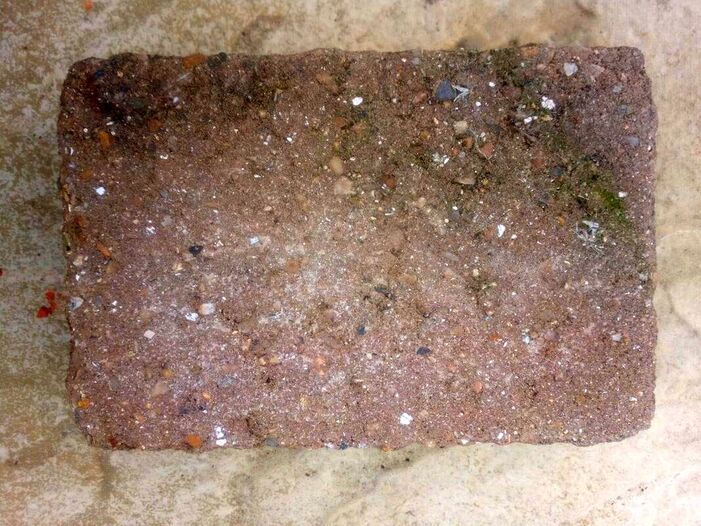
1. Ashdown bricks
Ashdown bricks are a clay brick which are quarried from clay deposits in the south of England. They have a high thermal mass and extremely durable.
During the firing process minerals within the clays produce pleasant shades of reds, oranges, purples and even pinks. This gives them an aesthetic appeal and can provide an interesting texture to garden projects.
Ashdown bricks also suite a variety of paving products including popular sandstones and flagstones. There are a few different types of Ashdown bricks and most are stocked at Travis Perkins.
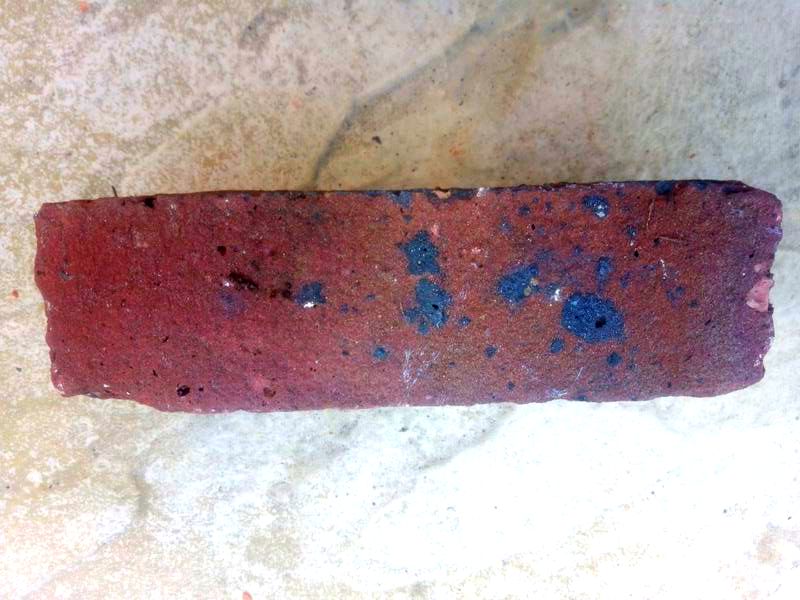
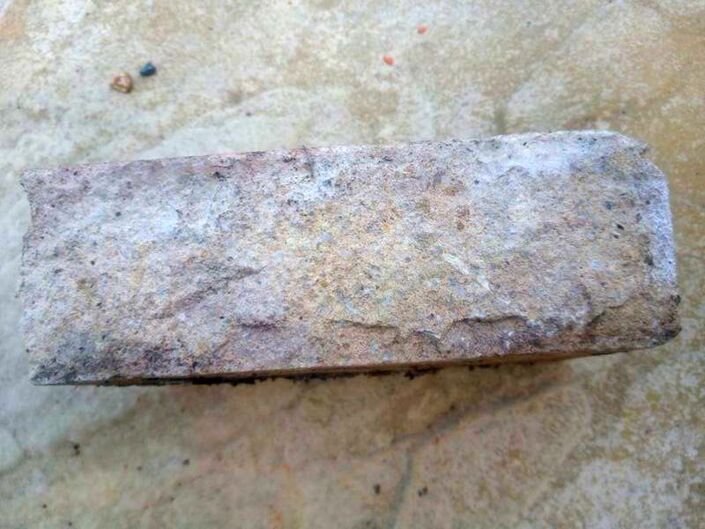
Side face view of Ashdown brick
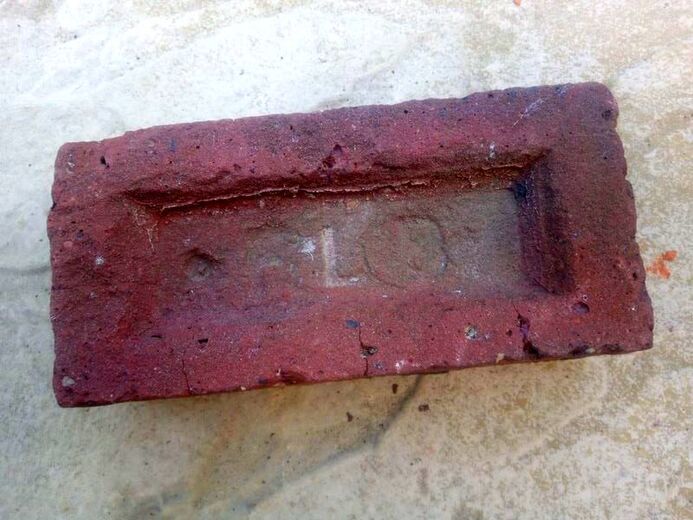
Top view of Ashdown brick
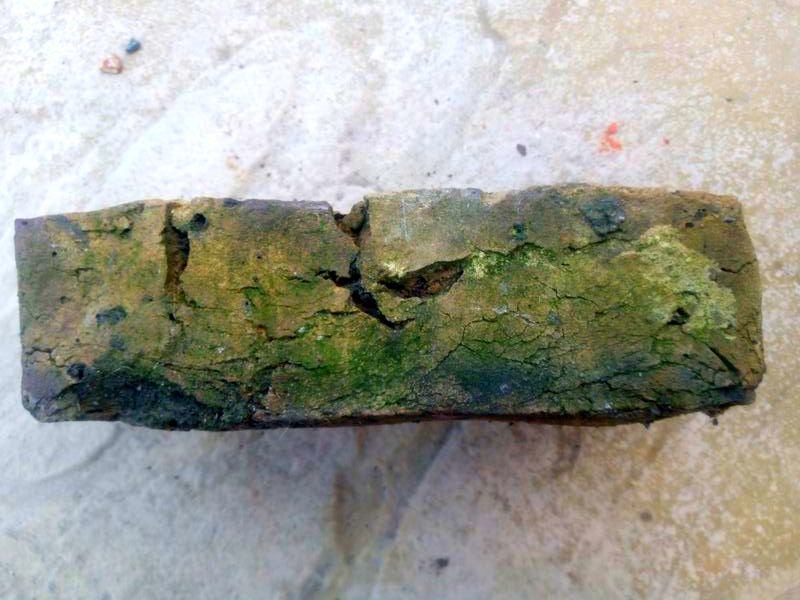
2. Chailey rustic bricks
Chailey rustic bricks are red, sand faced, stock bricks suitable for most masonry projects. These bricks have bright colour tones and contrasting dark black blotches.
Their rustic look makes them perfect for use in more traditional and cottage type gardens. It is important to note that Chaileys do have more porosity and a higher absorption rate.
Therefore, these are less desirable for flush edgings at ground level if you have boggy soil. However, Chaileys are effective for walls of varying sizes and look effective in many different building projects.
These bricks are also available for delivery from Travis Perkins here.
Side view of Chailey rustic brick

Top view of Chailey rustic brick
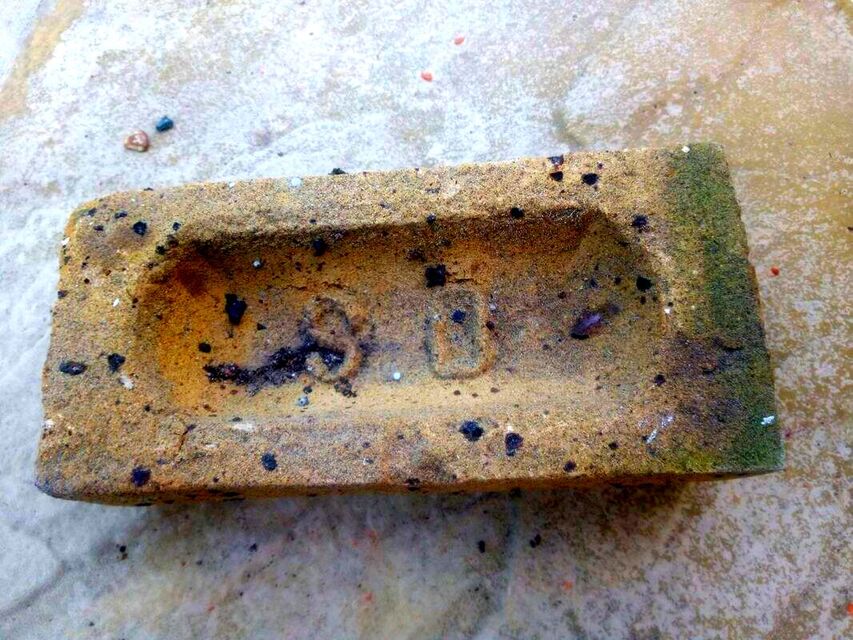
3. Old stocks
Old stock bricks were produced around the turn of the 20th century during the Victorian era.
During the late 1890’s around a hundred million of these bricks were produced every year for new housing around London. As transporting heavy loads was expensive, brick earth around London was excavated for brick clay.
This was fired to produce the building material which built Britain's capital city London. Clay was pressed into wooden moulds, often by child labour, consequently preventing distortions and imperfections.
This has led old stocks to becoming a popular brick for historical renovations and restorations. Old stocks have also become very popular landscaping and garden bricks.
Side face view of ALondon stock
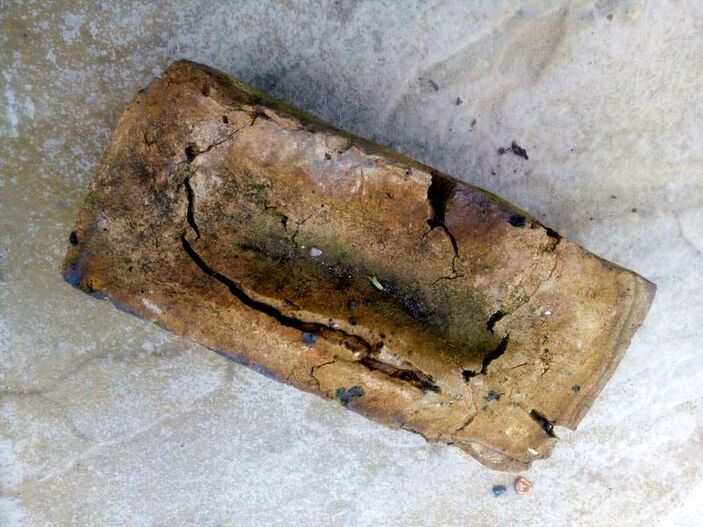
Top view of a London old stock
4. Thames Yellows
Often thought of as the original London old stock substitute the Thames yellow provides a new, old stock substitute.
The Clay for this brick typically quarried from the Smeed Dean brickworks next to the River Thames. These bricks have bright yellow tones with town ash spotting which provides a traditional appeal.
Their light buff colour makes them a favourite accompaniment to many types of buff paving and copings.
Thames yellow bricks are commonly used in landscaping alongside buff Indian sandstone and buff manufactured paving.
Side face view of Thames yellow brick
Side face view of Thames yellow brick
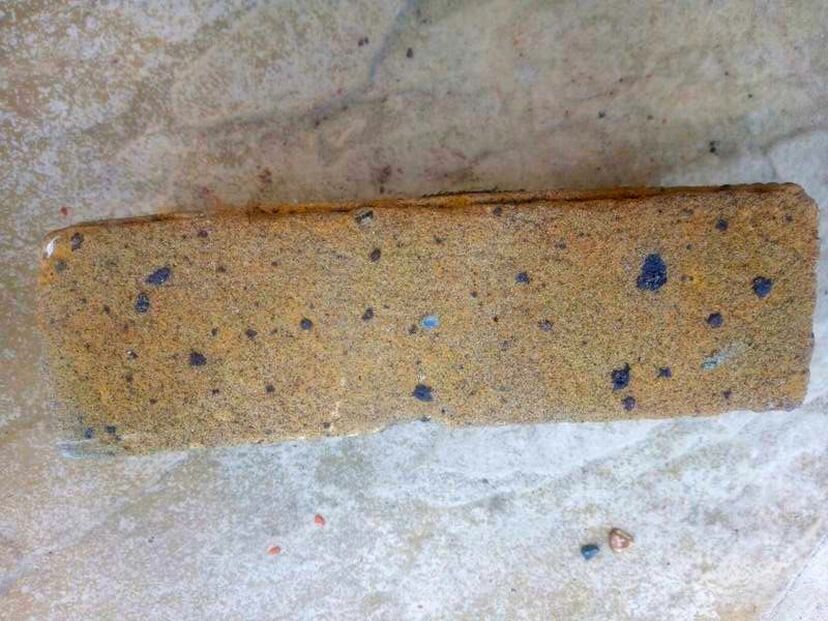
5. Blue engineering bricks
Very much like standard bricks engineering bricks are made using clay. These bricks however are made from very high quality clay and fired at very high temperatures.
This enables the brick to almost for a glazed surface making it impervious to water. Consequently engineering bricks have a high resistance to moisture and acidic conditions.
This had led to their extensive use in external construction and challenging environments. These bricks also have bright colours making them aesthetic in the correct situation.
Blue engineering bricks go very well with black limestone and slate paving. They also make fantastic garden edging to compliment dark grey or black paving.
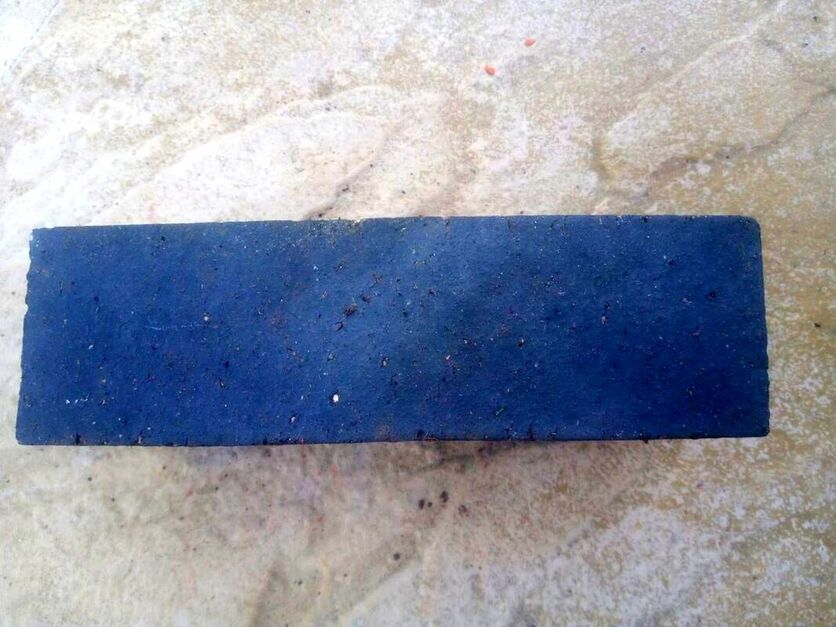
Side, face view of blue engineering brick

Top view of blue engineering brick
6. Marshalite walling bricks
Marshalite pitched split face walling is a landscaping brick manufactured to imitate natural stone.
These walling blocks have become very popular providing a natural stone look with a rough texture. What is even more desirable is they are easily split down to smaller units.
These can be used vertically to the top of walls to create a dry stone wall effect. This can be seen in the image below where I laid smaller split block vertically for a jagged finish.
Marshalites are very effective landscaping blocks but do have one main disadvantage. The colour dyes within the concrete do eventually fade with age.
Acids within rain can result in very old blocks becoming porous and susceptible to algae blooms. This can lead to a dark discolouration far removed from their original aesthetic.
side face of marshalite walling
top of view of marshalite walling
7. Tegula walling
Created by Marshalls to accompany their Tegula block paving range these landscaping blocks are durable and effective.
Tegula walling is some of the most attractive landscaping bricks on the market. Their slim profile and autumnal colours give them a real natural stone effect and pleasing visual texture.
These garden blocks are particularly efficient at creating raised beds and retaining walls. Although durable, if faced in full sun expect some colour fading after around ten years.
Like most landscaping bricks they will benefit from sealing with a weatherproof sealant.
Side face of tegula walling
Top view of tegula walling
8. Indian sandstone walling
Indian sandstone has become a much loved natural stone material which is both affordable and versatile.
Indian sandstone walling like paving comes in a broad variety of colours and sizes. As the bricks are natural stone their colours will not fade like concrete substitutes.
As their faces cover less surface area per weight compared to thinner sandstone paving they are more expensive. Expect to pay at least three times per square meter than the paving equivalent.
However Indian sandstone walling is probably one of the most durable and attractive landscaping blocks on the market. Their natural look and unique geology means aesthetic properties will not degrade in time.
Therefore although costly, represent some of the best value in regard to landscaping bricks.
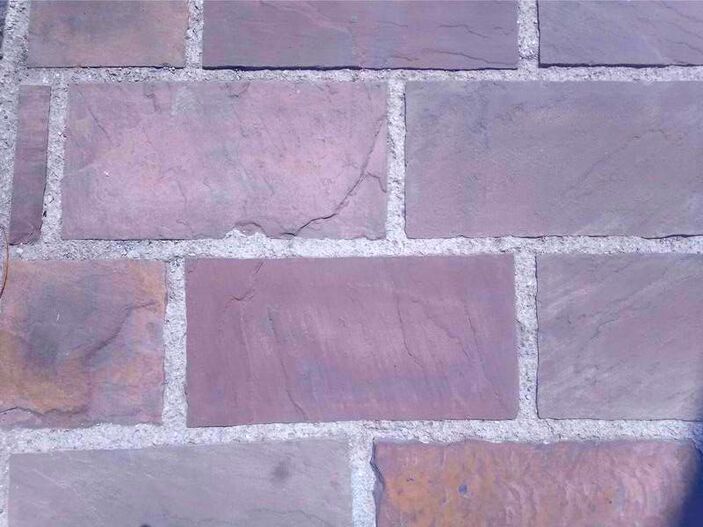
What is the best brick to match a sandstone patio?
Sandstones typically come in shades which range from buffs to greys. Traditionally it is best to use decorative bricks with a good visual texture to compliment sandstone paving. Therefore Ashdown, Chailey, Thames yellow and Old stocks are the best bricks to match sandstone.
Sandstones typically come in shades which range from buffs to greys. Traditionally it is best to use decorative bricks with a good visual texture to compliment sandstone paving. Therefore Ashdown, Chailey, Thames yellow and Old stocks are the best bricks to match sandstone.
What is the best brick to match a slate patio?
Due to slates clean, impervious surface and dark tones landscaping bricks should match these characteristics.
Therefore the best brick for slate would be blue engineering bricks or Staffordshire blues. However due to slates use in contemporary gardens vertical walls and steps are rarely built with brick.
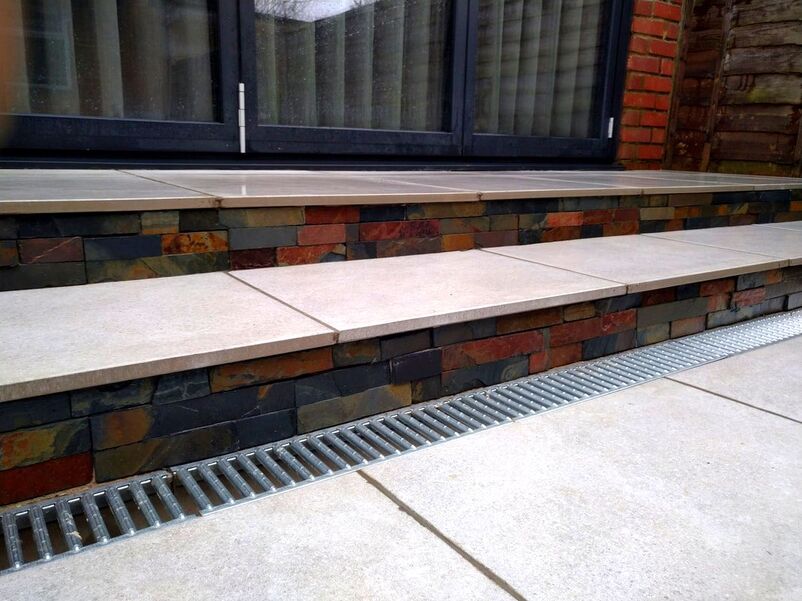
It is more typical to use tiles, cladding or render using lighter colours to contrast the slate. This can be seen in one of our projects below where we used porcelain stack cladding.
Due to slates clean, impervious surface and dark tones landscaping bricks should match these characteristics.
Therefore the best brick for slate would be blue engineering bricks or Staffordshire blues. However due to slates use in contemporary gardens vertical walls and steps are rarely built with brick.
It is more typical to use tiles, cladding or render using lighter colours to contrast the slate. This can be seen in one of our projects below where we used porcelain stack cladding.
What is the best brick to match porcelain paving?
Black engineering bricks and Staffordshire blues would be the best dark bricks to match porcelain paving. If you would prefer lighter colours then a white glazed brick white a white joint would be best.
As with slate, porcelain paving’s contemporary style makes stack cladding and rendered surfaces more suitable for vertical surfaces.
What is the best brick to match block paving?
Block paving comes in a wide variety of colours, sizes and products. However, it is always dark red bricks with mottled colours that always work the best.
I would say without a doubt Ashdowns and Chailey Rustic bricks are the best match for block paving. If you are using more contemporary Tegula block paving then Tegula walling is also an effective match.
Chailey rustic bricks with tegula block paving
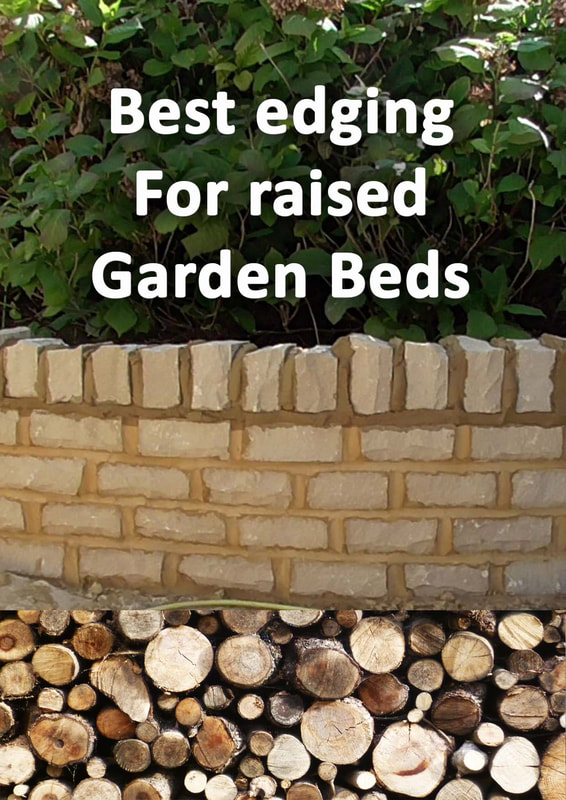
What are the best brick alternatives for garden walls?
If you desire a different look for your garden walls than traditional bricks you have a few options.
In a structural sense you are best building your walls with either bricks or concrete blocks. Concrete blocks are cheaper and faster to lay.
The vertical faces can then be clad with one of the four options below. Sandstone blocks are also an option but can be a very expensive method of building walls.
Rendering
Rendering is the process of simply applying a 10mm smooth layer of rendering mortar to masonry surfaces. This is often then painted a particular colour of choice, regularly white or cream.
Rendering is the process of simply applying a 10mm smooth layer of rendering mortar to masonry surfaces. This is often then painted a particular colour of choice, regularly white or cream.

Concrete block rendered and painted white
Cladding
There are many forms of external cladding on the market, many taking the form of a bulky textured tile.
Some good examples are stack cladding such as porcelain and slate for modern garden designs. For rustic gardens there are some very effective dry stone wall cladding products also available.
These are perfect for Tuscan, Mediterranean, Tropical, Succulent orDesert garden schemes.
Porcelain stack cladding
Paving
If you want to add some real interest to garden walls you can clad them with paving. This is particularly effective with natural stones such as slate or sandstone.
For a rustic look you may wish to lay broken sandstone in a crazy paving pattern to garden walls. This is very common in Mediterranean countries and if done well looks very effective.
You will need a strong external tile adhesive and very skilled and careful jointing.

Brazilian black Slate paving
Tiling
Tiles are also a very good choice for covering garden walls and come with so much choice. It is best to choose an external grade tile and adhesive suitable for the outdoors.
These are great for traditional Moroccan gardens or more quirky modern gardens.
Tiles are also a very good choice for covering garden walls and come with so much choice. It is best to choose an external grade tile and adhesive suitable for the outdoors.
These are great for traditional Moroccan gardens or more quirky modern gardens.

Thank you for reading our article on the best garden and landscaping bricks. Below I will link to some other articles you may find informative. If you enjoyed this article and found it useful, why not share it with your friends?
|
|
|
'As an Amazon associate I earn from from qualifying purchases'

This article contains affiliate links
It is not uncommon for landscapers and garden builders to be passionate about their work.
Such a profession requires love of a physical lifestyle, working with their hands and the great outdoors. Consequently, you always know gifts for landscapers will always be very much appreciated.
Landscapers love a new tool or gadget which makes their work more efficient! Most of the time, gifts for landscapers will actually benefit the landscaper out of work too!
Having a love of building and gardening means they are sure to enjoy landscaping gifts also during the weekend. Whether the landscaper in your life builds landscapes large or small we have a present for every situation.
We have listed 17 of our favourite landscaper gifts perfect for Christmas or birthday celebrations below.
1. Rigger boots
Rigger boots are the best type of protective footwear for landscapers. Not only to they provide ankle support and a steel toe they also keep your feet warm and dry.
Unlike many other safety boots, rigger boots come up high around the mid shin area. This prevents water and mud in very waterlogged sites entering the boot.
There is nothing worse than wet and cold feet when you are trying to work especially in winter! Rigger boots have no laces so are so easy to slip on and off with no hassle or broken laces.
The insides are lined with soft, fluffy, material keeping feet and ankles warm and snug. This makes rigger boots a must have gift for landscapers during wet and cold winters.

2. Sharpening stone
Landscapers know the importance of acquiring the best professional tools for specific tasks.
Unlike other building work landscaping involves being continuously exposed to the vigour’s of the outdoors. This means flimsy and bad quality landscaping tools rarely make the grade!
Consequently, landscapers know that proper tool care and maintenance is paramount to successful landscaping.
This sharpening stone will help your landscaping friends keep their tools sharp and ready for action all year round.

3. Multi tool
Every landscaper will tell you in order to be a landscaper you have to be adaptable! Building landscapes involves pretty much every building trade there is.
Most landscapers will be involved in fencing, bricklaying, tiling, rendering, concreting, paving, rendering, carpentry and much, much more!
Therefore, it is important to have tools which can also adapt too many tasks and situations. This power multi tool comes with a series of different attachments for numerous building tasks.
This power tool makes an awesome gift for multi-talented landscapers that can build anything.

4. Waterproof jacket
Unlike other professions landscapers are continuously exposed to whatever the outdoors throws at them.
Not only is this weatherproof jacket waterproof it also has an inbuilt fleece to protect from strong winds.
This jacket can also accompany your landscaping friend on nature hikes or camping expeditions. It makes the perfect gift for a landscaper that loves to conquer the outdoors.

5. Thermos flask
Being one of the most active professions in the world landscapers never really have much trouble sleeping.
When the working day is done it is so easy for landscapers to fall into a deep recharging sleep. However, waking up in the mornings can be a little challenging some times.
Make sure the landscaper you love has something strong to wake them up in the morning. This thermos flask will keep their favourite beverage warm all day no matter how cold the weather is!

6. Tool box
It is surprising to many people just how many tools you need to be a landscaper. If it is not multiple cutting blades for stone and timber it will be irrigation valves and fixings.
This can make it really challenging for a landscaper to organise their work life. Consequently, one of the best gifts for landscapers is a decent sized tool box.
This will help them house and organise all those little fixings and attachments which easily get lost!

7. Kelly Kettle
Every now and then landscapers find themselves on projects far from mains water supply or even civilisation in general.
This means getting projects done without all the typical amenities to hand. Not having a direct mains supply however should not mean a landscaper cannot have tea! This Kelly kettle will enable your landscaping friend the ability to boil water completely off grid.
Just fill with water and feed burning sticks into the base. They will have boiling water and a strong brew in no time!

8. Knee pads
Very often in landscaping there is a need to kneel down and undertake awkward tasks.
Projects like jointing patios, laying turf and installing edgings can take its toll on the knees. However, with these professional knee pads the landscaper in your life will never have bad knees!
These pads are comfortable to wear but also robust to protect knees from every impact. Landscaping gifts which show you care about their welfare are always very well received!

9. Tool belt
For certain tasks landscapers need multiple tools and gadgets to hand. This is especially so when you’re fixing up fences and carpentry work.
A well organised tool belt will make those awkward projects just that little bit easier. Not only will this belt allow landscapers to work faster, it will also provide a safe place for valuables.
Landscapers are known for loosing or breaking phones and keys while busy at work. Tool belts make really great gifts for landscapers and can really help revolutionise how they work.

10. Waterproof A4 document case
It is remarkable just how organised landscapers have to be to make projects run smoothly. With multiple materials and deliveries to organise it is essential they plan meticulously.
Not only should landscapers plan existing projects they also need to quantify and price new ones. Doing this all outside in all weathers can be tricky!
Consequently, this waterproof A4 document case is the perfect professional gift for landscapers. Whether an aspiring project manager or a landscaper starting their own business!

11. Makita site radio
Landscapers are resilient, know how to work hard and graft through challenging conditions. They also know how to keep the spirits high during landscaping projects.
The great thing about working physically is a little acoustic entertainment is never too distracting. Why not treat your landscaping friend with this robust, weather proof, site radio!
There will never be an awkward silence or lonely moment in the work place ever again.

12. Laser level
One of the most important parts of landscaping and garden building is understanding levels.
Most landscapers after years of experience can level most materials and even the ground by eye. For more precise levelling work over distance however there is no better gadget than a laser level.
This state of the art piece of kit will enable your landscaper to master the most challenging levels with ease. Laser levels make fantastic gifts for landscapers who love a new gadget in their toolbox.

13. Lunch cooler bag
One of the busiest times of the year for a landscaper is also one of the hottest!
When the summer comes around, you can be sure your landscaping buddies will be flat out! Such a busy season of hard physical work requires plenty of calories to keep operations on track!
A good landscaping gift will ensure the landscape gardeners in your life are well fed during the season. This lunch bag will not only transport tasty meals and beverages but also help keep them cool!

14. Work gloves
If there is one part of a landscaper’s anatomy which goes through some serious torment, it’s their hands.
Landscaping hands are continuously exposed to abrasive materials, excess vibration and heavy loads. Furthermore, extremes of the seasons can lead to dry and often cracked skin.
Consequently, one of the simplest but most effective landscaping gifts is a good pair of work gloves. These heavy duty gloves can resist impacts and abrasion without restricting normal day functions.

15. Funny landscaping t-shirt
One of the great things about landscapers is they always have a great sense of humour. The combination of physical exercise, fresh air and working with friends creates a positive atmosphere.
Consequently landscapers love any Christmas or birthday gift that caters to their funny side. Landscapers also have a strong sense of identity and pride in what they do.
This makes this funny landscaping T-shirt a truly fantastic landscaping present for any occasion.

16. Umbrella hat
Landscapers have a tolerance for working in wet weather, very rarely however do they actually manage to stay dry.
Rain macs and waterproof jackets do offer some protection but are never completely rain proof! Why not iliminate this age old landscaping problem forever with this ingenious umbrella hat.
This revolutionary gift will allow your landscaping buddy to never miss out because of bad weather again!

17. Working Hands hand cream
Most landscapers are amazing at building great gardens and wonderful landscapes but not always so good at skin care.
Landscape gardening can really take its toll on any skin which is not covered. Toxic plants, insect bites, UV radiation and extreme temperatures can all lead to irritated skin.
As most landscapers are tuff breeds who do not like to make a fuss, they need a special kind of skin care. This makes this working hand cream a well received gift for landscapers.

Thank you for reading our article on the best gifts for landscapers and garden builders. Below I will link to some other landscaping articles you may find useful.
If this article helped you with your search why not help us by sharing it via the tabs below? Thank you!
If this article helped you with your search why not help us by sharing it via the tabs below? Thank you!

|

|

|
'As an Amazon associate I earn from qualifying purchases'
This article contains affiliate links
Laying a curved path with square paving slabs may seem like a complete impossibility to many. However, it is not only completely possible to achieve but can also look amazing!
The best way to lay square paving as a curved path is to cut angles to connecting edges. This will allow your outer edges to follow whatever curve shape you wish.
To make your curves as gentle as possible, cut your square paving into thinner rectangles. The increased joints will help you to space the directional variations gradually.
This combined with slight angles cut to adjoining sides will turn any square paving into graceful meanders.
In this article I include a step by step guide on how to lay curved paths with square paving. The guide includes step by step images of a curved path I built using square slate paving.
What you will need to lay a curved path with paving
- String line
- Spray paint
- Spade
- Shovel
- Spirit level
- Wheelbarrow
- Loading ramps
- Cement mixer
- Rubber mallet
- Bricklaying trowel
How to lay a curved path with square paving
1. Mark out your curved path
A crucial part of laying a curved path is to achieve the shape you want. By marking out your pathways curvaceous route you give yourself a template to work to.
If you prepare your route with sub-base you will find it easy to cut your paving correctly as you lay. Mark out your desired curves with spray marker or hose pipe.
2. Check your surrounding levels
If you are laying your pathway through an existing garden you may wish its ‘finished levels’ to match the surrounding ground. Consequently, if your site has undulation your pathway may have a meandering level changes.
However, if you want a perfectly flush and level pathway you will have to plan out your levels. This can be done by setting up a tight string line from your start to destination level.
This ‘finished level’ can then be pegged out along your pathway route. You then have a guide level along your route so you know what height your sub-base must reach.
This will guide you to excavate to the correct depth when installing your sub-base.
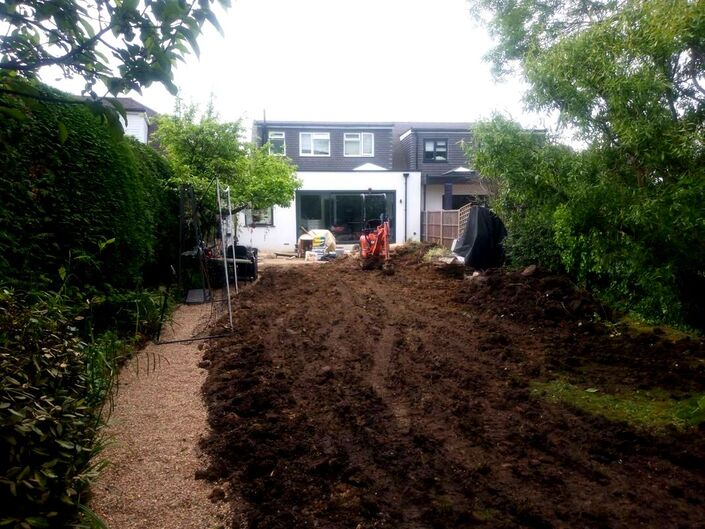
3. Excavate your curved path walkway
Excavate your curved pathway to a depth of 150mm and dispose of the spoil. Try to make the excavation as neat and square as possible with no loose soil remaining.
Excavate your curved pathway to a depth of 150mm and dispose of the spoil. Try to make the excavation as neat and square as possible with no loose soil remaining.
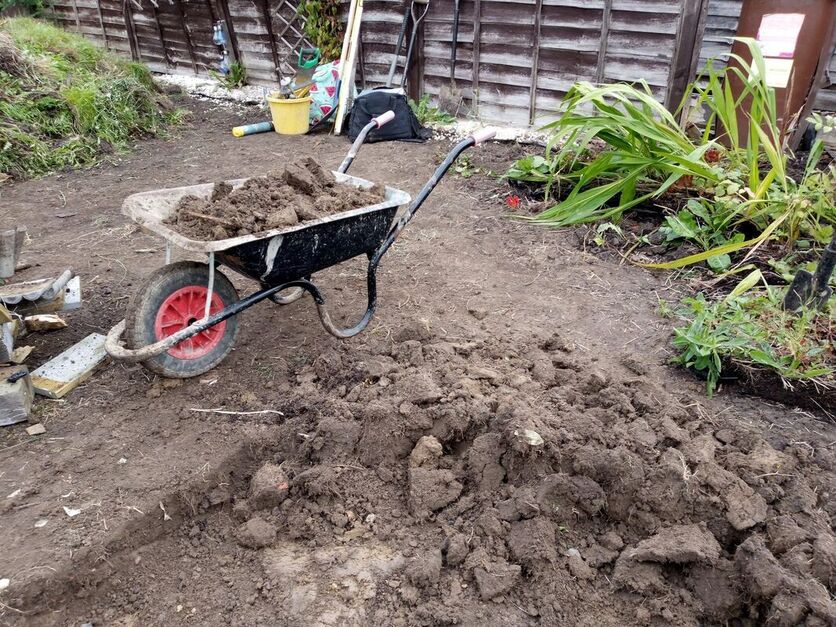
4. Spread your hardcore sub-base
Fill your excavation with a 100mm layer of compactable sub-base aggregate such a Mot type 1. Level the sub-base to a consistent level.
Fill your excavation with a 100mm layer of compactable sub-base aggregate such a Mot type 1. Level the sub-base to a consistent level.
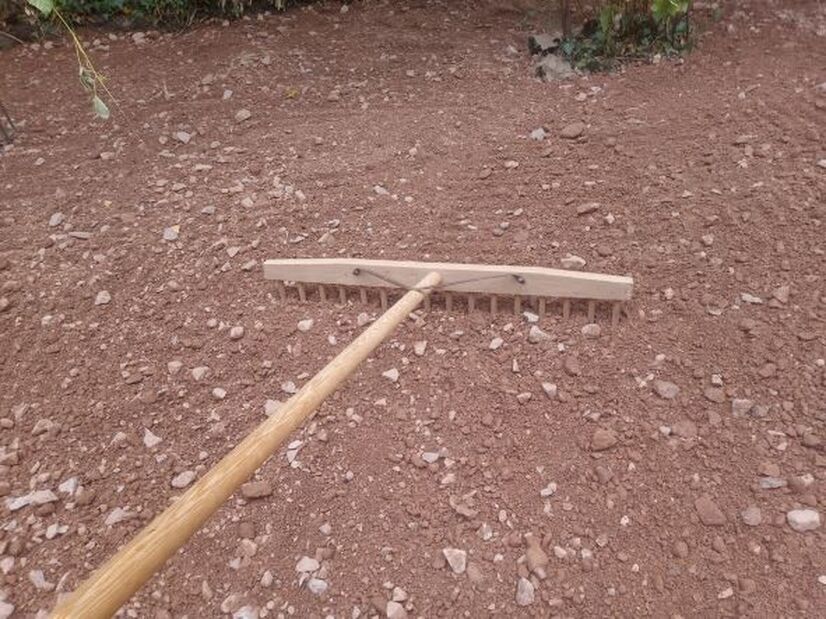
5. Compact your sub-base
Compact your sub-base well with a vibro-compaction plate. Make sure you go over the same section at least 5 times until it is hard under foot.
Compact your sub-base well with a vibro-compaction plate. Make sure you go over the same section at least 5 times until it is hard under foot.
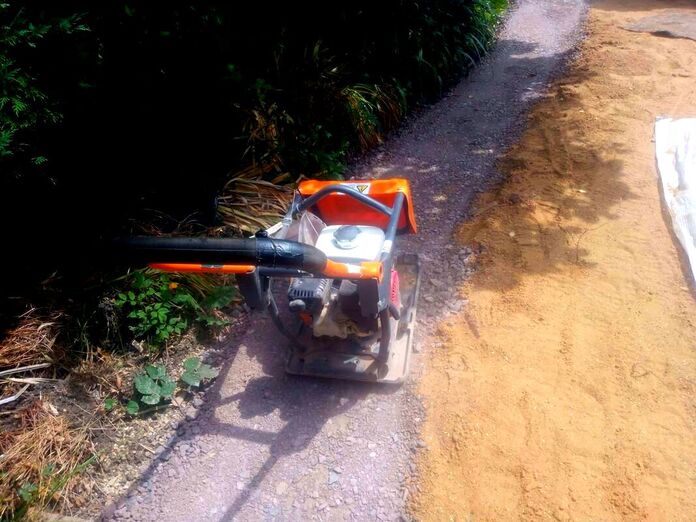
6. Set out your first 6 paving slabs
Roughly set out six paving slabs along the curved pathways route and observe the triangular gaps between them. This is a major clue as to how you will be cutting your slabs to create your curves.
Roughly set out six paving slabs along the curved pathways route and observe the triangular gaps between them. This is a major clue as to how you will be cutting your slabs to create your curves.
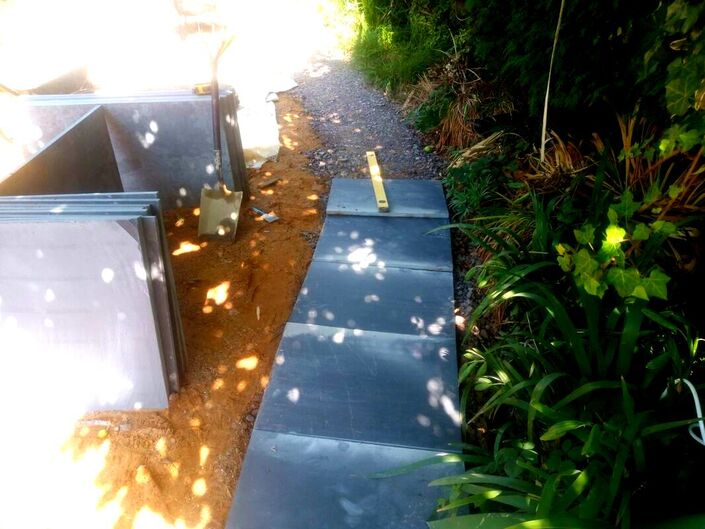
7. Overlap edges to form the curve you want
Now position your paving slabs forming your curved route with no triangular gaps. What you will find is you have to overlap slabs at the corners to make a continuous curve.
You will need to mark these triangular overlaps so they can be cut with a grinder. Your angular cut square edges will then butt up tightly while forming your curve.
You may find it easier to cut square slabs in half so you end up with multiple rectangles. These will increase the number of joins or joints along the paths length.
The greater density of joins will mean more ‘kinks’ along the pathway to meander the curve. The combination of angular cuts and thinner rectangles will make forming curves easy!
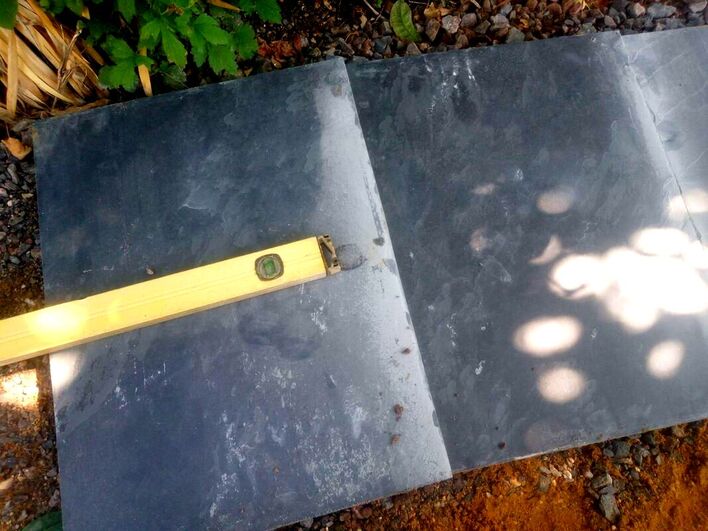
8. Score and cut your paving
Mark and cut your first 6 slabs with an angle grinder as accurately as possible. Make sure you use ear defenders, safety goggles and a tight fitting dust mask.
Mark and cut your first 6 slabs with an angle grinder as accurately as possible. Make sure you use ear defenders, safety goggles and a tight fitting dust mask.
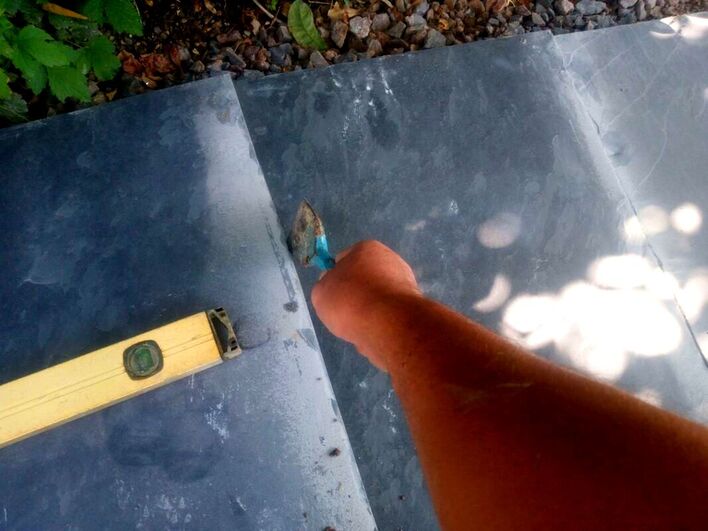
9. Set out your paving to check the curve
Set out your cut paving in sequence along your pathway to check its curve. When you are happy with the paths shape, start mixing up your slab laying mortar.
Set out your cut paving in sequence along your pathway to check its curve. When you are happy with the paths shape, start mixing up your slab laying mortar.
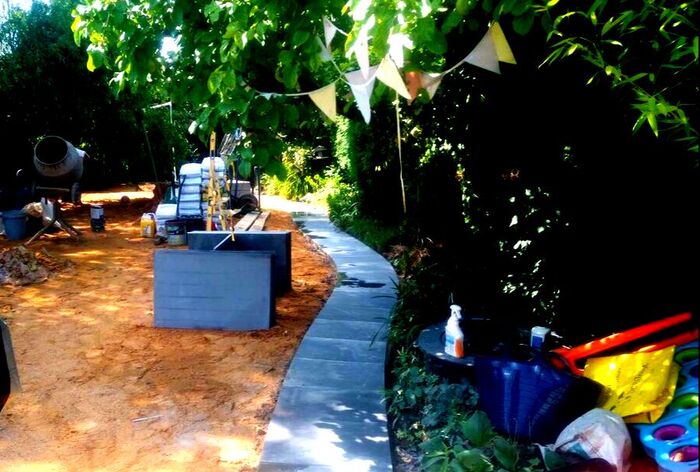
10. Mix up your mortar mix
Mix up one part cement, one part sharp sand mortar mix until it has the consistency of porridge. This is best done with a cement mixer and the addition of plasticiser for extra workability. Try to keep the mixing area away from the paving as splashing cement can stain surfaces.
Mix up one part cement, one part sharp sand mortar mix until it has the consistency of porridge. This is best done with a cement mixer and the addition of plasticiser for extra workability. Try to keep the mixing area away from the paving as splashing cement can stain surfaces.
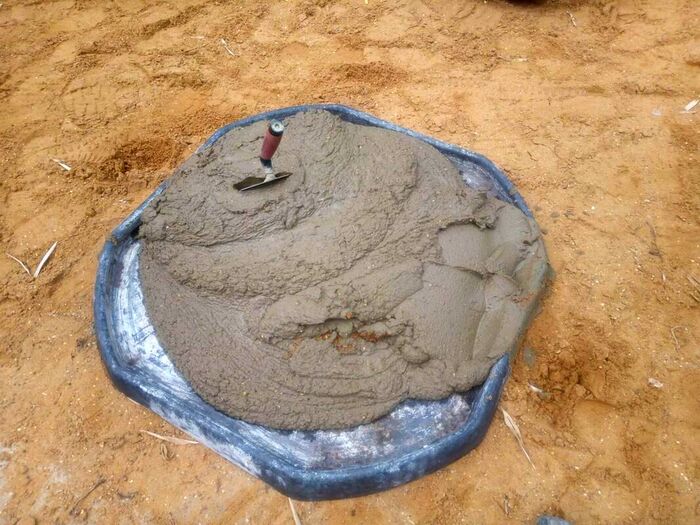
11. Lay your first 6 paving slabs
Lay your first 6 paving slabs in the correct order to form your curve. Keep your mortar bed consistent along the sub base and level as you go with a long spirit level.
Create peaks and valleys in your mortar so you can easily bed down your paving level. Try to make sure each paving slab has a consistent mortar bed under each paver with no voids.
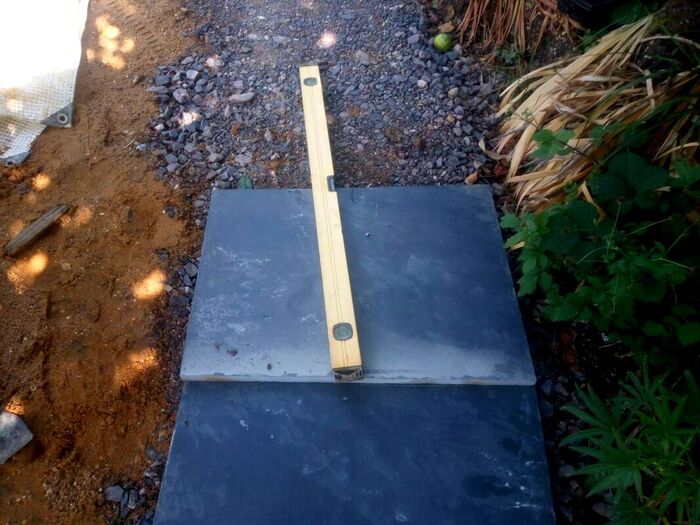
12. Repeat the process until the curved path is complete.
When you have laid your first section have a good look from multiple distances and angles. If the curve and level looks good it’s time to repeat the process!
Mark out, cut and lay your next section of paving until you reach the end. You will be surprised just how good it looks and what a great tradesperson you have become!
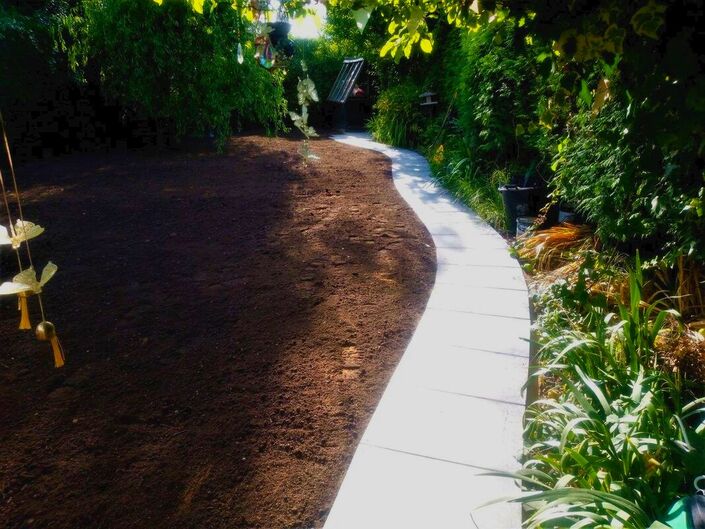
13. Grout your new walkway
When the pathway has had at least 24 hours to set, you can start grouting your joints. Try to make sure you grout on a dry day when your paving and its joints are dry.
You should ideally have no rain in the forecast for at least 16 hours after the grouting is complete. For my full step by step guide on how to grout paving, visit my article here.
14. Make good your surrounding levels
Now your curved pathway is complete you may have to make good surrounding ground disturbed by the work.
This may be an opportunity to lay a strip of new lawn to a flush level of the path. You may also want to add some quality topsoil around any edges to borders.
You have now completed building your curved path with square paving. Why not comment or email me to let me know how you got on?

Below I will link to some other relevant articles you may find useful.

|
|
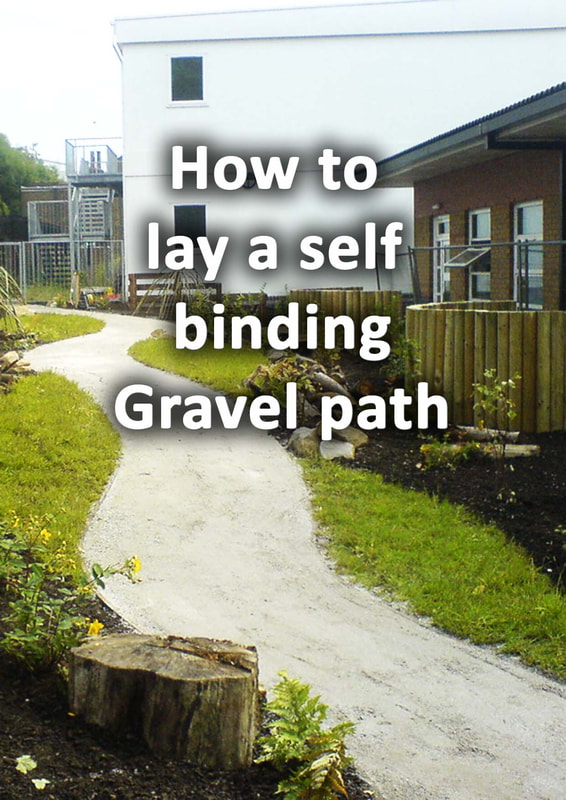
|
'As an Amazon associate I earn from qualifying purchases'
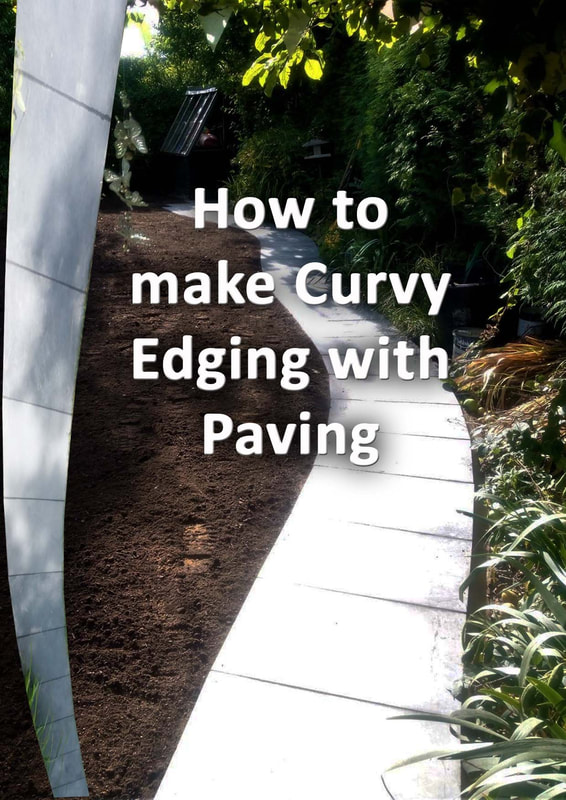
This article contains affiliate links
The structure of any garden design is defined by its lines and transitions within the landscape. Paths, patios, lawns and edgings all define the experience of an outdoor space.
In a world which forces orderly squares upon us curves celebrate the randomness of nature. The challenge is most garden elements are square; garden plots are typically square, timber, pavers and edgings are square.
Consequently, the desire to create more organic lines within our gardens is abundant. However, creating curves with square materials can require some imagination and skill.
As edgings add shape and structure our gardens I will explain how to lay edging in curves. With some simple preparation and careful cutting you will be able to create any curved shape you desire.
In this article we will show you how to cut square edging blocks and paving into perfect curves.
Why install curvy edging?
Most garden spaces and surfaces require some form of edge or border. Gravel needs retaining edges and lawns also need defined edges so they do not spread into borders.
Therefore curved edging can be a vital part of realising an organically shaped garden design. Curvy edging can create a real visual flow and excitement to a garden space.
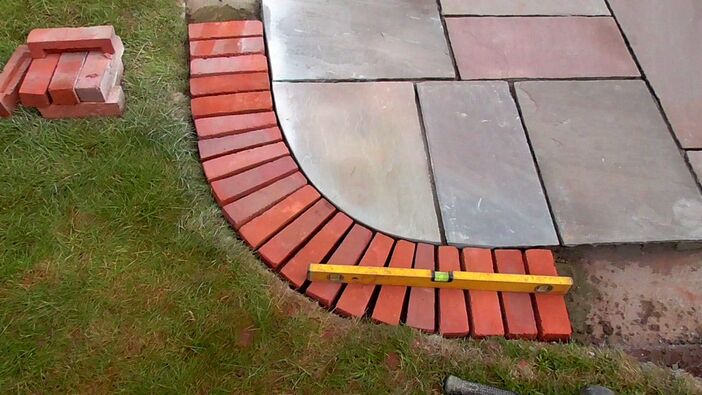
How to make curved garden edging with square pavers
In the case study below we will demonstrate how to make curvy garden edging with square pavers. The best way to execute this is by implementing the correct preparation.
First you will need to mark out the exact curves you want with either a spray or garden hose. Then you will need to excavate for your sub-base with a very neat and tidy trench.
Once this is filled with compactable sub-base and compacted you are ready to lay curved pavers.

The best way to cut your square pavers into curves is set them out overlapping at the edges. These diagonal overlaps can be marked on the edges of pavers and then cut.
For tighter curves you will need smaller paving units with more gaps. This is why it is easy to lay curves with square setts as they have multiple gaps (joints) each sett can have a slight angle to it to create continuous curves.
With larger edgings and pavers however, you will need to cut slight angles to edges to produce curves.
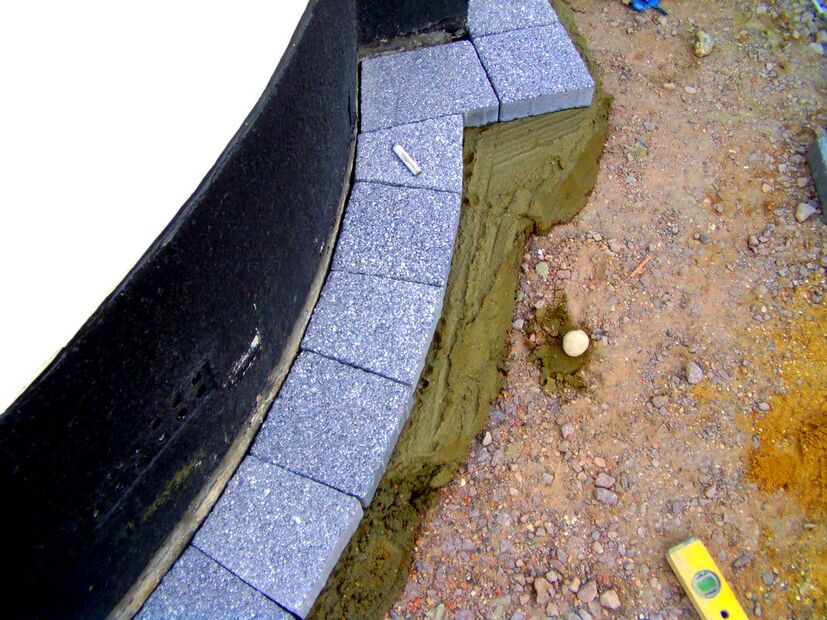
This concept can be seen in the diagram below. An effective way to lay curves with square paving is to set out 4-8 cut pavers at a time.
When you are happy with the curve, lay them on mortar and cut the next batch. Then you can keep going until you have completed your whole run. I will show this process below step by step.
When you are happy with the curve, lay them on mortar and cut the next batch. Then you can keep going until you have completed your whole run. I will show this process below step by step.
Curved edging shopping list
- Sharp sand
- Compactable sub-base (type1)
- Plastic packed cement
- Mortar plasticiser
- Mortar water proofer
- Paving of choice
- Skip
Tools you will need
- Cement mixer
- Extension lead
- Wheelbarrow
- Spade
- Shovel
- Spirit level
- String line
- Rubber mallet
- Bricklaying trowel
- Work ramp
Make curvy edging with paving step by step
Step 1: Mark out runs for your new edgings
One of the most important parts of laying curvy edging is getting the curves you want correct. The best way to do this is marking out your curves with an old hose pipe and marker spray. When you are happy with your curves you then check your levels.
One of the most important parts of laying curvy edging is getting the curves you want correct. The best way to do this is marking out your curves with an old hose pipe and marker spray. When you are happy with your curves you then check your levels.
Step 2: Check your completed levels
When laying any garden edging it is important to consider your completed levels. For mow strips you may want to follow the existing lawn level as you go for easy mowing.
However, most of the time, it is best to lay edgings which are flush and level. The best way to do this is by running a tight string line from your start point to your end point.
This will give you an idea of how deep you have to dig or build up to reach your desired level.
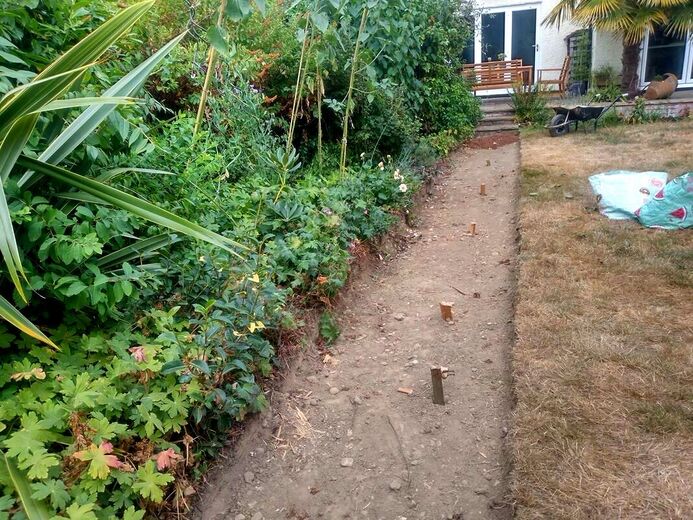
Step 3: Excavate your mowing strip edgings
Excavate the soil where curved edgings are to be situated about 150mm below your completed level.
Try to dig your foundations about the same width of your edgings and as neat and square as possible. You do not want to excavate too little or too much and leave no loose soil inside the excavation.
Excavate the soil where curved edgings are to be situated about 150mm below your completed level.
Try to dig your foundations about the same width of your edgings and as neat and square as possible. You do not want to excavate too little or too much and leave no loose soil inside the excavation.
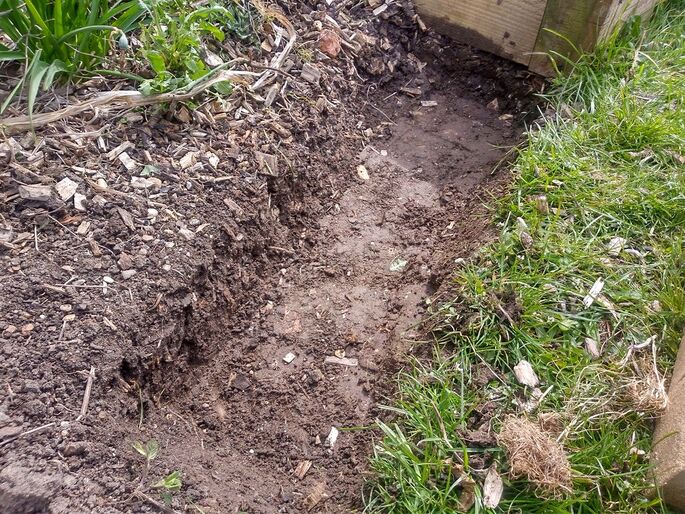
Step 4: Fill your excavation with sub-base
Fill your excavation with a compactable sub-base such as Mot type 1 to a depth of 100mm. Spread the aggregate as evenly as you can and compact well with a tamping bar.
Fill your excavation with a compactable sub-base such as Mot type 1 to a depth of 100mm. Spread the aggregate as evenly as you can and compact well with a tamping bar.
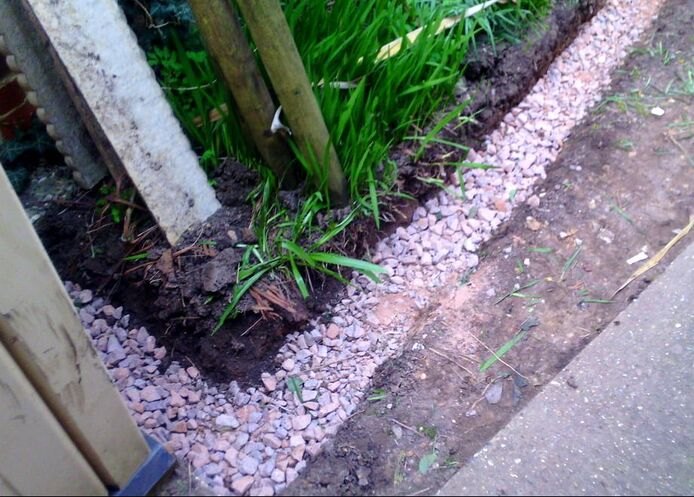
Step 5: Set up your working area
When laying curvy edgings you will need everything to hand. Set up your working area with adequate power, mixer, wheelbarrow and grinders. A well organised working area will make your process much more efficient.
When laying curvy edgings you will need everything to hand. Set up your working area with adequate power, mixer, wheelbarrow and grinders. A well organised working area will make your process much more efficient.

Step 6: Cut your paving into mow strips
The best way to cut edging to a curve is to set out about 6 to 10 edgings at a time. Overlap the edgings at the corners to reach your desired curve.
Then mark and cut these angles to create the curve you desire. If you are having difficulty reaching a tighter curve, consider cutting edgings into smaller units.
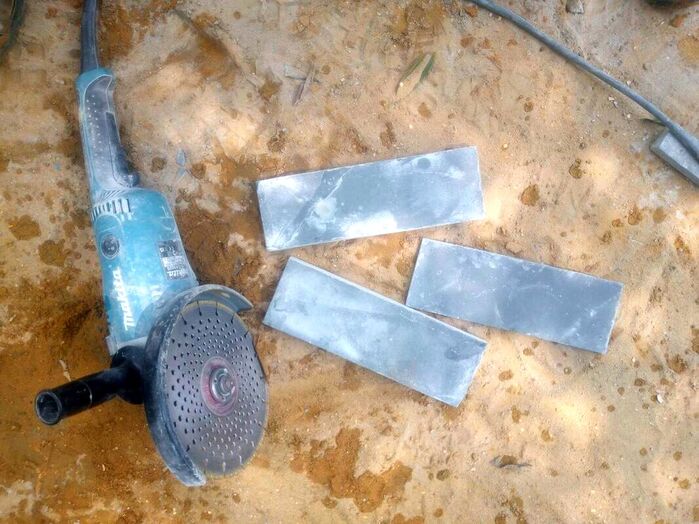
Step 7: Mix up your laying mortar
Mix up a 1:4 sharp sand cement mix to a consistency of a stiff brick laying mortar. Make sure you add a bonding agent such as PVA and some plasticiser for workability.
Mix up a 1:4 sharp sand cement mix to a consistency of a stiff brick laying mortar. Make sure you add a bonding agent such as PVA and some plasticiser for workability.

Step 8: Tamp down your edgings
Lay your mortar down onto the sub-base creating peaks and valleys in the muck. Then, one at a time, tamp down your edgings so they make good contact with the mortar. You want your edgings to sit on a consistent mortar bed with no voids underneath.
Lay your mortar down onto the sub-base creating peaks and valleys in the muck. Then, one at a time, tamp down your edgings so they make good contact with the mortar. You want your edgings to sit on a consistent mortar bed with no voids underneath.
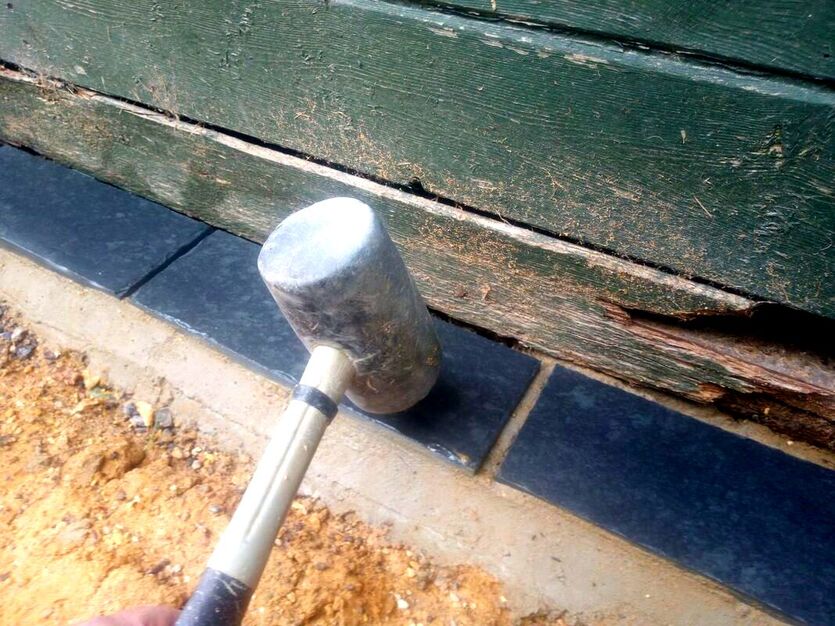
Step 9: Joint your edgings
Mix up a 1: 3 cement to plastering sand mix just damp enough to form a ball in your hand. Joint up your edging joins on a day when it is dry with no risk of rain for 16 hours. For a more in depth guide on grouting paving and edgings visit our step by step guide here.
Mix up a 1: 3 cement to plastering sand mix just damp enough to form a ball in your hand. Joint up your edging joins on a day when it is dry with no risk of rain for 16 hours. For a more in depth guide on grouting paving and edgings visit our step by step guide here.
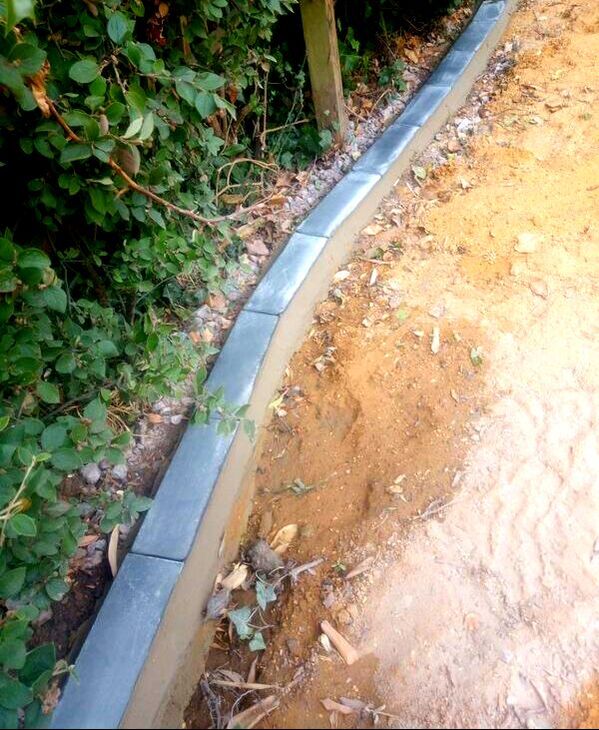
Step 10 Make good surrounding ground
When your curvy edgings are cured, tidy up and level the surrounding ground. Spread some freshly bought in topsoil if need be to finish them off neatly.
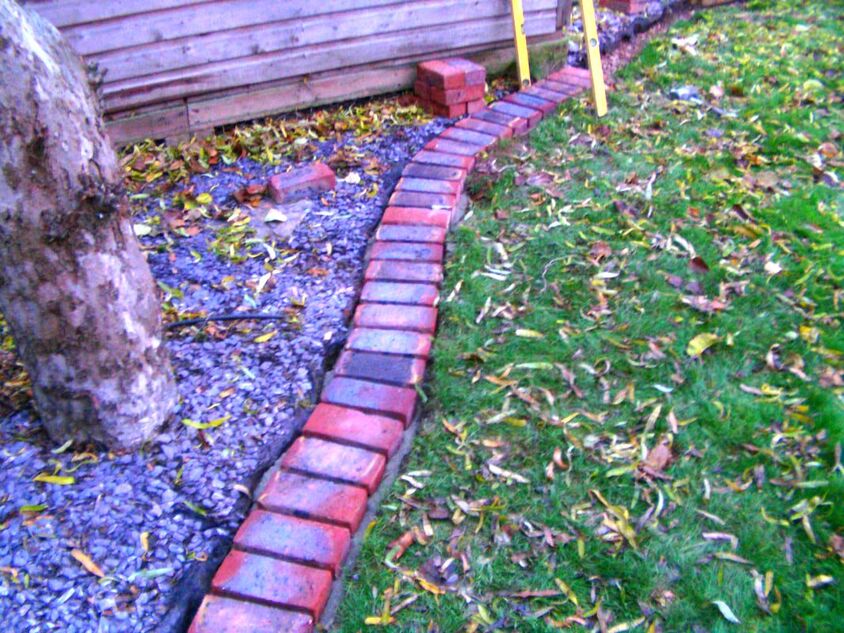
Thank you for ready our article on how to make curvy edging with paving. Below I have linked to some other relevant articles you may find useful.
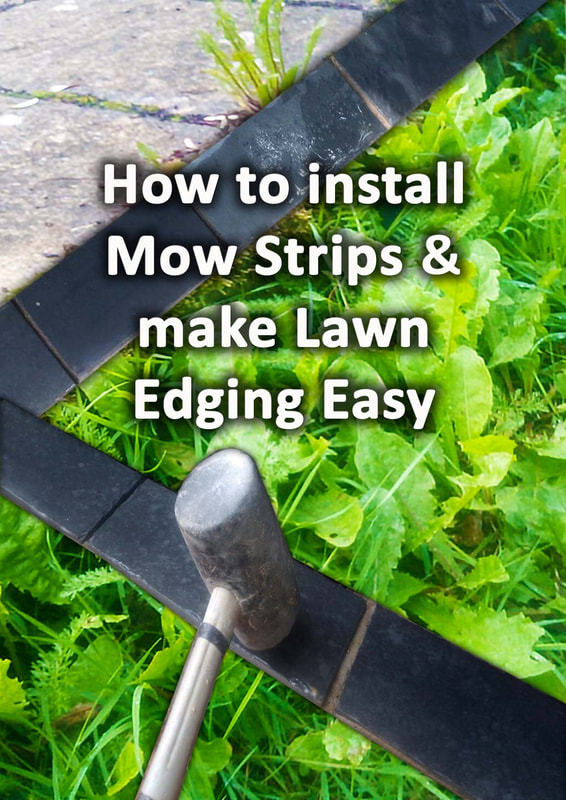
|
|
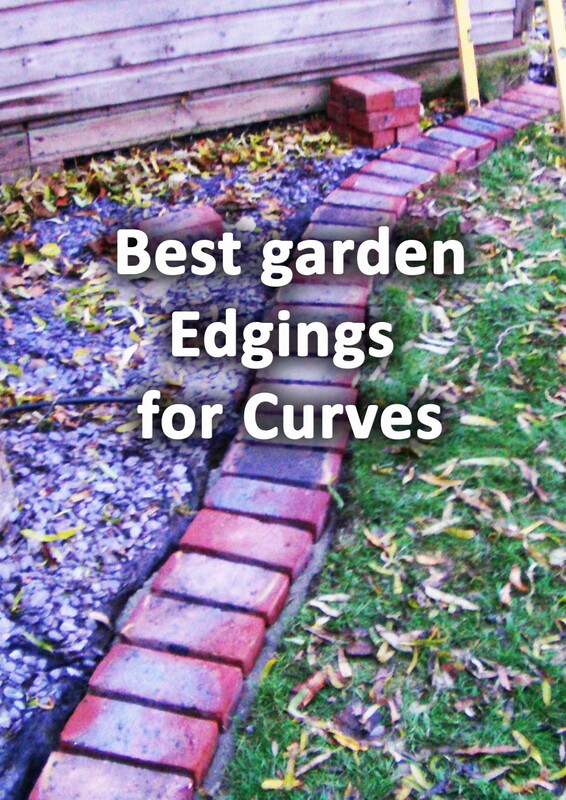
|
'As an Amazon associate I earn from qualifying purchases'
This article contains affiliate links
Concrete blocks are a great way to build strong and permanent planters which can last the test of time.
Not only are they fast to lay, they are also relatively affordable in comparison to other masonry materials. If you are planning on installing raised garden beds concrete blocks are an excellent choice.
In this article I answer some common questions in regard to building planters with concrete blocks. At the end find a step by step guide on how to clad your bed with contemporary stack cladding.
I will also explain how to build raised beds with concrete blocks step by step.
Are concrete blocks good for raised beds?
Concrete is one of the best materials for building raised beds! One of the most common methods of building raised garden beds today is with timber.
However, the problem with even waterproofed timber is it will eventually degrade. Raised beds built with bricks however are often very laboured intensive and expensive.
This leaves concrete blocks as the best long term solution for raised planters. Concrete block can also be finished in a broad variety of styles including rendered, painted, tiled and clad.
This allows them to easily match any garden design style or theme.
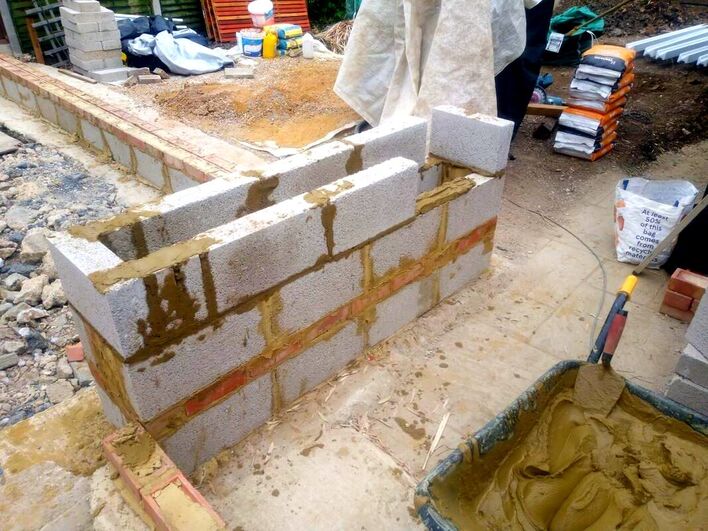
Benefits of using concrete blocks for raised beds
- Relatively affordable compared to other masonry materials
- Fast to lay raised beds and requires less skill than bricks or stone.
- Extremely durable and hard wearing will never rot like timber
- Can be clad in any material making them fit into any garden style or design
- Can be cut and laid into pretty much any shape you desire including curves
How deep should foundations be for concrete raised beds?
The depth of the foundation will depend upon your soil type, and width and height of your walls. As a general rule I like to over engineer these things to guarantee stability.
You will need to excavate down to the hard subsoil. For a bed only one block high 250mm may be fine but for a larger bed a few blocks high aim for 500mm.
Try to make your foundations not just deep but broad for extra stability. It is not just the depth but the mass ratio of concrete to retaining walls which is also important.
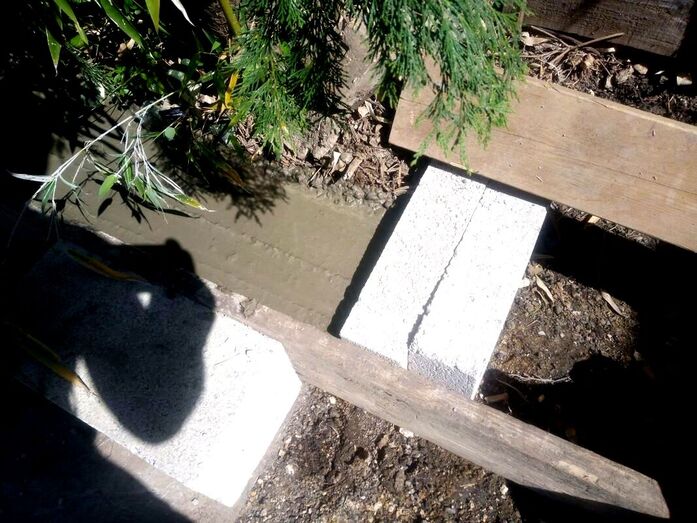
How thick should concrete blocks be for raised beds?
I would say the maximum height for a raised bed of a single block thickness (100mm thick) is 500mm.
If you build any higher than 500mm the mass of soil could overwhelm the structure. Therefore it is also important to consider the width of the bed as well as just the height.
If you are building concrete raised beds higher than 500mm (two blocks) go for double thickness or 200mm thick.
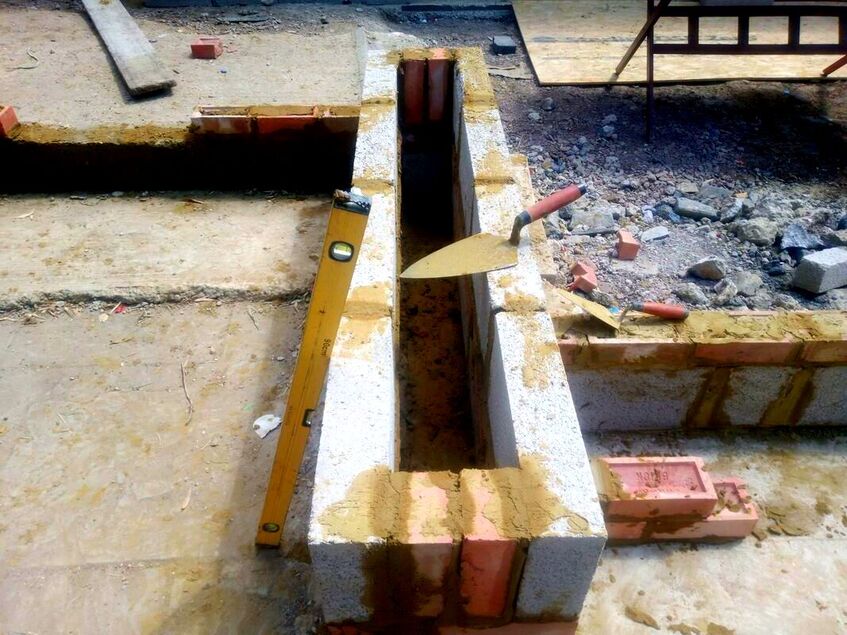
Do you need to line a raised concrete bed?
You have to line inside your concrete raised bed if you want to finish it aesthetically.
In other words, if you are rendering, painting, tiling or cladding the concrete you should waterproof the inside.
If not, you may find continuous saturation will lead to a compromised aesthetics. Paint may flake off and freeze and thaw action could pop render and cladding.
However, if your raised bed is a very rough affair it is not essential to line or waterproof. Bear in mind, waterproofing will prolong the life of your concrete raised bed further.
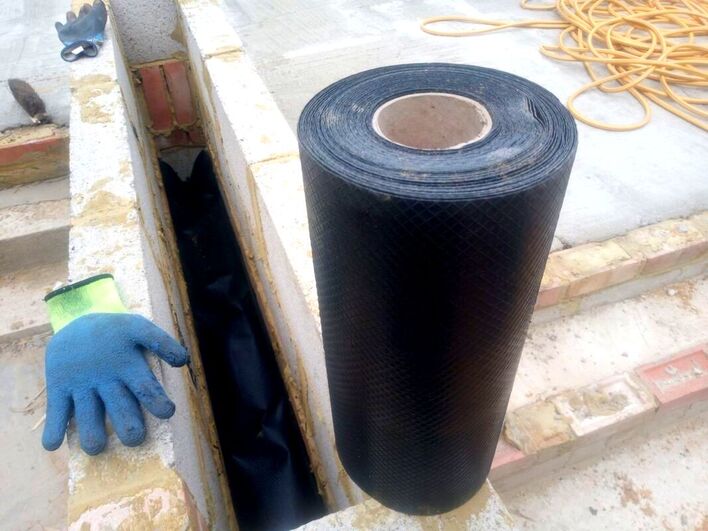
What do you put at the bottom of a raised bed?
There is nothing specific you ‘have’ to put at the bottom of a raised bed. I would say you are always best having no barrier between the bed and the underlying soil.
This will create a much less volatile environment in terms of soil moisture and temperature. It will also allow your beds soil to interact with local and surrounding soil life.
This will lead to healthier plants. You can also add a layer of free draining, drainage gravel to the bottom of your raised bed.
This will help assist drainage a lower the chances of your drainage holes becoming blocked. Just make sure you lay a filtration membrane over the top of the gravel.
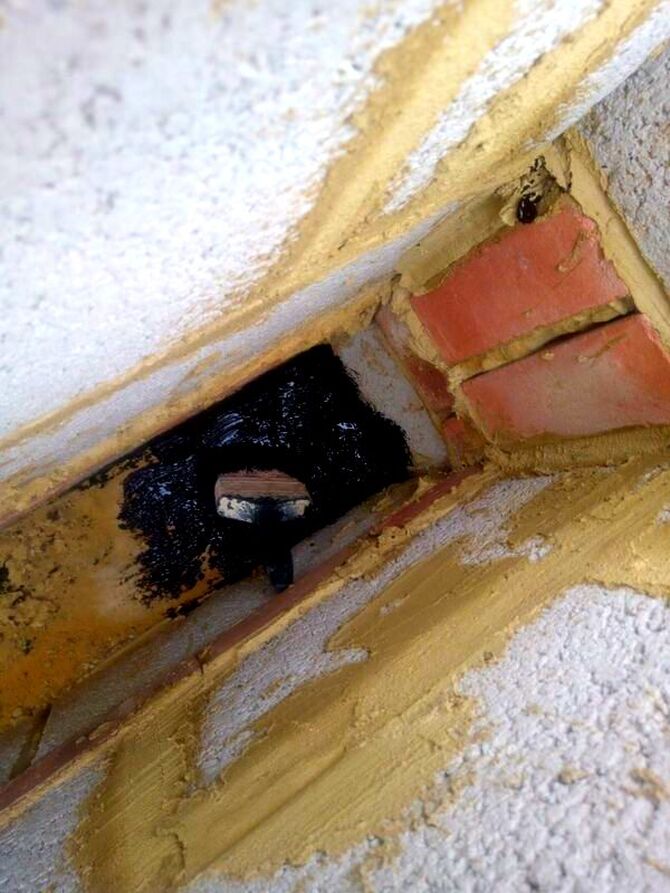
Do concrete raised beds need drainage holes?
Concrete raised beds do need drainage holes or 'weep holes'. These will allow excess water to drain away which will reduce the weight of your soil.
It will also prevent your soil becoming devoid of oxygen and stagnant. Your holes should really be at least 30mm in diameter and be spaced at least every couple of meters.
You will need to incorporate a basic filtration system behind the weep holes. This can simply be some tightly woven wire mesh and landscape filtration fabric.
The system will prevent drainage holes from becoming blocked after a few years. We will show you how to do this in our step by step guide below.

Tools for building raised beds with concrete blocks
- Spade
- Shovel
- Wheelbarrow
- Cement mixer
- Extension lead
- Long spirit level
- String line
- 9 inch grinder
- Bricklaying trowel
- Loading ramp
- Builder’s scissors
- Wire snips
- Paintbrush
Concrete block raised bed shopping list
- Concrete blocks
- Soft sand
- Ballast
- Cement
- Topsoil
- Coping stones
- Bituminous paint
- Cladding or Rendering materials
How to build a garden concrete raised bed step by step
Step 1: Site selection
Select a location for your new raised beds, think about how large you want them to be. You may also wish to consider how to finish their external surfaces.
With concrete raised beds you have many options including rendering, cladding, tiling and paint. Mark out where your raised beds are to situated, you will also have to mark out for your concrete foundations.
Typically these need to at least three times the width of your retaining walls.
Step 2: Excavating your foundations
Excavate for your foundations, the depth you go will depend upon how tall and broad your beds will be. The average raised bed built with concrete blocks should have a minimum depth of 300mm and minimum width of 300mm.
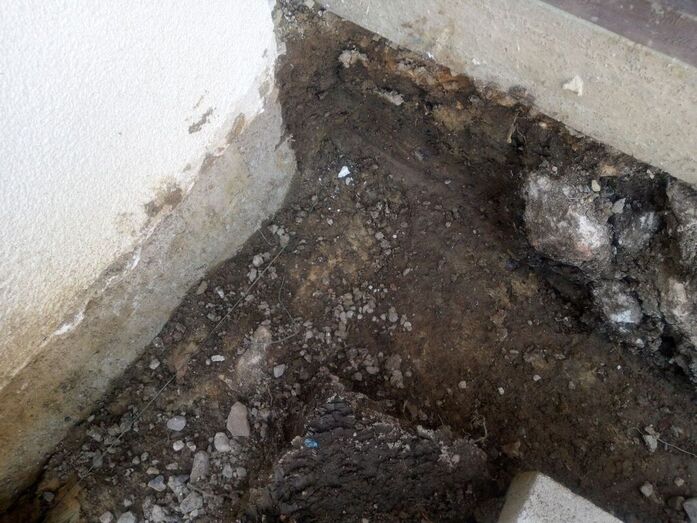
Step 3: Concreting your foundations
Mix up your concrete using a cement mixer at a ratio of 5 parts ballast to 1 part cement. Mix until your concrete has the consistency of porridge then pour it into your trench.
It is often effective to peg out your finished height inside the trench. This way you can level your concrete to the top of the pegs as you go.
Work your concrete to the top of the pegs and tamp it to a consistent level. This can be achieved using a straight piece of timber or a spirit level.

Step 4: Marking out your block work
Once your foundation has set after 24 hours, mark out the position of your walls. This can be done using a set square, spirit level and bolster. This will provide you a visual reference to build to when you start laying your blocks.
Once your foundation has set after 24 hours, mark out the position of your walls. This can be done using a set square, spirit level and bolster. This will provide you a visual reference to build to when you start laying your blocks.
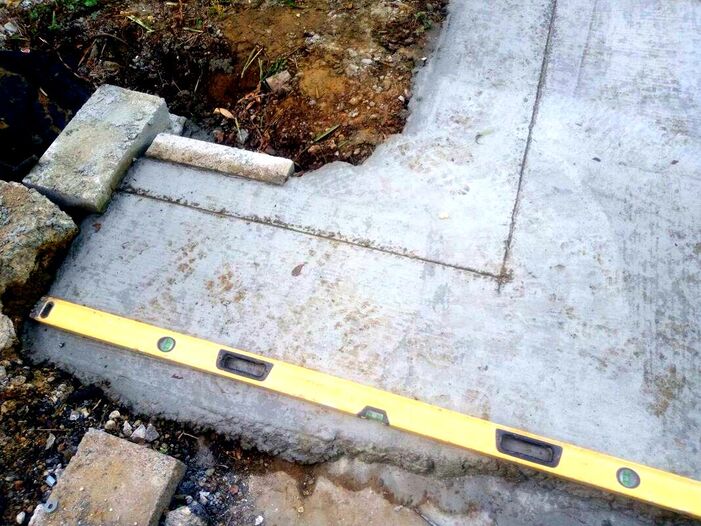
Step 5: Setting up your laying area
For efficient block laying it is good to set up your laying area well. You will want to stack up your blocks methodically around your working area. Also make sure you have undisrupted access around your raised bed. This will allow you to work easily with no obstructions.

Step 6: Knocking up your block mortar
Mix up 1 part cement to 5 parts soft sand in a cement mixer with water. Add some plasticiser for extra workability and mix well until it reaches a brick laying mortars consistency.
Empty your bricklaying mortar into a wheelbarrow so you are ready to lay blocks.
Mix up 1 part cement to 5 parts soft sand in a cement mixer with water. Add some plasticiser for extra workability and mix well until it reaches a brick laying mortars consistency.
Empty your bricklaying mortar into a wheelbarrow so you are ready to lay blocks.
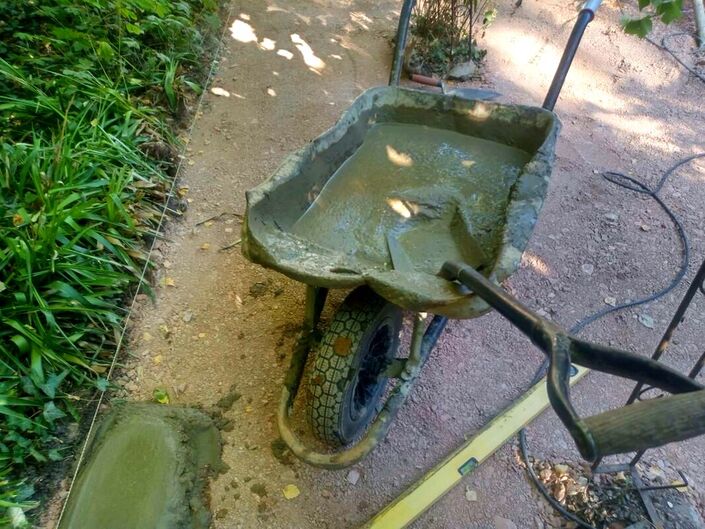
Step 7: Laying your first blocks
When laying bricks or blocks it is better to build up your corners first vertically level or ‘plumb’.
You can then stretch a tight string line across the top of opposite corners to lay blocks to. This will allow you lay blocks straight and level easily.
Lay a fillet of mortar onto your foundation along your guide line. Create little peaks and valleys in the mortar so you can easily bed down your blocks.
You are aiming for a joint of around 10mm. Keep your mortar thickness consistent as you lay levelling your blocks with a spirit level as you go.

Step 8: Keep your lines straight
As you lay, keep an eye on the line you are laying to making sure it is straight. This can be done with a long spirit level or straight edge. The process is much easier if you have set up a tight string line.
As you lay, keep an eye on the line you are laying to making sure it is straight. This can be done with a long spirit level or straight edge. The process is much easier if you have set up a tight string line.
Step 9: Keep your corners plumb
As you build higher, make sure your edges and corners are levelled vertically. Place your level vertically flush up the wall and make sure the bubble falls within the two lines. This is known as keeping your verticals plumb.
As you build higher, make sure your edges and corners are levelled vertically. Place your level vertically flush up the wall and make sure the bubble falls within the two lines. This is known as keeping your verticals plumb.
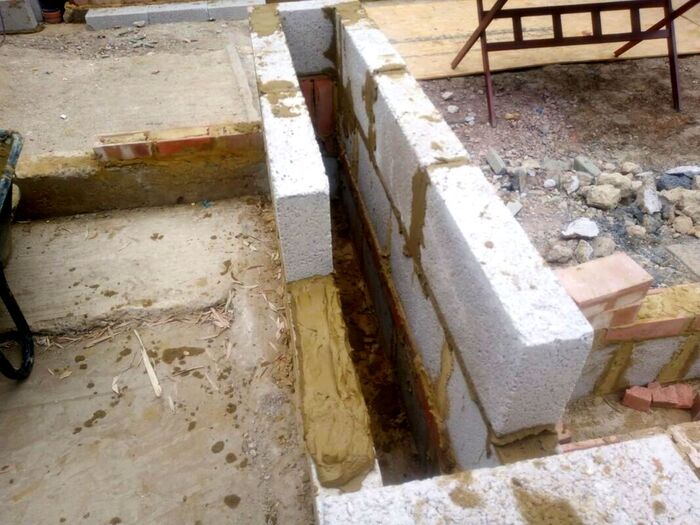
Step 10: Curing
Once you have laid your blocks you will need to let them set for 24 hours to go hard.
Once you have laid your blocks you will need to let them set for 24 hours to go hard.
Step 11: Coring out drainage holes
Your concrete raised bed will require some drainage holes for excess water to escape. These can be cored out of the concrete using a circular diamond blade drill attachment. Try to make your drainage holes a diameter of at least 30mm.

Step 12: Adding drainage filtration
Your drainage holes will need a filtration feature around them to stop soil and silt clogging them up. You can do this with a rigid wire mesh backed with filtration membrane.
Cut the mesh into squares and curve it in your palm. Then offer it up to the back of the drainage hole backed with filtration membrane. For extra drainage you can add a layer of free draining gravel to the base of your bed.
You will also need to cap the gravel with a filtration membrane to prevent soil mixing with gravel.

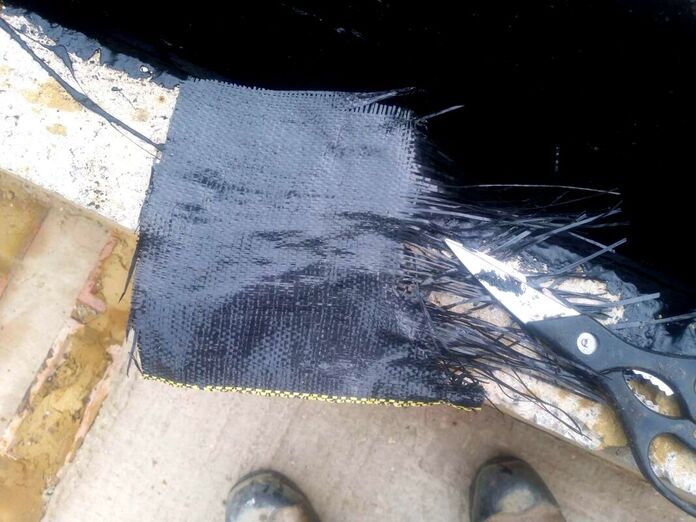
Step 13: Laying copings on your raised bed
Raised beds built with concrete blocks benefit from laying coping stones on top. These look more desirable than bare block and help to protect blockwork from moisture and weathering. Why not check out our step by step guide on how to make coping stones with paving.
Raised beds built with concrete blocks benefit from laying coping stones on top. These look more desirable than bare block and help to protect blockwork from moisture and weathering. Why not check out our step by step guide on how to make coping stones with paving.
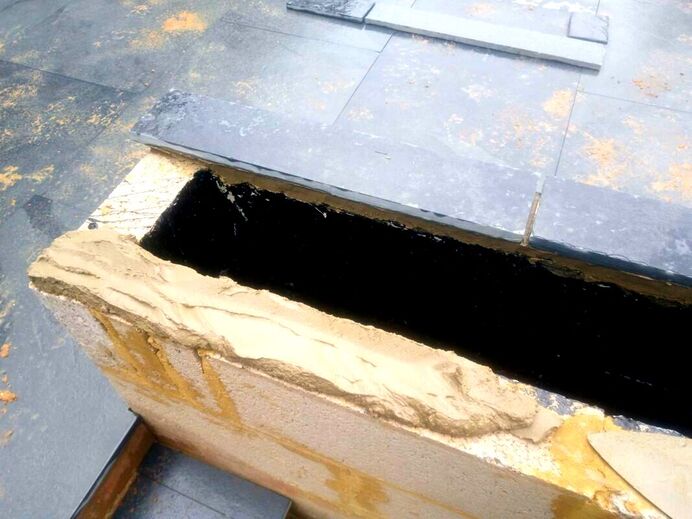
Step 14: Waterproofing your raised bed
As your raised bed will be filled with damp soil all year round it is a good idea to waterproof it. This will prevent your wall becoming too saturated throughout the season.
Excess moisture saturation can lead to eventual weathering from freeze and thaw action. You can line your bed with damp proof membrane or bituminous paint like in the example below.

Step 15: Cladding your raised bed
The great thing about concrete raised beds is they can be decorated in a number of different ways. You can use paint, render, tiles or cladding. With this raised bed we used a type of cladding called porcelain rock stack cladding.
The great thing about concrete raised beds is they can be decorated in a number of different ways. You can use paint, render, tiles or cladding. With this raised bed we used a type of cladding called porcelain rock stack cladding.

Step 16: Filling your raised bed
Now you have finished building your raised bed you can fill it with soil. Many landscape retailers supply topsoil mixes suitable for filling raised beds. These normally consist of a topsoil and compost blend.
Now you have finished building your raised bed you can fill it with soil. Many landscape retailers supply topsoil mixes suitable for filling raised beds. These normally consist of a topsoil and compost blend.
Step 17: Planting your raised bed
Decide what plants you would like in your raised bed and plant them. Your new bed may be a little dry so make sure you give them a good watering in. In our raised bed we planted Chinese fountain bamboo which has soft feathery foliage.
Decide what plants you would like in your raised bed and plant them. Your new bed may be a little dry so make sure you give them a good watering in. In our raised bed we planted Chinese fountain bamboo which has soft feathery foliage.
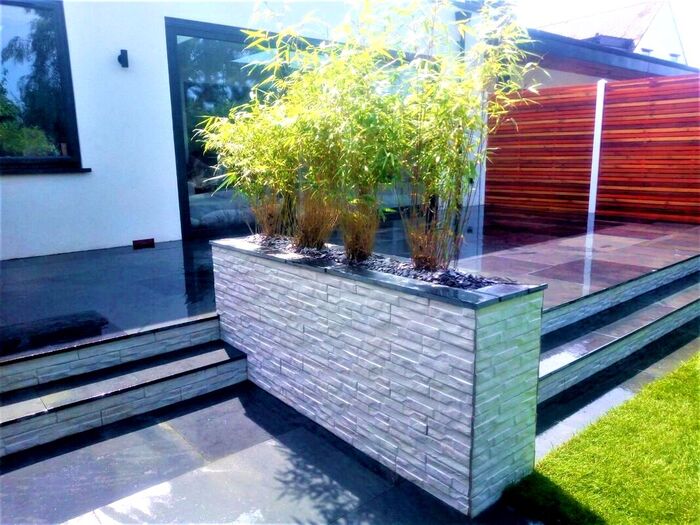
Step 18: Irrigating your raised bed
If your raised bed is very high you may find that it can become dry during the summer months. If so make sure you keep your raised beds well watered or install an irrigation system.
If your raised bed is very high you may find that it can become dry during the summer months. If so make sure you keep your raised beds well watered or install an irrigation system.
Thank you for reading our article on how to build a raised bed with concrete blocks. If you would like us to install a raised bed in your garden contact us here. Below I have linked to some other articles you may find useful.
|
|

|
|
'As an Amazon associate I earn from qualifying purchases'
This article contains affiliate links
Building a raised patio is a great way to provide elevation to an outdoor seating area. This can create a higher spatial hierarchy hosting commanding views over your garden.
Raised patios can provide a more transitional level from indoors to the outdoors. This enables your patio to become a part of the home during the warmer summer months.
Raised patios require more planning and construction than ground level patios. Raised, retaining walls and steps will all require robust foundations and base work.
Here, I will address common questions and considerations of building raised patios. I will then describe how to build a raised patio with blocks or bricks step by step.
Benefits of raised patios
Raised patios can provide level seating platforms which harmoniously integrate the garden and home.
These transitional surfaces can host the perfect, elevated, seating area to relax and enjoy nature. Raised seating areas can also provide a slightly better perspective and commanding view over your outside space.
Such seating areas are even more advantageous in undulating and sloping gardens. They can provide stability and useable space to otherwise treacherous terrain.
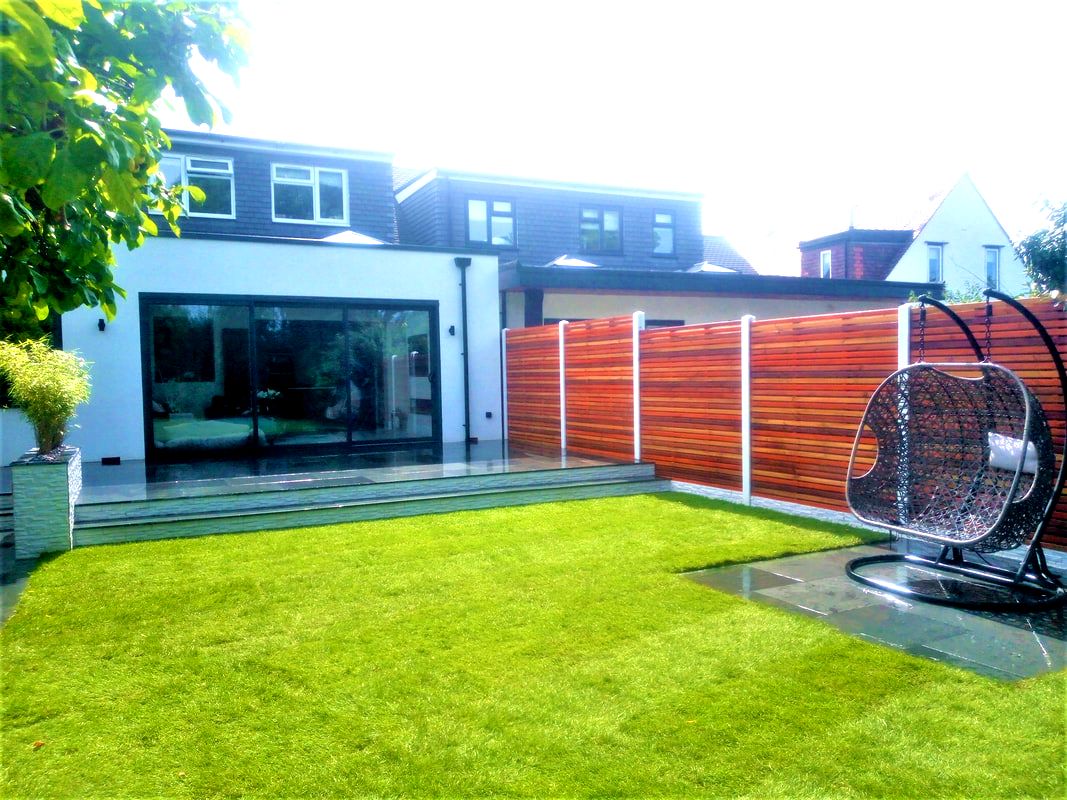
How do I raise the height of my patio?
If you want to raise your existing patio you will need to install a perimeter foundation, retaining walls and fill the centre with well compacted hardcore.
This will provide a solid structure for your new patio to be laid on top. You will typically need to excavate many tones of soil from site.
It will also require many more tones of concrete, block work and compactable sub-base.
Is a raised patio expensive?
A raised patio is much more expensive than a ground level patio. How much more will depend upon the surface area of the paving and how high the retaining structure is.
The higher the patio the larger the foundations and thicker the walls must be. Higher patios will also require more compactable aggregates and the cost of labour to shift them.
The average raised patio, about 300mm high with steps costs around double that of a ground level patio. This is due to the installation of robust foundations, brickwork, rendering and filling.
How deep should foundation walls be for raised patio?
It is difficult to pinpoint the perfect depth for raised patio wall foundations. There are many different considerations including soil type and annual ground moisture saturation levels.
However, I always prefer to excavate a little deeper than you think especially if the ground is soft. For your average raised patio I prefer to excavate a minimum depth of 400mm.

How wide should foundations be for a raised patio?
The foundations should be at least 3 times the width of the retaining wall you are building.
However, retaining walls of any type should have a wider foundation which runs back under the retaining load. This is called a 'cantilever foundation' where the retained load adds extra stability to the retaining wall.
You may want your raised patio to have long steps running the length of the patio. This will provide you the opportunity to lay a large and broad cantilever foundation along the whole length.
The mass of walls and the broad foundation will act as an anchor of stability for the whole structure.
Broad and deep foundation for retaining walls and steps
How thick should retaining walls be for raised patio?
Any retaining wall holding back compacted material must have a suitable thickness. For most raised patios you should aim for 210mm thickness.
This is two bricks thick or the thickness of a concrete block on its side. If you are building quite high (above 800mm) I would recommend making this thicker still (300 - 400mm).
You can lay a cavity between blocks or bricks and fill with wet concrete as you build higher. However as you get to the top 600 - 800mm you can go back to 201mm thickness.
This may seem a little excessive to some, however in landscaping everything must be built to last.

Do you have to dig out for a raised patio?
This is a very common question and unfortunately the answer is yes. Just because the patios base is not physically sitting under ground doesn’t mean the soil should not be removed.
You will still need to remove the soft topsoil layer to the ground. This darker soil has a higher quantity of lighter organic matter within its particles.
This means it is less stable and liable to displace under excessive loads. Seasonal fluctuations in ground moisture can lubricate these soil particles leading to excess movement.
This can lead to your raised patio moving and cracking eventually failing. It may seem counter intuitive to dig down for a raised patio but it is the correct way.
There are some exceptions, for example, if you are building over a robust concrete slab with no cracks. However, for most situations you should excavate at least a 150mm depth of topsoil.
There are some exceptions, for example, if you are building over a robust concrete slab with no cracks. However, for most situations you should excavate at least a 150mm depth of topsoil.
What is the best base for a raised patio?
You should use a traditional, compactable aggregate such mot type 1. This is a suitable base for a raised patio.
If your retaining structure however is quite high you should apply your aggregate in layers. You should compact your layers of sub-base every 100mm with heavy compaction plate.
This will make sure your build up layers do not sink over time. I prefer to lay a 100mm layer of wet concrete to the top of raised patio sub-bases.
This provides extra stability and an equal weight disruption onto the ground below.
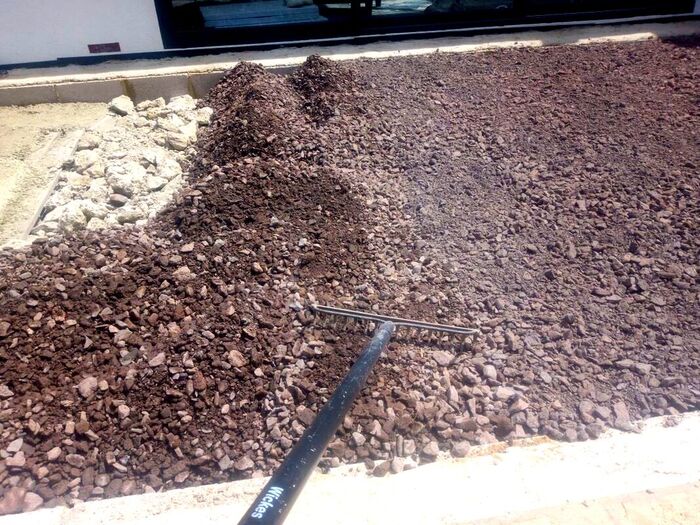
Levelling mot type 1
What do you fill a raised patio with?
You can only fill up raised patios with hard masonry materials like brick, stone and concrete. However, you should not allow too many air gaps between the hardcore!
In times of high ground saturation, this can lead to water and silt rising up into your sub-base. Eventually this can cause displacement and cracking.
It is best to break up larger masonry into thin layers and spread mot type one over the top. This enables all hardcore gaps to be tightly filled and then compacted.
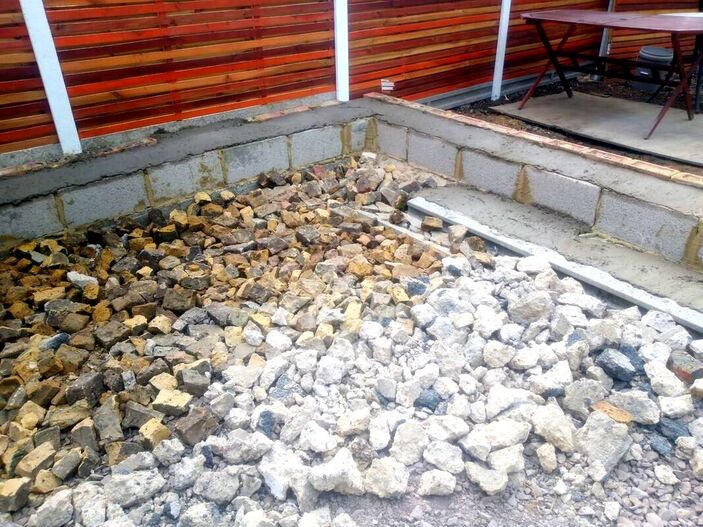
Can I raise a patio to my sliding doors level?
It is very typical for homeowners to want their raised patios to meet the same level as the home. This is to create a seamless and uninterrupted transition from inside to outside.
The rising popularity in wide and open, sliding, patio doors has further popularised this idea. The problem with this is, UK building regulations require external surfaces to be 150mm below the DPC level.
This ‘damp proof course’ is a waterproof membrane within walls to stop damp rising up from saturated ground. This ‘damp proof layer’ is typically situated just under the level of back doors.

This makes it very troublesome to raise a patio to the same level as the home.
Building higher than the recommended 150mm is sometimes tolerated if you create a channel between surfaces. However this typically ruins the visual effect one is trying to achieve.
There are many instances where homeowners simply ignore this regulation. If you do, bear in mind when you sell your home, the surveyor could flag it. This could mean a home devaluation or an expensive recommendation to remedy the works.
The 150mm distance between paving and the DPC is to prevent splash back from heavy rain saturating walls.
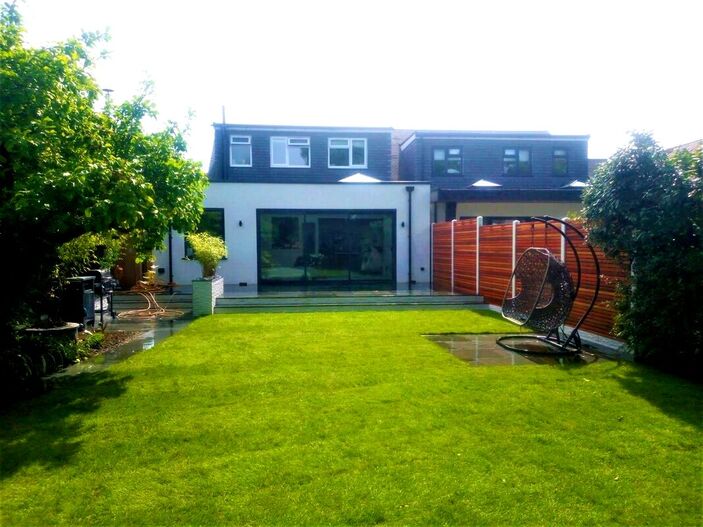
It is also justified in the case of garden flooding events. Therefore, if you do ignore this rule make sure your walls are well waterproofed.
This can be achieved with robust masonry sealants, External weather shield paints or resin wall coatings. You will want to make sure the patio level fall decisively away from the building.
You may also wish to install some sort of rain proof lean to, pergola to provide shelter. However, only you can decide if a simple step up to the home is really worth any extra stress or expense.
Does a raised patio need drainage?
A raised patio will need no more particular special treatment in regard to drainage as a regular patio. Any new hard surface where there was once soil will cause excess surface run off.
This could lead to boggy gardens or in extreme cases, flooding. Consequently any new patio including raised patios will require a drainage strategy.
This could be collection chambers channelling water into a soak away or wetland habitat. Why not visit our in-depth article on patio drainage for a full briefing on the topic.
This will give you a good idea of what patio drainage option will work best for you.
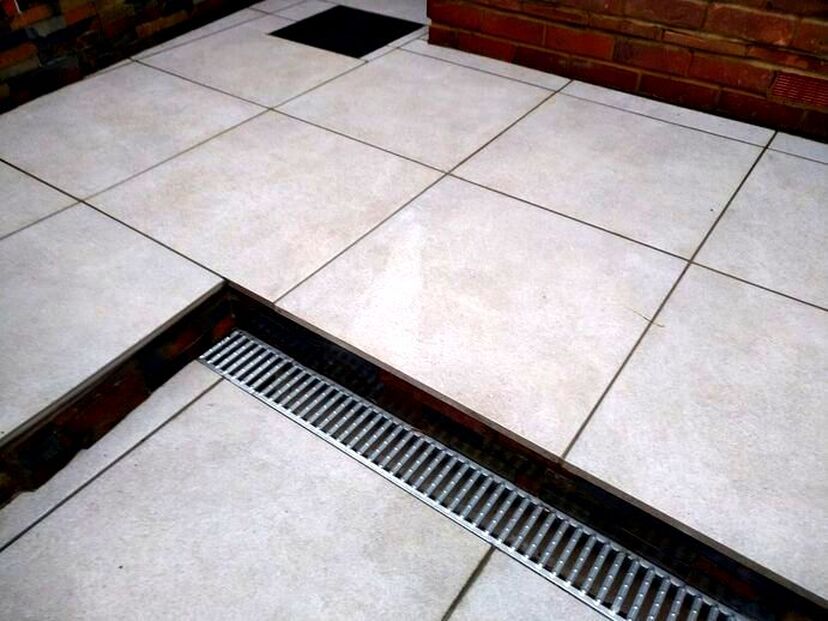
How to build a raised patio step by step
Shopping list for a raised patio
Skips
Compactable sub-base Mot-Type 1
Bricks or blocks
Ballast
Sharp sand
Soft sand
Cement
Paving
Rendering sand
Cladding + External adhesive
Tools for building a raised patio
Spade
Long handled shovel
Wheelbarrow
Loading ramp
Landscaping rake
Cement mixer
Bricklaying trowel
Pointing trowel
Rendering trowel
Tiling trowel
Rubber mallet
Long spirit level
String line
Set square
Stiff brush
Soft brush
Large sponge
Jointing iron
Building a raised patio with bricks or blocks
Step 1: Set out your patio
Before you start any construction work on your raised patio you should do some planning.
If you are using paving slabs think about where your cuts will go! Could you build it accurately enough so you only use full pavers with no cuts?
Will there be any steps and where will they go? Mark out your new patio with spray paint to get a feel for its shape and scale.
Step 2: work out your levels
Levels are even more important for a raised patio than a ground level patio. This is because most of the time you will need to build steps.
Comfortable steps are typically about 150mm high (6 inches). Therefore it is best to plan your finished patio level at a multiple of this distance.
This will allow you to have equal sized steps from your patio to ground level. If your patio is next to your home it is good to mark your finished levels on the building.
This will provide you a visual guide as you build.
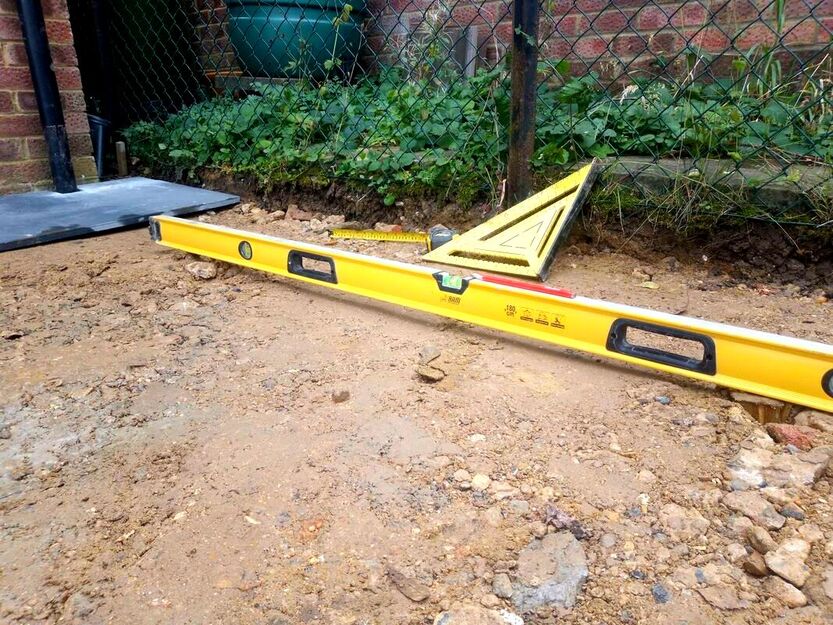
Step 3: Excavate your patio area
Excavate the footprint of your raised patio to get rid of the soft, topsoil layer. You will need to remove at least 150mm, if you cannot re-use the topsoil wheel it into a skip. Make you excavation as neat and square as you can with no loose soil left inside.
Excavate the footprint of your raised patio to get rid of the soft, topsoil layer. You will need to remove at least 150mm, if you cannot re-use the topsoil wheel it into a skip. Make you excavation as neat and square as you can with no loose soil left inside.
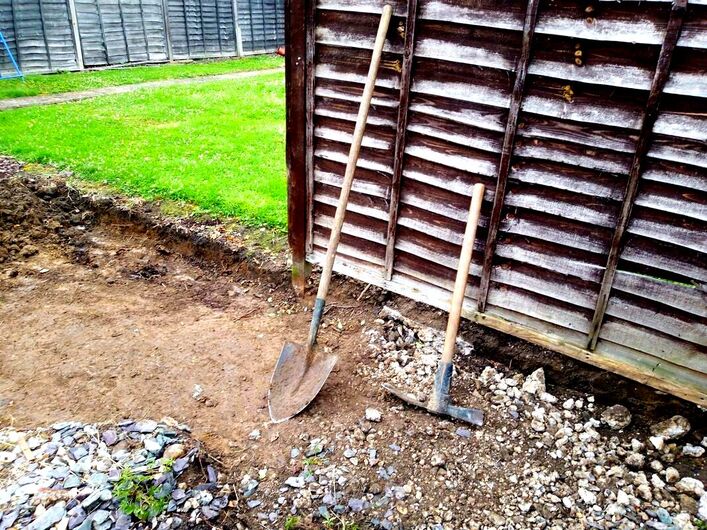
Step 4: Excavate your retaining wall foundations
Excavate your wall foundations around a minimum of 400mm from the existing ground level. If you make your foundations much wider you can reduce the depth somewhat.
For raised patios it is best to have cantilever foundations for the retaining walls. This is a wide foundation which stretches back under the retaining load.
Such construction utilises the mass of the structure for greater stability and strength. Again make your excavation neat, square with a flat bottom and no loose material.

Step 5: Load your skips with excavated soil
It can be very surprising just how much soil comes out of the ground during such excavations. Bear in mind that soil bulks up by 30% when it is excavated.
Try to factor this in when working out your calculations. It is very likely you will require more than one skip for an average raised patio. Using a wheelbarrow and a loading ramp, fill your skip with the excavated soil.
If you are a beginner this may seem daunting! Visit our step by step guide on how to fill a skip with soil here.
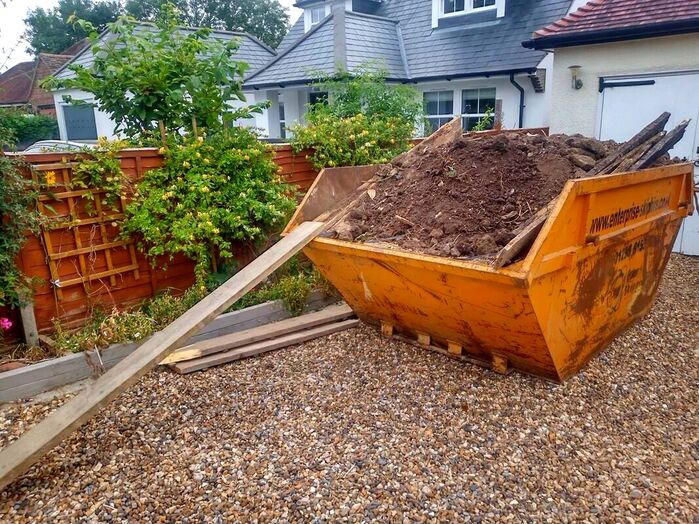
Step 6: Set up your cement mixer
Before you start construction work it is a good idea to set up a mixing area. Try to keep your mixing area a little further away from the patio to prevent cement splashes! Create a working area with your cement and ballast ready to start mixing.

Step 7: Mix up your concrete
Start mixing your concrete! Turn on your mixer and put around two thirds of a bucket of water into the drum. Add half a bag of cement and let it spin until it is well hydrated.
Gradually, shovel in around 13 shovels of ballast until it reaches the consistency of porridge. You are aiming for a 1:5 cement to ballast ratio.
How many shovels will depend on your shovel and your shovel loads.
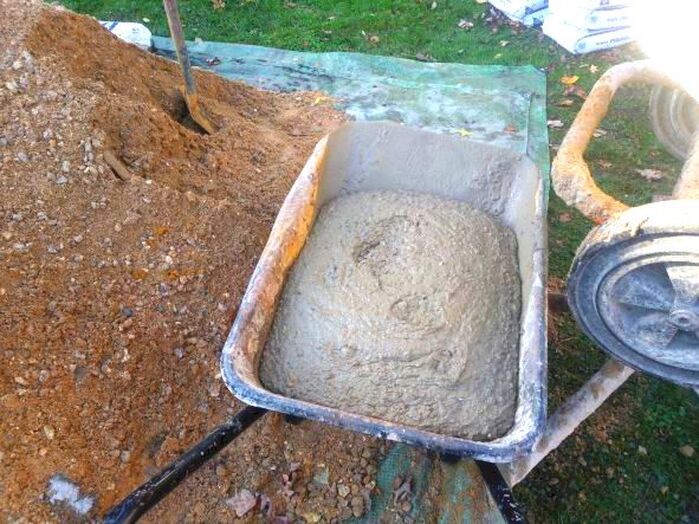
Step 8: Level your concrete
Pour your concrete into your foundation excavation and tamp level with a long spirit level. A good way to guarantee a perfect level is to hammer in long pegs along the excavation.
This will allow you to level to the top of the pegs as you go. Work the concrete until you reach a smooth and level surface.
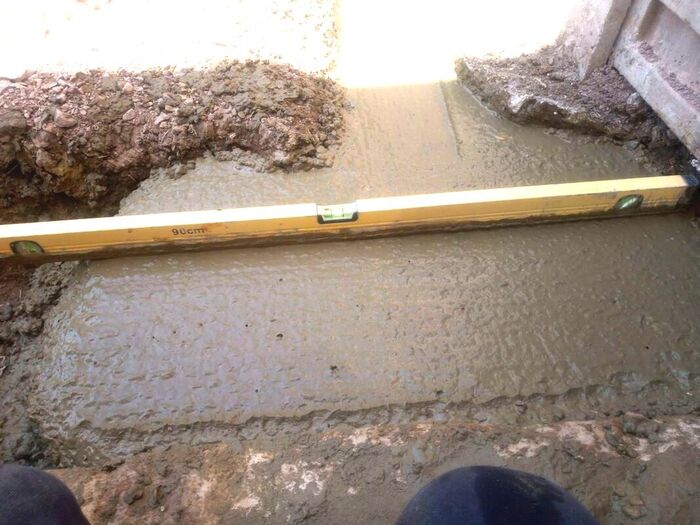
Step 9: Set out your blocks
When your concrete is set the next day, stack your blocks or bricks strategically around the foundation. Keep the blocks stacked back from the concrete to allow access for a wheelbarrow full of mortar.
When your concrete is set the next day, stack your blocks or bricks strategically around the foundation. Keep the blocks stacked back from the concrete to allow access for a wheelbarrow full of mortar.
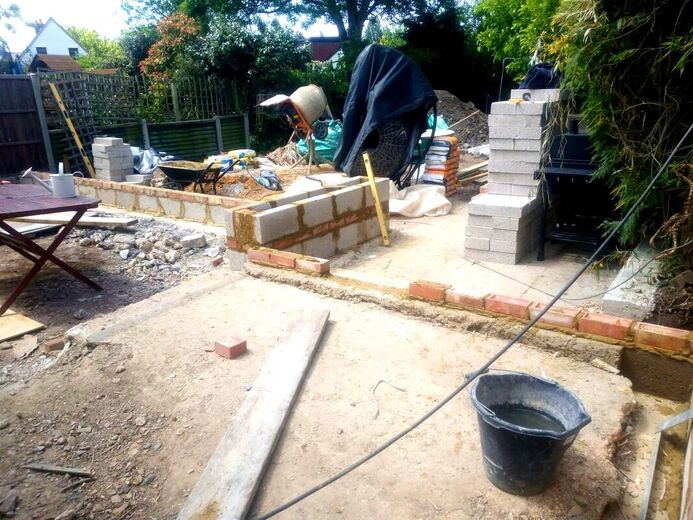
Step 10: mix up your mortar
Mix up one part cement to five parts soft sand and mix to a brick laying mortars consistency. Make sure you add some plasticiser for easy workability.
Mix up one part cement to five parts soft sand and mix to a brick laying mortars consistency. Make sure you add some plasticiser for easy workability.
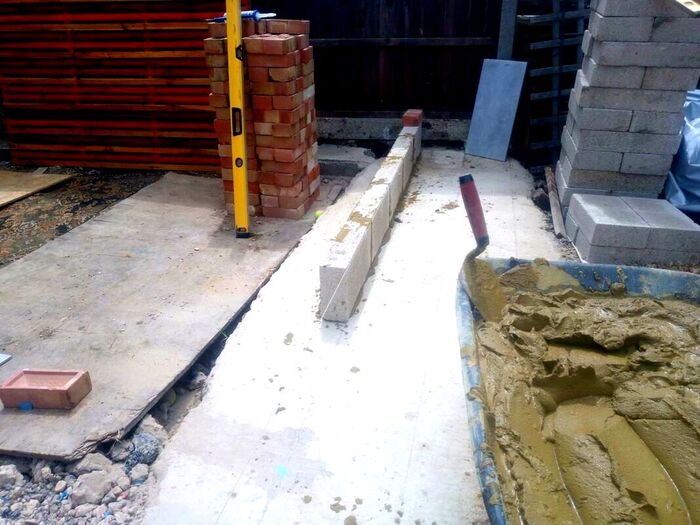
Step 11: Lay your blocks
Lay fillets of mortar along the foundation with peaks and valleys to bed down your blocks or bricks.
Try to put down enough mortar so you bed down a 10mm joint, this is standard for brickwork.
Build up your corners first so your corners are vertically level or plumb.
Then set up a tight string line from the top of each corner block across one patio edge. This will allow you to build your retaining walls perfectly straight and level.
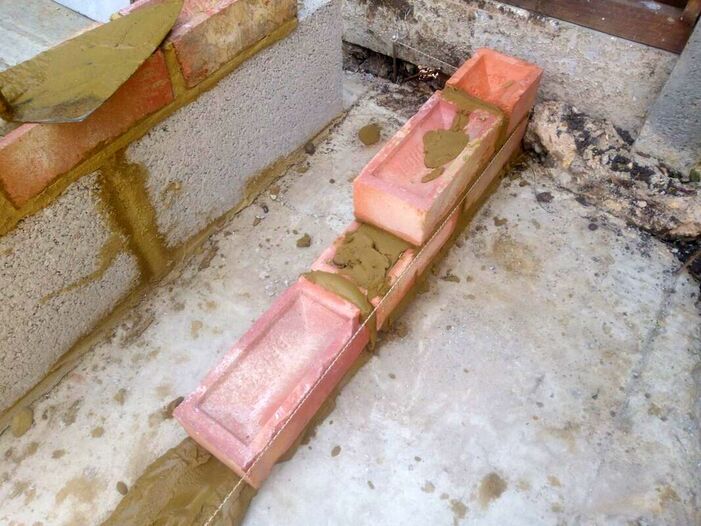
Step 12: Strengthen retaining walls
If you want to make sure your walls are extra strong, lay a cavity and fill it with concrete.
Alternatively, you set up shuttering and fill the back of your walls with wet concrete. It can also be effective to create triangular concrete haunching inside your raised structure.
This will help your hardcore and sub-base aggregates to compact tightly inward.

Step 13: Filling your raised patio
Fill your raised patio area with old concrete or other waste masonry materials.
You must however, make sure that large pieces of hardcore are well broken up or buried within wet concrete. Spread out larger pieces of hardcore and cover them in smaller aggregates such as type 1.
Make sure you spread your sub-base and compact it well every 100mm. This can be achieved with a heavy vibro-compaction plate.

Step 14: Compacting your sub-base
Make sure you spread your sub-base and compact it thoroughly every 100mm.
This can be achieved with heavy vibro-compaction plates which are readily available from hire shops. Make sure you hose down your sub-base or leave a sprinkler on the area for at least half an hour.
Make sure you spread your sub-base and compact it thoroughly every 100mm.
This can be achieved with heavy vibro-compaction plates which are readily available from hire shops. Make sure you hose down your sub-base or leave a sprinkler on the area for at least half an hour.
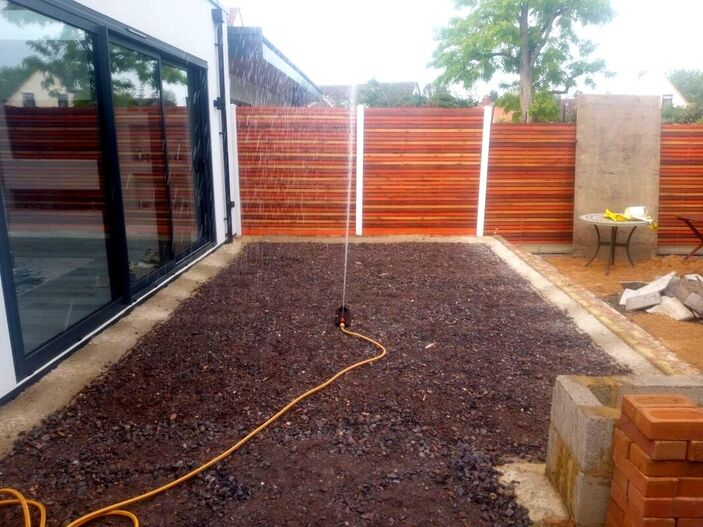
This will help to lubricate the aggregates particles making them compact tightly and become hard as rock.

When your Mot type 1 is compacted it should feel hard underfoot, press your heel into the surface to make sure its well compacted.
Step 15: Capping with concrete
If you want to make your raised patio absolutely bullet proof and guaranteed to last, cap it with concrete. Level your sub-base to around 100mm below the brickwork and lay a 100-150mm layer of concrete.
Mix up a wet concrete mix and tamp it to a consistently flush level. This will also make your patio slab laying much easier!
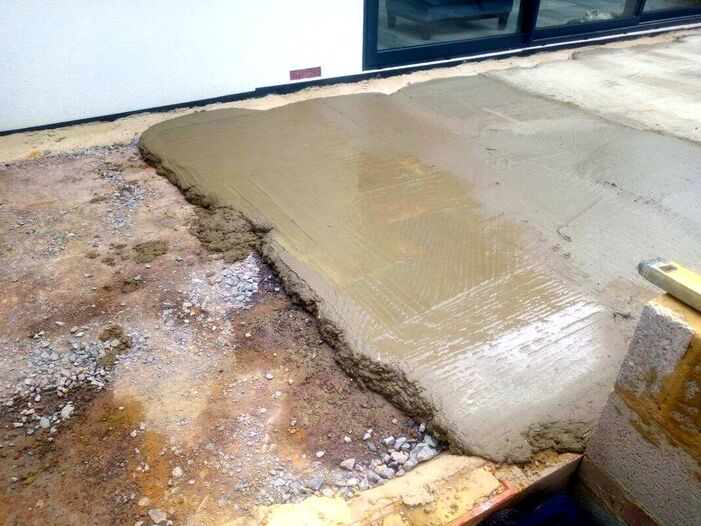
Step 16: Laying your paving
Set out your paving to help figure out where is the best place to start laying. Typically it is best to start from the front edge of your raised patio laying back towards the home.
This way you can leave more unsightly cut edges facing the building. Try to let your paving overhang your block or brickwork by around 10mm.
This will prevent rain running down the face of steps which could lead to water stains. If you are applying render or cladding to the steps leave even more of an overhang.
Laying paving with cement mortar is quite an in depth and specific skill. Therefore if you are a beginner I recommend our resource on how to lay paving correctly here.
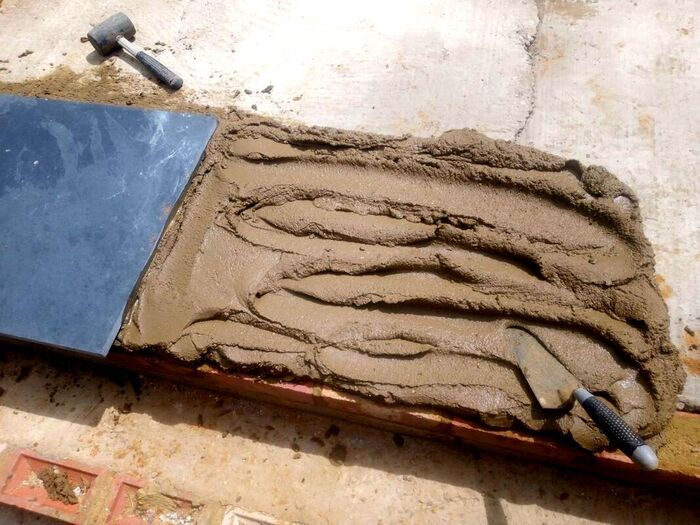
Step 17: grouting a raised patio
Mix up a 1:3 plastering sand and cement grouting mix to point your raised patio.
Mix the grout until it is just damp enough to form a ball in your hand. This way you will be able to get a good finish without staining your paving.
It is best to grout when there is no moisture within the joints or the surface of the paving. You will also need to grout on a day when there is no rain in the forecast for 16 hours after completion.
If you are unsure why notvisit our step by step guide on how to grout a patio here.
Step 18: Cladding walls and steps
If you are going for a modern style raised patio you may have built it with concrete blocks. If so this means you can finish your verticals with either rendering or cladding.
Smooth, rendered, finishes can be painted or like in our example below clad with cladding. On this raised patio I laid contemporary style, porcelain stack cladding.
It provides an amazing, visual texture and a real touch of elegance. If you like the idea of laying this cladding to your project, follow our step by step guide here.

Step 19: Making good to edges
Once your raised patio is completed, you can touch up areas that were affected by the works. Fluff up flower beds and add some fresh compost or mulch. You may also have to repair the edges of lawns which have become damaged or too compacted.
Once your raised patio is completed, you can touch up areas that were affected by the works. Fluff up flower beds and add some fresh compost or mulch. You may also have to repair the edges of lawns which have become damaged or too compacted.
Step 20: Enjoying your raised patio
Now you have created your masterpiece why not invite your friends over to christen it? There is nothing better than sitting back with friends and admiring the fruits of your hard labour. Enjoy!
Now you have created your masterpiece why not invite your friends over to christen it? There is nothing better than sitting back with friends and admiring the fruits of your hard labour. Enjoy!

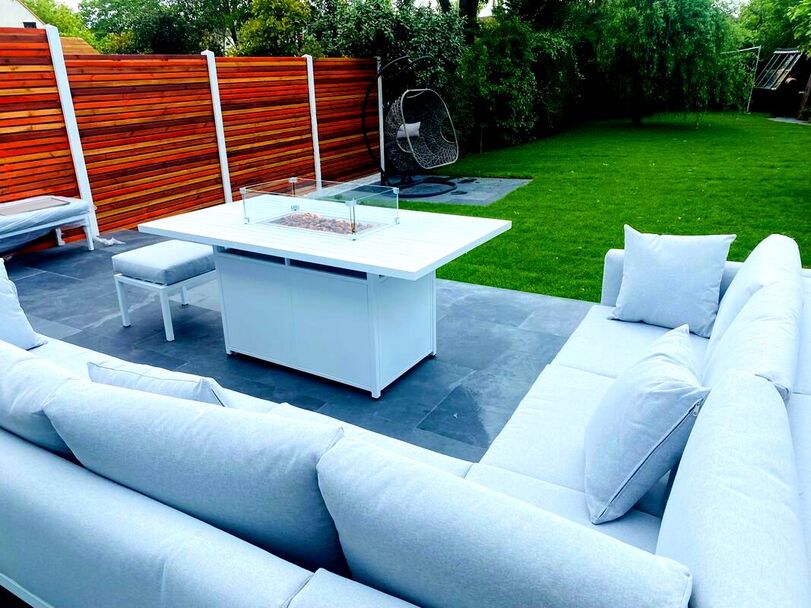
Raised patio with outdoor patio set with coffee table and fire pit
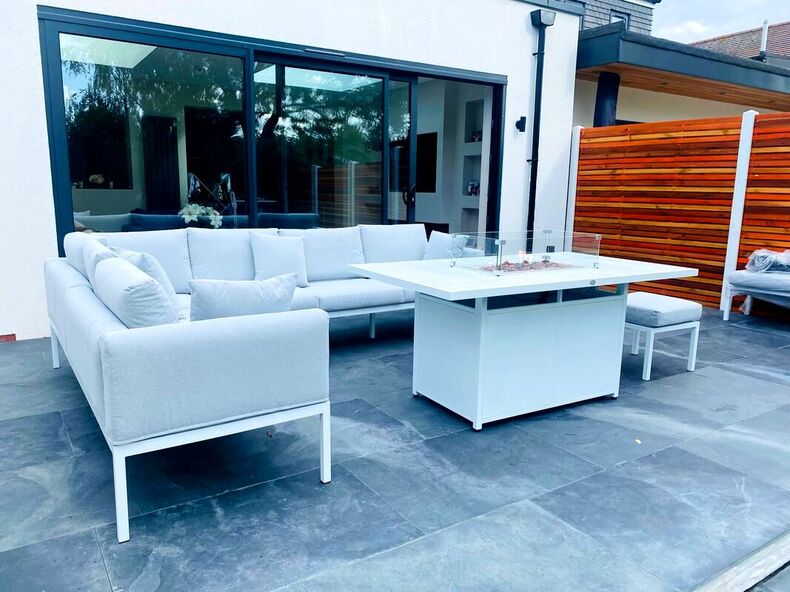
Raised patio, house view, with outdoor patio set with coffee table and fire pit
Thank you for reading out article on how to build a raised patio with retaining wall blocks! If you would like us to plan and build your raised patio please contact me here.
If you have any questions regarding building your raised patio project please email me! Furthermore if you found this article useful why not help us and share it via the tabs below? Thank you!
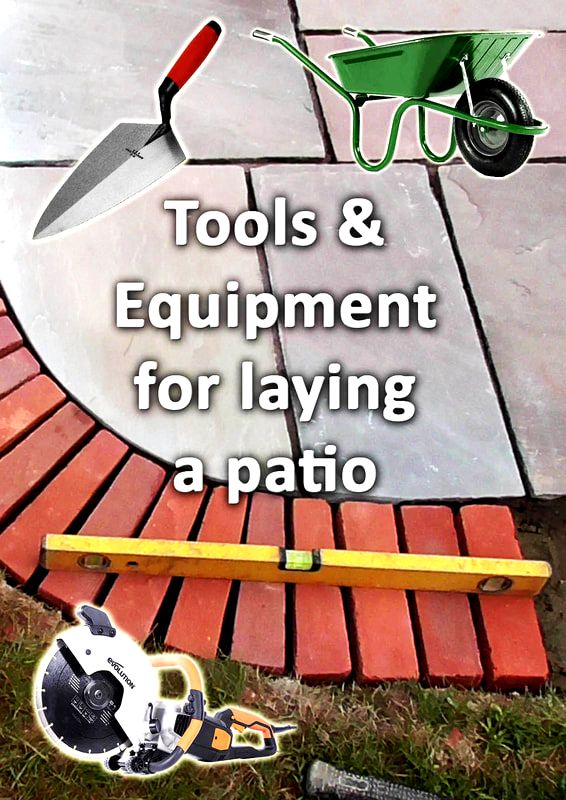
|
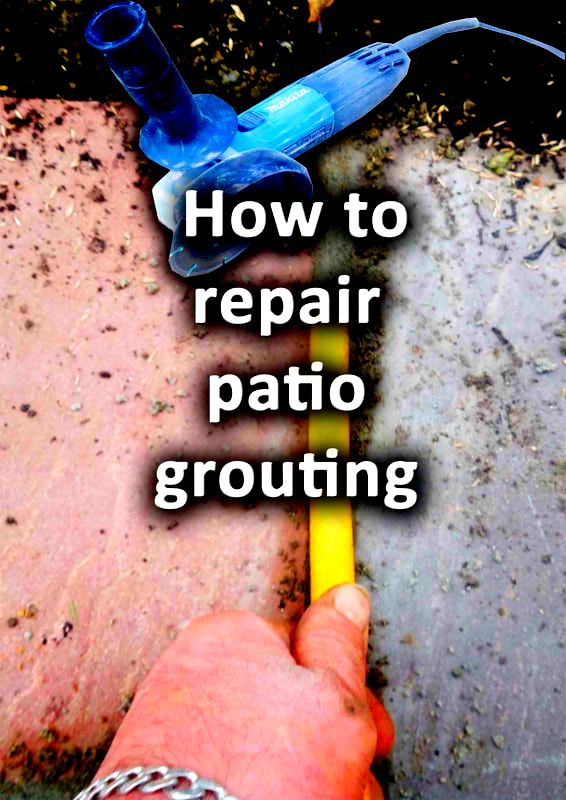
|
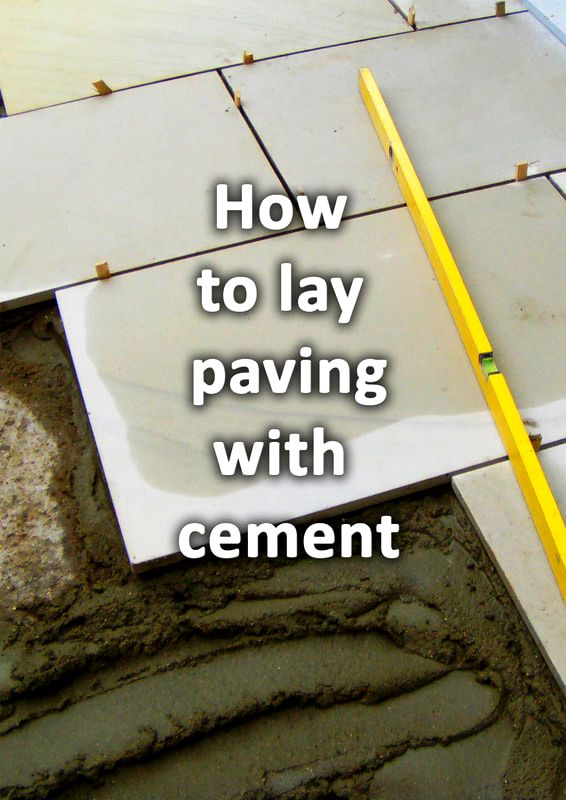
|
'As an Amazon associate I earn from qualifying purchases'

|
The Author
Paul Nicolaides
BA (Hons) Dip
Paul Nicolaides has over 30 years of recreational gardening and 20 years of professional landscaping experience. He has worked for landscape contractors including design and build practices across London and the South East. In 2006 he qualified with a BA Hons degree and post graduate diploma in Landscape Architecture. In 2009 he founded Ecospaces an ecological landscaping practice which aims to improve social cohesion and reduce climate change through landscaping. In 2016 he founded Buckinghamshire Landscape Gardeners which designs and builds gardens across Buckinghamshire and the South East. This blog aims to provide easy problem solving information to its audience and encourage others to take up the joy of landscaping and gardening.