
This article contains affiliate links
Both paving slabs and coping stones are generally made from the same or similar materials.
With coping stones being much more expensive per square metre the question often arises; can you make coping stones with paving? The answer to this question really depends on a few factors and your specific needs. Here I will explain when you can use pavers as coping stones and how to make copings with paving. What is the difference between paving and coping stones?
Coping stones are specifically made to cap off the tops of walls and other masonry construction. Consequently, they have smooth or rounded edges with specific widths to fit standard wall thicknesses. Such widths often allow for a slight overhang over walls to prevent water running over the walls surface. Manufactured copings typically have a drip groove on the underside of the overhang. This captures running water droplets and forces them to drip away from the wall face. 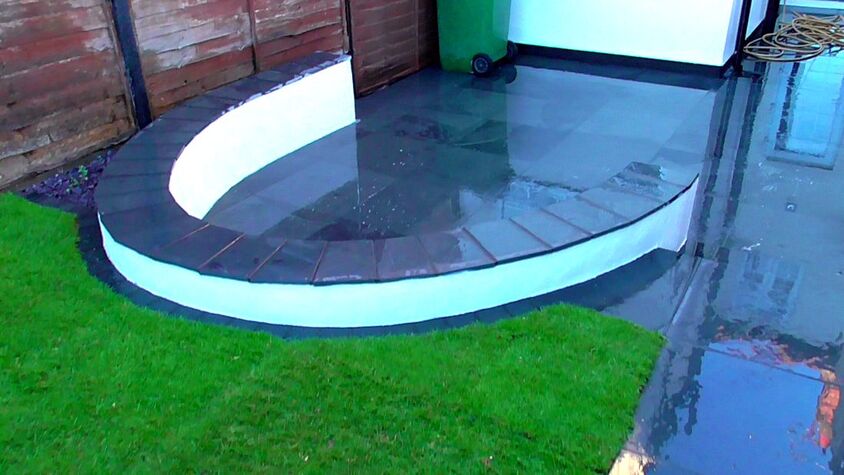
Slate paving utilised as coping stones
In a nutshell, copings are installed to prevent too much rain and dampness penetrating the wall. This protects the wall from freeze and thaw action and discolouration.
Coping stones are generally thick and rounded to provide a robust barrier to the top of masonry. Paving on the other hand is generally thinner with much wider dimensions. This means they are not pre-made to fit standard wall thicknesses. Therefore most paving has edges not visually suited to create wall copings. Can paving be used as coping stones?
Yes, in many circumstances paving can be used as coping stones. It really comes down to if the width of the paving fits the wall well. If it doesn't it means the paving would need to be cut leaving an untidy edge. This is not necessarily a problem if your wall has only one face. Also, some paving materials such as slate are easier to cut neatly than other types of paving. One of the best solutions for using paving as copings is using 300mm x 300mm paving. These can be laid on top of double skinned brickwork or 9 inch walls. 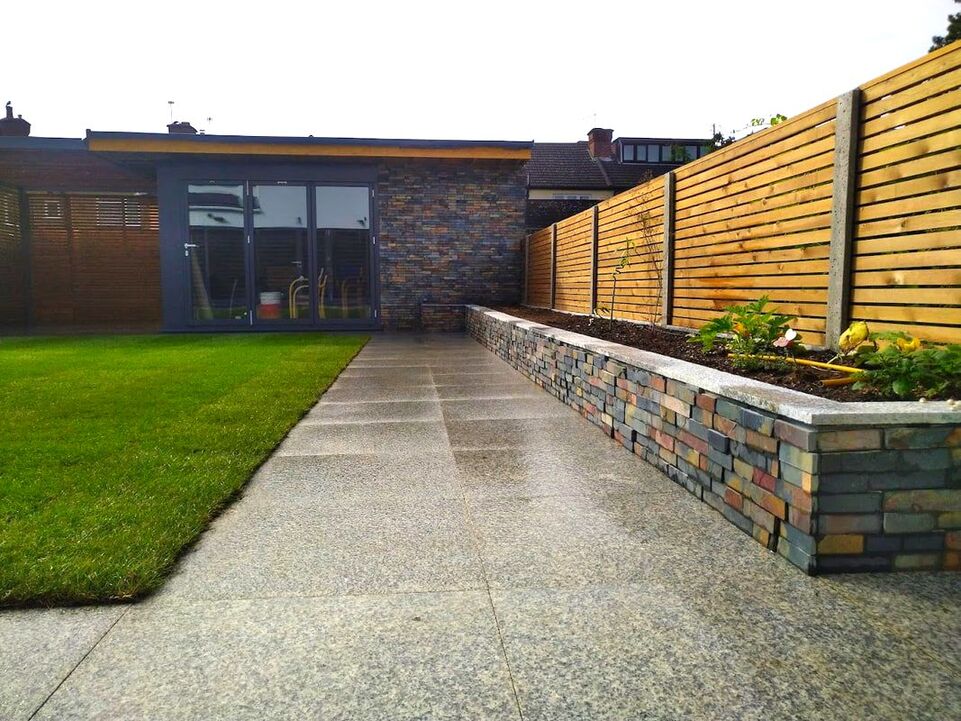
Raised bed coping stones cut from granite patio paving
The 300 x 300 paving can easily be laid on top with 50mm over hang with no need to cut them down.
This is regularly done with natural stones such as Indian sandstone and slate paving. Drip groves can be cut into the underside edge with a grinder. What is the best paving to use for coping stones?
The best paving to use for coping stones is paving with a neat edge. Typically 300x300mm small paving slabs are the perfect width to use as copings for 9 inch walls (double brick thickness). Some of the best paving for copings is either paving with a thickness above 25mm (1 inch). Or natural stone materials that are very impervious to water penetration such as slate paving. 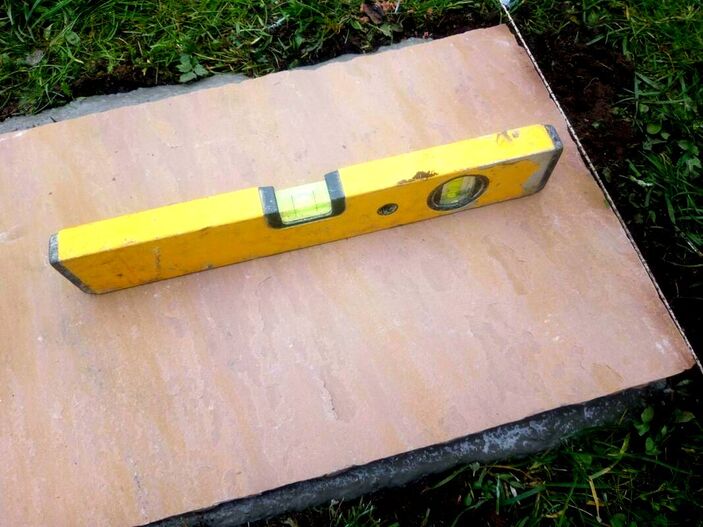
300mm wide Indian sandstone paving slabs
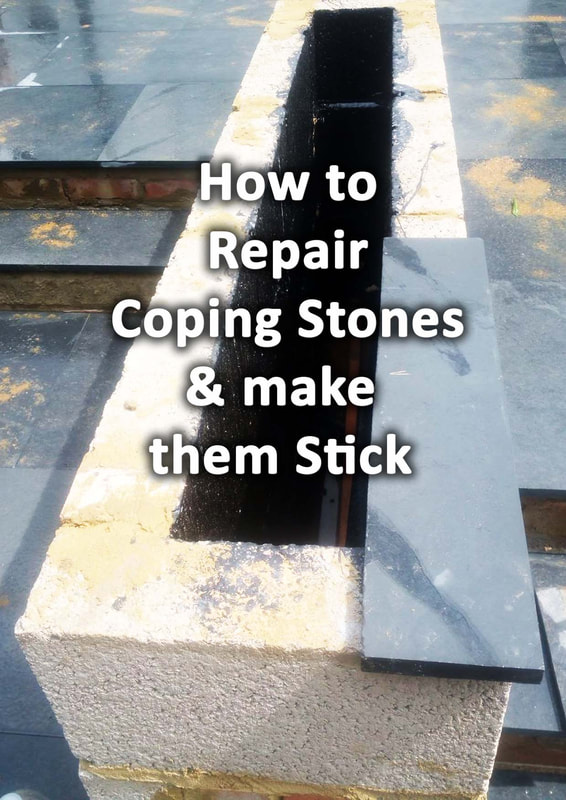
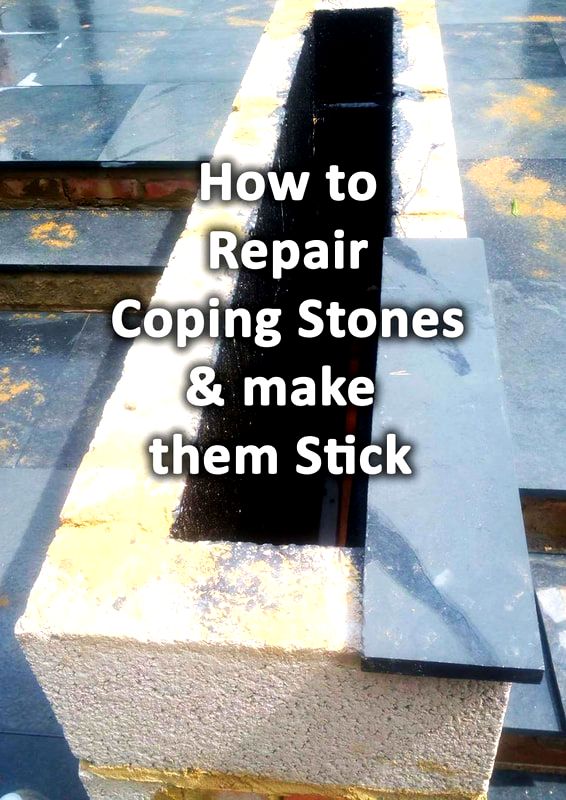
How to make coping stones stick to mortar?
The best way to make coping stones stick to mortar is to cut groves on the underside of the copings. This can be done with an electric grinder with a diamond blade cutting disk. Cut to a depth of around 6mm in a X formation and at a slight angle. As you bed down your copings the mortar will seep up into the groves creating a strong grip. 
As copings are subject to multiple stresses and impacts, good mortar penetration into the coping is preferable.
Also be sure to mix your mortar with a good bonding agent such as PVA. Mortar should also contain plasticiser for extra workability and not be too wet or too dry. The best mortar for laying coping stones is one part cement to four parts sand mix. It is better to use a 50% sharp sand and 50% soft sand mix. The mortar should have a consistency of stiff brick laying mortar. Step 1: Select your paving
Select the paving you wish to use for your coping stones. Make sure if you have to cut them that you can achieve a tidy cut to the edge of the paving. See if the paving supplier can provide smaller paving units more ideal for copings. 
Step 2: Cut your paving
If you have to cut your paving, mark out long strips at the thickness you desire. With a diamond blade cutting disk carefully and slowly, start to cut your paving. Try to keep your disk as square as possible and cut slowly for as smooth a finish as possible. 
Step 3: Create bedding key
Using your grinder, cut grooves into the base of your coping stones. This will enable your mortar to rise up into the key for a firm bond. Once they have been cut, wash your copings with water to rinse off excess dust. 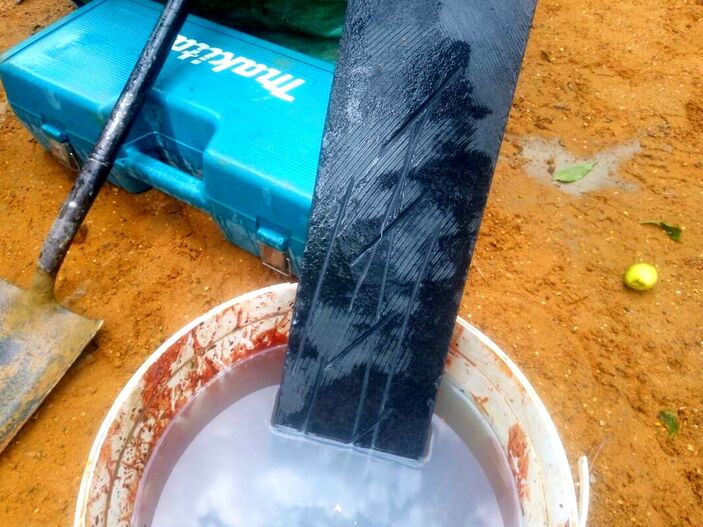
Step 4: Mix up mortar
Mix your mortar with a good bonding agent such as PVA. Mortar should also contain plasticiser and not be too wet or too dry. The best mortar for laying coping stones is one part cement to four parts sand mix. It is better to use 50% sharp sand and 50% soft sand mix. The mortar should have the consistency of a stiff brick laying mortar. 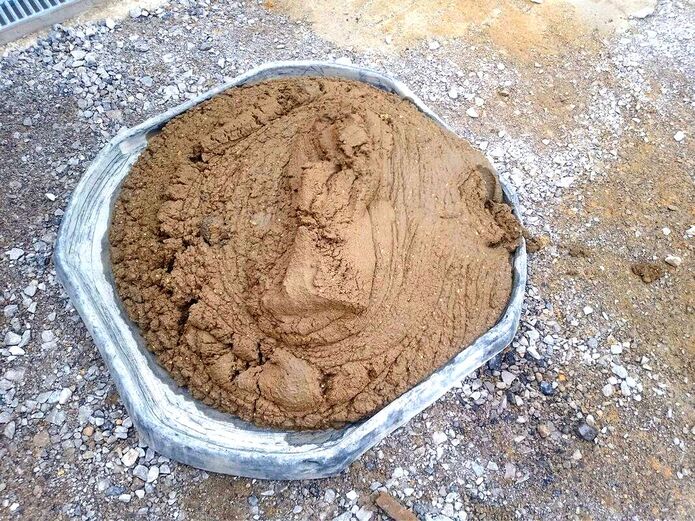
Step 5: Bed down your copings
Lay a fillet of mortar on top of your wall creating peaks and valleys. Gradually bed down your copings onto the mortar so they have consistent contact with the mortar below. Tamp them down gradually using a spirit level to keep them flush. Using a pointing trowel cut off any excess mortar and work it to a smooth finish. 
Step 6: Grout your copings
Using a grouting or pointing mix grout your copings to a neat jointing finish. Why not visit my step by step guide for grouting paving here. Step 7: Curing
Now you have laid your copings make sure they can cure for 24 hours with no disturbance. Any impacts or movements during this process could prevent a strong bond forming. A good idea is to cover them over or tape off the area.
Thank you for reading our article on how to make coping stones with paving. Below I have linked to some other articles you may find informative.
'As an Amazon associate I earn from qualifying purchases'
0 Comments
This article contains affiliate links
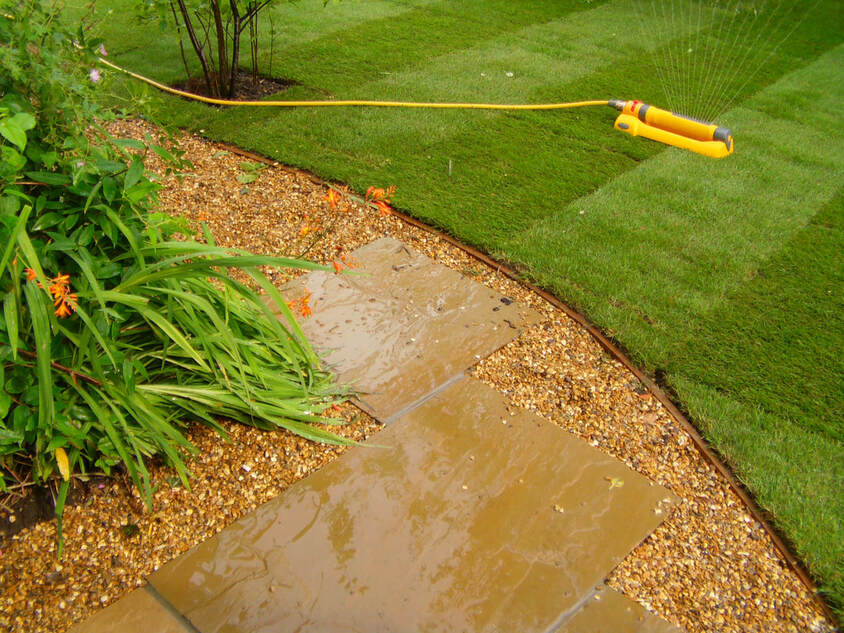
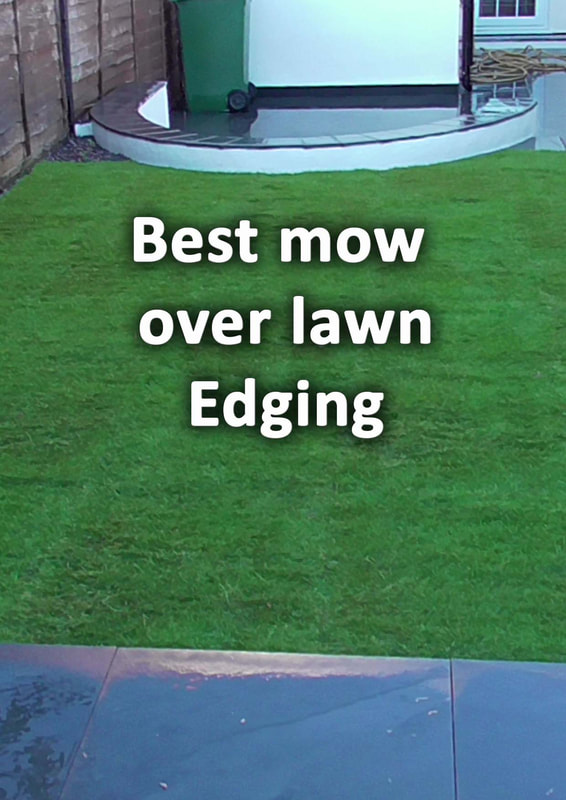
Lawn edges have always required regular maintenance, as grass grows it encroaches upon flower boarders, paths and patios.
This leads to many hours of weeding, edge trimming and edging. Not only is this extra work it can also lead to an untidy and shrinking lawn over time. Furthermore, many lawns border other features higher than the lawns surface level. Features such as sheds, raised beds and raised patios are difficult to mow neatly up against leaving strands of un-mown grass. 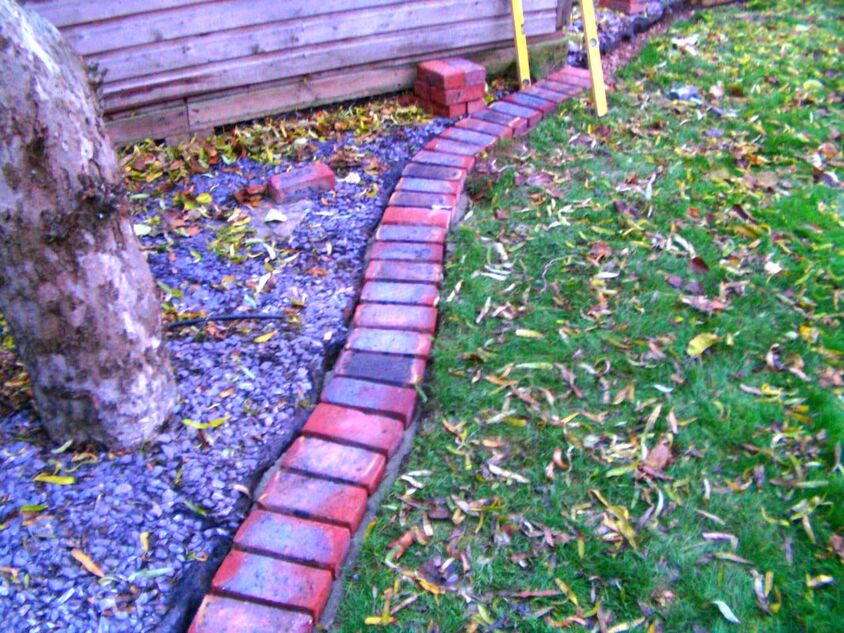
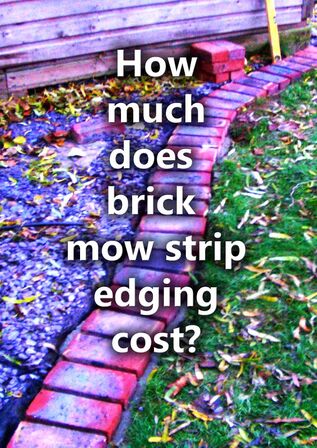
Brick mow strip
This is because high, vertical sides, act as a barrier to the edge of mowing blades. Over time, continuous strimming can cause damage and deterioration to these vertical features.
Consequently, the best mowing strips have a broad width of at least 100mm. This enables mower blades to easily overlap mow strips without colliding and damaging vertical features. What is a lawn mowing edge strip?
A mowing edge strip is a strip of material which enables easy mowing and eliminates the need of lawn edging. The primary concept of creating a mowing strip is having a hard edge completely flush at the same level of the grass. This enables easy mowing, stops grass encroaching on other areas and gives the lawn a clean edge. More robust mow strips made of paving and natural stone also add the extra benefit of forming landscape structure. Mow strips made of paving and natural stone can stay in keeping with gardens other surfaces and design theme. 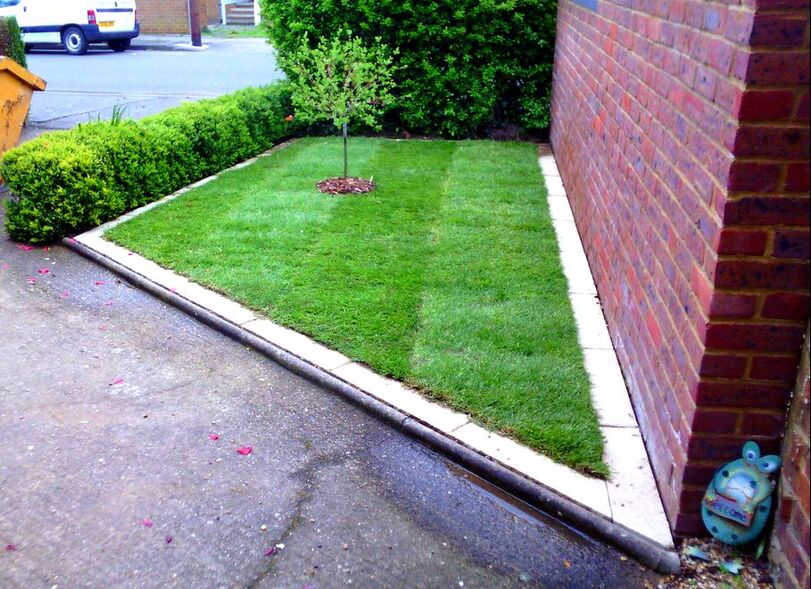
Paving mow strip
Why install a mowing strip to your lawn?
Different types of mow stripsTimber
Timber mow strips are typically created using gravel boards. These thin boards are rather flexible and effective for forming organic shapes and curves. The main disadvantages with timber mow strips are they eventually degrade and are often very thin.
Timber mowing edge
Metal
Metal edgings, like timber, can be perfect for forming curved lawns and flower borders. Their metallic aesthetics make them effective for a contemporary and modern look. Unlike timber, metal is much less likely to degrade, however their thin profile are not ideal for mow strips.
Plastic
There are now a number of plastic edgings on the market advertised as lawn edgings. I personally do not recommend using them as mow strips. On an environmental level plastics are suitable for landscape construction. They have a tendency to break easily and degrade within sunlight.
Rubber
There are rubber edging products on the market that can be used as mow strips. However on a functional, aesthetic, and environmental level I do not feel they are a good option.
Why use paving and stone to edge your lawn?
Paving and stone is a much more effective material for creating mowing strips. Firstly, masonry materials offer wide and flat surfaces which allow mowers blades to reach lawn edges.
Materials such as bricks, setts, and paving as edgings can easily match other garden features such as paths and patios. Masonry is much more durable than other materials and more likely to last the test of time. The installation of a robust sub-base will also prevent roots of shrubs and perennial weeds encroaching upon your lawn. 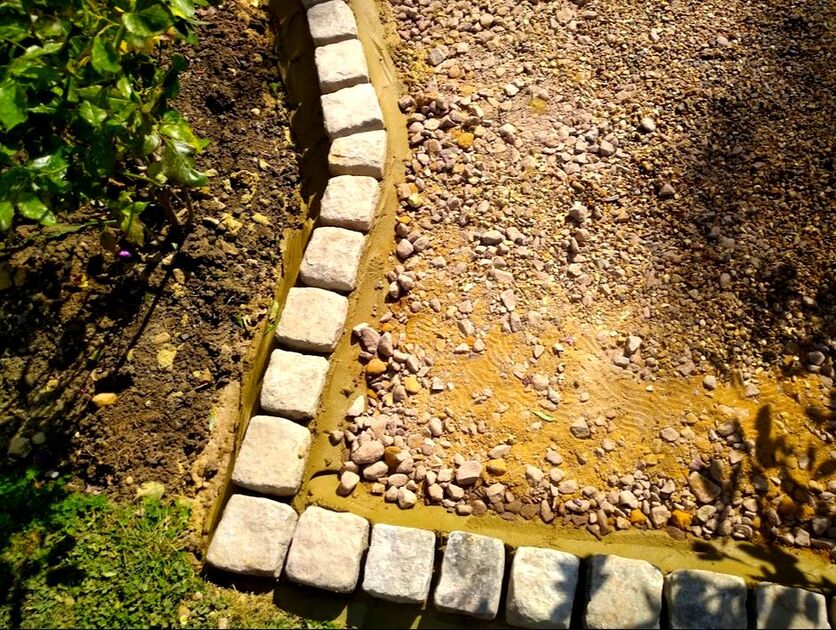
Granite sett mow strip
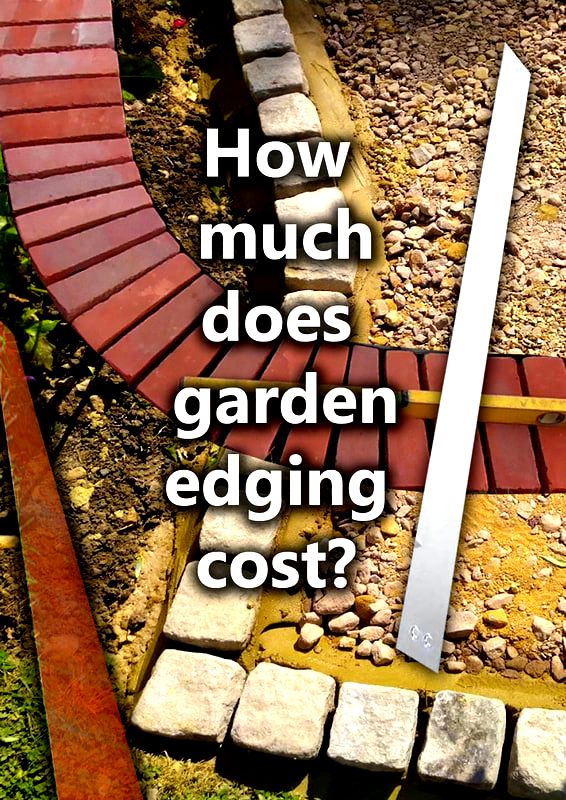
How much do mow strips cost?
The best way to build robust mow strips is with either landscaping bricks or paving. If you want to know how much mow strips cost in these materials visit our costing articles below.
How to make a mowing strip with paving step by step
Mow strip shopping list
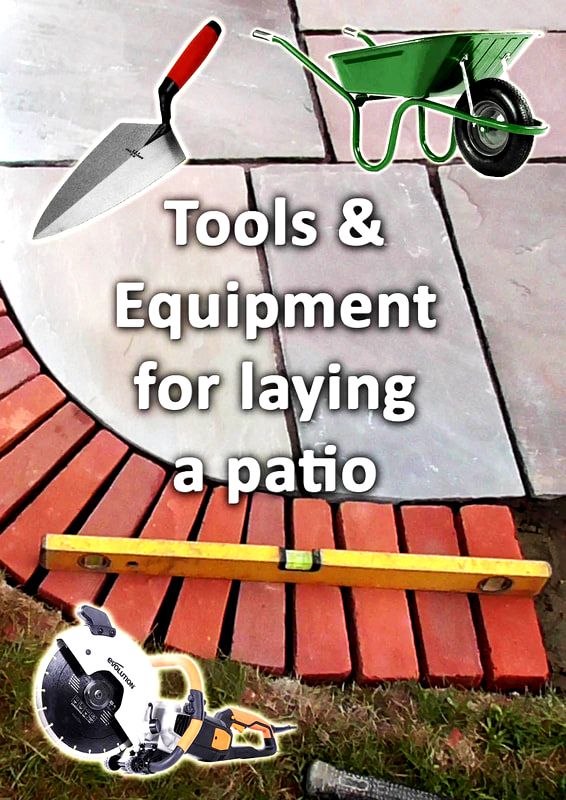
Tools you will need
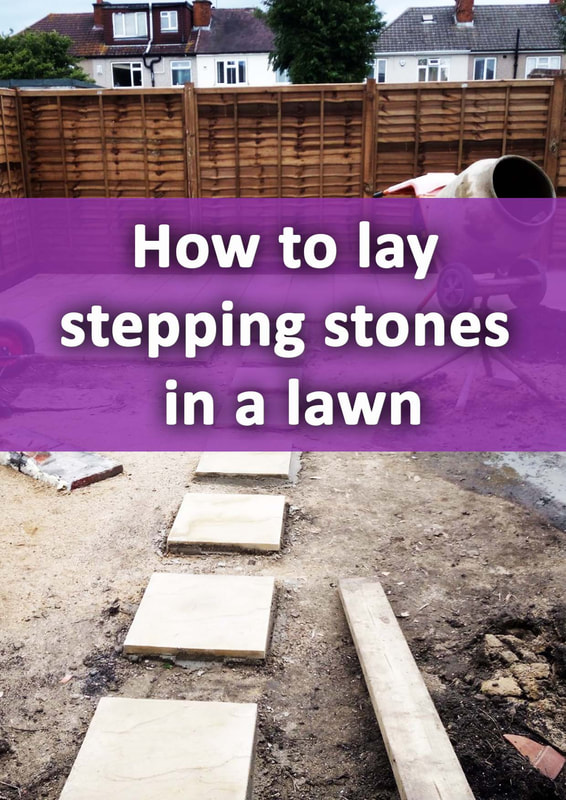
Step 1: Mark out runs for your new mow strip
It is important that you mark out where your new mow strips will be situated. This is so you excavate out just the right amount of soil for your sub-base. Marking out can be done with line spraying paint. Step 2: Check your completed levels
If you are digging into an existing lawn you will want your mow strips to follow the existing lawns level. This means following any natural undulations and bumps around the perimeter. In such a case you will have to measure a consistent depth down as you dig. If you are laying a whole new lawn you have the opportunity to lay your mow strips completely flush and level. Consistent levels can be formed using string lines, timber pegs, sprit levels and laser levels. 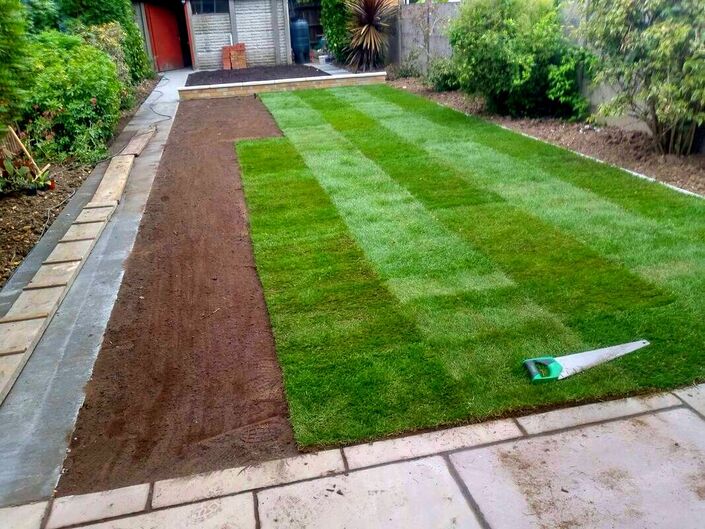
Step 3: Excavate your mowing strip edgings
Excavate your mow strips to a depth of around 150mm. Try to keep your excavation neat and square with no loose soil in the base. It is best keep your excavation the width of your completed mow strip. 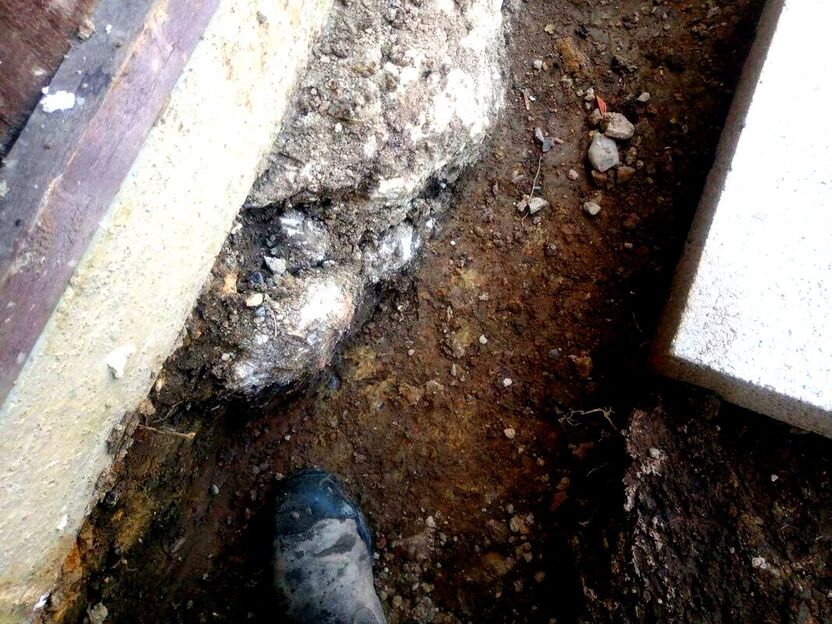
Step 4: Fill your excavation with sub-base
Fill the bottom of your excavation with 100mm of compactable Mot type 1 sub-base. Spread out the sub-base as level as possible and then compact firmly with a tamping bar. 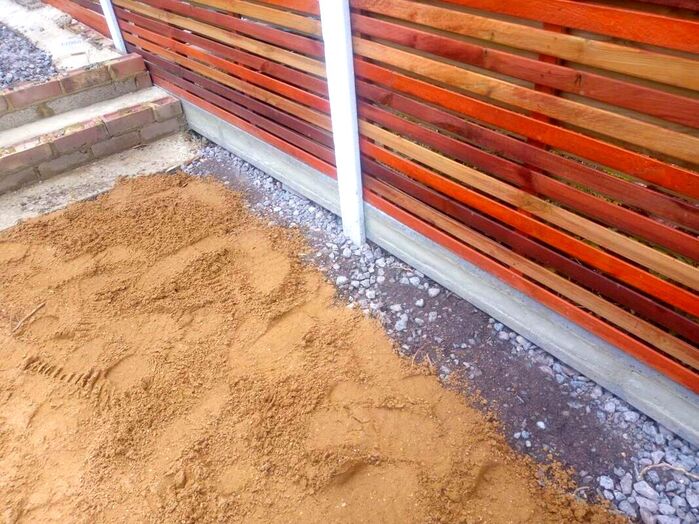
Step 5: Set up your working area
Set up your working area for laying your new mowing strips. This typically will include a power lead, cement mixer, wheelbarrow and all relevant materials. 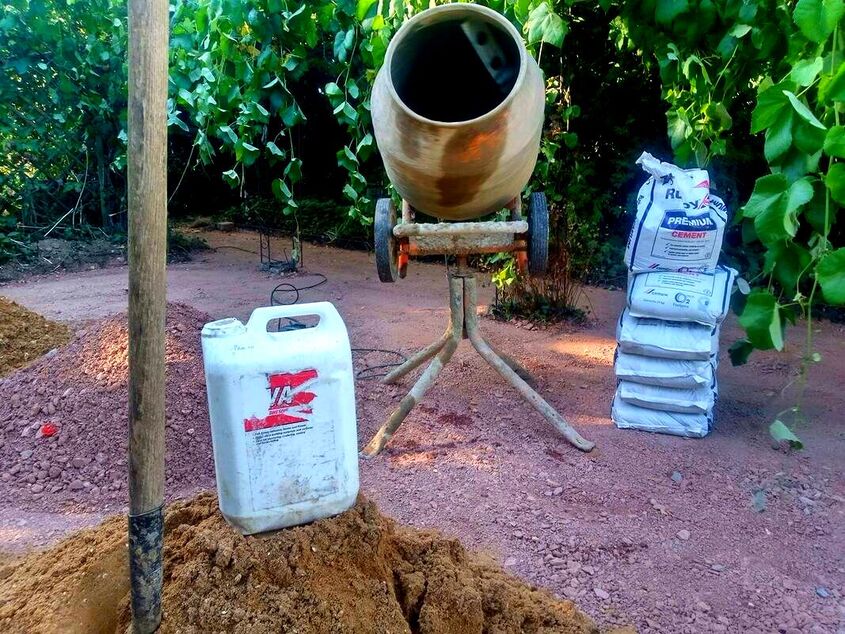
Step 6: Cut your paving into mow strips
Measure out your paving into 100mm wide strips or whatever width you prefer. You may preferer a brick or sett effect, if so, cut them down into smaller and consistent sections. If your coping undersides are very flat score in some grip keys with your grinder. 
Step 7: Mix up your laying mortar
Mix up your laying mortar for your mow strips. I recommend using a 1:4 sharp sand cement mix with a PVA bonding agent and mortar plasticiser. The mortar should have the consistency of a stiff brick laying mortar. 
Step 8: Tamp down your edgings
Tamp down your edgings into position gently making sure they make full contact with the mortar. Check the level as you lay with a spirit level or alternatively utilise a string line. 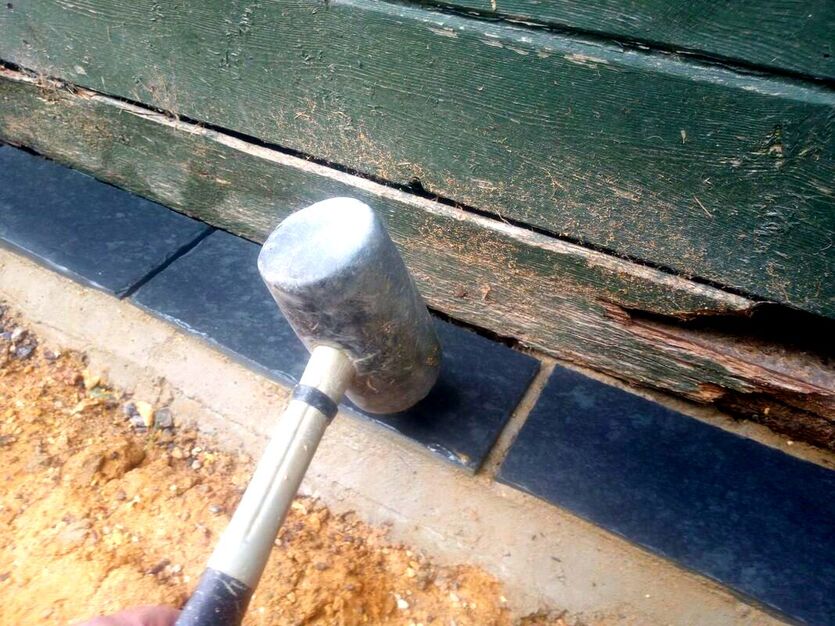
Step 9: Joint your edgings
Using a strong, weatherproof grouting mix point the gaps between your mow strip units. For more information on how to grout external paving visit our step by step guide here. Step 10: Make good surrounding ground
Now that you have completed laying your edgings, fill in soil around them and tidy up the surrounding area. If there is a gap between your existing lawn and mow strips, fill with topsoil and seed them.
Thank you for reading our article on creating your mow strips for easy mowing. If you would like us to install a mow strip around your lawn contact us here. Below we have linked to some other mow strip articles you may find useful.
'As an Amazon Associate I earn from qualifying purchases'
This article contains affiliate links
Loose coping stones can be an annoyance and make your property look dilapidated.
As copings are typically situated on the top of walls they also have a risk of falling and breaking. This can lead to troublesome replacements of both copings and mortar to match the existing! Consequently it is wise to repair loose copings as soon as humanly possible. Here I will show you how to repair loose coping stones and make them less likely to become loose in future. Why do coping stones come loose?
There are a number of reasons why coping stones will work loose over time. Many copings do not have very defined grip ridges to their base. A lack of suitable key grip can make it very difficult for mortars to bond well. This is even more so the case with materials such as slate and porcelain which are no very absorbent. Consequently, it is better to lay such copings with a bonding agent added into the mortar. Weak mortar mixes are also sometimes to blame for loose copings. If the cement ratio is low, the mortar may have trouble bonding to the copings. 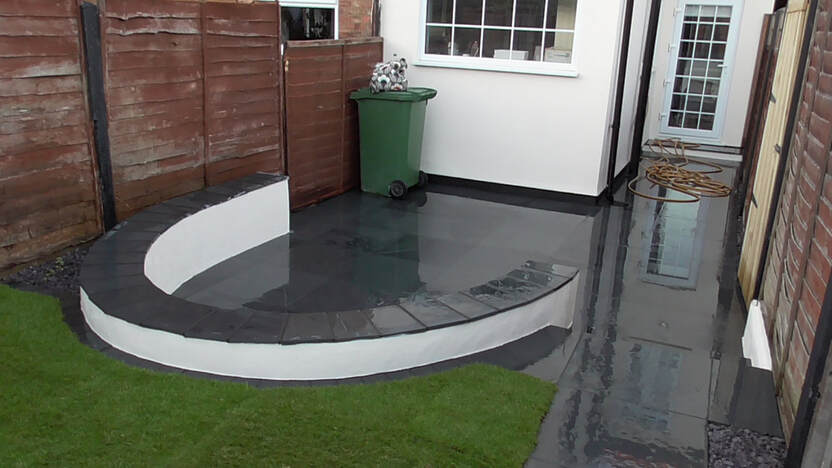
Furthermore, mortar which dries out very quickly can fail to set well and bond to the copings. This can be an issue with laying very absorbent copings in hot and dry weather.
Similarly mortar mixers which are too watery can also prevent a durable seal forming. As copings are usually located in places which endure impact and extremes of weather they are often prone to coming loose. Later in this article I will describe how you can alter your copings to prevent this happening. Can you use adhesive or glue to fix coping stones?
You can use adhesive and strong glues to fix coping stones. However this methods effectiveness will depend upon the type of adhesive and the condition of the underlying mortar. Your adhesive will have to be a durable and suitable for outdoor use. Also you do not want your glue to be too flexible as it will lead to fractured joints or pointing. However, your underlying mortar is is crumbly or weak you may find the glues bond will only be temporary. Therefore, using adhesive to repair copping stones can be effective as a quick fix in the correct circumstances. What is the best mortar mix for coping stones?
The best mortar mix for coping stones is a hybrid between a strong bricklaying mortar and slab laying mortar. This means a 50/50 mixture of both sharp and soft sand. The fine particles of the soft sand provide better suction and bonding to the mix. At the same time the course, sharp, sand allows for thicker bedding and high strength. Therefore the mix ratio should be 1:4, one cement, two parts soft sand and two parts sharp sand. For extra stickiness a PVA bonding agent and plasticiser should be added to the mix. The mortar should be mixed to the consistency of a stiff bricklaying mix. 
Why my are coping stones not sticking to mortar?
Coping stones not bonding to mortar is a common problem. This is because there are few different factors which can contribute to poor bonding. Firstly, many copings do not have very grippy undersides for mortar to key into. This can further be exacerbated by impervious materials such as slate. In my step by step guide below I will give some tips on how to mitigate this. Other reasons for poor bonding are; weak mortar mixes, dry mortar mixes, runny mortar, no bonding admixtures in mortar, fast setting caused by absorption and either extreme heat or extreme cold. How to repair coping stones with cement mortar step by step
Step 1: Remove loose coping stones
Remove your loose coping stones away from the wall carefully without dropping them. Even if your copings are very loose they can sometimes still be awkward to remove. Therefore it is a good idea to have a hammer and bolster to hand. 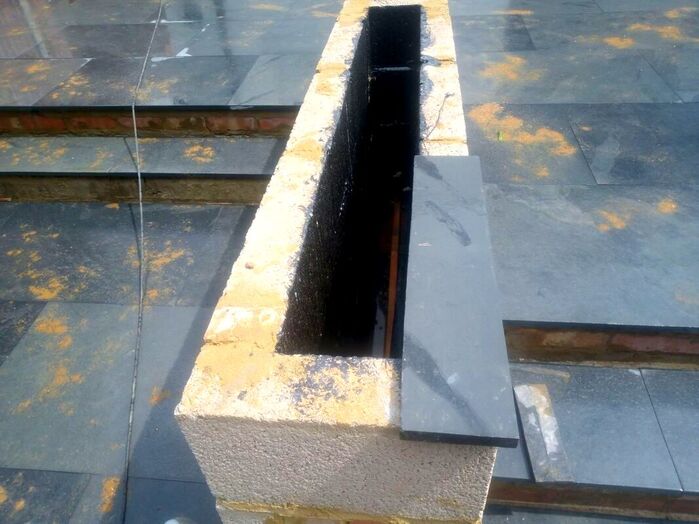
Step 2: Removed failed mortar
Remove all of the failed mortar from both the wall and any stuck to the copings. Stuck on mortar can be surprisingly stubborn, if you have no luck with a chisel you may need a grinder. Step 3: Cut bonding keys to copings
Using a grinder and diamond blade, cut scores into the undersides of your copings at varying angles. This is best done in an X Pattern which will provide a good strong key for mortar to grip into. Such a key will strengthen the copings from multiple impacts and directional forces. 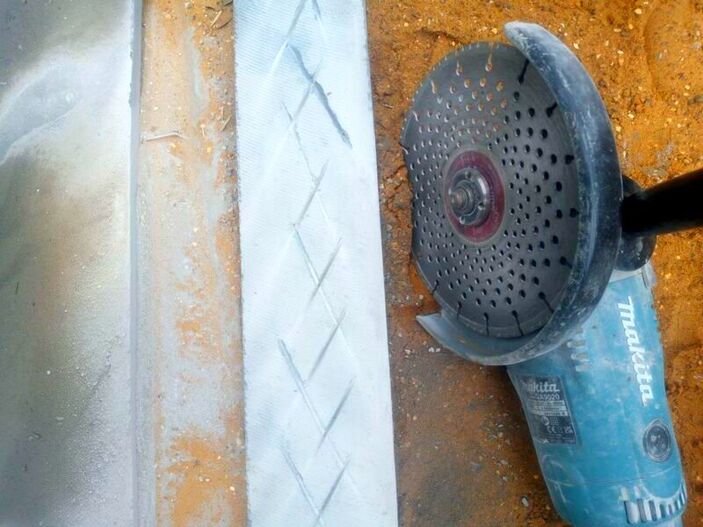
Step 4: Clean bonding surfaces
During the cutting process there will be a lot of dust created. Fine dust upon your wall and copings can create a barrier to strong bonding. Consequently, if is essential you give both your wall and copings a thorough wash and brush. 
Step 5: Mix up bedding mortar
Getting the mortar mix correct is an essential part of repairing your loose copings successfully. In my experience the best mix for laying copings is a strong, 1:4 mortar mix with one part cement to four parts sand. Use a 50/50 mix of sharp and soft sand for better bonding. Add PVA bonding agent and mortar plasticiser to your mix. Add water until you reach a consistency of a stiff bricklaying mix. 
Step 6: Bed down copingsBefore you bed down your copings make sure your bonding surfaces are free from dust and debris. If you’re experiencing hot and dry weather gently dampen the working area with a wet brush. Using a bricklaying trowel apply an even bed of mortar to bed down your copings. Make peaks and valleys in the mortar so the coping beds down easily to the correct level. 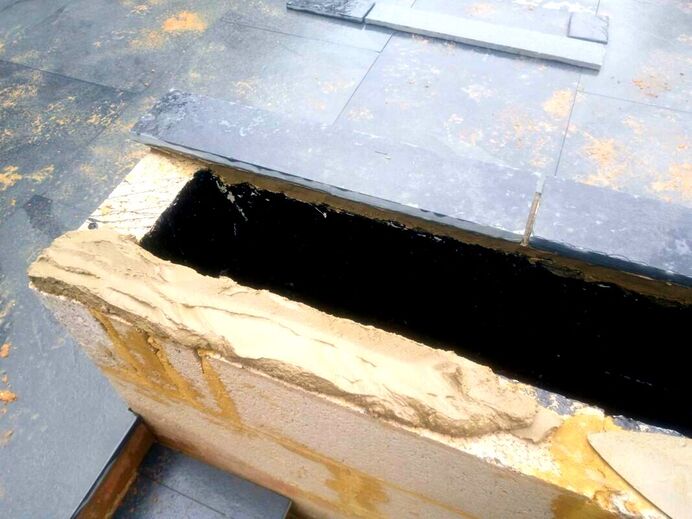
Step 7: Point coping joints
When your copings are laid, cut off any excess bedding mortar from the undersides of the copings. Using a pointing trowel, smooth down the mortar to a clean and neat finish, then, with a grouting mix, grout the joints between the copings. If you have never grouted copings or paving before visit out step by step guide here. Step 8: Curing
Leave you copings to cure, if there is any risks of them being disturbed, cover them over. The copings should be solid after around 24 hours. Thank you for reading our article on how to repair loose coping stones. Below I will link to some other articles you may find useful.
'As an Amazon affiliate I earn from qualifying purchases'
This article contains affiliate links
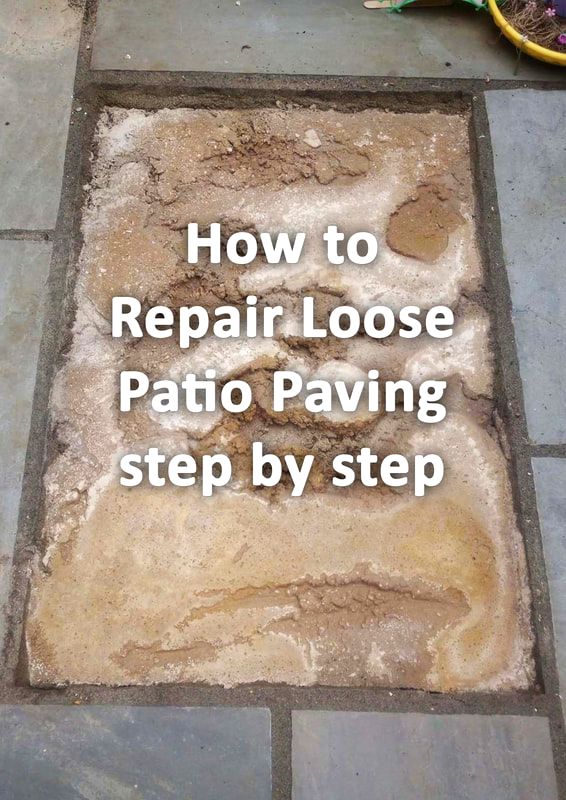
Not only are loose paving slabs an eyesore they can also be a hazard. If paving is becoming loose it is typically a part of a progressive trend.
The more rocking slabs are walked upon the looser they become. Therefore it is really essential you repair any loose paving slabs which appear on your patio. The key to repairing, rocking pavers is to diagnose the cause correctly from the outset. In this article I will explain the common causes of loose paving slabs, how to diagnose the issue and how to repair them. Why has a paving slab on my patio come loose?Insufficient base
A very common problem which causes loose paving slabs is an insufficient base. This normally means there is not enough compacted sub-base to mitigate any movement within the ground. Over time, loads applied to the paving creates cracking and movement. The tell tale signs of an incorrect base are multiple cracks throughout the surface and sinking. 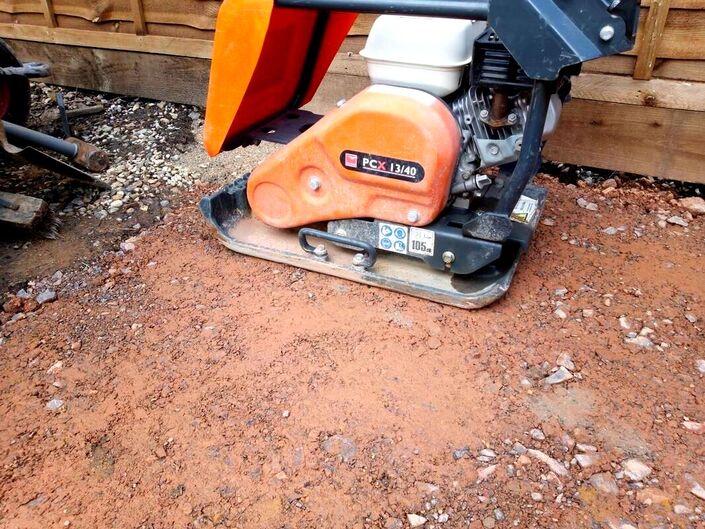
Poor bonding
Poor bonding is an inability for the mortar to stick onto the paving tightly. This issue can normally be traced back to the laying process. Some more impervious types of paving such as slate and porcelain have more trouble sticking to mortar. This is because the mortar mix has greater difficulty absorbing into the paving. Consequently bonding agents should be added to mortar when laying such paving. Poor bonding can also occur when the mortar is too weak or too dry to form an adequate suction seal. If the underlying mortar looks very sandy and crumbly then poor bonding is likely to be the cause. 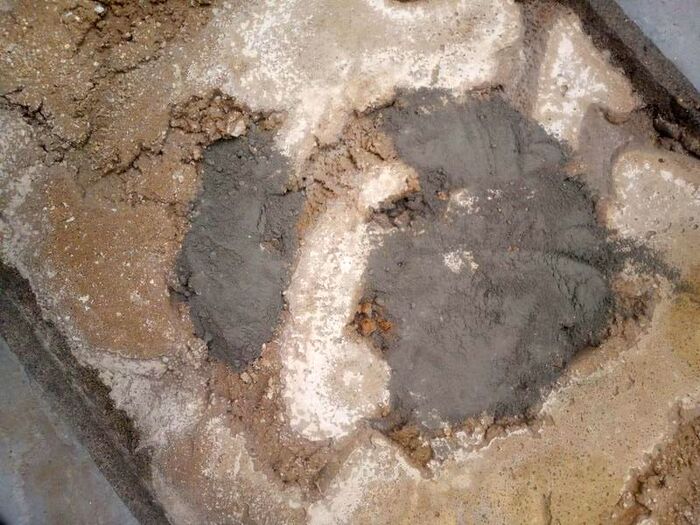
Less than 90% contact with mortar
By far one of the most common reasons for loose paving slabs is not having a solid and consistent mortar bed. Mortar beds should have a minimum contact with the paving of around 90%. Dobbing paving slabs with voids under them will lead to rockers and loose paving. If you’re paving has circular dobs of mortar at the corners and the centre it has been dobbed. 
Disturbed during settingIf paving is disturbed during the setting process it can break the seal between the slab and mortar. The most typical cause of this is the paving being walked upon during setting. If your paving slab produces a slight tapping sound when walked upon the disturbed setting is often the cause. Laid upon sand
Sand is not a suitable base for paving slabs as it can displace under heavy loads. Sand can easily become penetrated by roots which can expand and cause loose paving. It can also easily mix with surrounding soil over time leading to movement. If you have sand under your paving it is no surprise it is loose. 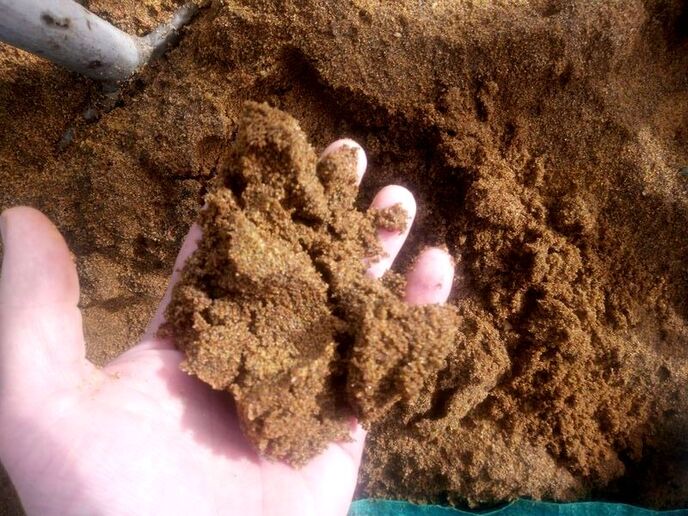
Tree roots
The roots of large trees can break through the toughest of paving bases. If your paving is rising in a linear pattern it is very possibly caused by tree roots. Freeze and thaw
Paving with broken pointing and large voids around mortar are vulnerable to freeze and thaw action. Water penetrates the paving’s surface and during freezing temperatures expands. This leads to eventual cracking and paving becoming loose. Ground saturation
Underlying saturated and boggy ground can lead to movement under your patio. Furthermore, seasonal fluctuations in ground moisture in sub soils such as clay can cause a lot of movement. This can lead to paving slabs becoming loose and undulated. If you have boggy soil in winter and dry, cracked ground in summer this can be the cause of loose pavers. 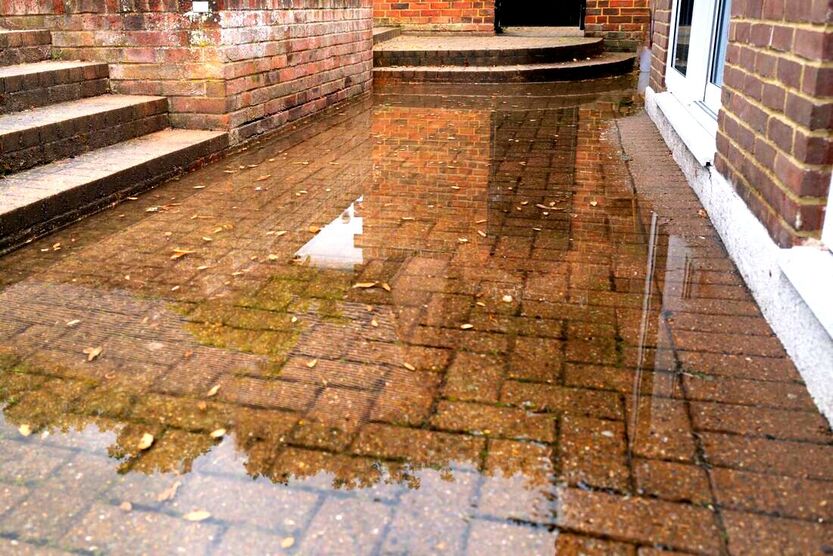
Why has a paving slab on my patio cracked?
Paving slabs being relatively thin and made of either concrete or stone do not have much flexible strength. Therefore, they are capable of cracking if unequal forces are placed upon them. This should not be a problem if they are laid with a consistent mortar bed and a robust sub-base. However, the circumstances listed below could be the reason your paving is cracking. 1. Excess tamping when laying
Paving contractors regularly tamp down paving into position with rubber mallets. Too much heavy tamping can lead to hairline cracks within the paving as it is being laid. As the paving ages any movement in the surrounding surface can lead to cracking. 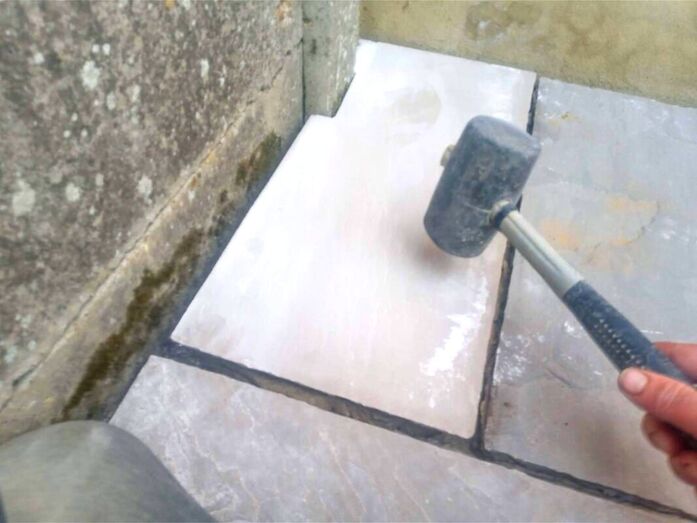
Insufficient base
If paving has been laid on an insufficient base ground movements can lead to pavers cracking. 
Heavy impacts
If paving has been impacted with a dense and heavy load this can lead to cracking. If your paving has been laid with an unsuitable base or mortar bed the risk of this increases. Less than 90% contact with mortar
If you’re paving has large voids within the mortar bed this can greatly increase the chances of cracked paving. This is especially so if your paving is subject to heavy traffic or continuous use. 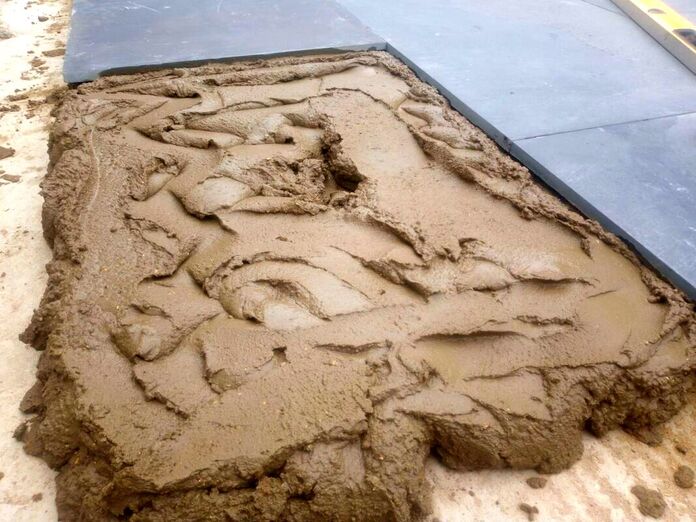
Impurities in paving
Some paving can have impurities within their material make up. This is much more relevant with natural stone although it is rare. Natural stone can have grains of less dense stone which could cause cracking. Most quarries and suppliers however do have quality control procedures to mitigate this risk. 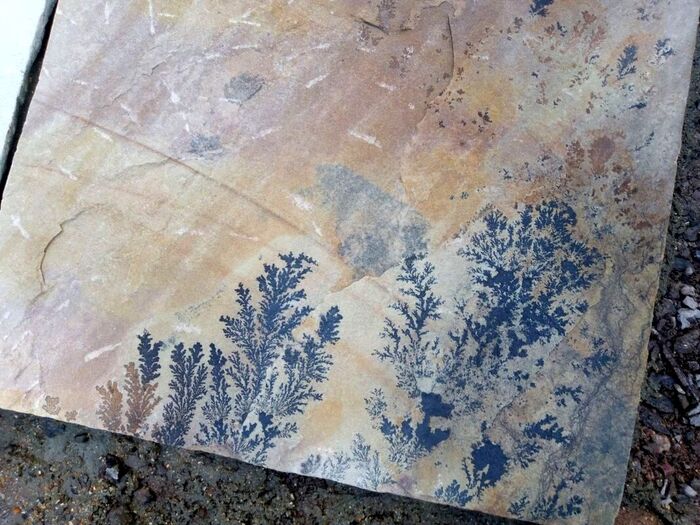
How to repair a loose paving slab step by stepStep 1: Check the surrounding levels
One of the first steps in diagnosing why your paving slab is loose is surveying the surrounding levels. Place a long spirit level across and over the slab to try to identify any level changes. If the underlying base is unsound you may discover undulation or abrupt level changes. Also look for cracking around the affected area. 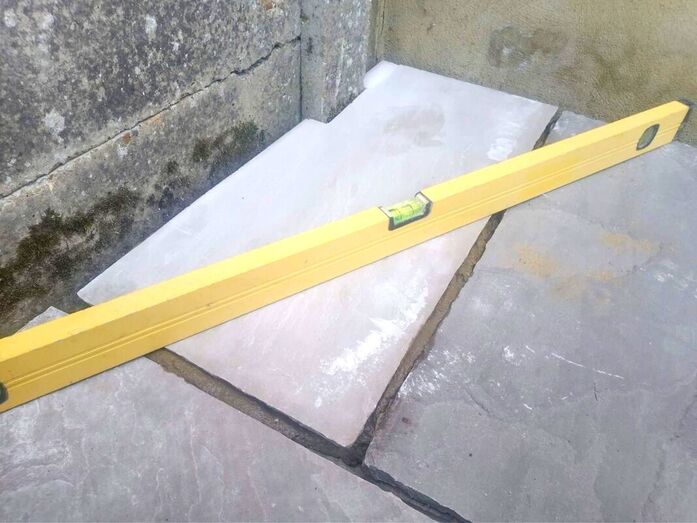
Step 2: Lift the loose slab
Using a hammer and chisel, lift up the paving by tapping the chisel head into the corners. When the chisel has penetrated into the mortar, use leverage to lift up the paving slab. Step 3: Inspect the underlying base
Inspect the base of the slab, is it a consistent mortar base? Are there large voids under the paving? As shown in the example below the slab has a reasonable mortar bed but there are considerable voids. Also check for crumbly weak mortar, if the mortar is crumbly you must remove it and re-bed the slab. 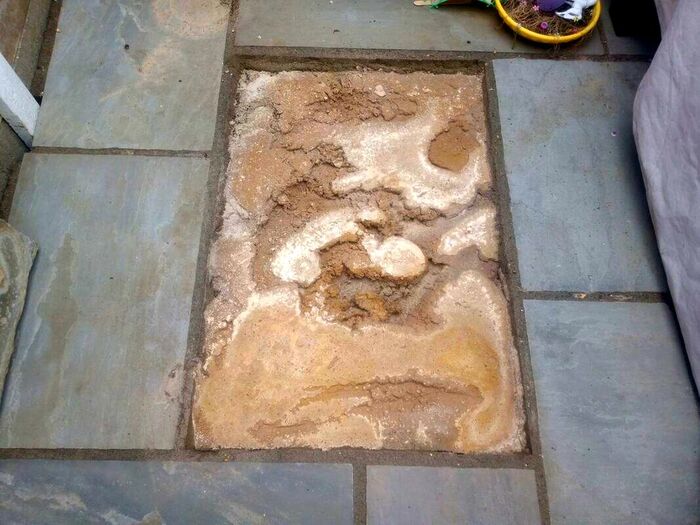
Step 4: sweep away any dust or debris
Using a hand brush remove any dust or debris from the mortar bed. It is also a good idea to rinse the base with water to wash out any dust. 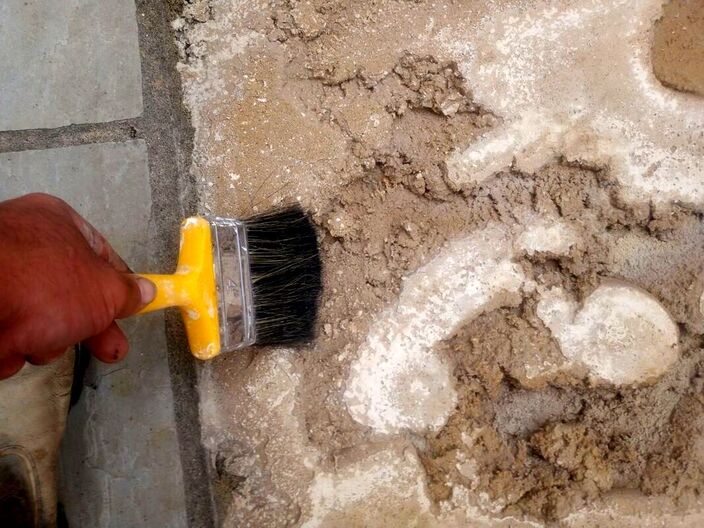
Step 5: fill mortar voids
Mix up a 1:4 sharp sand to cement mortar mix to the consistency of brick laying mortar and fill in any voids. 
Step 6: Create a bonding cement paste
Dissolve about a mug full of water in a bucket with a little dribble of PVA. Mix the solution well so the PVA is well dissolved. Slowly add rapid setting cement to the bucket until you reach a consistency of double cream. 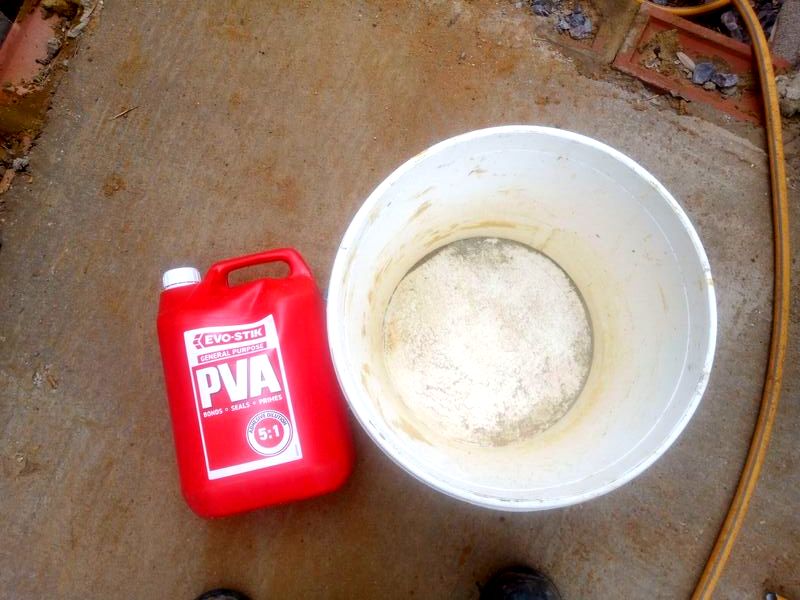
Step 7: Dampen the mortar bed
Gently dampen the mortar bed with some water and a brush. You don’t want any standing water on the mortar bed, just enough moisture to dampen it. Step 8: Apply the slurry
After a quick whisk, gently pour the cream like mixture over the mortar bed. You don’t want to overdo it here, just pour enough to coat the mortar bed. Spread out the cement cream with a hand trowel so it coats the whole mortar bed. 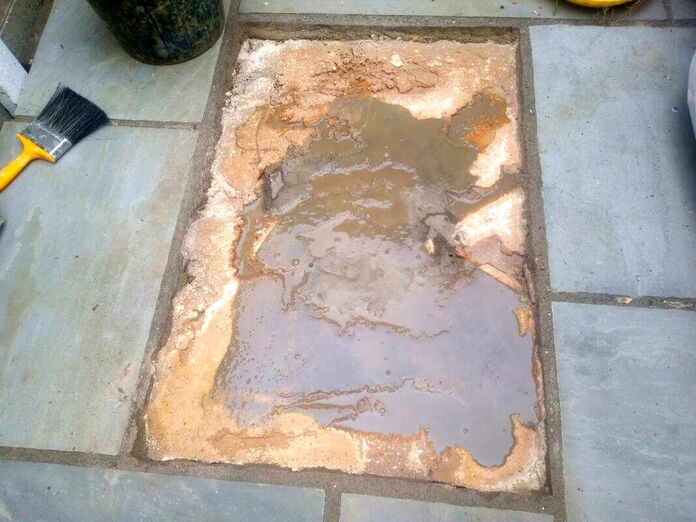
Step 9: Replace the paving
Gently replace the paving slab in the same position in which it was lifted. Using your hands apply pressure to the paving slab so it makes good contact with the mortar bed. You should see cement cream bubbling up around the paving. 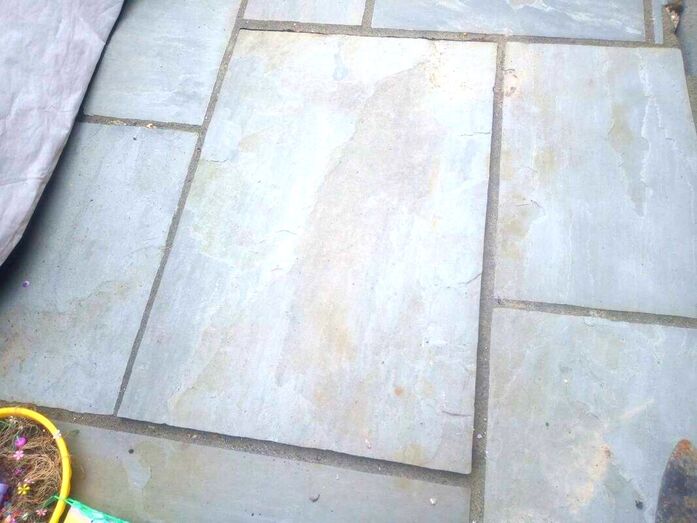
Step 10: Clean off excess cement cream
If any cement cream gets onto the surface of the paving you must wash it off immediately! Otherwise you will stain your patio! With a bucket of water and a hand brush wash off any excess cement or spillages thoroughly. Step 11: leave undisturbed for curing
Now you have replaced the paver make sure nobody walks on it for 24 hours. You can leave an upturned wheel barrow over it or tape the area off. You may need to re-grout the paving slab when it is cured.Visit our article on how to re-grout patio paving here.
How to repair loose paving laid on sand or inadequate base workIf you have crumbly, weak mortar under your loose slab, sand or an inadequate sub-base, follow the instructions below. Step 1: Lift the loose paving
Using a hammer and chisel, lift up the paving by tapping the chisel head into the corners. When the chisel has penetrated into the mortar, use leverage to lift up the paving slab. 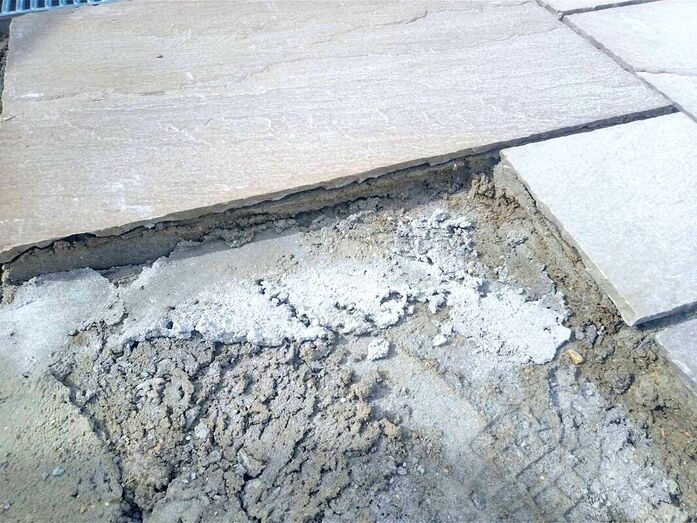
Step 2: Excavate out sand or soil
Excavate out the slab area to a depth of 150mm. Make sure you make the excavation consistently square with no loose soil at the base. Step 3: Add compactable sub-base
Add a compactable sub-base material such as Mot type 1 to the excavation and level 40mm from the top. Using a tamper then compact the sub-base well until it is well compacted. 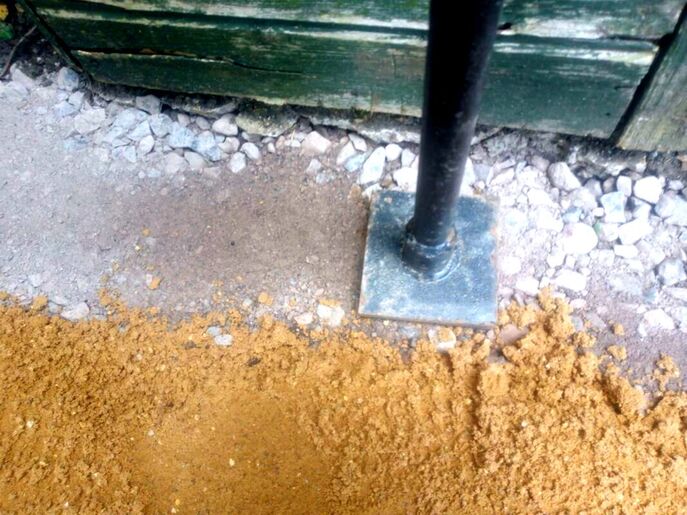
Step 4: Mix up mortar
Mix up your slab laying mortar with a 1:4 sharp sand to cement mix. It is also a good idea to add some PVA bonding agent and plasticiser. The mix should have the consistency of a thick and stiff brick laying mortar. 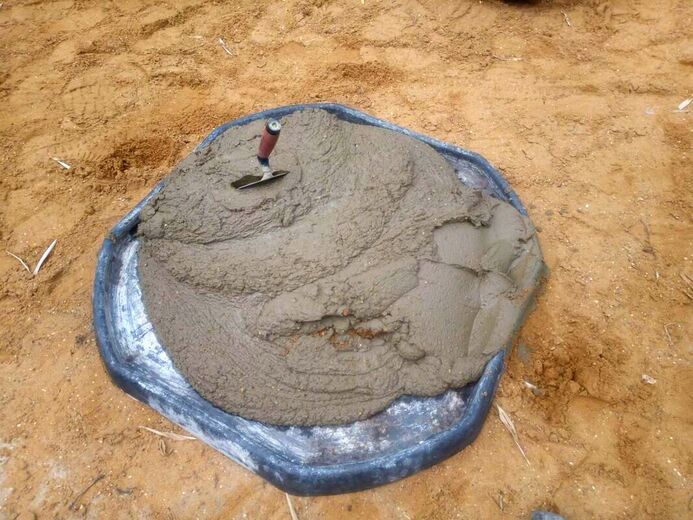
Step 5: Re-lay paving
Using a hand trowel lay the mortar onto the compacted hardcore; create peaks and valleys in the mortar so the slab will bed down gradually. This will help you to gently tamp down the paving flush and level to the surrounding pavers. Make sure the slab has a thick and consistent mortar bed under the slab 
Step 6: repair broken pointing
When you have allowed 24 hours for the slab to set, re-grout the paving slab. For a full guide on how to re-grout a patio visit our step by step guide here. Thank you for reading our article on how to repair loose paving slabs. Below I have linked to some other paving articles you may find useful for relaying paving.
'As an Amazon associate I earn from qualifying purchases'
This article contains affiliate links
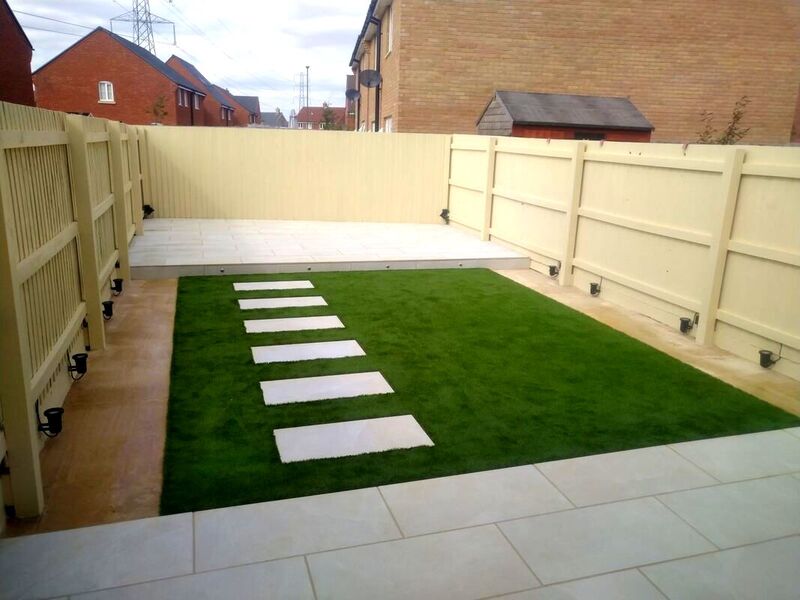
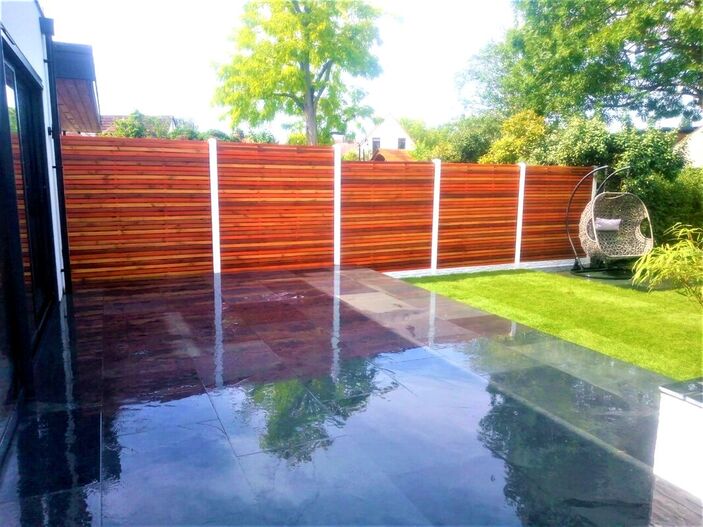
Contemporary slatted fences have become an increasingly popular way to add some design flair to gardens.
The horizontal slats have a clean and orderly look which produces a very minimalist feel. Garden boundaries and fences have always been a challenge when creating an aesthetic garden design. Typical rough and randomly finished timber panels can look boring and chaotic especially as they age. Consequently, modern slatted fences can really add a dramatic change to your contemporary landscaping project. 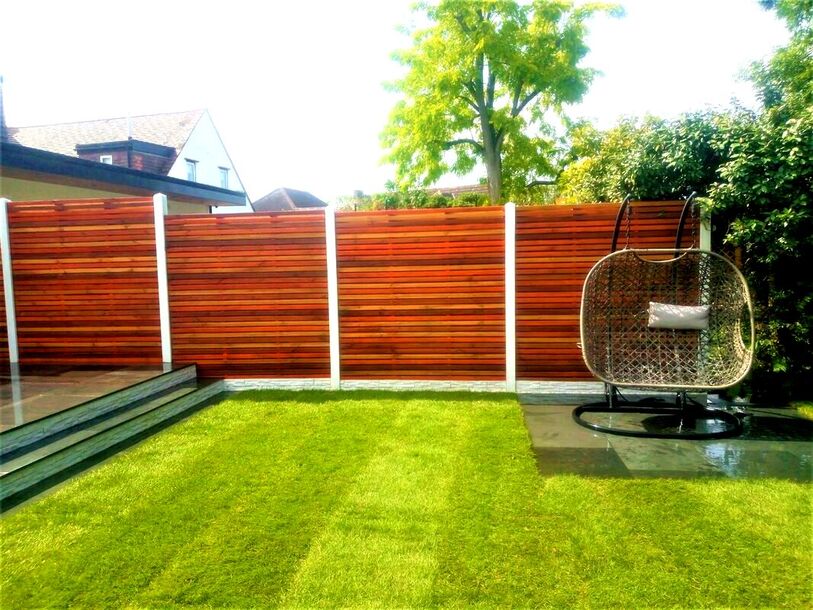
One of our contemporary gardens with a modern slatted fence
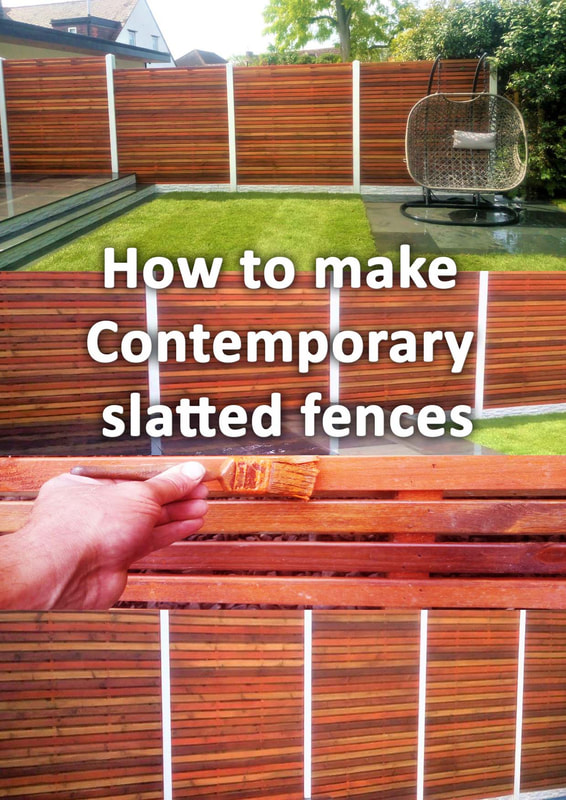
In this article I will explain how to install your very own modern slatted fence for maximum impact.
I will also explain how to make soft wood slats look like more desirable Balau or Cedar hardwood. As seen in the graphic above, the dark red and orange tones bring some real excitement to contemporary fences. Keep reading to the end to know how to create these modern slatted panels step by step. How to make my fence panels look more attractive or modern?
The reason typical fences don’t suit modern gardens is they have a very traditional look and finish. To make your fence panels look modern they will need much cleaner lines. This is why horizontal, slatted fences are so popular. Their consistent slats and thin shadows really provide a visual cleanness and order to the design. However, if you do not have the budget for a whole new fence here are some suggestions:
One of our modern gardens with cream painted fences
How do you make a contemporary slatted fence?DIY contemporary fencesThere are two main ways of making a contemporary slatted fences. The first is to build the whole fence in situ yourself. This will involve concreting in timber posts and fixing individual slats between them. This is a very cost effective method particularly if you cut down recycled timber. However what you save in money you will certainly not make up for in time, this can be a very a very fiddly and timely process. You can also purchase hardwood slats which are expensive but are very effective at creating very beautiful fences. Ready made panels
One of the most efficient ways of installing a contemporary slatted fence is to buy readymade panels. The most common are soft wood double sided slated panels. Although these are expensive they cut out a lot of time and fiddly work. The panels can be painted or stained your colour of choice. Keep reading to see our suggestion on making these panels look like hardwood below. 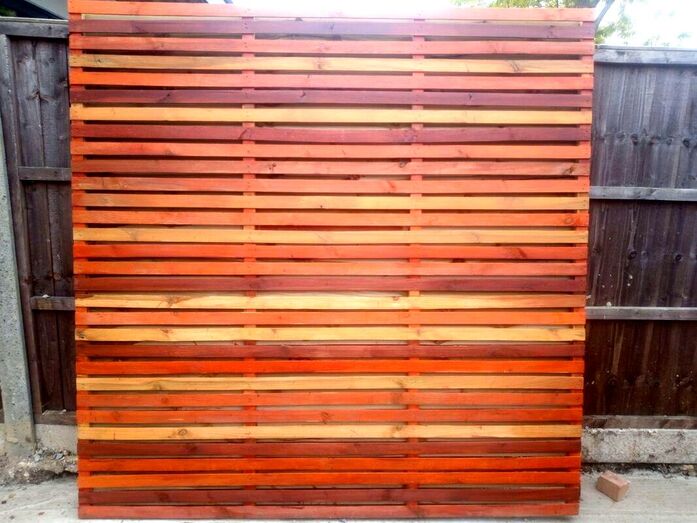
What kind of wood should I use for a slatted fence?
The best wood for slatted fences is hardwoods like Cedar Teak and Balau. Not only do their natural colours look amazing they are also more durable than softwoods. You will however, need a healthy budget if you want to fence your whole boundary this way. In our case study below we recommend installing slatted fences around a feature such as a patio. What is the gap between slatted fences?
The gap between slats is really up to you, however you do not want them either too large or too small. I would say a gap of between 6 -12 mm is enough to form a good shadow without making the fence too open. If you are making your panels double sided you can make your gaps a little wider. 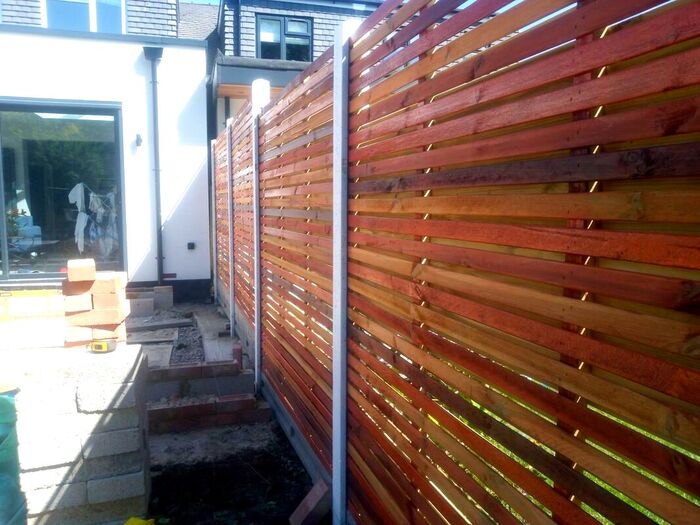
Should slats touch the ground or soil?
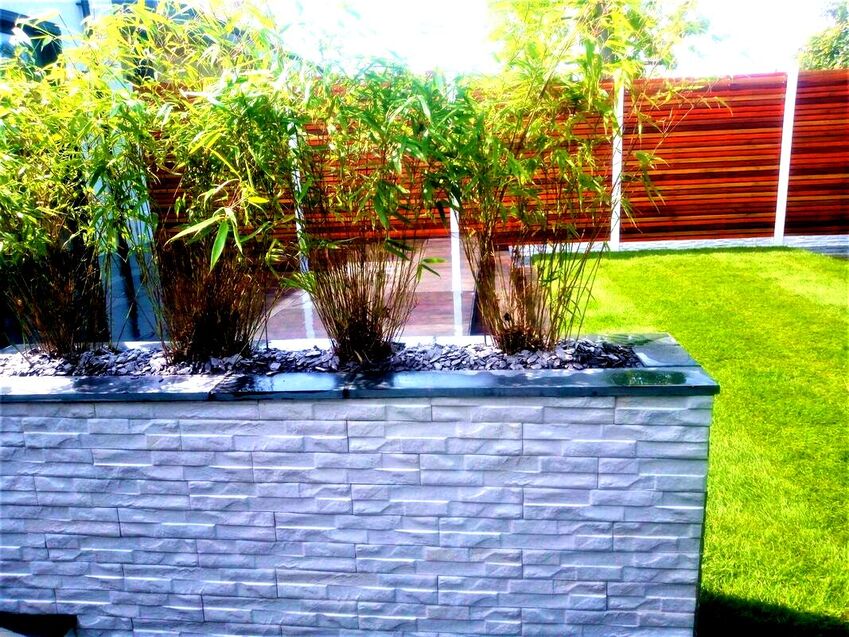
Like all other fences slatted fences should not really touch the soil. This is because exposure to topsoil and damp conditions will lead to rot. Algae and microorganisms can also discolour the lower slats on your fence. Why not base your slatted fences with either timber or concrete gravel boards? Like in our case study below these can be clad with contemporary stack style cladding. If your slats are resting upon a patio you can allow a much narrower gap. 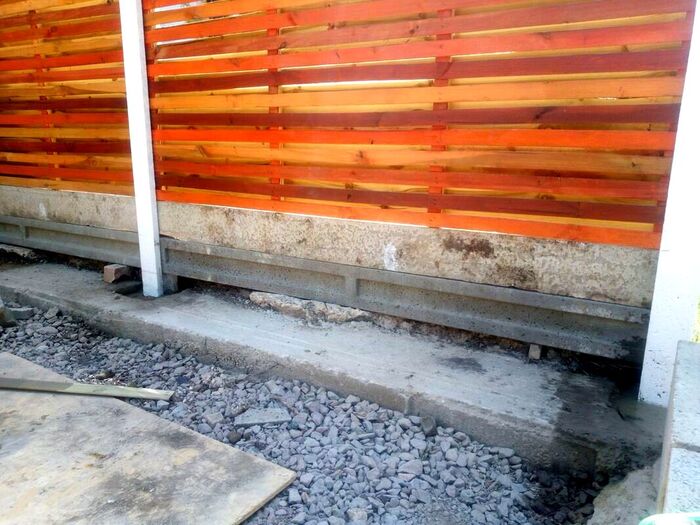
How should you fix a slatted fence?
How you fix your slatted fence is up to you but bear in mind, visible fixings will be visually less desirable! Screws have a tendency to split the end of slats and the screw heads look rather ugly. Therefore nails and staples are probably the best option for fixing slats. How do I make horizontal slatted fences look like hardwood?
If your slats are hardwood their colours can be enhanced by using a good quality decking oil. Oils such as Osma oils are some of the best products on the market. However if your slats are softwood you can use varying softwoods with different tones for contrast. The best way is to let your artistic juices flow and stain your soft wood fence slats. In my guide below I will show you how to make your softwood slatted panels look like tropical hardwood. 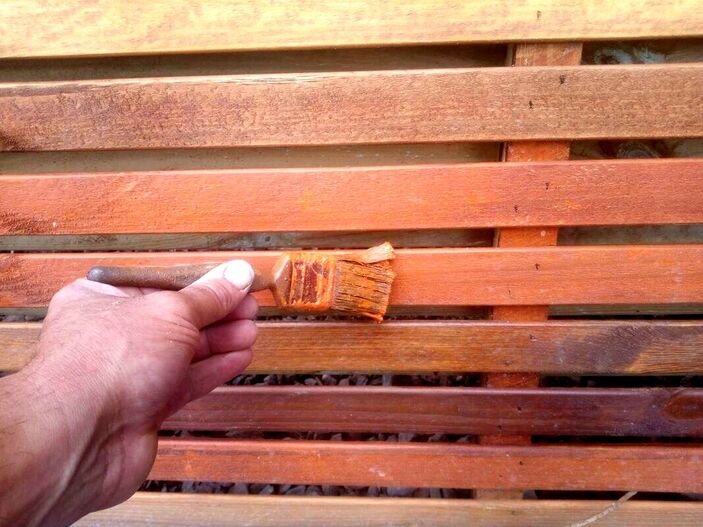
Contemporary slatted fence shopping list
Contemporary slatted fence tools list
How to make the best contemporary fence step by stepStep 1: Plan your layout
Before starting your fence plan out its layout, this is typically done by setting up a string line. This will enable you to locate and remove obstacles before construction begins. Measure the length of your fence run to work out how many materials you need. Step 2: Work out levels
Very rarely are garden boundaries perfectly level, however fences typically are. Therefore if you are on a considerable slope you may need to step up or step down your fence. This can be seen with our contemporary slatted fence case study image below. 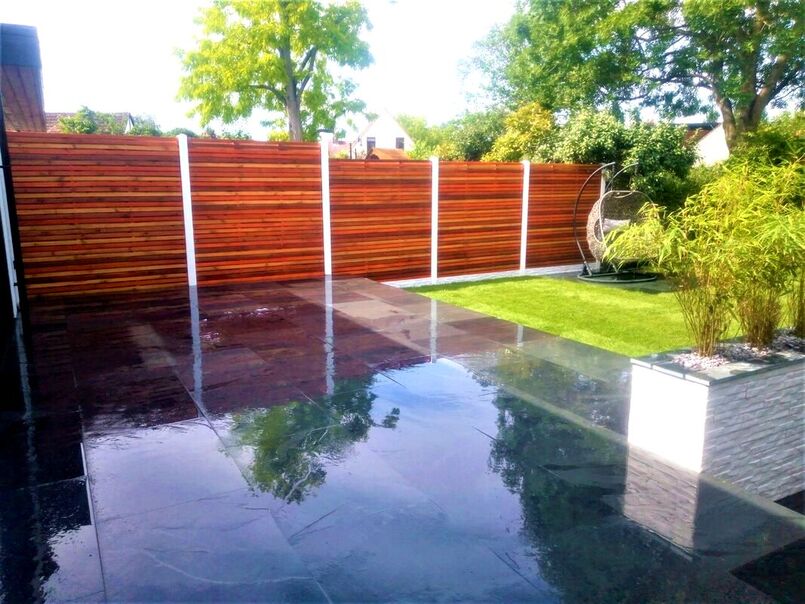
Step 3: remove obstacles
Before you start work it is a good idea to remove any old fencing or obstacles such as shrubs. Make sure you allow for getting rid of waste in your costing. Step 4: Paint your posts
A great way to make your fence look modern is to paint your posts. In this slatted fence example we gave our concrete posts two coats of brilliant white masonry paint. 
Step 5: Stain your slats
To replicate our contemporary, tropical hardwood, fence, effect, paint your slats with our recommended four wood stains. Combine, orange wood paint, Teak, Golden, and Red cedar wood stains. Perhaps print out images of our slatted fence to guide you. 
Step 6: Set up your string line
Set up a tight string line to run along the route of your fence line about 150mm above the ground. This will help you to build straight and plumb posts as you build. Step 7: Mark fence base on your post
Before setting in your posts it is useful to mark where the base of your panel will sit on the post. This will enable you to accurately excavate your posts holes to the correct depth. If you are using 1800mm metre panels measure 1830mm from the top of the post. This will make sure the post sits slightly above the panels. 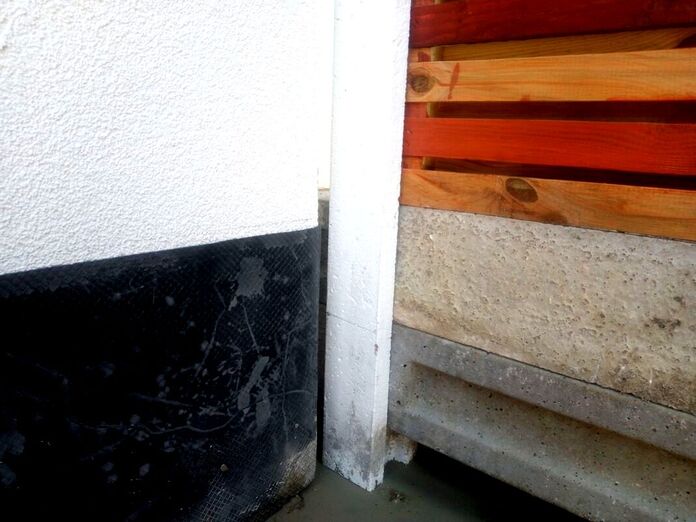
Step 9: Excavate your post holes
Excavate your post holes to a depth of about 600mm for extra stability. Try to make sure you have an equal distance of concrete mix all the way around the post. 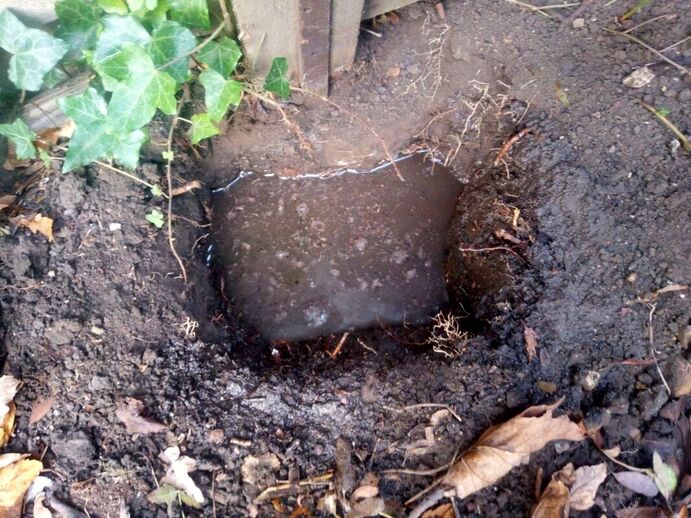
Step 10: Concrete in your first post
With your post in the hole, fill the post hole half way with water. Then empty your first bag of postcrete into the hole. Using a long and rigid stick, poke and rotate the dry mix around the hole so it mixes with the water well. Add more water is needed and empty in the second bag of postcrete. Postcrete has rapid setting cement added so you should be able to plumb and level your posts very fast. Allow to set for 5 minutes. 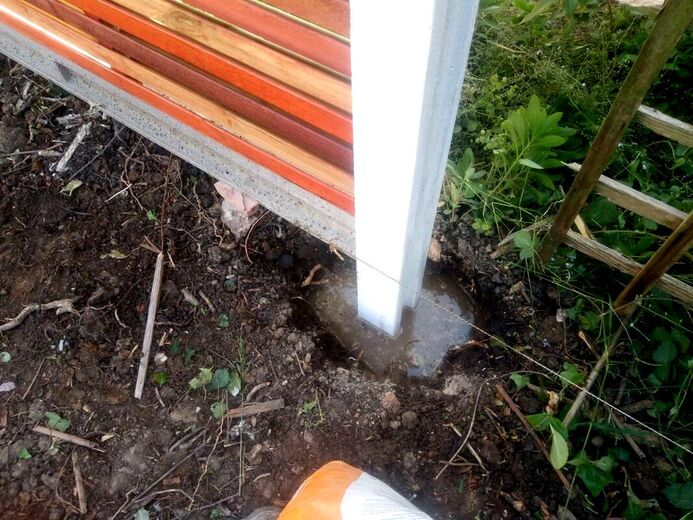
Step 11: Offer up your fence
Offer up your gravel board and fence panel so they fit tightly against the post. Check your levels and fence line and get ready to concrete in your next post. 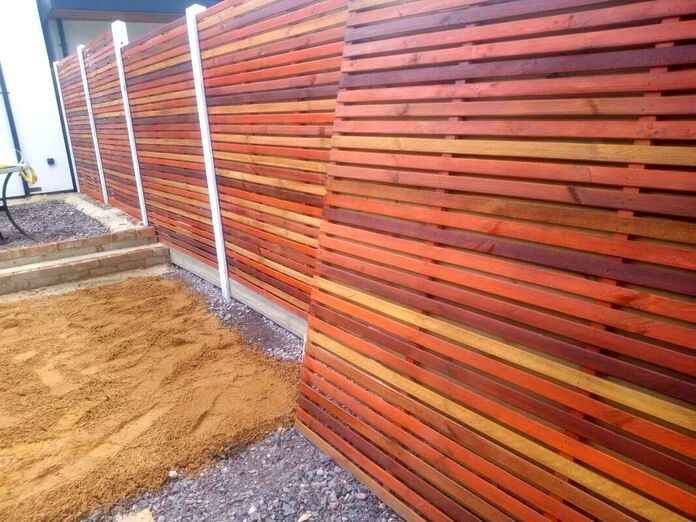
Step 12: Concrete in your next post
Concrete your next post in tightly against the slatted panel and the gravel board. 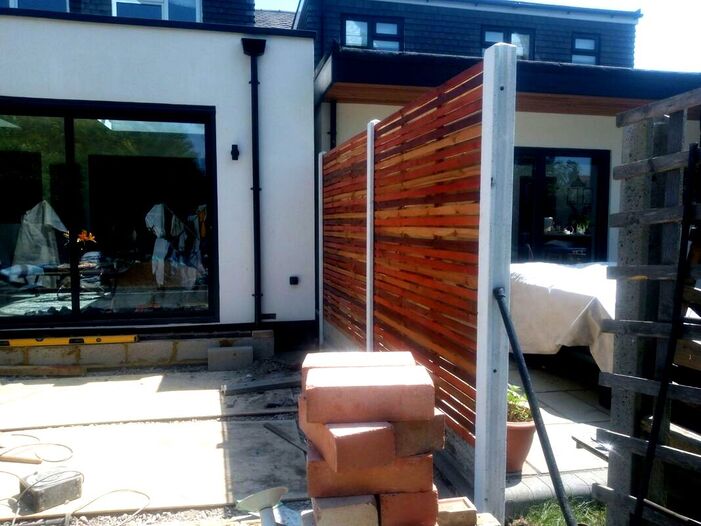
Step 13: Repeat the process
Repeat the process until you reach the very end of your fence run. Make sure you check your string line as you work to keep the fence straight. 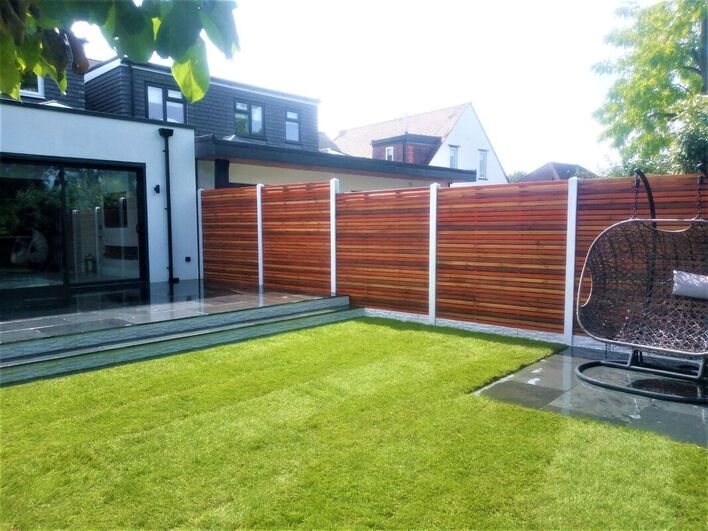
Step 14: Clad your gravel boards
Why not add some contemporary design flair by cladding gravel boards with Porcelain Rock Stack Cladding. All you will need is some stack cladding and external grade tile adhesive. 
Step 15: Admire your contemporary slatted fence
Now you can admire your new, contemporary slatted fence masterpiece and show off to all your friends. Why not give it a go? 

Thank you for reading our article on making your own contemporary slatted fence. If you would like us to install a slatted fence for you why not contact us here.
If you found this article useful please help us by sharing it via the buttons below? This really helps us to create more useful and exciting landscaping tips in the future. Thank you!
'As an Amazon Associate I earn from qualifying purchases'

This article contains affiliate links
One of the most important elements of creating tropical gardens in the UK and cold climates is plant selection.
If you want to create a jungle effect, plants must be both cold tolerant and exotic looking! Fortunately this is not as challenging as you may at first think. There are many plants which are perfect for cold climate tropical garden designs. Some of these include hardy palms from China, Cold tolerant perennials and tropical looking plants which are native to cooler climates. With the correct plant selection, you can create your very own tropical paradise right within your very own backyard. Check out these 40 tropical looking plants that will thrive in the UK climate and cold climates below. Understanding the UK climate for tropical gardens.Before planting your tropical garden, it's important to understand the climate and conditions your plants will be exposed to. While the UK may not have the same tropical climate as countries near the equator, it does have advantages over other northern climates. Due to the UK being an island it benefits from having a more maritime climate. This allows for much less volatile temperature extremes throughout the season. Warm trade winds which blow from the tropics help to keep the winters relatively mild. Consequently you may have a greater choice of planting material than you think for your tropical garden. 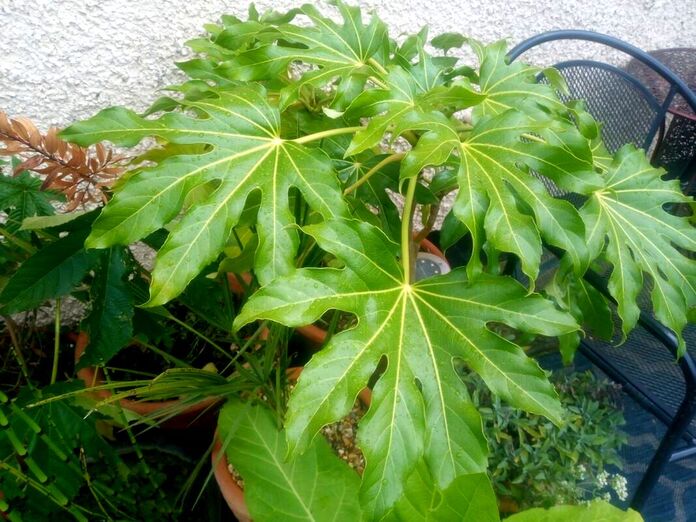
Fatsia Japonica in a small tropical pot garden in the UK
Overwintering tropical plants in cold climates
If you want to add a greater diversity of exotic plants to your jungle garden consider overwintering tender species. This can be done inside a greenhouse, polytunnel or even inside your home. There are many tropical perennials such as Cannas which are typical grown in this way. Microclimates
When planting your tropical and jungle garden borders in cooler regions utilise microclimates to your advantage. Microclimates are zones which due to surrounding features have differing climates to their regional norm. For example south facing walls or sheltered suntraps which are always warmer from the surrounding environment. Tropical gardens in the UK and cold climates should be sheltered from strong winds particularly from the North and East. 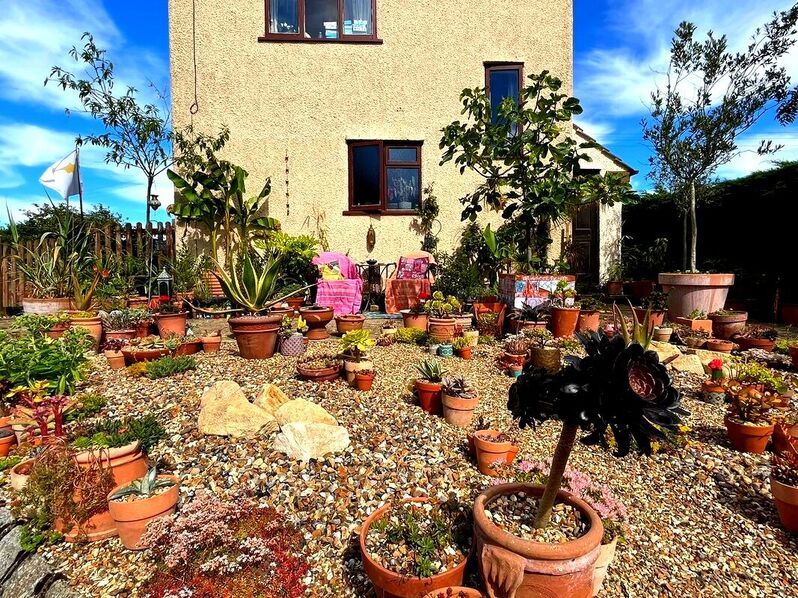
40 Of the best plants for tropical gardens in the UK
1. Chusan palm
Also known by its Latin name 'Trachycarpus fortunei', this palm has a classic fan palm shape with tropical looking leaves. Native to both China and Japan it can tolerate surprisingly cold temperatures. This palm is a perfect way to add height, elevation and drama to tropical garden borders. The Chusan palm is extremely adaptable to soil type and generally widely available as a landscaping plant. 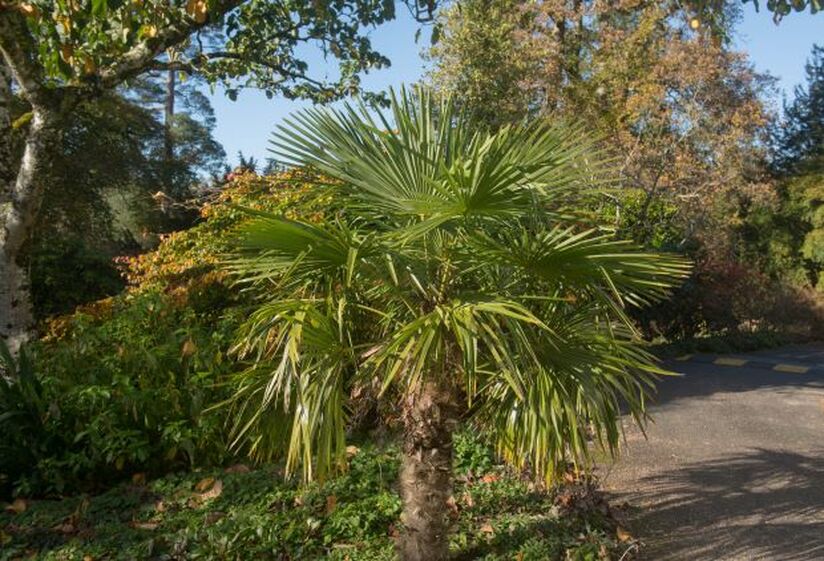
2. Cannas
Cannas are well known for their bold leaves and striking, colourful, flowers. These sub-tropical perennials have foliage similar to Bananas giving them a realy tropical feel. In the UK and cooler climates Cannas are normally taken undercover for the winter months. The perennial flowering plants then re-sprout from their rhizomes in late spring. These exotic looking plants are perfect for adding height to a jungle planting scheme. 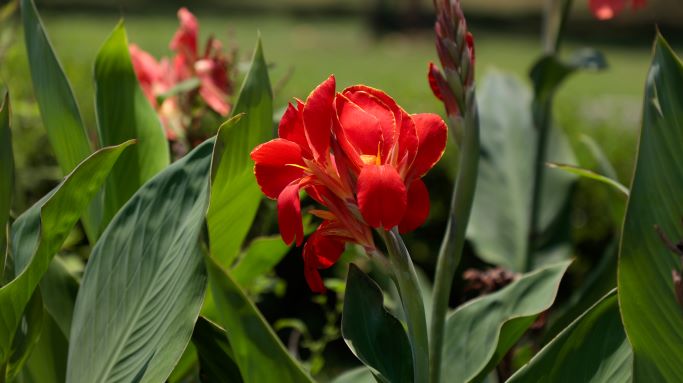
3. Ostrich fernAlso known as the 'Fiddlehead fern' this perennial fern is native to temperate regions of the northern hemisphere. This attractive fern has feathery foliage which fits into tropical planting schemes very effectively. Originating from temperate climates makes it extremely hardy and cold tolerant. Its ability to enjoy shady and damp conditions makes it well suited to jungle themed dense planting. 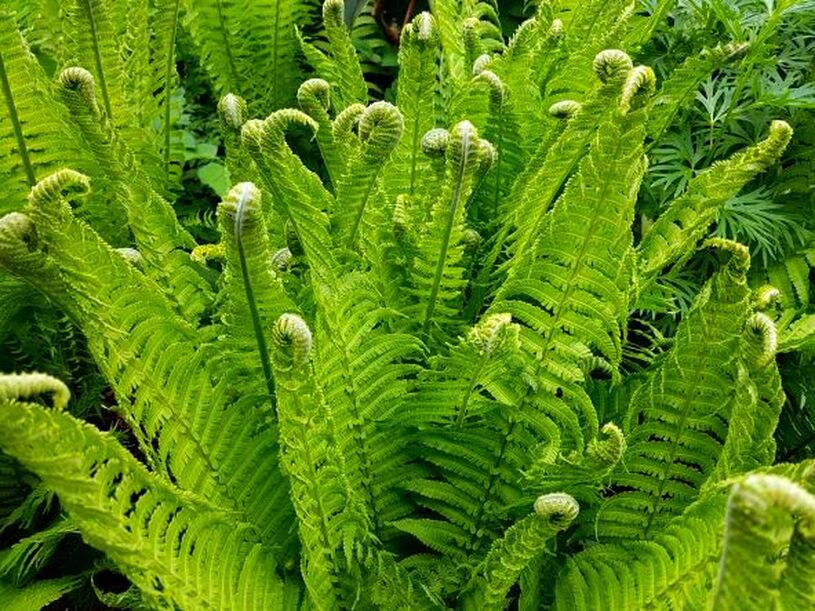
4. Paper plantMore commonly referred to by its Latin name ‘Fatsia Japonica’ this evergreen shrub originates from the East Asia. Found in the temperate forests of Korea and Japan it has a natural tolerance to cold and shady conditions. Fatsia is famous for its tropical looking form and jagged, palmate leaves. Growing to a height of around 2 metres it makes a bold candidate for a tropical garden planting scheme. 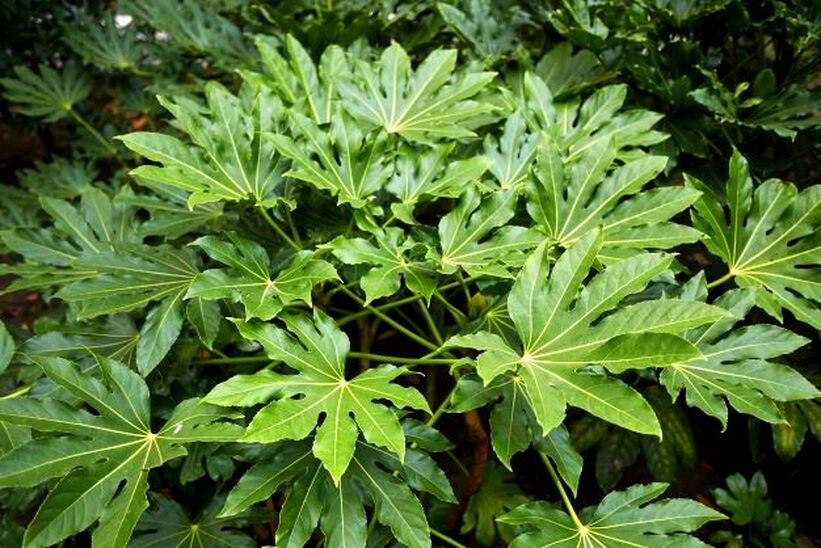
5. Japanese laurel
The Japanese laurel is an evergreen shrub with large, glossy leaves with a tropical look. This shrub has decorative, light green speckling on its otherwise dark green leaves. Being a medium sized shrub with good shade tolerance it works well within a densely planted tropical border. The Japanese laurel is also able to handle drought and cold conditions making it perfect for the UK and colder climates. 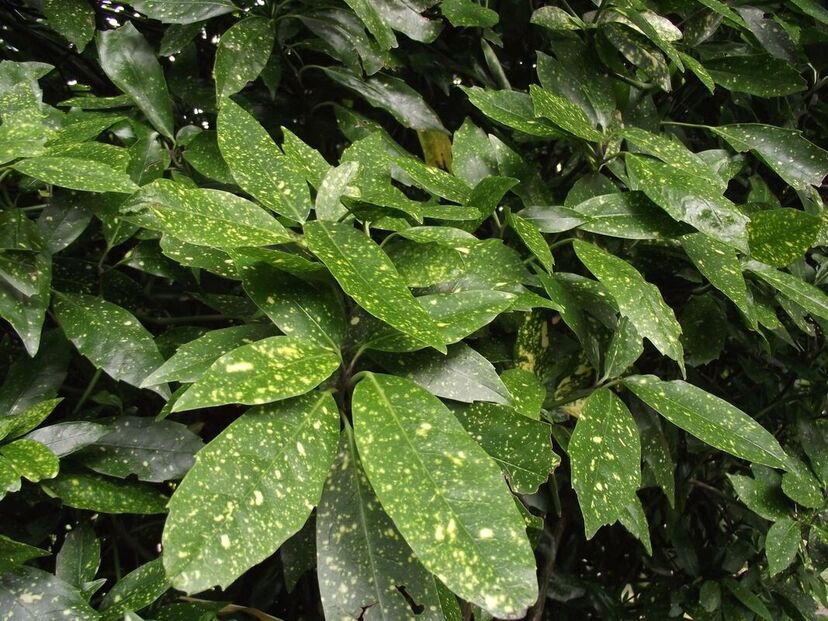
6. Plantain lilies
Most commonly referred to as 'Hostas', these perennial plants have large, exotic looking, leaves and attractive, summer flowers. However it is the large leaves which are typically more sought after especially the variegated variety. Their ability to tolerate shady conditions and periods of drought make them perfect for tropical garden, understory planting. 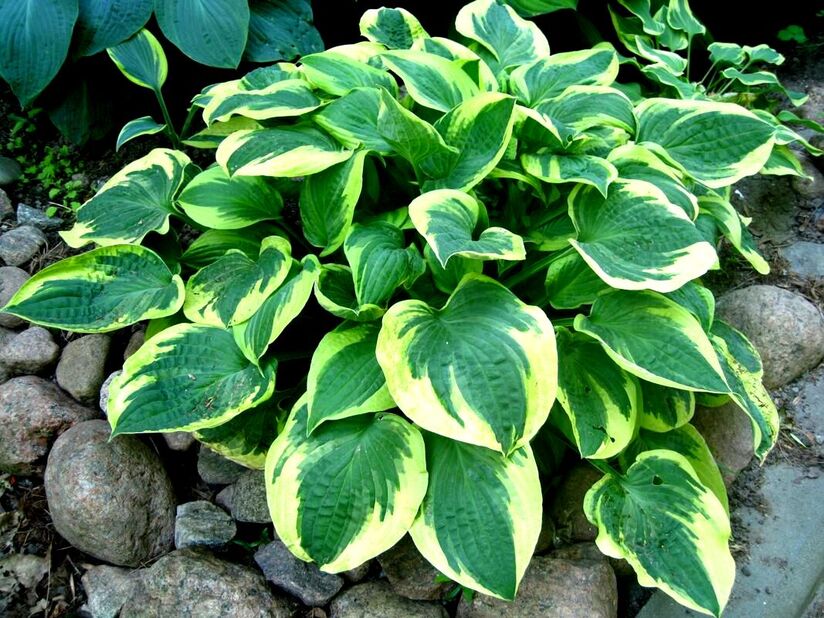
7. Japanese banana
Also known as the Hardy banana or Musa Basjoo, this banana has impressive, tropical leaves and a palm like form. Originating from Japan it is thought to have evolved to withstand a greater range of temperature fluctuation. This was probably due to Japans long land mass which spanned from a sub-arctic north to a sub-tropical south. This makes the Japanese banana the perfect hardy palm for tropical gardens in the UK. However the trunks and foliage must be wrapped up every late October to avoid frost damage. 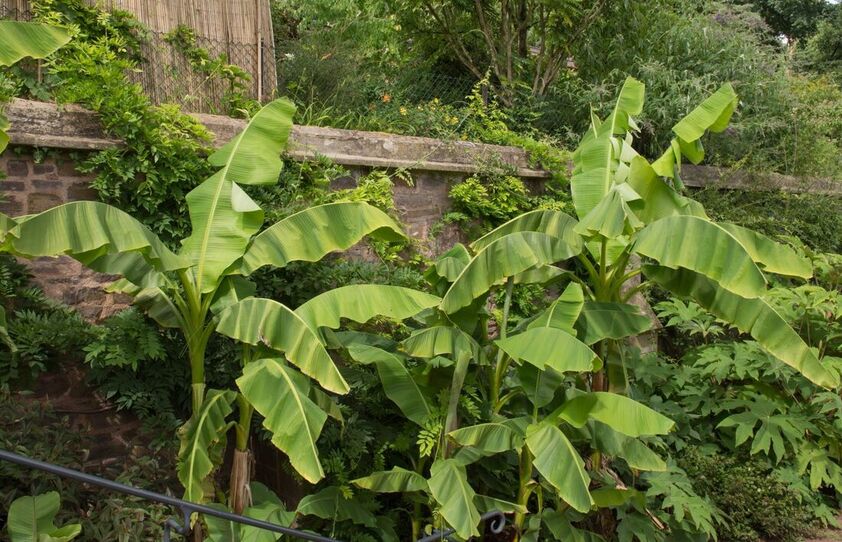
8. Lilly
Lillies are one of the most favoured flowering plants for their magnificent scent and proportionally large blooms. These perennial flowers have tall, erect, stems and long thin foliage. Although lilies look incredibly exotic they are actually very tolerant of a variety of growing conditions. As long as they have well drained, fertile soil and ample sunlight they are happy in any temperate climate, tropical garden. 
9. Crocosmia
Crocosmia are a low growing, perennial plant with exotic, iris like flowers. These plants have sword like leaves which can form lush and dense groundcovers within flower borders. The plants grow from small bulbs which readily divide every season. Due to their bulbs storing moisture they are remarkably drought tolerant. This can make them ideal for planting in the front of tropical garden borders with a dense root mass. 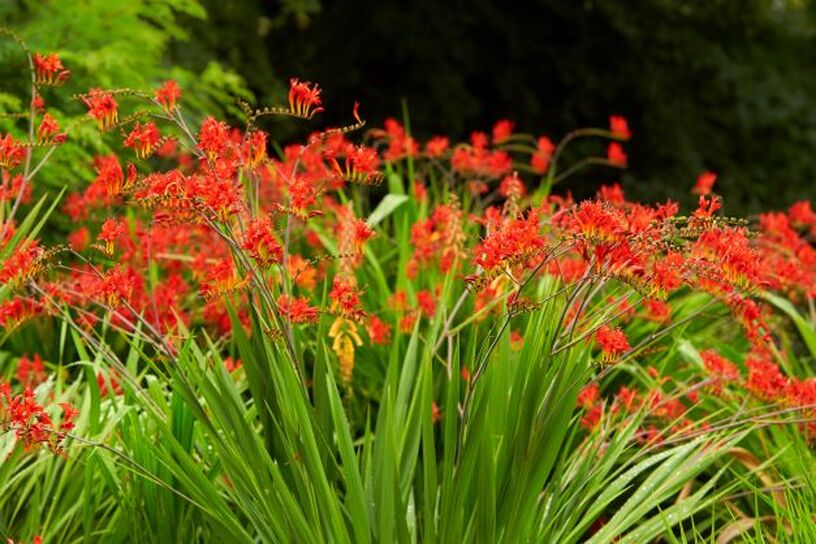
10. Chinese fountain bamboo
More commonly referred to by its Latin name 'Fargesia Nitida' this is an attractive bamboo with fine textured foliage. Unlike more aggressive types of ornamental bamboo it has thin, flexible stems which sway in the breeze. It can grow to an impressive height with gently arching stems which resemble a water fountain. Its dense foliage with an Asian flavour makes it the perfect plant for a tropical garden border. 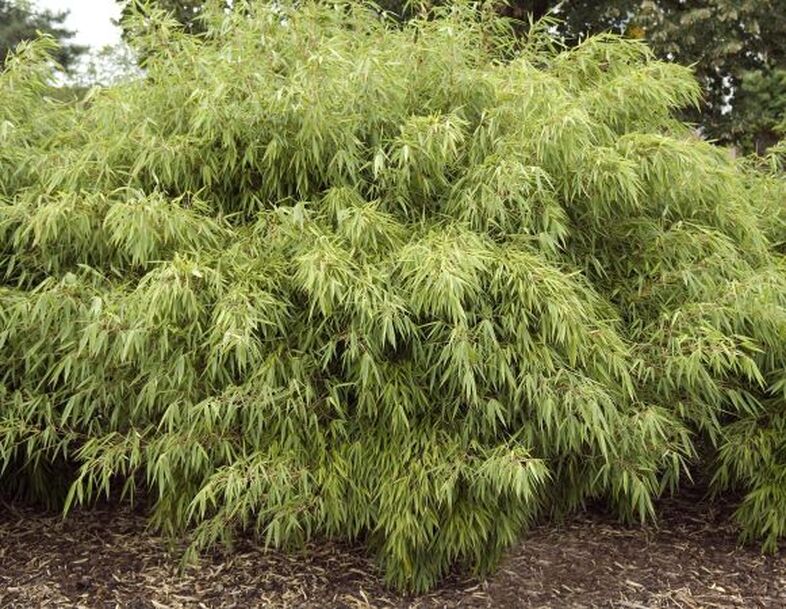
11. Tree fernIf you want your tropical garden to have a real jungle look, tree ferns are complete novelties. These tall, palm like, ferns bring a real sense of prehistoric wonder into the garden. Most tree ferns originally come from New Zealand making them quite cold tolerant. However, these plants do require specific conditions to grow well. Make sure you plant your tree fern in partial shade and make sure it gets plenty of water. Tree ferns provide a bold vertical line to jungle borders which contrasts with surrounding lush green foliage. 
12. Giant miscanthusScientifically known as 'Miscanthus x Giganteus', Giant miscanthus is a robust and perennial grass valued for its impressive size and form. This grass has a tubular and fountain like, form which can grow up to 12 feet tall. Its tall foliage is very responsive to the breeze creating both movement and sound. This giant grass has a very tropical feel and is extremely hardy and tolerant of different growing conditions. 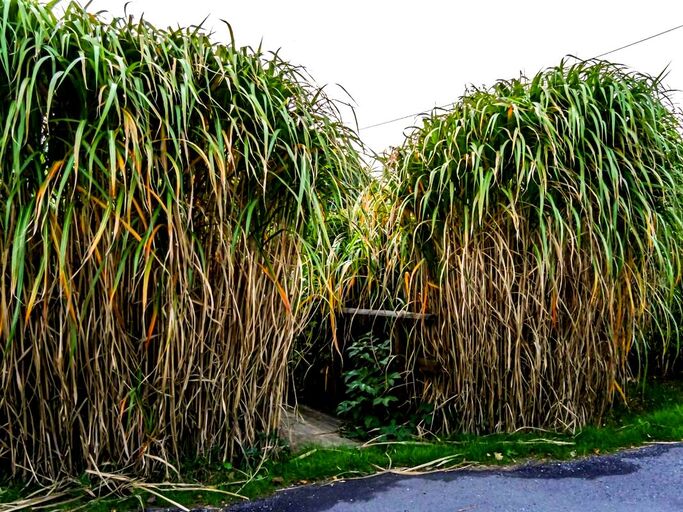
13. Star jasmine
Star jasmine is an attractive, climbing plant with dark glossy leaves and typical jasmine shaped white flowers. Although the flowers themselves are small they give off the most wonderful jasmine scent. This vine has a tropical look to it although it will tolerate colder environments such as the UK. The best growing environment for star jasmine is a sunny position with a fertile but well drained soil. It is ideal for covering fences and trellises within tropical gardens. 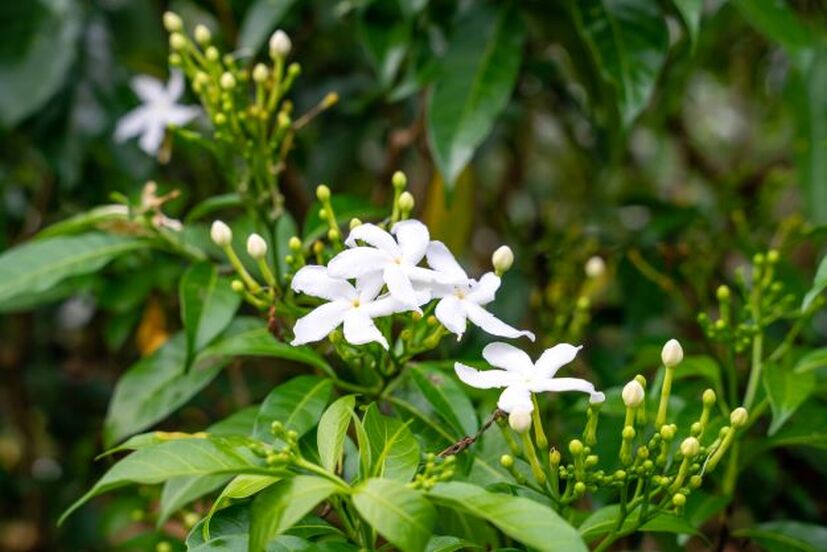
14. Gunnera
'Gunnera' is an extremely impressive and architectural plant with very large leaves. The leaves are similar to leaves of Rhubarb earning it its nickname; ‘Giant Rhubarb’. When established, 'Gunnera' looks rather prehistoric and fits perfectly into a jungle themed garden. Preferring a boggy soil it is very suitable planted next to tropical garden ponds or other water features. 'Gunnera' are susceptible to very cold winters but in a sunny, sheltered position will do well. 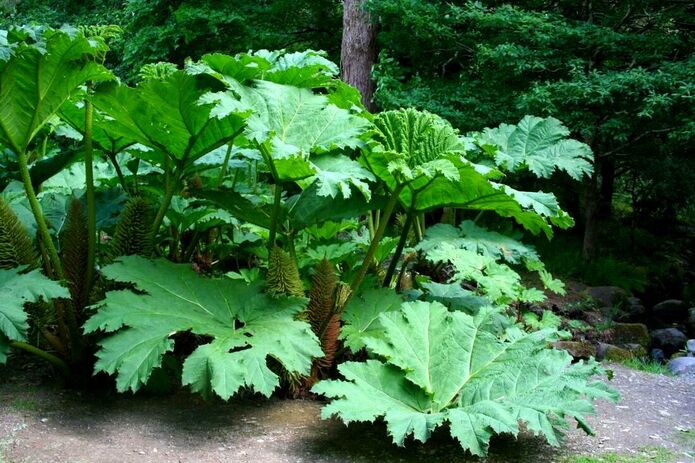
15. Spanish daggerMost commonly referred to by its Latin name; 'Yucca Gloriosa', Spanish dagger is a tropical looking yucca from the South Eastern United States. It eventually forms a robust central truck with dagger like, leathery leaves. During midsummer it throws up a vertical spike which erupts into multiple, large, flowers. The Spanish dagger has an exotic look to it making it perfect for tropical garden designs in cooler climates. 
16. Indian bean tree
Indian bean tree or ‘Catalpa bignonioides’ is an unusual tree favoured for its large foliage, attractive flowers and bean like seed pods. This medium sized tree naturally has a tropical look to its foliage and is extremely adaptable. When coppiced or pollarded the tree generates fresh growth with exaggeratingly large leaves. Such pruning consequently makes it look even more like a jungle species. 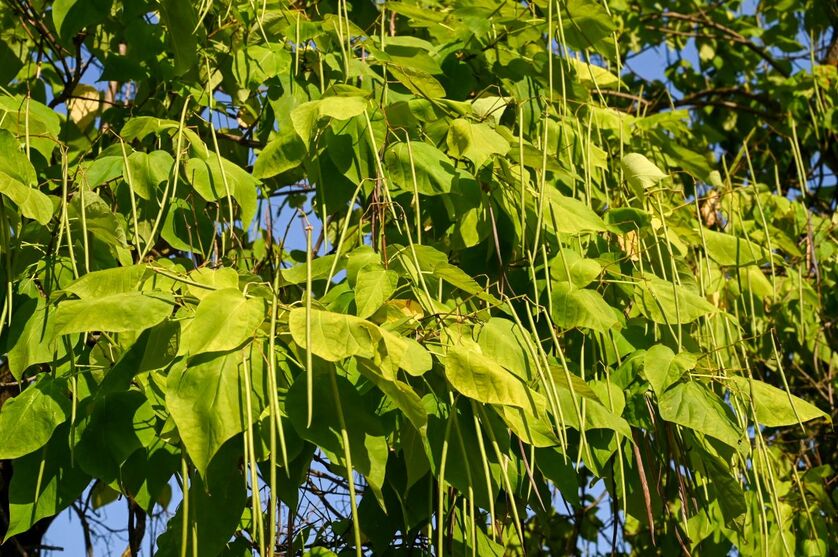
17. New Zealand cabbage treeThe New Zealand cabbage tree is a tall, yucca like, tree which has a vertical, palm tree like habit. Originating from New Zealand this tropical looking plant has a good tolerance to cold climates. With its sword like leaves and attractive flower clusters it can become a real focal point. In tropical gardens its light coloured trunk can create fantastic contrast against darker green foliage. 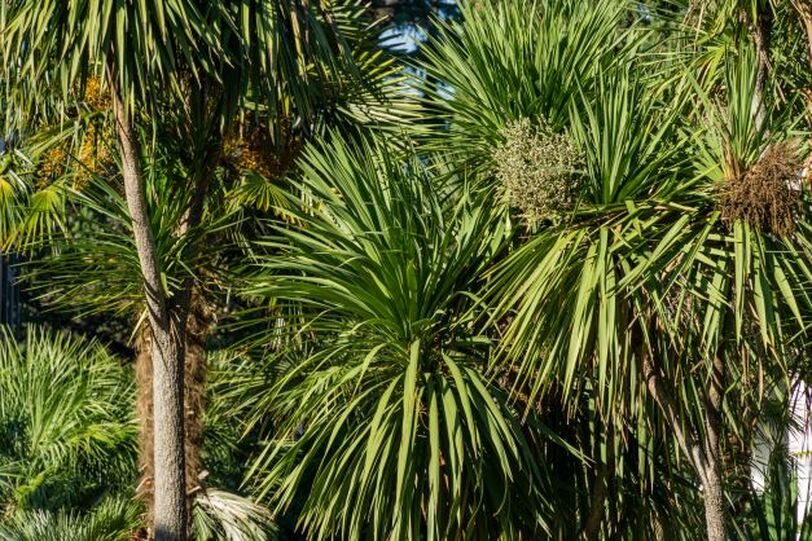
18. Elephant earsAlso known by its Latin name 'Bergenia', Elephant ears is a low growing, perennial plant with large leaves. The leaves have an oval shape creating a tropical looking groundcover to borders. During the summer months Bergenia sprouts flower stalks with desirable pink flowers. These plants are extremely adaptable and tolerant of partial shade making them great for dense jungle gardens. 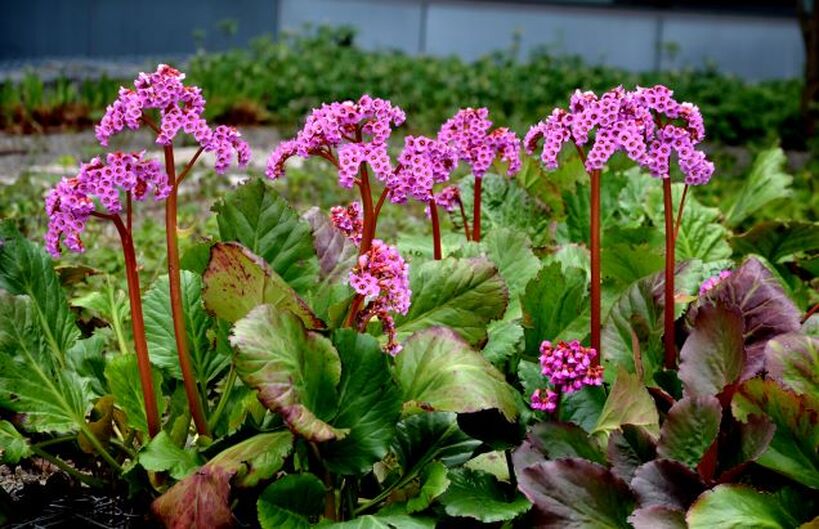
19. Giant reed
Giant reed, scientifically known as 'Arundo donax', is a versatile perennial that is well-suited for tropical gardens in cooler regions. This tall grass is able to thrive in temperate climates and can withstand excessive moisture and cold temperatures. Its dense foliage has an exotic feel to it with variegated varieties widely available as landscaping plants. This can make it a popular choice among gardeners who want to create a jungle look. 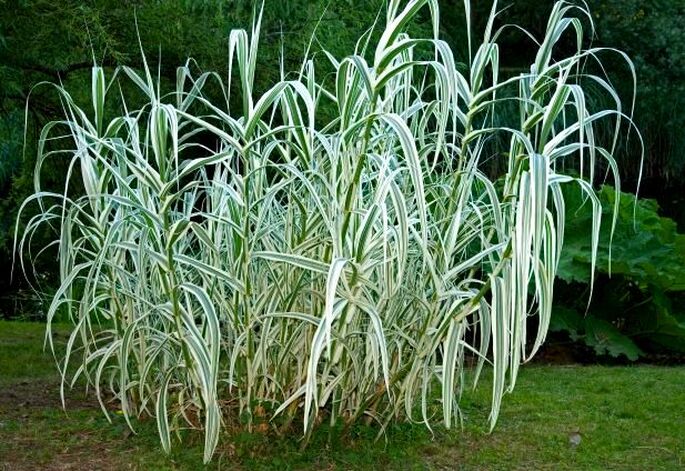
20. Pineapple lilly
The Pineapple Lily, also known as 'Eucomis', is a beautiful flowering plant which has an interesting form. Originally from South Africa, it thrives in sunny borders and has unique spiky leaves with tall flower spikes that resemble pineapples. Its vibrant colours, which can range from white to pink and purple, make it a striking focal point for tropical themed gardens. Not only is the Pineapple Lily adaptable to different types of soil it is hardy down to around -6. 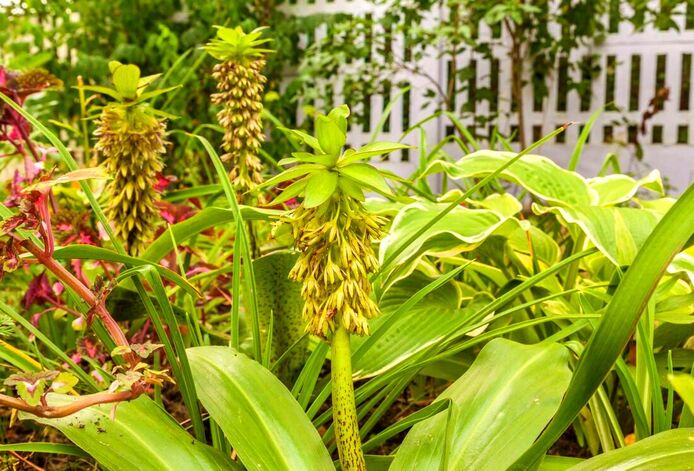
21. Japanese anemone
The Japanese anemone is an attractive, perennial flowering plant which originates from eastern Asia. Not typically associated with the tropics it actually originates from cooler, temperate climates. However in a jungle themed garden their large, jagged, leaves do provide a tropical look. This plant can not only tolerate cold conditions it can also thrive in part shade, perfect for densely planted jungle borders. 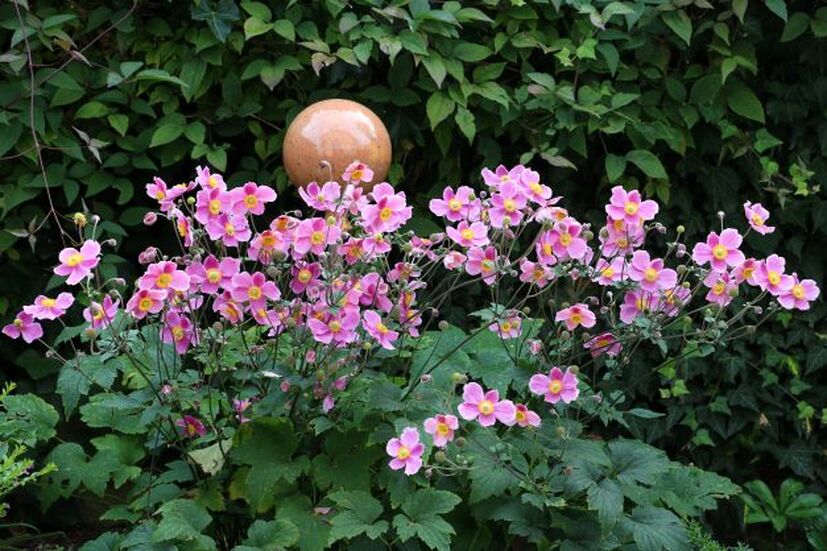
22. Fingerleaf Rodgersia
Fingerleaf Rodgersia, also known as 'Rodgersia aesculifolia', is a bold perennial plant that has very distinctive foliage and beautiful flower spikes. Its large leaves spread out broadly creating an effective ground cover within tropical gardens. This plant can tolerate dappled shade making it perfect for densely planted borders. Its leaves look consistent with plants which grow upon jungle floors; needless to say it is quite hardy. 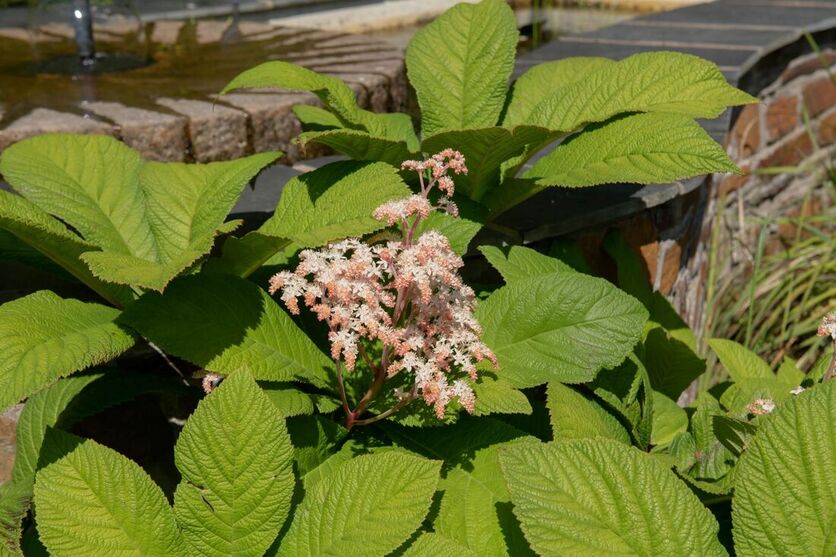
23. Canary island date palm
The Canary island date palm is a very distinct variety of palm with its broad base and large arching fronds. This palm has a tropical and even prehistoric feel making it perfect for jungle gardens. Remarkably this palm will tolerate cooler climates as long as temperatures do not dip below -6. There are actually some very large specimens growing in the ground in suburban London but may struggle further north in the UK. 
24. Foxglove tree
If you are creating a tropical garden in the UK or a cold climate there is one plant you simply must plant. The Foxglove Tree, also known as 'Paulownia tomentosa' is an or inspiring tree with very large hexagonal shaped leaves. When pollarded or coppiced the leaves become even more exaggerated making them perfect for a jungle effect. Originating from China this fast growing tree is fully hardy in the UK and much of Europe. 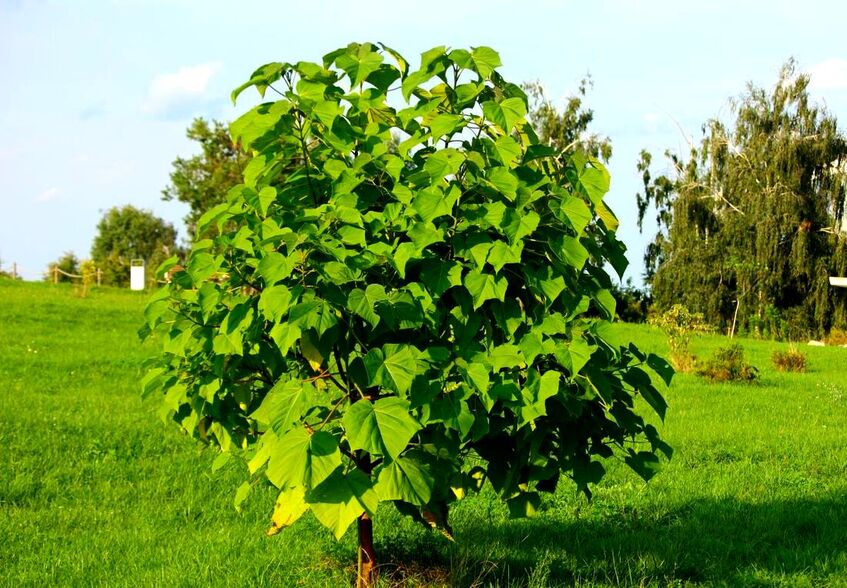
25. Castor oil plant
Scientifically known as 'Ricinus communis' the castor oil plant originally comes from tropical Africa. Its large, jagged leaves give it a real tropical look and can grow to an impressive size. In colder climates like the UK Ricinus is often grown as an annual by being sown every spring. Its fast growing nature means it can soon become an impressive specimen growing up to 3 metres tall. However do bear in mind the seeds of the plant are poisonous. 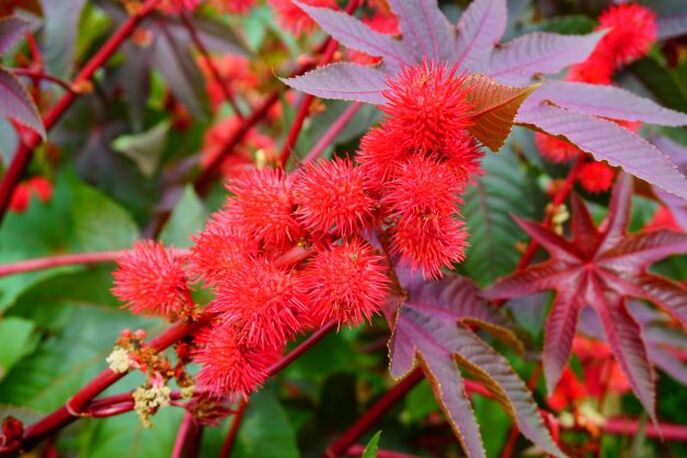
26. Fuchsia
Fuchsias are a group of shrubs which are widely planted in gardens for their attractive flowers. A common theme with fuchsias is they have an arching or weeping form. This has made them popular for planting on top of raised beds or on sloping ground. Although these shrubs are hardy their exotic looking flowers mean they work well in cold climate tropical garden planting schemes. 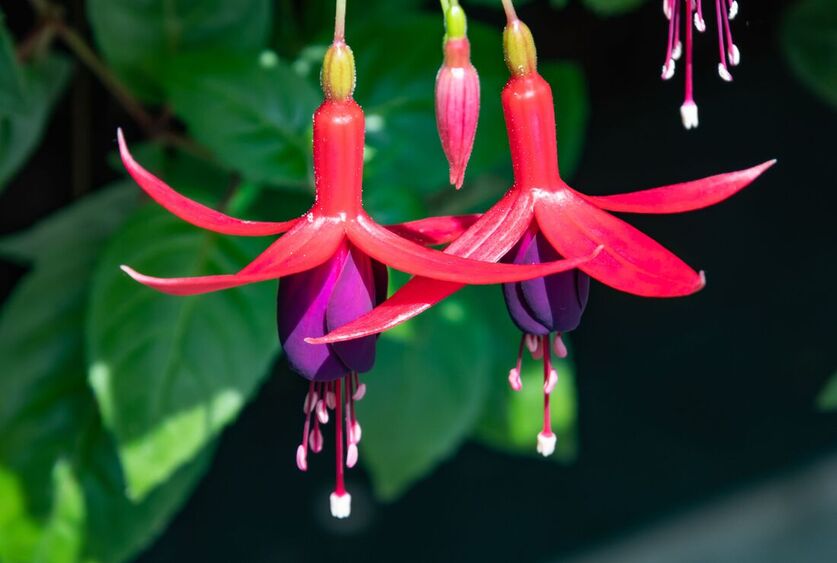
27. New Zealand flax
Commonly known by its Latin name 'phormium', this plant has spread around the world as a successful landscaping plant. Its erect, sword like leaves come in a variety of colours, textures and sizes. Its architectural form creates drama within planting schemes and its tropical look allows it to fit in well to jungle like planting. Phormiums are also extremely adaptable and cold hardy, perfect for the UK and other cold regions. 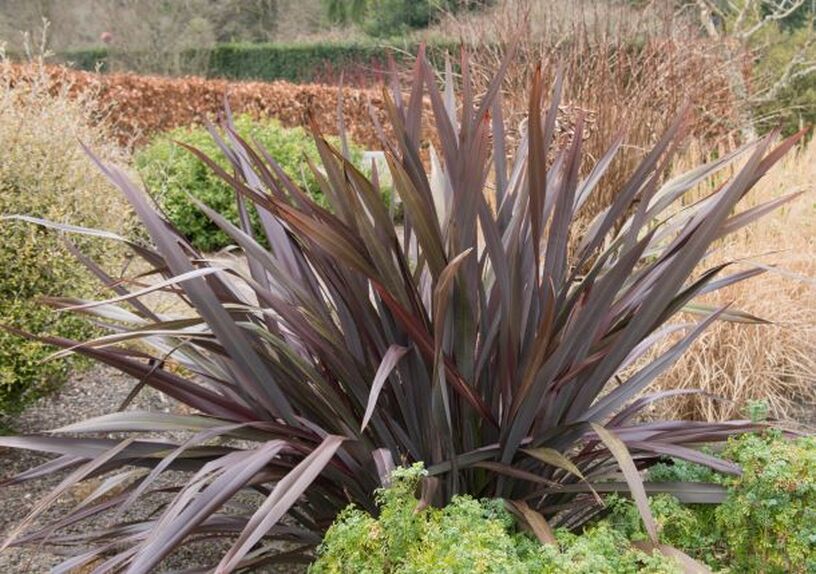
28. Fig tree
Fig trees are very well known for their decorative foliage and delicious fruits. Originating from the Middle East they have a surprising ability to adapt to much colder geographies. However for more successful fruiting in cold climates a south facing wall is best. In regard to jungle gardens it is the tropical looking, palmate leaves where they add the most value. Figs are a must have if you want to inject some great foliage to your planting scheme as well as some tasty treats. 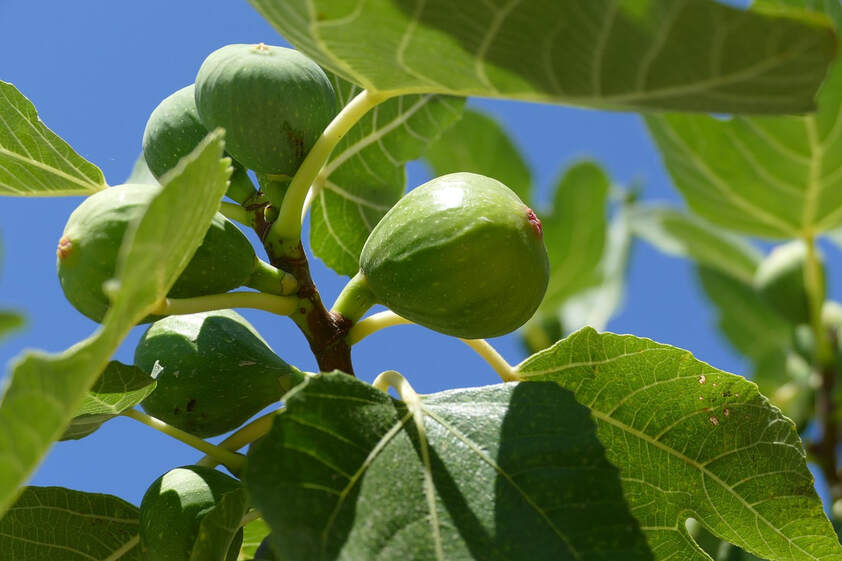
29. Iris
Iris is an attractive, perennial, flowering plant which grows from a tuberous root system. With over 300 varieties this plant is diverse as it is sought after for garden borders. Even though many iris are hardy of cooler conditions their flowers and foliage have a tropical feel to them. This makes them perfect for tropical gardens in cooler climates. These delightful plants come in a range of colours and also bring some seasonal interest to the jungle border. 
30. Dahlia
Native to Central and South America, Dahlias can bring a real sense of the tropics to your garden. Originally brought over as a food crop this attractive plant is well known for its striking flowers. The blooms can come in a wide variety of form and colours. This makes them an ideal candidate for adding some colour and interest to tropical garden flower beds. In the UK they are not always fully hardy with tubers lifted and stored over winter. 
31. Lilly of the Nile
Also known as 'Agapanthus' Lilly of the Nile is a perennial plant native to South Africa. This flowering plant has an unusual form with a singular stem bearing a circular cluster of trumpet shaped flowers. These globe like blooms come in a range of colours including blue, purple, white and pink. They have an exotic look making them perfect for adding height to tropical planting schemes. 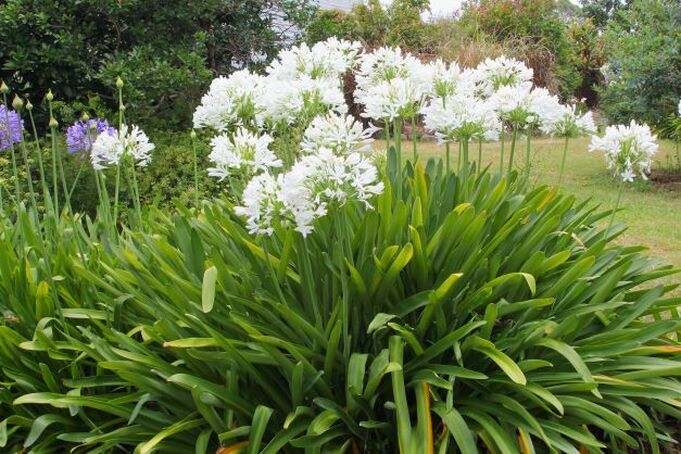
32. Red hot poker
Red hot poker is also native to South Africa and has an extremely eye catching and vibrant flower. The tall flower stems support rows of pendulous and tubular flowers. Unopened flower buds at the top are red or dark orange which as they open become lighter yellow tones. The result is a flower resembling a flaming torch. This tropical looking plant is a great novelty within jungle planting displays. 
33. MahoniaMahonia are a type of evergreen shrub which have excellent, architectural form and clusters of yellow flowers. They have a palm like growing habit with glossy leaves and tall erect growing stems. Mahonia’s low maintenance and tolerance to colder climates make it suitable for tropical gardens in cooler regions. Its exotic looking form and foliage fits in well amongst other tropical looking plant species. 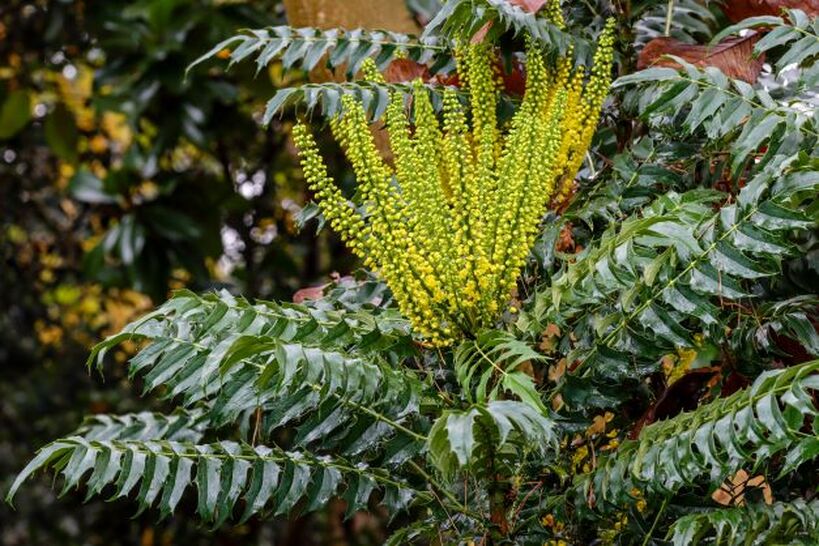
34. Passion flower
Scientifically known as 'Passiflora' the passionflower is a climbing vine with stunning flowers and lobed foliage. The flowers have the most intricate and decorative flowers which look very exotic and almost alien. The passionflower is the perfect climbing plant for tropical garden trellises and structures. Once the flowering has ended the plant forms multiple, circular, fruits which also have aesthetic value. 
35. Heavenly bamboo
Also known by its Latin name 'Nandina domestica', this bamboo like plant has decorative foliage and bright red berries. Native to the Eastern Asia it has a tolerance of both wet and cooler climates. During the fall its foliage provides radiant autumn colour and brightly coloured berries which last into winter. Heavenly bamboo can add an exotic touch and seasonal interest to a tropical planting scheme. 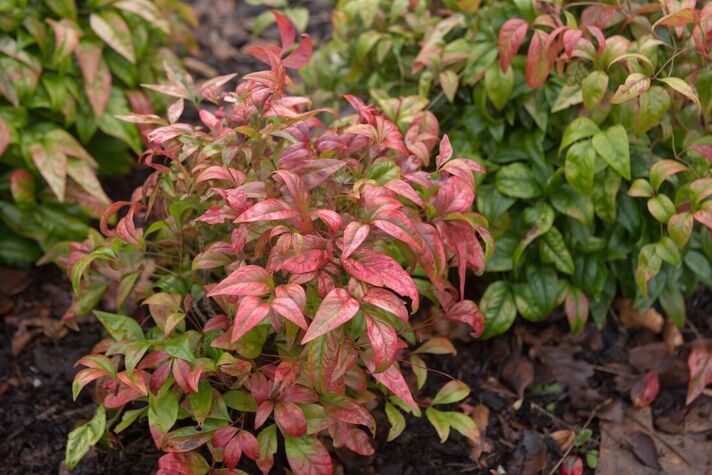
36. Calla lily
Calla lilies are herbaceous perennials that grow from rhizomes every growing season. Native to Southern Africa these amazing plants have tropical like foliage and beautiful flowers. Their lush green foliage is perfect for block planting around tropical garden borders and water features. In regions with very cold winters it is best to lift the tubers and store them inside every autumn. 
37. Camellia
Camellias are flowering, evergreen shrubs which originate from southern and Eastern Asia. These plants are highly favoured in gardens for their dark green, glossy leaves and stunning flowers. Their preference for dappled shade makes them an effective candidate for dense tropical gardens. Camellias can be fussy but are generally tolerant of cooler temperate climates. 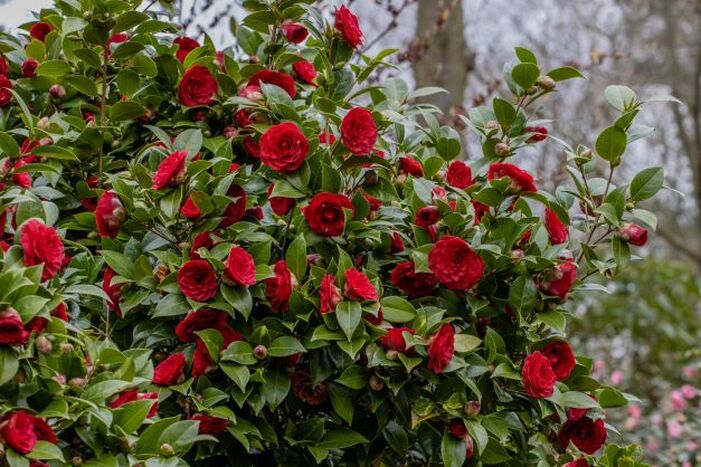
38. Magnolia
Magnolias represent a wide species range of tree which has large glossy leaves and large flowers. The flowers have an exotic look to them and are perfect for creating seasonal interest. Most Magnolias are hardy of cooler climates and can make the perfect backdrop for larger tropical garden borders. They also have the added benefit of providing a pleasant fragrance when in bloom. 
39. Boston ivy
Scientifically named 'Parthenocissus tricuspidata' Boston ivy is a deciduous climber native to East Asia. Its native range means it is more than capable of tolerating cold and wet environments. The foliage has jagged, three lobed leaves which can form a dense texture to trellises and fences. The foliage has a tropical look which turns bright red during autumn time. This climber makes the perfect backdrop and screening plant for tropical gardens. 
40. Japanese blood grass
Japanese blood grass is an ornamental grass much loved for its striking red foliage. The foliage is perfect for block planting in the front of tropical borders and providing colour contrasts. This grass has a pleasant growing habit and provides plenty of movement in the breeze. Its dazzling colour makes it a real asset in a tropical or jungle garden planting display. 
Thank you for reading our article on the best plants for tropical gardens in the UK and cooler climates.
Do you think I missed any plants? If so feel free to comment below and I can ad them to the list, Thank you. For more information on tropical garden plants for the UK visit 'House Beautiful's article here. If you found this article useful please help us write more content by sharing this article on your social media channels! Below we have linked to other tropical garden resources you may find informative.
'As an Amazon associate I earn from qualifying purchases'
This article contains affiliate links
Tropical gardens are magical places where you can easily escape the stresses of life and reach a state of tranquillity.
A celebration of exotic foliage and vibrant flowers allow you to psychologically transport to a far away paradise. The many varying colours, textures and contrasts tropical gardens provide can be a feast for the senses! A convenient characteristic of tropical gardens is they typically rely upon evergreen planting. Consequently, they look amazing all year, enabling you to hide away within your very own jungle paradise. However, you do not just have to rely upon exotic looking plants to provide a tropical look. Why not spice up your garden design with some tropical garden ornaments? These may have a cultural relevance to a tropical country or a region that you love! Or, they can simply inject that little bit of extra magic into your tropical garden design. Here I will list and summarise 10 amazing tropical garden ornaments perfect for any tropical garden. 1. Bronze crane ornament
Tropical regions of the world are well known for their stunning and exotic wildlife. This is especially so when it comes to the bird kingdom with cranes being some of the most elegant and graceful. Cranes are commonly associated with the transition between land and water. This makes these stunning bronze crane ornaments perfect for a tropical garden pond or water feature.  2. Ghanesh statue
This stone Ghanesh statue represents the Hindu deity Ganesha who is associated with great wisdom and beginnings. The god is often associated with tropical environments due to his worship by many people in India. This statue makes the perfect tropical garden ornament whatever your culture or spiritual beliefs. The stone ornament is perfect for creating an outdoor shrine or focal point.  3. Orangutan ornament
The Orangutan is probably one of the most famous tropical species in the world. Sadly this real wild man of the forest is critically endangered due to habitat loss within its native range. However, you can now enjoy your very own Orangutan with this large outdoor ornament. Made of resin it makes a dramatic feature amongst tropical vegetation within your very own tropical garden.  4. Buddha ornamentBuddha has long been associated with Asia and the tropical regions of the Far East. Being the father of Buddhism he is often depicted in a peaceful and meditative state. This captivating and serene representation of Buddha is perfect for a tropical garden shrine or seating area. Crafted from high quality resin this tropical garden ornament will take whatever nature throws at it.  5. African head statue
Crafted from durable stone, this totem style ornament is perfect for injecting an exotic look into your tropical garden. The 'Totem pole Easter Island and African Head Tiki Statue' is a great way to showcase the cultural diversity of tropical regions. This tropical garden ornament will provide a real conversation starter and something to be cherished forever more.  6. Large gorilla statue
Humans have always had a fascination with the great apes as they are so much like our own species. Catching a glimpse of a gorilla within a tropical forest is a glimpse into our ancient past. This makes this large, resin gorilla, ornament so effective within a tropical garden. The ornament is best slightly covered behind vegetation to supprise guests as they pass through!  7. Agave rustic sculpture
Tropical gardens are loved for their architectural form and exotic looking foliage. Unfortunately, not all tropical plants will be able to survive in colder climate tropical gardens. This makes this Agave, rustic, sculpture the perfect tropical garden ornament. Its erect, metal and architectural form will look amazing at any time of the year. This particular ornament looks amazing at night illuminated by up lighters.  8. Peacock ornament
Who can deny that the Peacock has one of the most spectacular animal displays on earth! These amazing birds capture the very essence of a tropical paradise. Unfortunately, not all of us can actually have a real life peacock in our garden! We can however, easily own this beautiful metal peacock ornament with striking colours and details.  9. Resin parrot ornament
Parrots have long been admired for their striking colours and amazing intelligence. If you really want to give your tropical garden a taste of paradise consider this outdoor ornament. This resin parrot ornament can easily attach to a vertical wall or tree trunk. Its life like design will make it a fitting novelty in any tropical garden.  10. Tropical lizard statue
This extremely life-like tropical lizard statue is a perfect way to inject some excitement into your tropical garden. Based upon the Iguana this striking looking reptile will bring the tropical Americas right to your very own back door. The stature is best placed protruding from tropical borders and around seating areas. What a great way to add a scary surprise for new garden visitors! 
'As an Amazon associate I earn from qualifying purchases'
This article contains affiliate links
There is nothing more exciting than having your very own tropical garden paradise. This is especially so if you live in a cooler climate and select plants with an exotic look.
Tropical gardens can transport us to a far away place providing a holiday atmosphere. As such gardens rely upon evergreen plants they often look amazing all year round! However, the planting should not only be the only delight your tropical paradise provides. There are many ways you can enhance your outdoor space for an authentically exotic look. Tropical garden accessories can inject that extra little bit of magic into your jungle scheme. In this article, I identify and summarise 13 amazing tropical garden accessories to make your exotic paradise extra special. 1. Garden Hammock
If you really want you to give your tropical garden a true feeling of paradise set up a garden hammock. These are perfect for lounging around on warm days, sipping a cocktail or simply reading a book. Hammocks can be set up in a place where you are completely surrounded with tropical, jungle planting!  2. SunTime Tikki Bar
What better way to escape on holiday than to have your very own tropical themed bar. This Tikki bar is a fantastic addition to a tropical garden patio or secluded seating area. It comes complete with a Hawaiian style, grass roof, glass bar and bar stools. What better way to enjoy a cocktail or two with friends?  3. Tiefes Buddha Sculpture
Buddha has long been associated with tropical Asia and the Far East. His form has been celebrated and personified in statues and sculptures across world. Buddha ornaments have a general popularity in gardens whatever their specific theme. They do however suit tropical themed gardens very well providing an Asian flavour.  4. Stone Ghanesh statue
Ghanesh is a well known figure and god within the Hindu religion. His image and form is celebrated throughout India and can be found in places of spiritual importance as well as homes. Being a Hindu god Ghanesh is heavily associated with Indian culture as well as its tropical landscape.  5. Swinging egg seat
One of the best things about tropical gardens is their representation of the natural world. Jungle style plantings represent unexplored forests with their dense, green, foliage. Such environments have been proven to be extremely relaxing. Why not relax in your jungle garden with this amazing swinging egg seat.  6. Hawaiian beach umbrella
The great thing about tropical gardens is they allow you to experience a completely different world. When the summer comes, jungle gardens can really make you believe you are on holiday. To enhance a true holiday experience why not install a Hawaiian style beach umbrella?  7. Heron garden ornament
Tropical regions of the world make up some of the most bio-diverse regions on the planet. Consequently, tropical themed gardens benefit from the representation of wildlife. If you do not have wild animals wandering around your garden why not place out these elegant Heron ornaments.  8. Garden mirror
Tropical gardens are well admired for their dense foliage and sense of enclosure. Garden mirrors can help to enhance tropical garden planting by reflecting plants foliage. This can make a space look more densely planted than it actually is and create a tranquil atmosphere. This beautiful garden mirror is perfect for hanging on walls, fences or next to seating areas.  9. Asian style temple lantern
Tropical gardens regularly have an Asian theme running through them. This is generally because many tropical regions of the world are located around this continent. It is common for tropical gardens to have ornaments which have the form of buildings and even temples. Consequently, this Asian style temple lantern is perfect for lighting up patios and pathways.  10. Clay chimenea
Most tropical gardens are lush and green making them perfect places for nature bathing. Once you have created your perfect tropical garden you will want to sit out until the sun goes down. This makes this decorative clay chiminea the perfect accessory for your very own tropical paradise.  11. Garden co outdoor heater
If you want to throw a tropical garden party and don’t like smoky fires this patio heater could be for you. Its tall slender design will look elegant within any tropical garden design. It also has a built in drinks table and portable wheels for easy manoeuvrability.  12. Outdoor rock speakersA tropical garden should give off the impression you are visiting a real exotic jungle. One of the best ways to evoke such an atmosphere is with sound. Tropical rainforest background sounds are easily obtained for free on Youtube. Outdoor rock speakers are a great way to play such sounds or your favourite music by linking to your smart phone. These speakers will easily blend into the landscaping of tropical gardens.  13. Bamboo torches
When it comes to late night garden lighting there is nothing better than a naked flame. These Bamboo oil torches have an authentic, tropical and even tribal look. These torches are oil fuelled and come with replacement wicks for long term burning. Bamboo torches are a great way to light up pathways and seating areas within tropical gardens. 
'As an Amazon associate I earn from qualifying purchases'
This article contains affiliate links
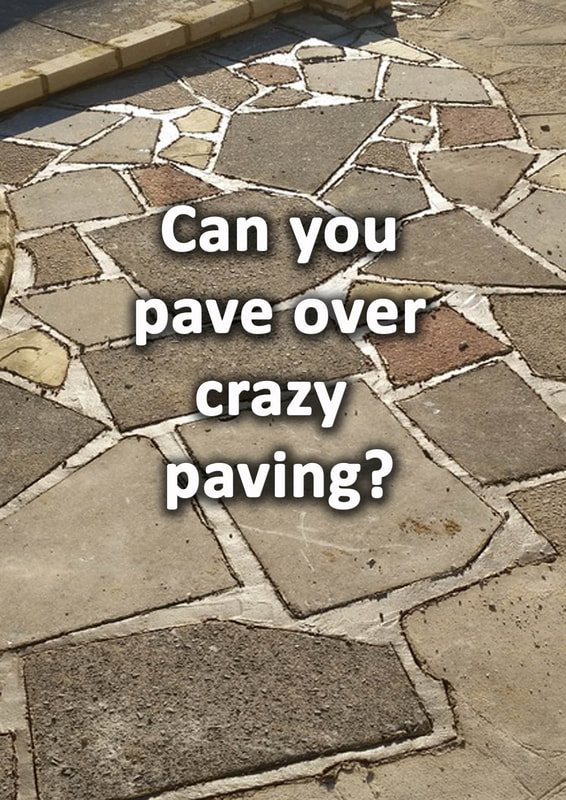
Crazy paving is a method of paving which utilises random sized and broken paving units.
Such a paving method was common place before the development of modern paving suppliers. Many properties had crazy paving driveways and back patios built from disused and broken council paving. Today however, it is surprising just how much old crazy paving from this era remains. If built properly crazy paving can be very robust and last the test of time! Very often, pressure washing crazy paving will reap good results revealing a light and textured surface. Here I will explain how to repair crazy paving as well as answering some common crazy paving questions. Can you repair crazy paving?
You can certainly repair crazy paving if it is damaged or cracked. However, the general state of the whole surface should be able to tell you if it is worth repairing. If the majority of the surface is robust with no cracks it is probably worth repairing. If the whole surface is undulating and cracked it probably was not based or laid correctly. In such a case it is worth relaying the whole surface. However if you have a single crack or broken area it is best to repair the paving. 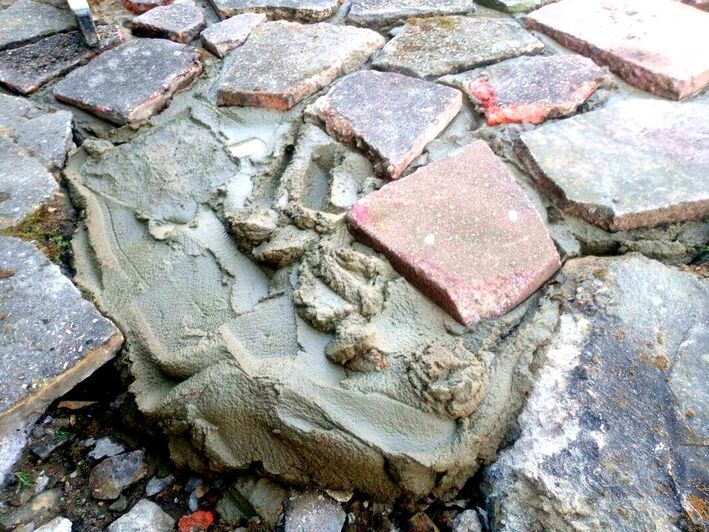
What is the best base for crazy paving?
If your paving needs to take the weight of cars it is best to have a sub base of at least 150mm. This should be a compactable aggregate such as mot type 1 If however, you’re crazy paving will be taking the weight of people a compacted base of 100mm is ok. 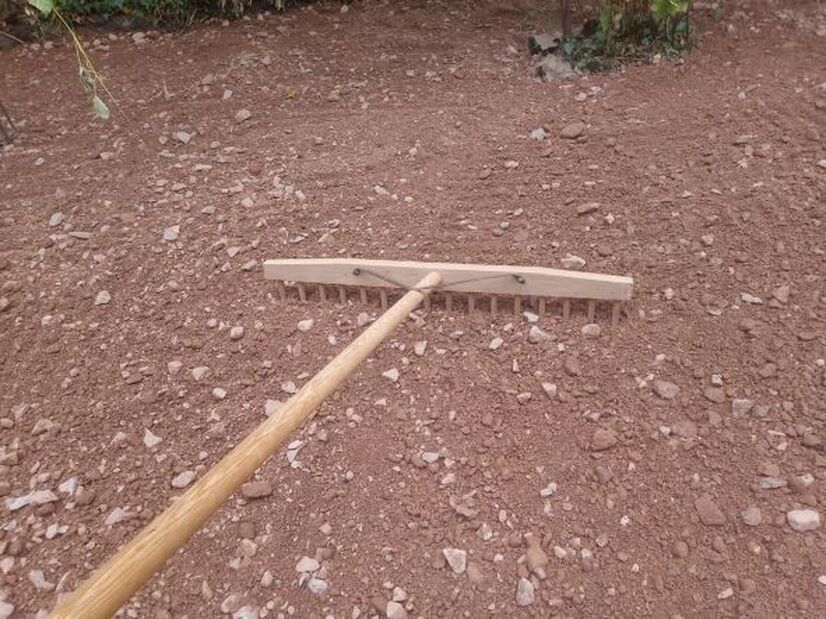
What is the best mortar mix for crazy paving?
The best mortar mix for crazy paving will be a sharp or coarse sand cement mortar mix. Mix up 1 part cement to 4 parts sand and mix with water with a splash of plasticiser added. Mix well until the mix has the consistency of a stiff brick laying mortar. Crazy paving can be very absorbent during hot and dry weather. This means you may have to add a little water in such conditions to keep it workable. 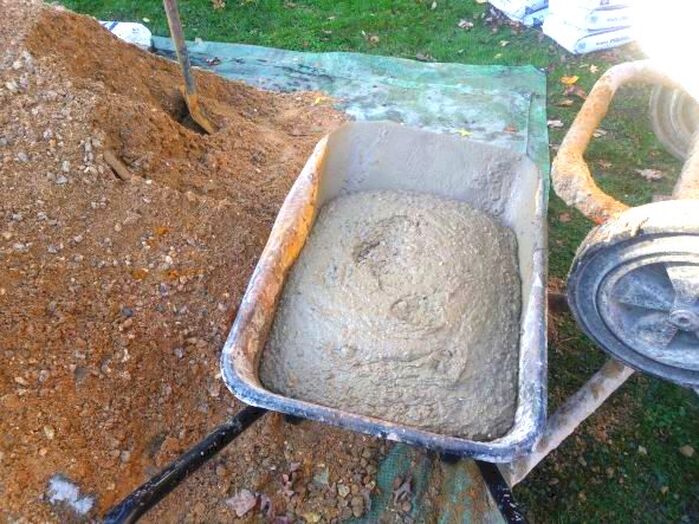
How do you fill in holes in crazy paving?
Holes typically appear in crazy paving around the joints. This could be because the slab has separated from the mortar bed or grout has weathered out over time. If the paving is loose you will need to break out the old mortar and re-bed the slab before pointing. If the problem is just the pointing, cut out the old and point with a new mix. 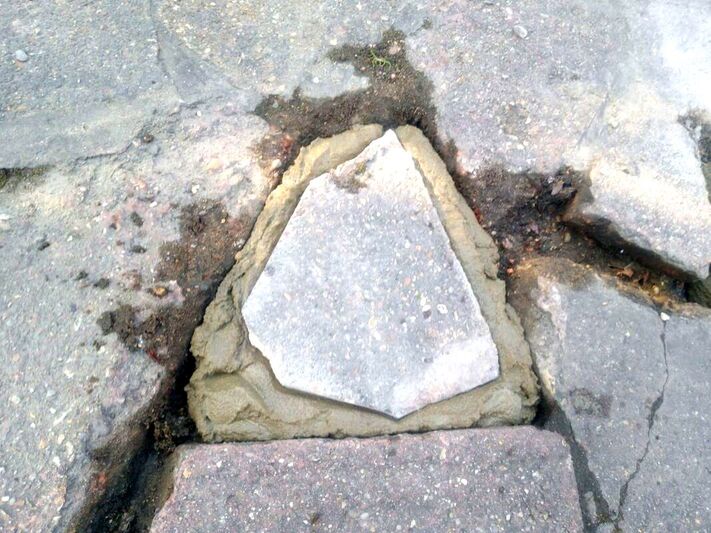
Can you put gravel in between crazy paving?
It is not recommended to put gravel between crazy paving. Gravel will allow water and frost to penetrate down into the mortar bed. This can lead to paving coming loose and the structural failure of the surface. Gravel joints will also lead to the accumulation of dust and dirt. This will lead to the establishment of weeds within the crazy paving. How do you point crazy paving?
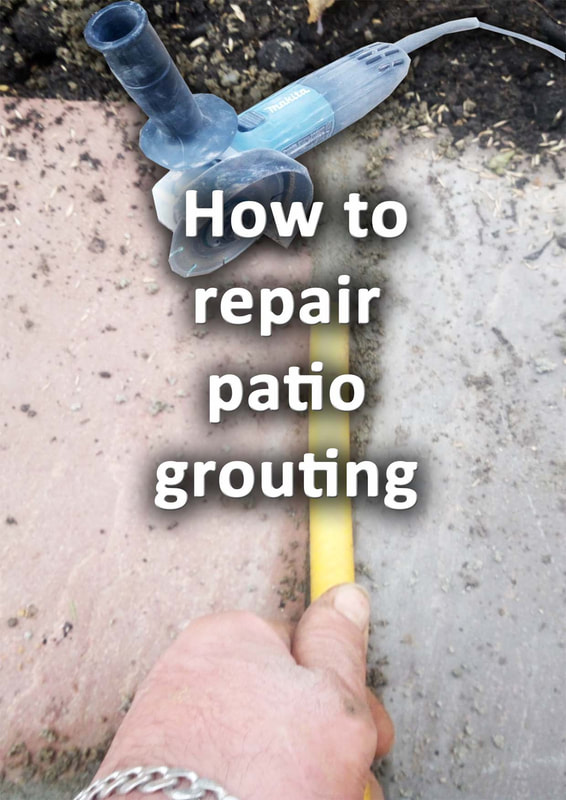
Due to crazy paving’s high absorbency and large joint size pointing and grouting is different to conventional paving. Your pointing mortar should be a 1 part cement 4 parts plastering sand mix. Your mix should be a little bit wetter and workable than conventional mixes. This is because the thick concrete pavers can draw out moisture from the pointing quickly. This can lead to poor curing and an unsealed finish. 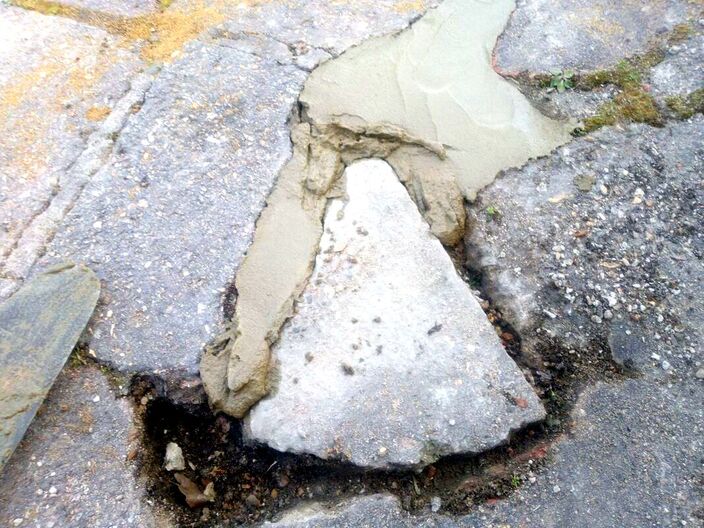
Mix your mortar until it is a very stiff mix with some elasticity. Slowly fill up the voids flush with a pointing trowel.
Take care not to let the mortar come into contact with the paving’s surface and stain it. With a rounded pointing trowel, smooth the mortar carefully to a neat finish. You may wish to take the extra time to implement weather shield or birds beak pointing. How to repair crazy paving step by stepStep 1.
Break or cut out any loose crazy paving or broken and degraded pointing. 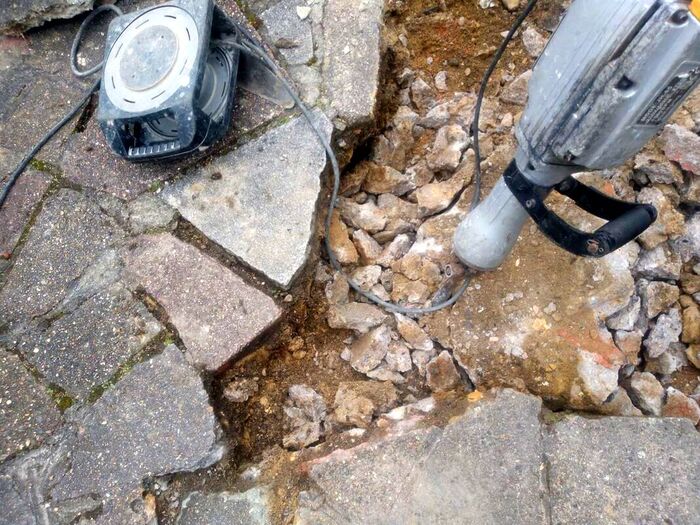
Step 2.
Break out any bedding mortar completely from where paving has been removed. 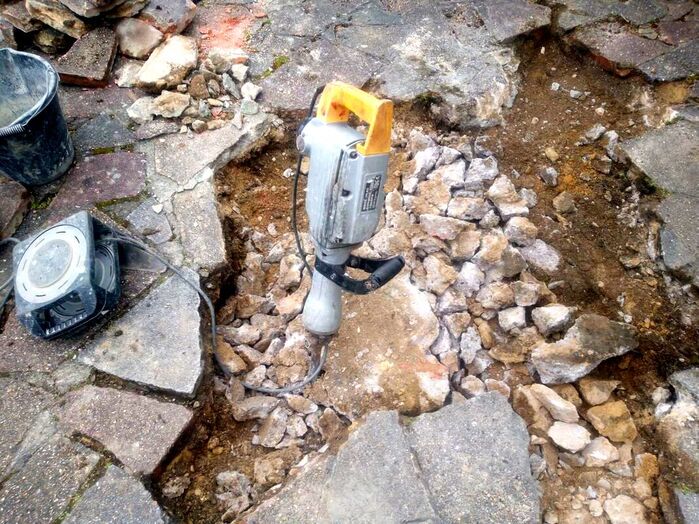
Step 3.
Using a workable 1:4 cement and sharp sand mortar mix re-bed down any removed paving. 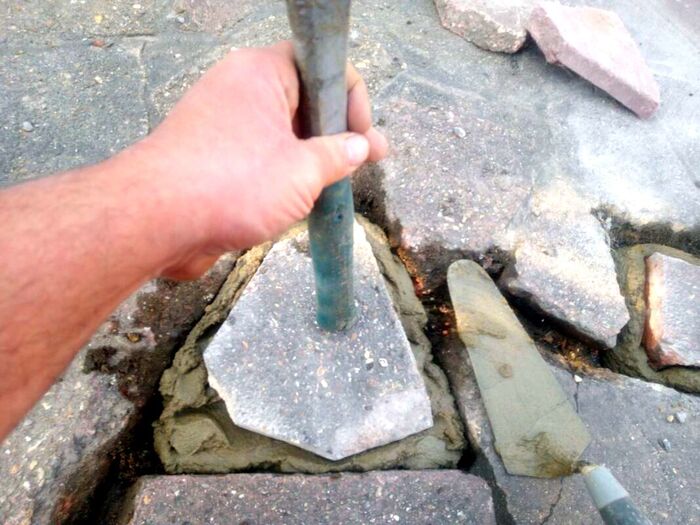
Step 4.
Allow paving to set and cure for at least 24 hours. Step 5.
Clean out all pointing gaps so they are free of dust and debris. 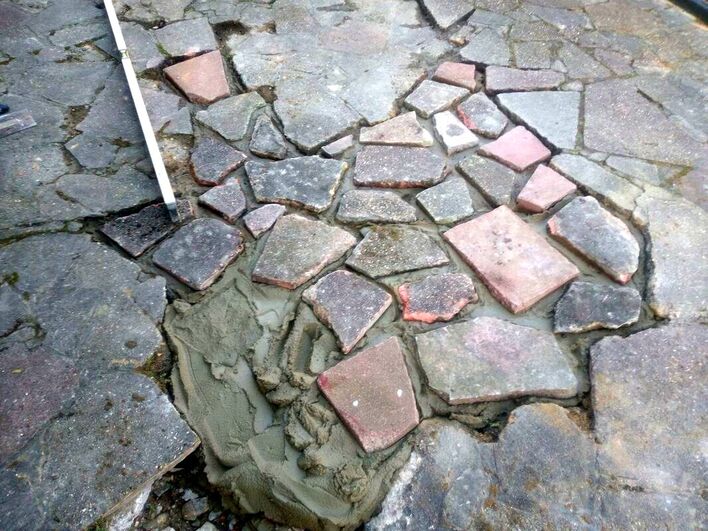
Step 6.
Mix up a 1:4 cement and plastering sand mortar mix with plasticiser for extra workability. Add water until it has the consistency of a stiff bricklaying mortar. 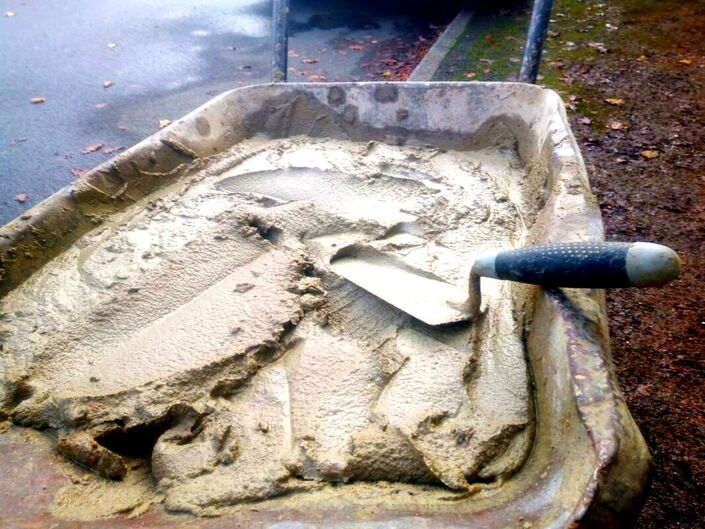
Step 7.
Carefully fill the gaps in the paving with the jointing mix taking care not to stain the surface of the paving. 
Step 8.
When the pointing mortar is flush with the top of the paving work it to a smooth finish with a trowel. The best tool for this is a round ended pointing trowel. There should be no risk of rain the day you point and 16 hours of dry weather after completion. This will prevent the jointing being blown and the paving becoming stained. To help highlight the individual pavers score around the edge of the slaps with a nail like in the image below. 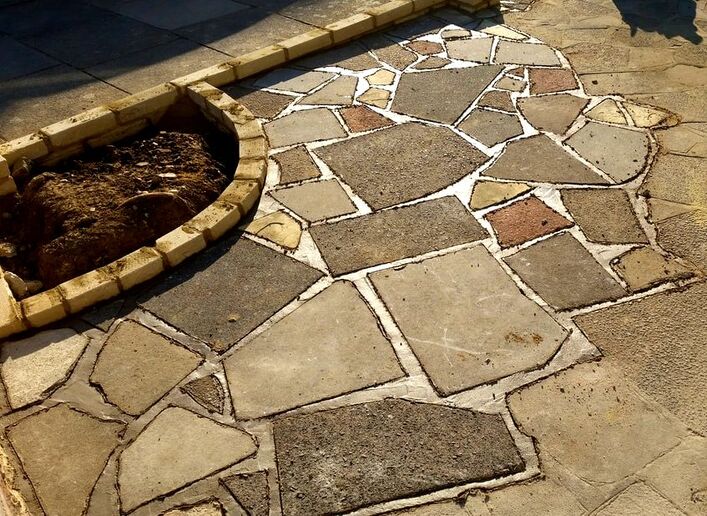
Thank you for reading our article on how to repair crazy paving. Below I have included some other articles you may also find useful and relevant.
'As an Amazon associate I earn from qualifying purchases'
this article contains affiliate links
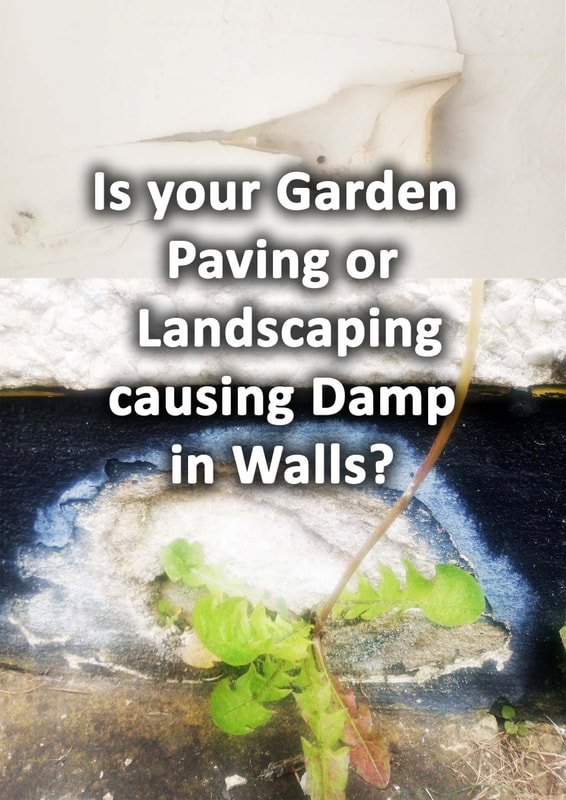
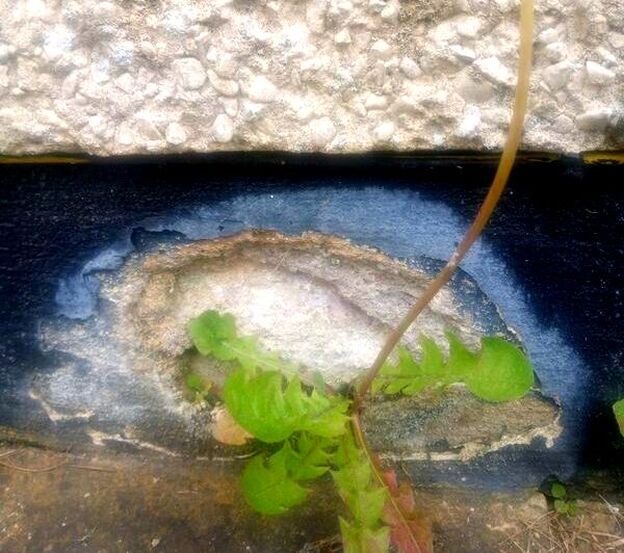
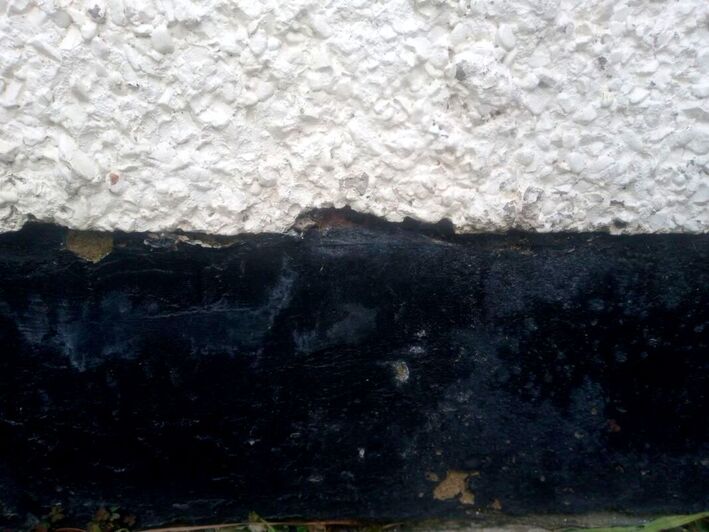
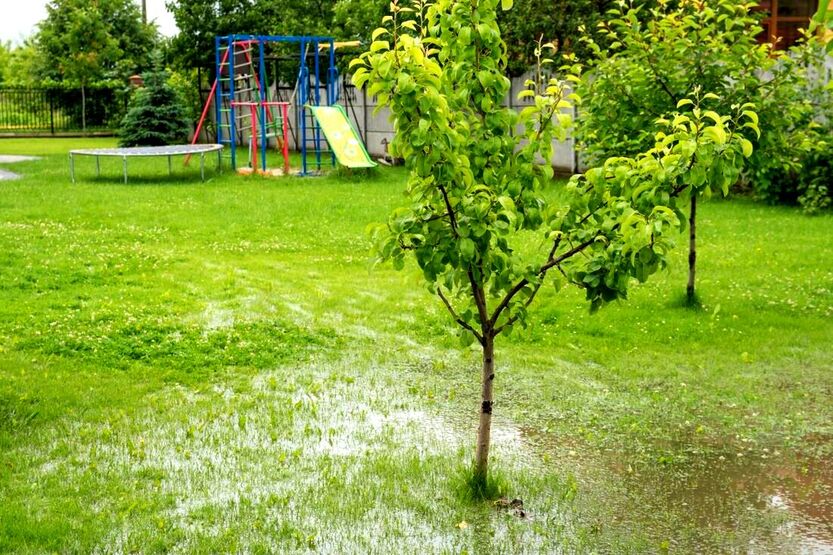
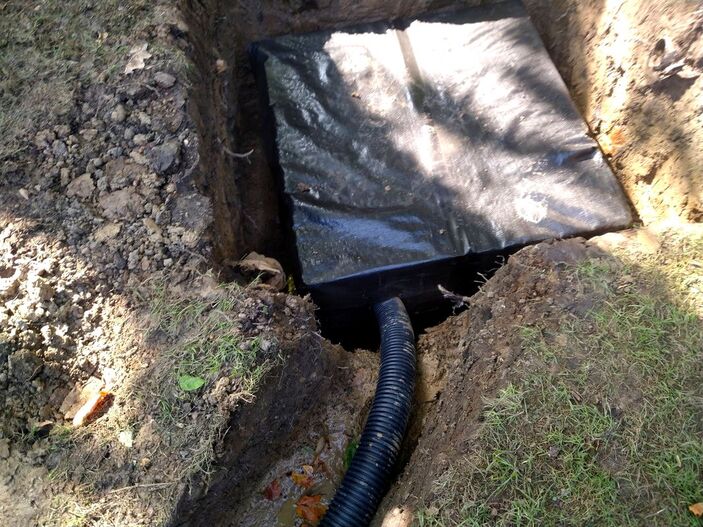
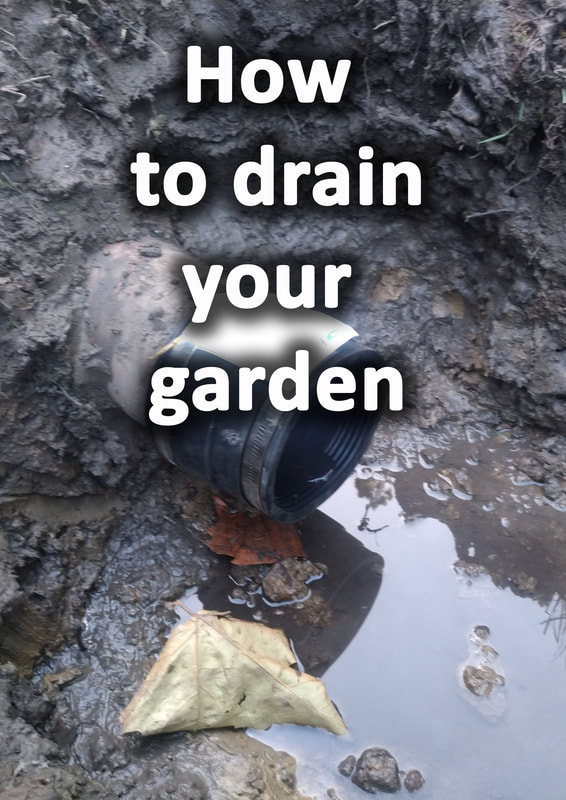
Dampness within walls can be a serious problem for a home leading to costly repairs and health problems. Damp walls can lead to mould, bad smells, discolouration, flaking, cracking and even structural issues.
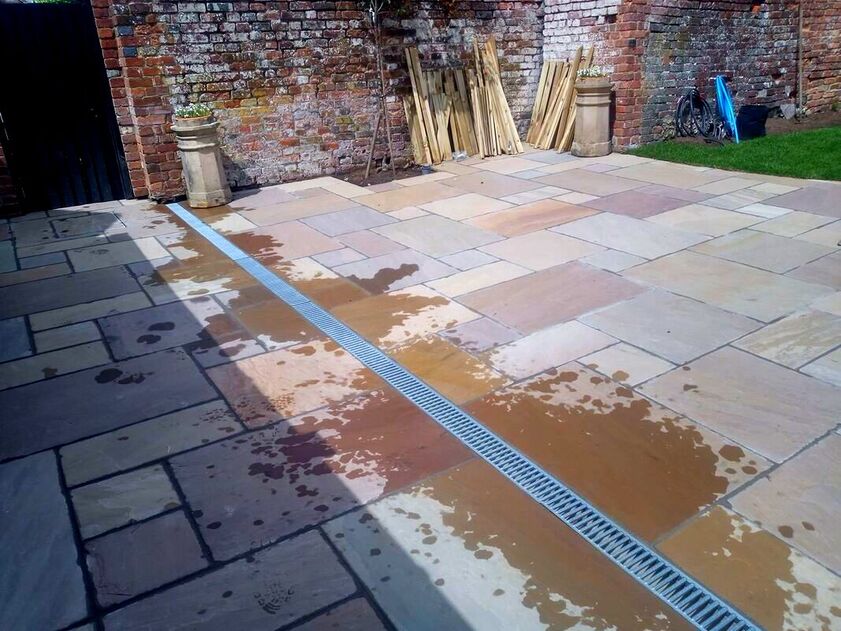
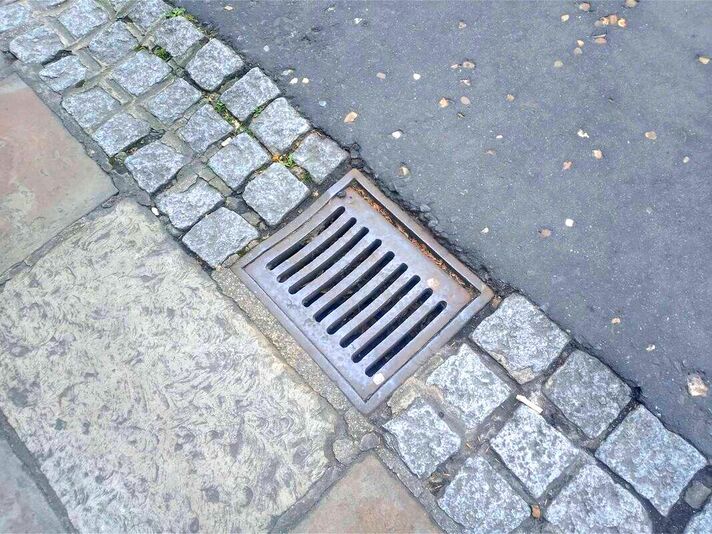
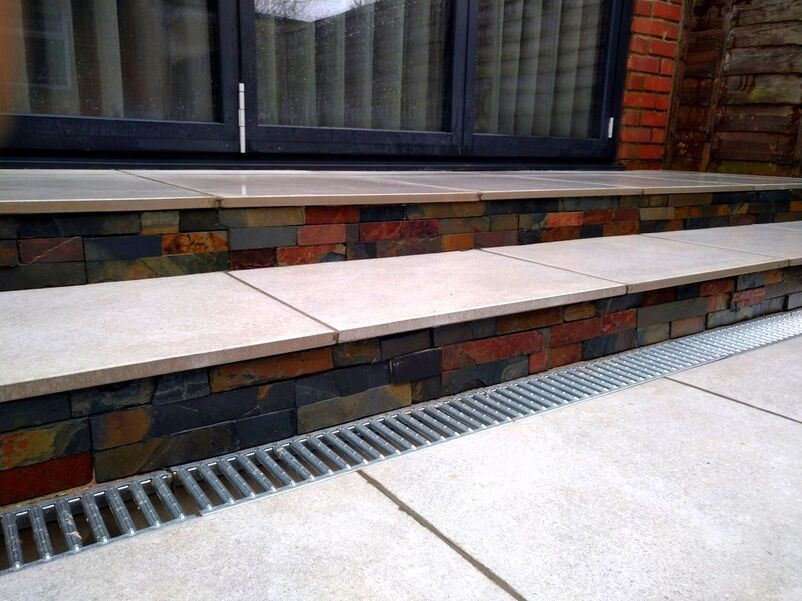
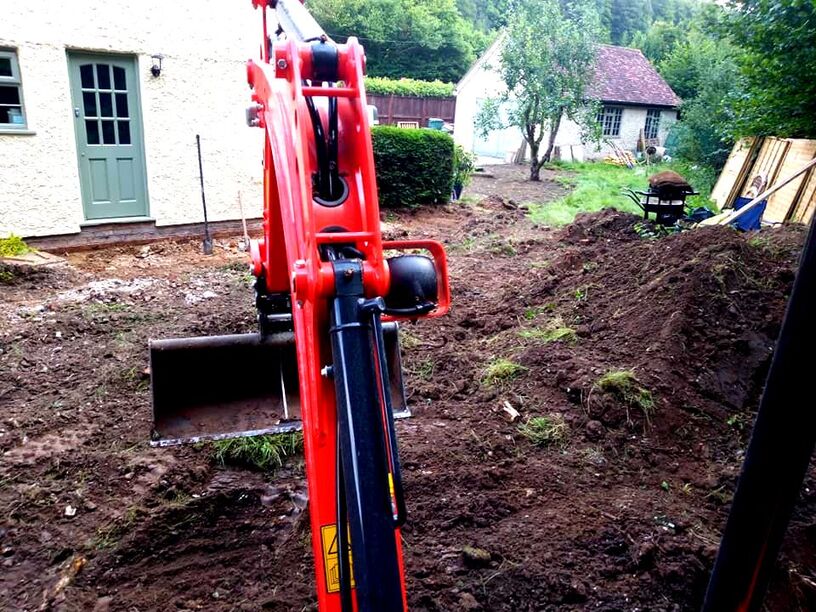
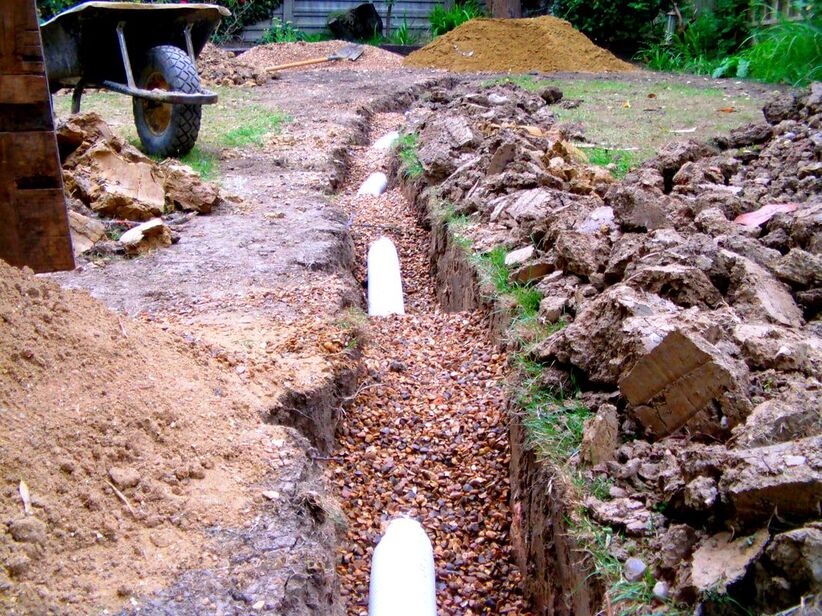
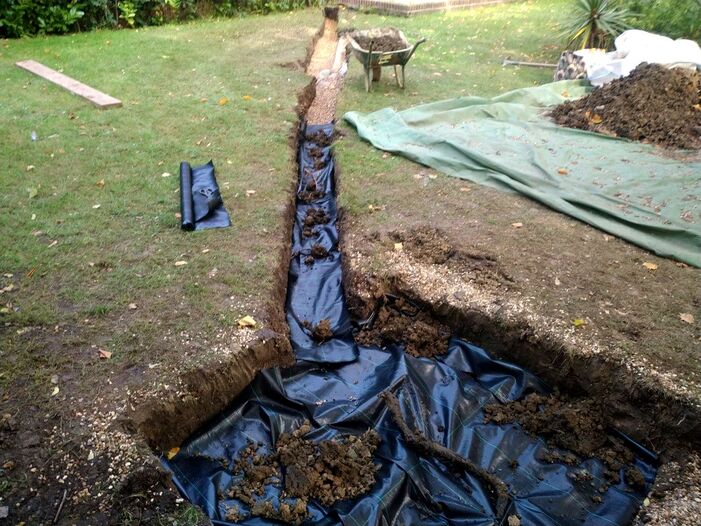
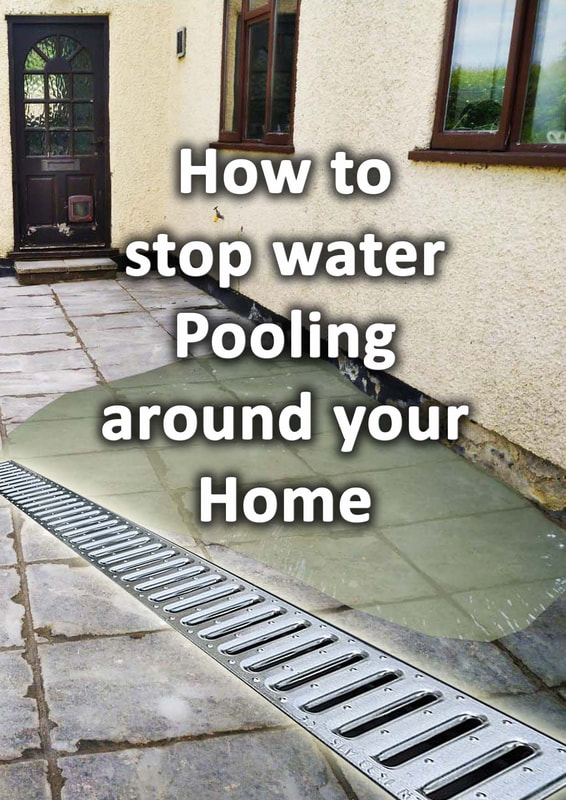
Although many assume damp walls are caused by leaky roofs or plumbing, it is also important to consider other sources. Poorly designed gardens and paving can actually contribute significantly to the build up of moisture within walls. This is particularly the case in homes that are of older construction and have poor, landscape, drainage. In this article we will explore various ways gardens and paving can contribute to damp walls. I will explain how to diagnose if the garden is causing dampness and how to solve the issue. Regardless of if you have knowledge of garden drainage or construction this should provide you all the information you need. If your garden or paving is causing damp walls a swift resolution is essential to maintain a healthy living environment. 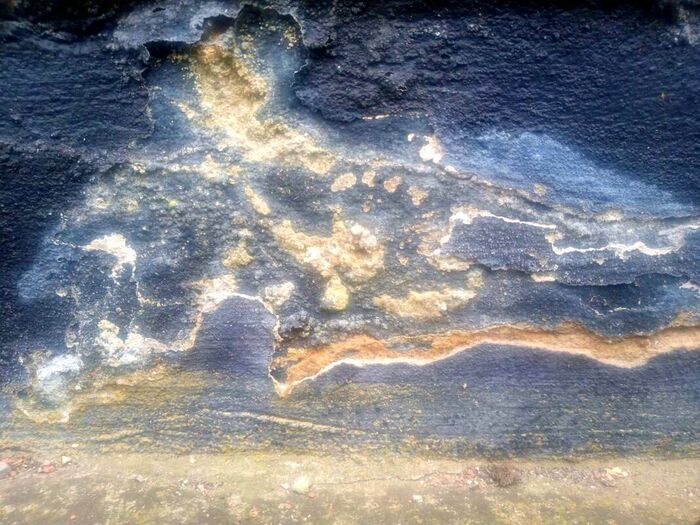
Common causes of dampness in walls
|


|
|

|

|

|

|
'As an Amazon Associate I earn from from qualifying purchases'

|
The Author
Paul Nicolaides
BA (Hons) Dip
Paul Nicolaides has over 30 years of recreational gardening and 20 years of professional landscaping experience. He has worked for landscape contractors including design and build practices across London and the South East. In 2006 he qualified with a BA Hons degree and post graduate diploma in Landscape Architecture. In 2009 he founded Ecospaces an ecological landscaping practice which aims to improve social cohesion and reduce climate change through landscaping. In 2016 he founded Buckinghamshire Landscape Gardeners which designs and builds gardens across Buckinghamshire and the South East. This blog aims to provide easy problem solving information to its audience and encourage others to take up the joy of landscaping and gardening.