
This article contains affiliate links
Granite sets are an extremely aesthetic and durable building material. Made up of crystallised, igneous rocks, granite setts have incredible compressive strength and weather resistance.
Their speckled appearance is dotted with shades of black, pinks and greys. These, fine, visual, textures have led them to become a favoured and common sight in external construction. The most traditional use for granite sets was surfacing the streets or towns. This was before the widespread adoption of tarmac. In my early career we would regularly uncover hundreds of metres of granite setts covered over with tarmac. Due to their timeless charm and indestructibility there is a high demand for reclaimed granite setts. However, there are also many suppliers who now also stock new granite setts. Here, I will answer common granite sett questions as well as how to lay granite setts correctly. What is the difference between cobbles and granite setts?There is some debate on if there is actually any difference between cobbles or setts at all. The word cobble typically refers to large circular stones found around mountainous coasts. As a general rule setts are square and cobbles are rounded. Old streets laid with granite setts are often referred to as ‘cobbled streets’ This is because the individual granite sets have formed into more circular, dome, shapes over time. 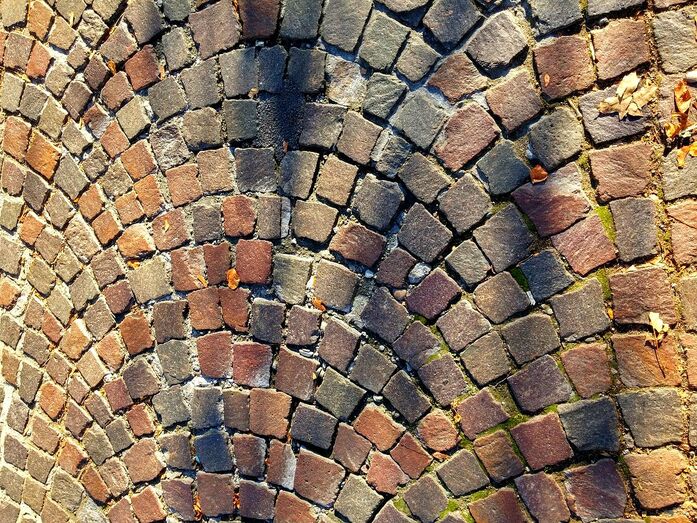
The continuous action of vehicles, foot fall, horses and carriages have smoothed down the setts angular edges and wearing surface.
If you wish to replicate a 'cobble effect' you will need to use reclaimed granite setts from a road. However, it is also fair to say that new setts will also create a cobble effect surface. The difference is new sets with have a more rough texture and angular surface. Can you lay setts on sand?
Granite setts are a robust building material and need to be laid on a strong mortar mix. Sand on its own will not be strong enough to hold granite sets in position. How many granite setts in a square metre?
If you are using the most common type of granite sett (100mm x 100mm square) you will need about 85 setts per square meter.
Are granite setts slippery?
Some reclaimed sets from roads with heavy traffic have smooth and rounded surfaces. These do have the potential to be slightly slippery if re-laid. However, these can be laid with an alternative side facing upwards. Alternatively, you can purchase new granite sets with a more textured and angular surface. 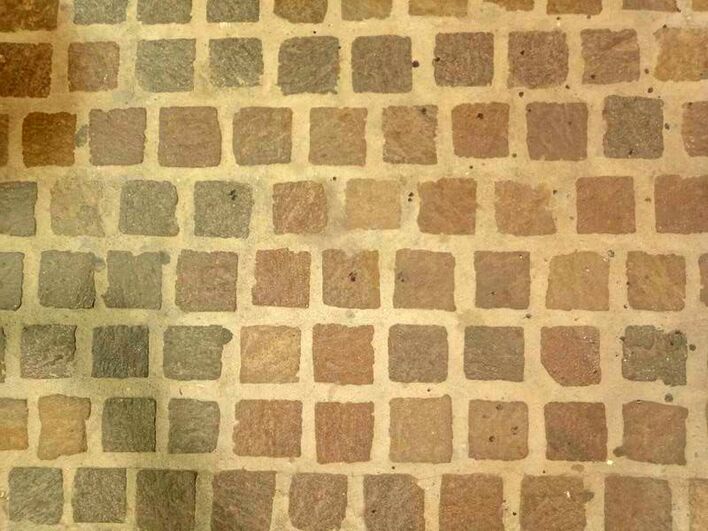
What is the best mortar mix to lay granite setts?
The best mortar mix to lay granite setts is one which uses course or sharp sand. These have fine enough particles to make the mortar workable to bed the units into position. At the same time the particles are coarse enough that heavy setts do not sink and displace. The best mortar mix for setts is 1 part cement and 4 parts sharp sand. Plasticiser should be added for extra workability and the mix should not be too wet. Sett laying mortar should be just wet enough to create a suction seal around the unit. However, the mix should be stiff enough to hold the sett level and firmly in position. For the easiest laying experience create a consistent and level sub-base beneath your setts. You should aim for a mortar thickness of around 15-25mm under your setts. 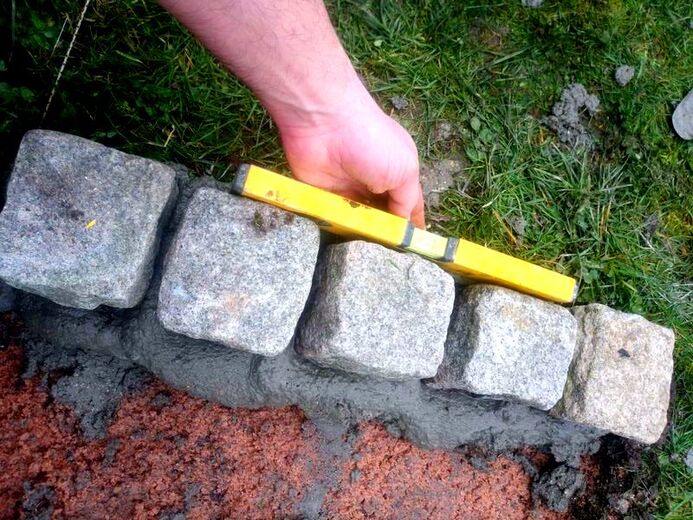
How much does it cost to lay granite setts?
To lay an extensive surface area with granite setts is a labour intensive and expensive method of surfacing. This is because granite setts themselves are much more expensive per metre than other paving materials. Add to this each unit has to be individually bedded down, levelled and grouted. I have worked out you could expect to pay around £450.00 per square metre for granite sett surfacing. 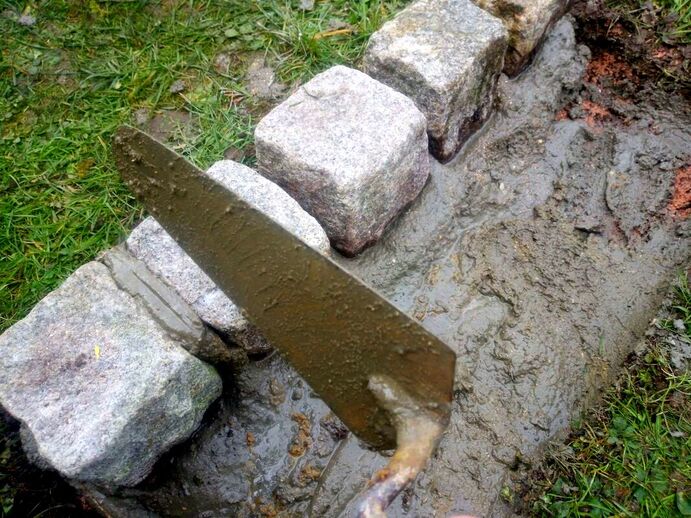
This would include excavation, disposal of spoil, installing a sub-base, laying the setts and grouting the setts.
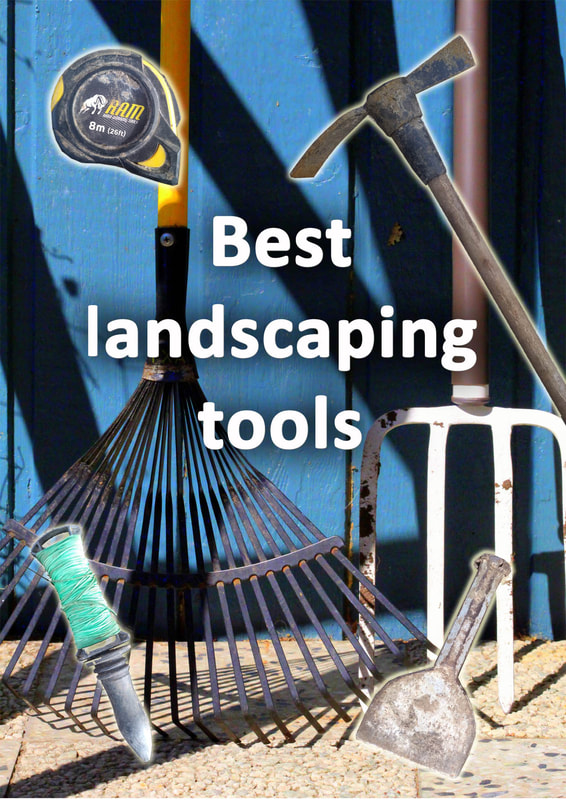
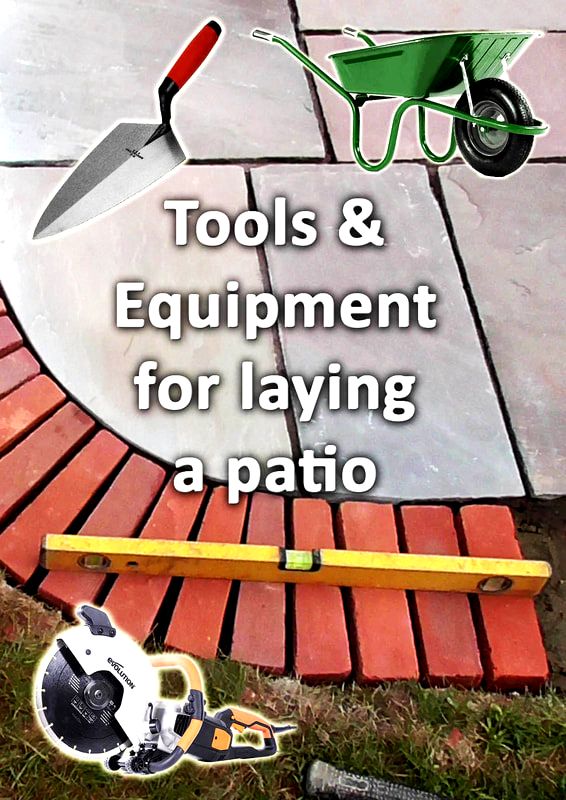
For laying single granite sett edgings expect to pay about £55.00 per linear metre. Again this would include all excavation, preparation, laying and grouting. How to lay granite setts step by stepBelow I have included a step by step guide on how to lay granite setts with pictures. Before starting your project you may wish to visit our article on the best tools for paving here.
Step 1
Work out the finished level of your new granite setts. The best way to do this is with a tight string line to realise a consistent gradient. This level can then be pegged out so you know much you need to excavate. 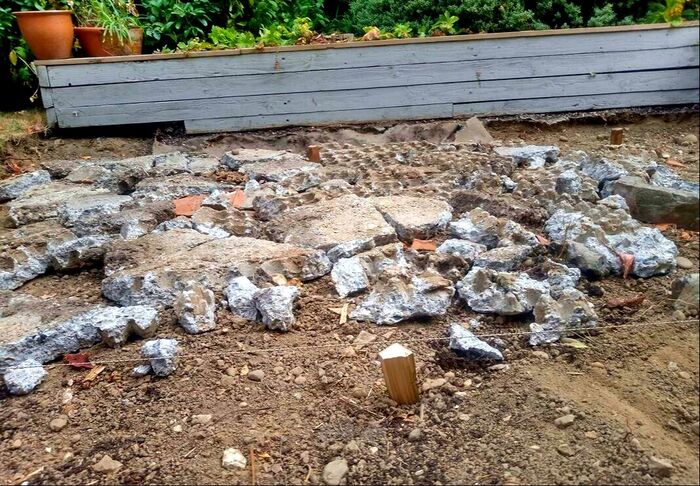
Step 2
Excavate out the area where you wish to lay your setts to a depth of 180mm. Make sure the excavation is consistent and square with no loose soil present. The best way to get rid of excavated soil is in a skip. Why not read our article on how to fill a skip with soil here. 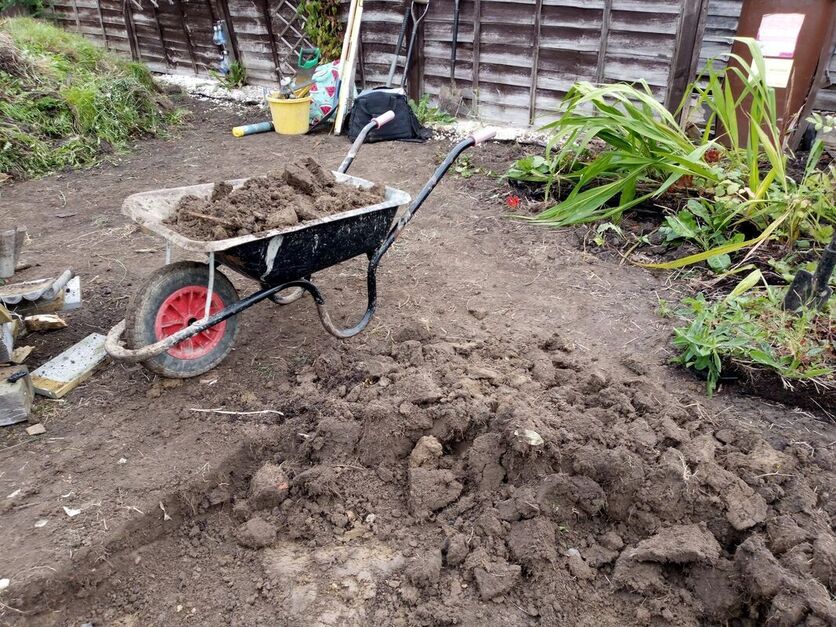
Step 3
Supply and spread an 100mm layer of mot type 1 to the base of the excavation and compact well. 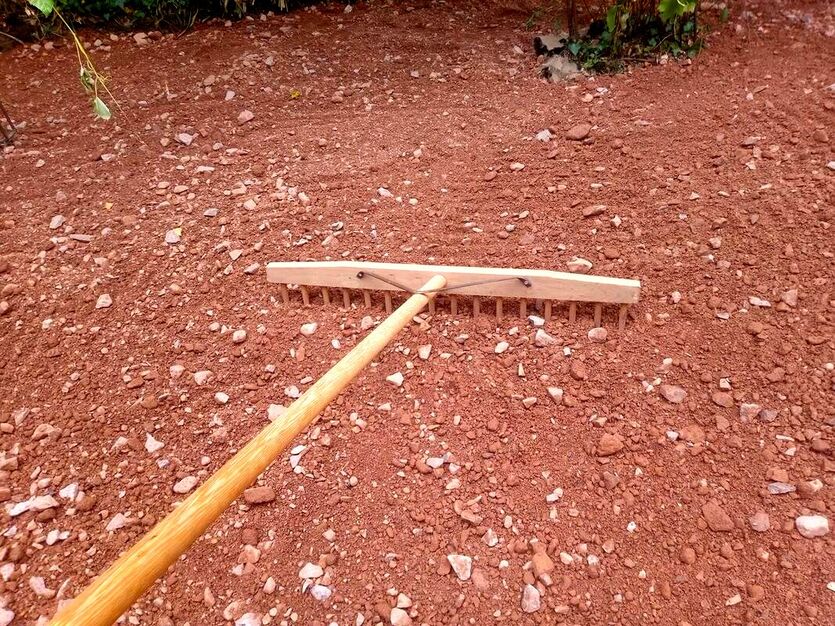
Step 4.
Mix up 1 part cement to 4 parts sharp sand in a cement mixer with some water and plasticiser. Mix well until the mortar reaches a stiff bricklaying mix. 
Step 5.
Set up a string line so you can lay your first row of granite sets perfectly straight and level. 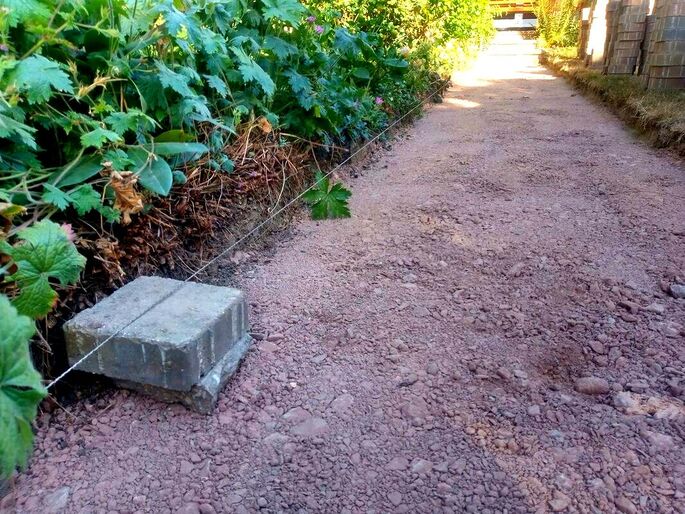
Step 6.
One at a time bed down your granite sets on to the mortar taking care to keep them flush and level. 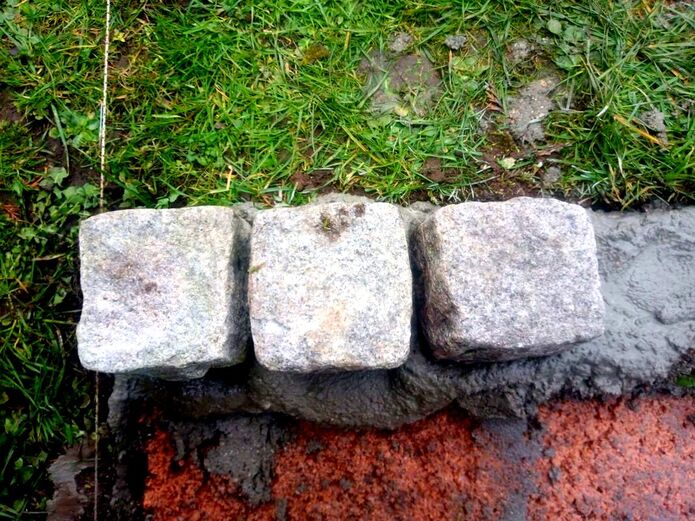
Step 7.
As you lay check your level and alignment with a spirit level. 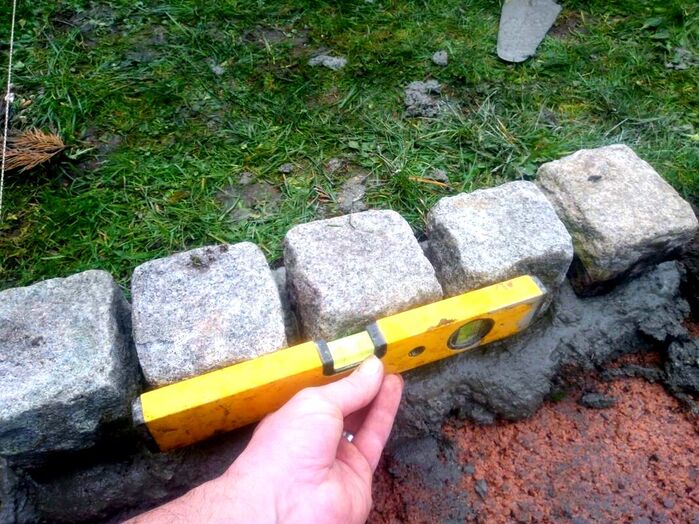
Step 7.
Haunch any exterior or edging setts with a triangular fillet of mortar to lock them into position. 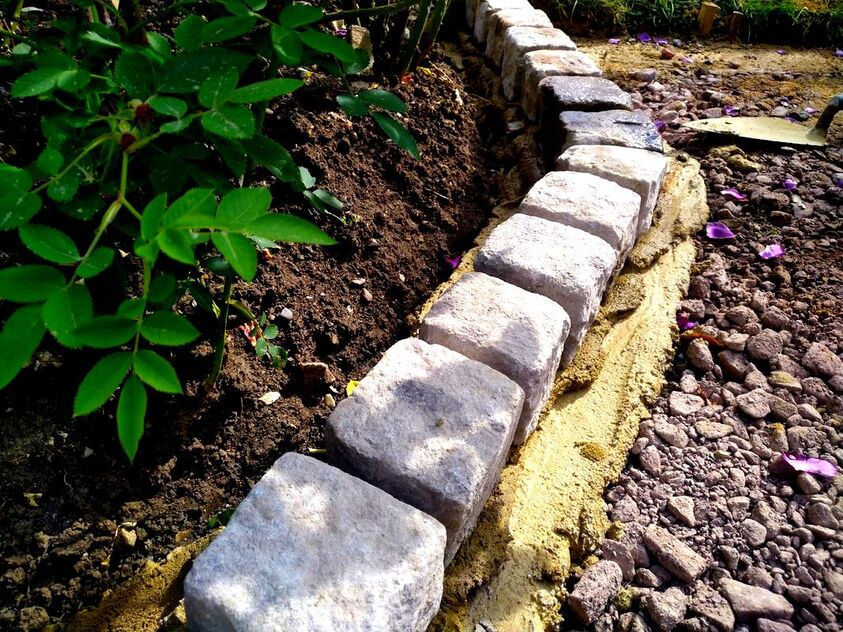
Step 8.
Mix up a 1 part cement 3 part plastering sand mortar mix dry until it is well mixed. Slowly add a little water until it is damp but not wet. You should be able to just form a ball with the mix inside your hand. The grouting mortar should be just damp enough to work a good finish but not wet enough to smear. 
Step 9.
Grout your granite setts by packing in mortar tightly between the units. Then, using a jointing iron or hose pipe, work the joints to a smooth and consistent finish. When the grout has been jointed gently brush off excess grout with a very soft brush. The best brush for this is an old and dry paint brush. 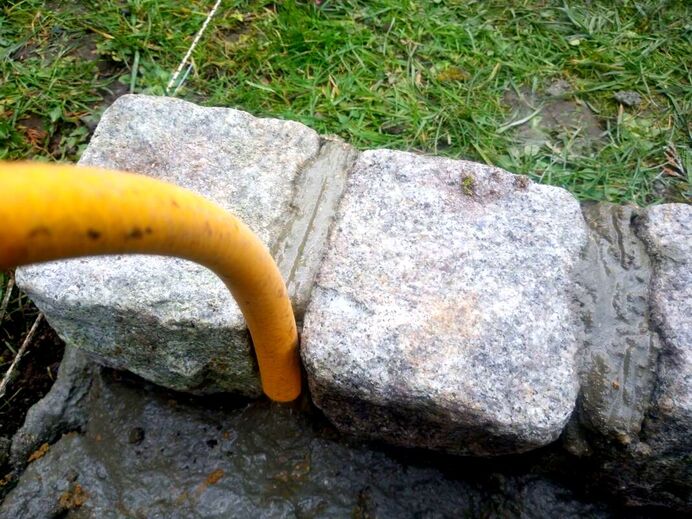

You have now completed laying your granite setts! If you require landscaping services requiring laying granite setts do not hesitate to contact us.
Below we have included some other landscaping articles you may find useful.
'As an Amazon associate I earn from qualifying purchases'
0 Comments

This article contains affiliate links
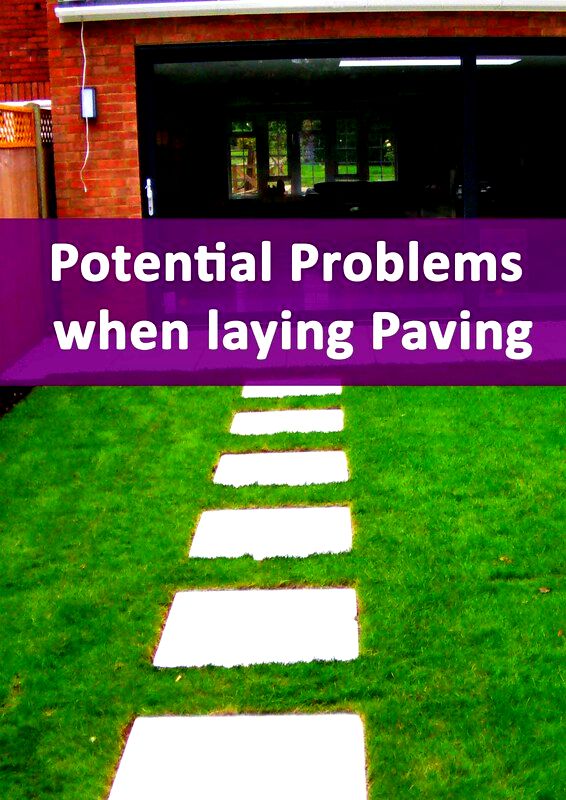
Stepping stones can be a great way to create a defined journey through a garden space. This is especially so if your garden soil and lawn is subject to seasonally boggy conditions.
Most of the time garden lawns are the most prominent candidate for new stepping stones. These can help to alleviate compaction and reduce grass turning into mud. Stepping stones can also have a primary design function within a gardens aesthetic. They can visually integrate different surfaces as well as creating striking juxtapositions and contrast. This can be seen below in one of our landscaping projects where porcelain pavers where laid within a lawn. Here I will answer common stepping stone questions as well as how to lay stepping stones within correctly. Can you put stepping stones straight on to grass?
In theory you can simply just place stepping stones straight on top of grass. However, this really is far from an ideal solution! Eventually your paving will shift and slide upon the soft topsoil surface. This will lead to inconsistent spaces and varying levels. Over time, your stepping stones will start to rock and sink into the soft soil below. Eventually grass will start to grow over the top of the slabs making them completely submerged. 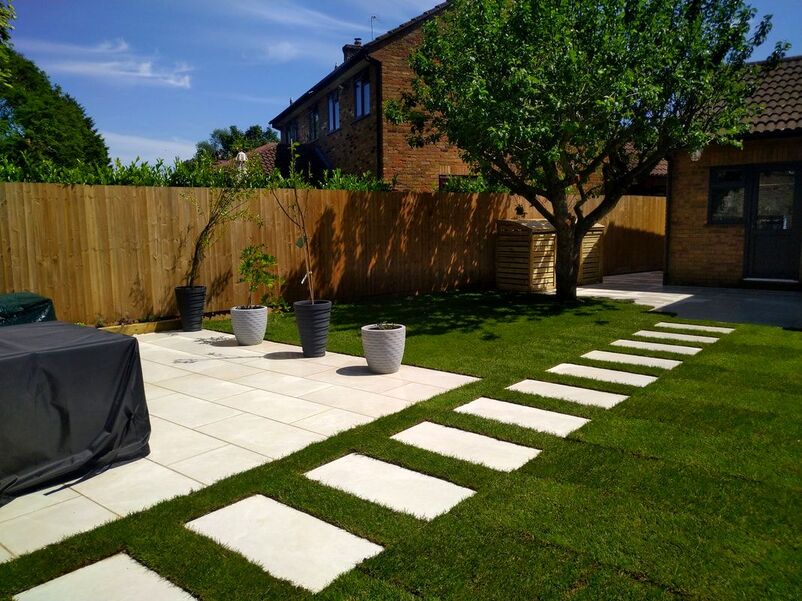
What do you put under stepping stones?
Really the best thing to put under stepping stones is the same sub-base you would put under a patio. This means at least 80mm of compactable hardcore such as Mot type1 and 30mm of mortar. Such a base may seem like over engineering for stepping stones however this will prevent eventual movement. This is even more crucial if your stepping stones are a garden design feature like the example above. The human eye is incredibly sensitive when it comes to perspectives and alignments. Stepping stones moving over time will stick out like a sore thumb and ruin your effect. 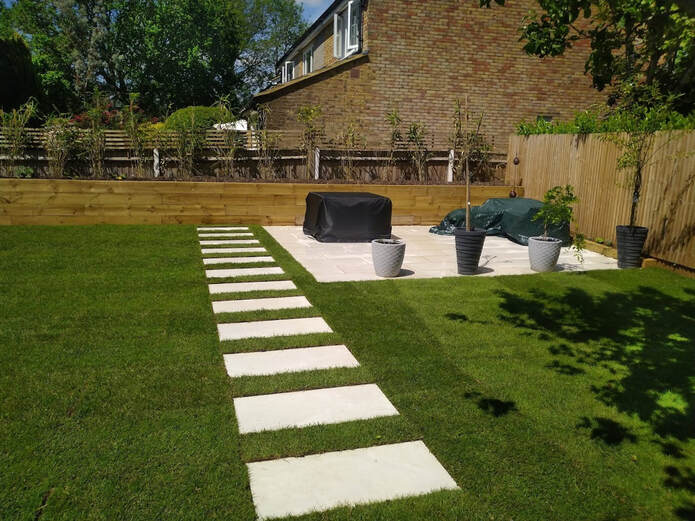
Do you need mortar with cement to lay stepping stones?
In an ideal world you will lay stepping stones onto a consistent bed of cement, based, mortar. This will provide a solid base which will be firmly bonded to the paver. Such a base will prevent any movement or change in level over time. Laying stepping stones upon compacted sand is better than soil but will still eventually subside and displace. 
What is the best distance between stepping stones?
There is no one optimal distance for between individual stepping stones. This is because there are two main variables; differences in peoples stride length and the varying widths of paving slabs. It is more common for the distance between stepping stones to be less than the width of paving. The best way to work out the best stepping stone distance is to set out your paving. Experiment walking up and down the stepping stones until you discover a distance which works for you. The average human stride is around 700mm. This means you want the centres of your stepping stones to be around this distance. Expecting to perfectly step seamlessly between stepping stones on every journey is however, a little unrealistic. 
How to lay stepping stones step by step
Step 1.
Set up a tight string line along the path you want the stepping stones to travel. Make sure you realise the perfect, consistent level for your stepping stones. Set up the string line so it bridges destination levels seamlessly. For example, from the base of a summer house to a patio at the rear of the home. 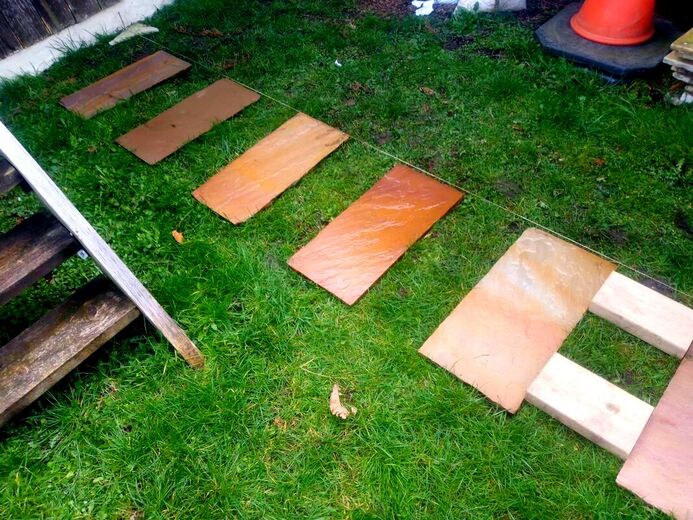
Step 2.
Using your paving slabs, set out your stepping stone frequency so it is comfortable to walk upon. 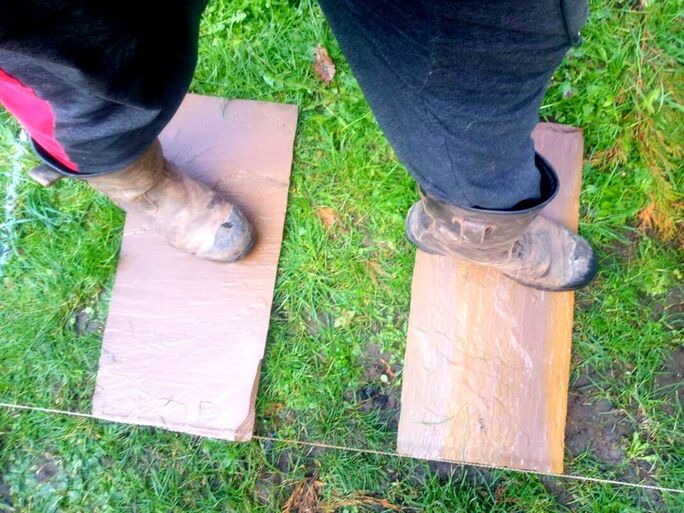
Step 3.
Tweek the distances to accommodate a good fit at each end of the stepping stone run. 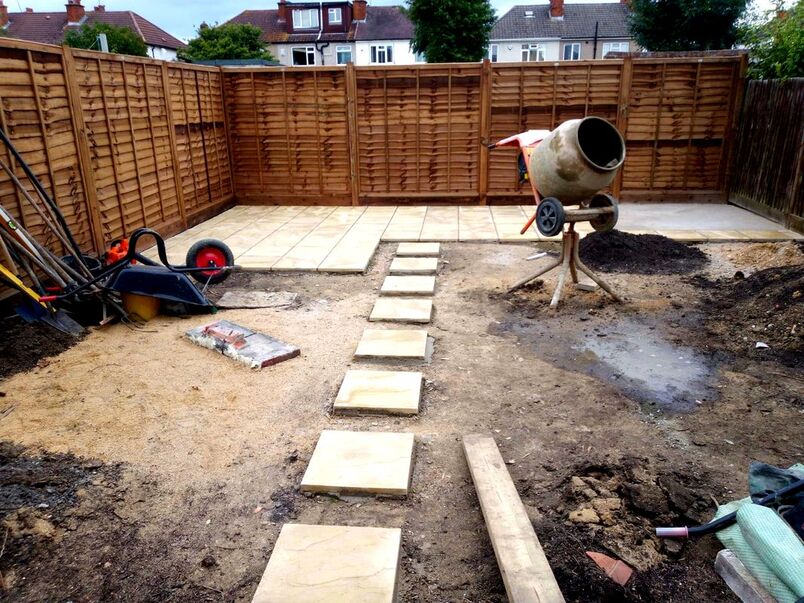
Step 4.
Cut a piece of wood to the exact measurement you require between each paving slab. 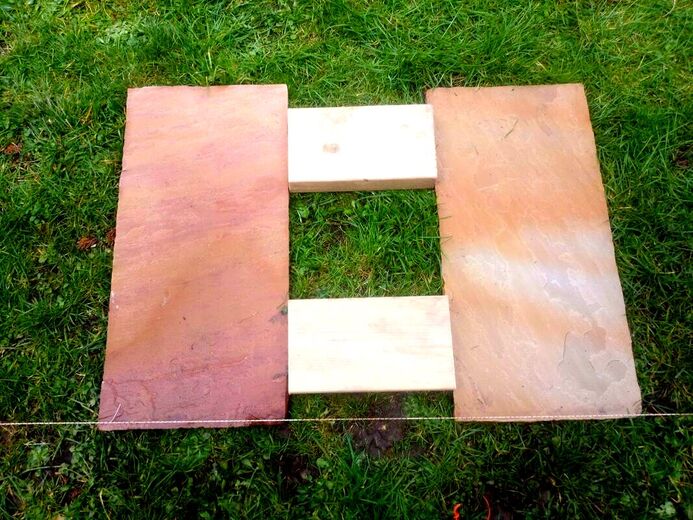
Step 5.
Using a line spray mark out around each paving slab where it is to be laid. 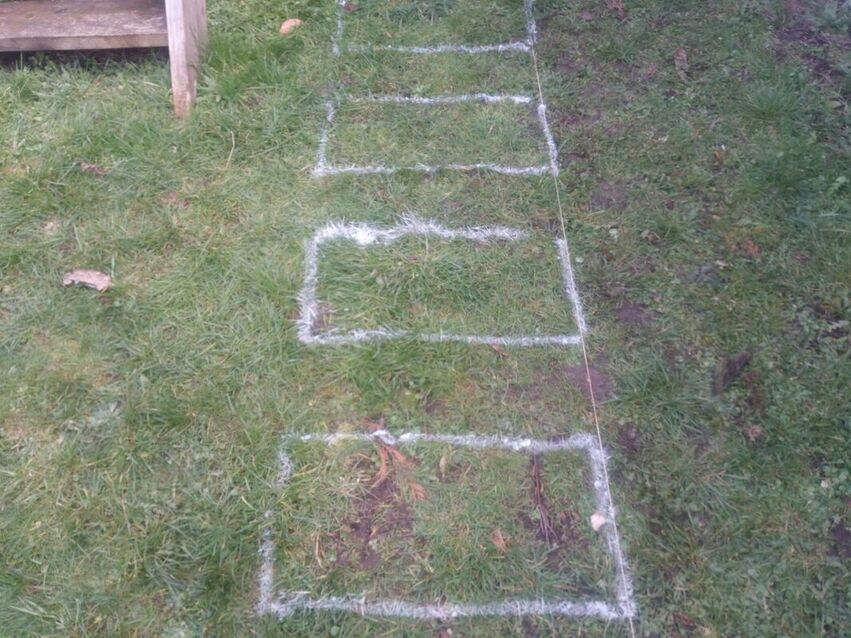
Step 6.
Excavate out each stepping stone area to a depth of 140mm from the finished height and dispose of the soil. 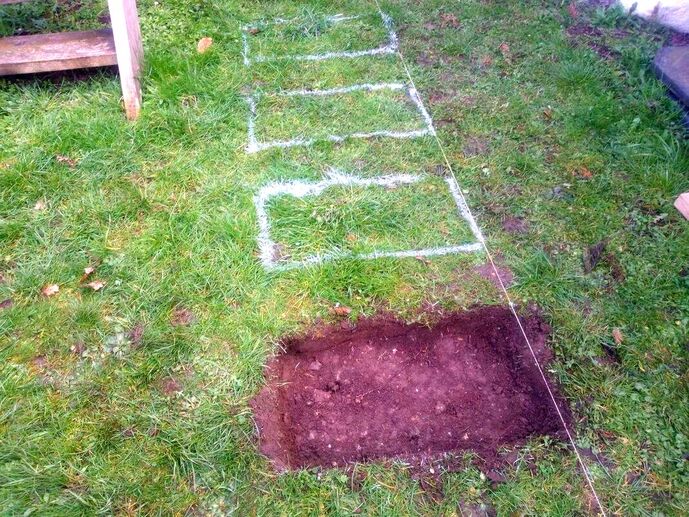
Step 7.
Fill each excavated pit with 80mm of compactable hardcore, sub-base and compact well. 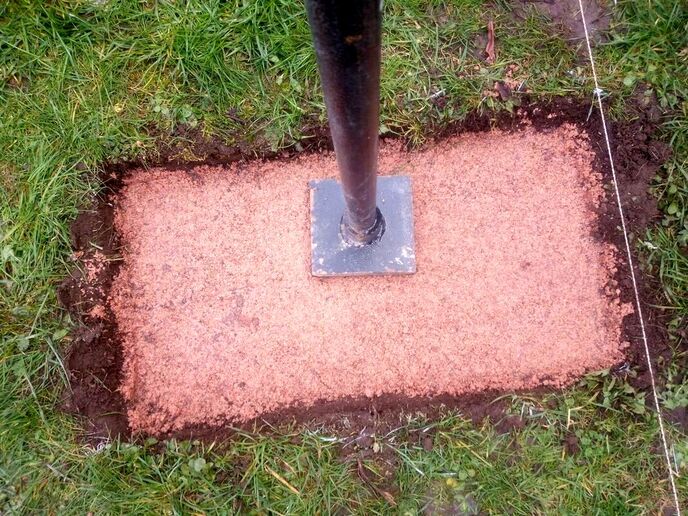
Step 8.
Mix up a 1:5 cement sharp sand mortar mix until it have the consistency of a thick brick laying mortar. 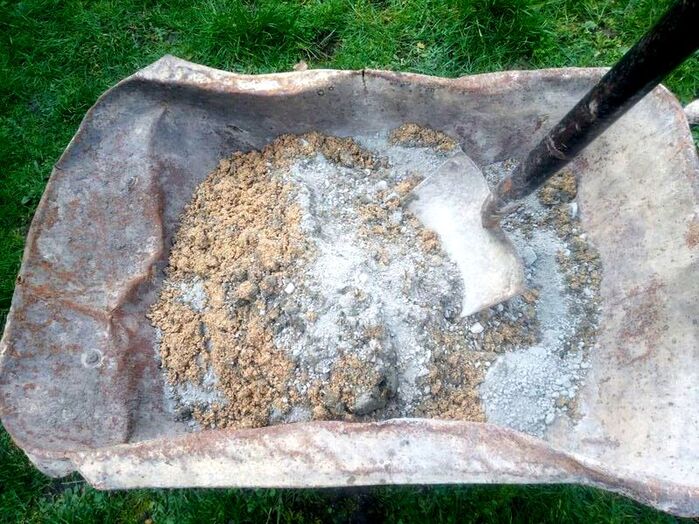
Step 9.
Make sure your string line is tight and start to gently bed down your stepping stones to the line. Use your timber distance gauge to also bed down your stepping stones at the correct frequency. 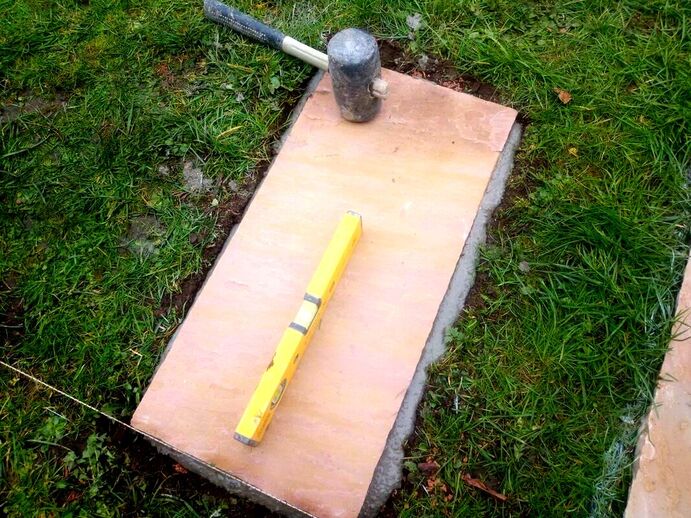
Step 10.
Take time to make sure your stepping stones are perfectly in line, square and at the correct distance. You will be very pleased with the completed result! 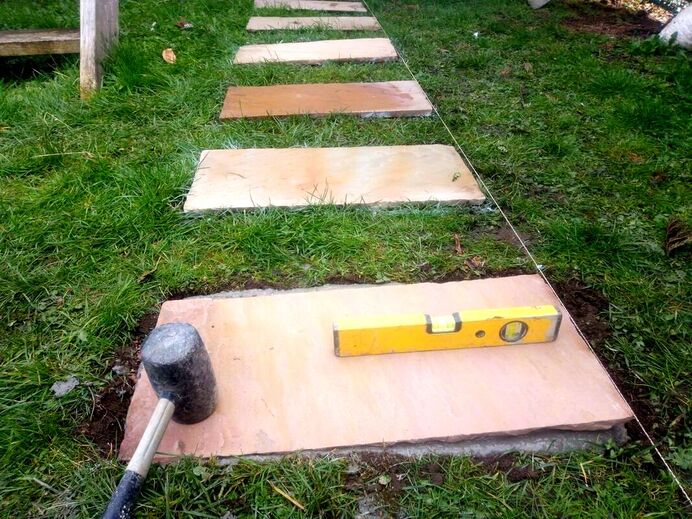
Step 11.
Cut off any excess mortar from around the edges of the paving with a pointing trowel and finish it neatly. 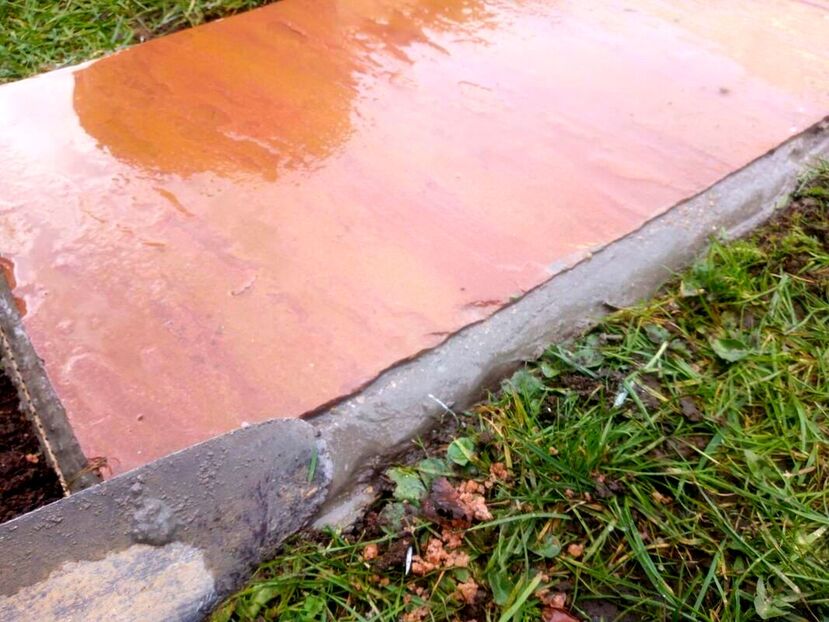
Thank you for reading our article on how to lay stepping stones on lawn. If you require stepping stone, paving or landscaping services do not hesitate to contact us.
We cover most of Buckinghamshire with our typical areas of operation including; Amersham, Aylesbury, Bovingdon, Chalfont, Chesham, Hyde Heath, Great Missenden, Princes Risborough, High Wycombe, Penn, Beaconsfield, Tring, Gerrard's Cross and Denham.
'As an Amazon Associate I earn from qualifying purchases'
This article contains affiliate links
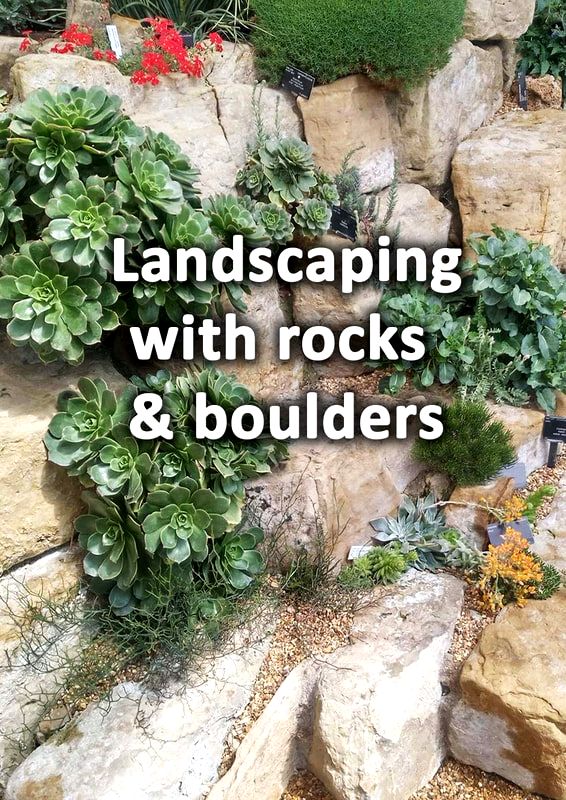
Landscaping with rocks can add some real drama and excitement into a garden. Rough, random, rocks remind us of the rugged and rustic beauty of the natural world .
Their fragmented shapes and textures create a dramatic contrast to our typical built environment. Rocks and boulders can provide much needed juxtaposition to square lawns and smooth surfaces. In Japanese gardens rocks are used to symbolise the mountains and outcrops of wild, untamed landscapes. This concept of microcosm can be implemented into any garden style. Rocks take millions of years of natural and tectonic process to form. This makes having them around our homes and gardens an exciting privilege! In this article I will list and describe eleven tips and ideas for landscaping with rocks. Create a desert gardenDesert gardens and planting schemes are designed to replicate arid regions of the world. Such places include; North Africa, The Middle East and Mexico. These landscapes can be very beautiful and provide a warm and inviting feel. As these regions are often too hot for much ground vegetation they take on interesting characteristics. Such are typically dominated by rocky outcrops, gravels and sands. 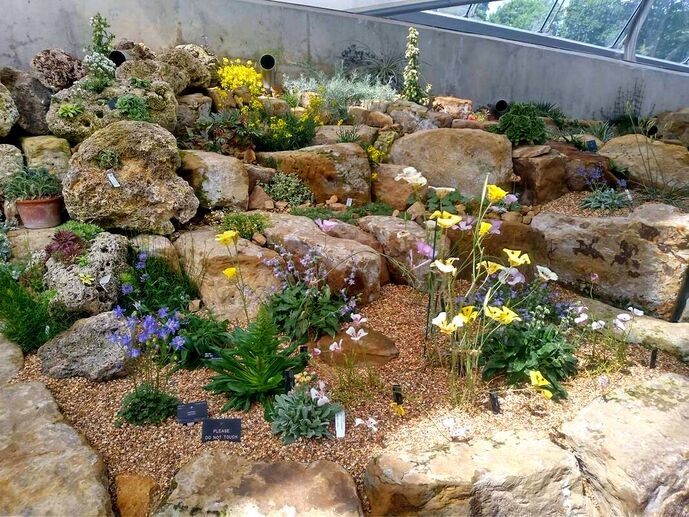
Plants are generally scattered at low densities throughout deserts but never a primary feature. This gives desert gardens the opportunity to become the perfect low maintenance garden.
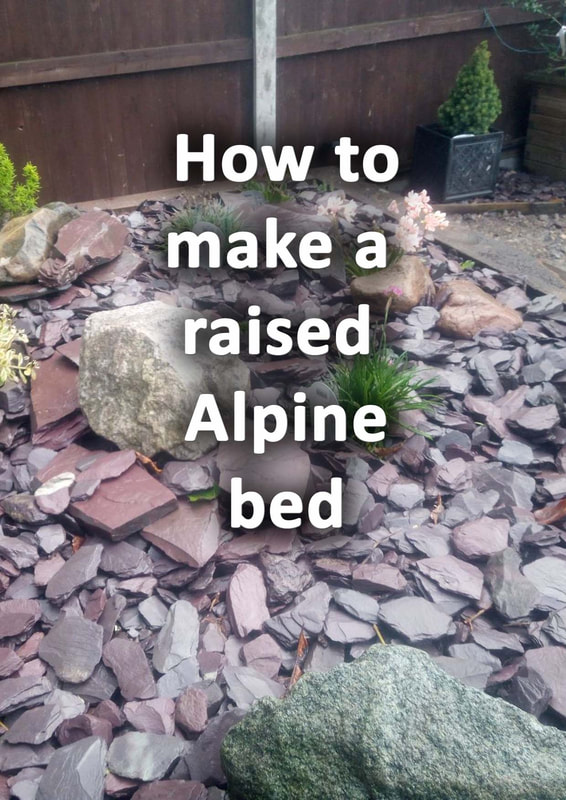
Rocks and gravels can be positioned naturally and planted with palms and succulents. Build dry stone walls
Dry stone walls can be a great way to build raised structures such as raised borders. Smaller rocks can be stacked together to form walls and steps. The rough textures of natural rocks can provide an effective contrast to smooth, horizontal, surfaces. Rocks do not even have to be laid dry, rocks can be mortared together to form walls and embankments. boulders which are more circular can be cut with a grinder and diamond blade. This way you can make use of both natural sides of your rocks. If you are on a budget you can create a dry stone wall effect with broken paving. This can be used to clad concrete blocks so you maximise natural stone as much as possible. 
Form land art
Land art installations can come in many forms and can look extremely interesting within the landscape. Such art pushes the boundaries of what is natural and unnatural within an outside space. A good example of very old land art would be ancient stone circles. The rocks themselves look naturally occurring but are arranged in an unnatural way. Such a concept is a great landscaping idea for rocks! Rocks can be positioned in peculiar formations and arrangements to provoke curiosity and imagination. 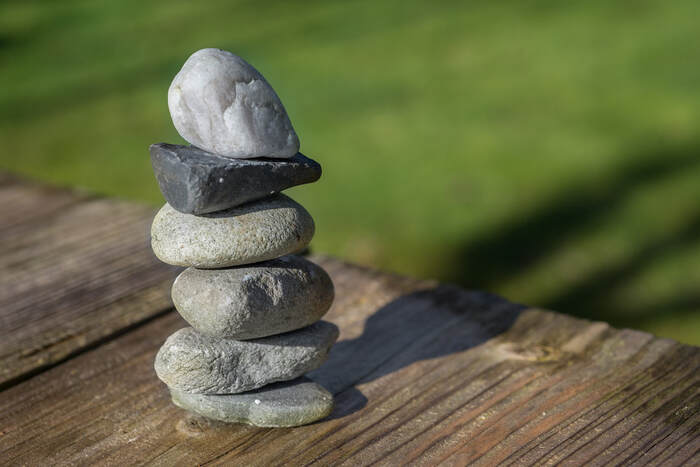
Create dry river bed schemes
In the natural landscape some of the most impressive rocks are within gorges and dry river beds. This is because seasonal flood water flushes large rocks down from high up rocky environments. Over many years water erodes and scatters rocks in organic and meandering formations. These rocky river beds open out into sedimentary gravel beds which are dry during the summer months. The dry gravel beds can be exceptionally beautiful and easy to replicate in gardens. Rocks can be arranged around varying sized gravels to form impressive features. These can then be enhanced with both planting and lighting. 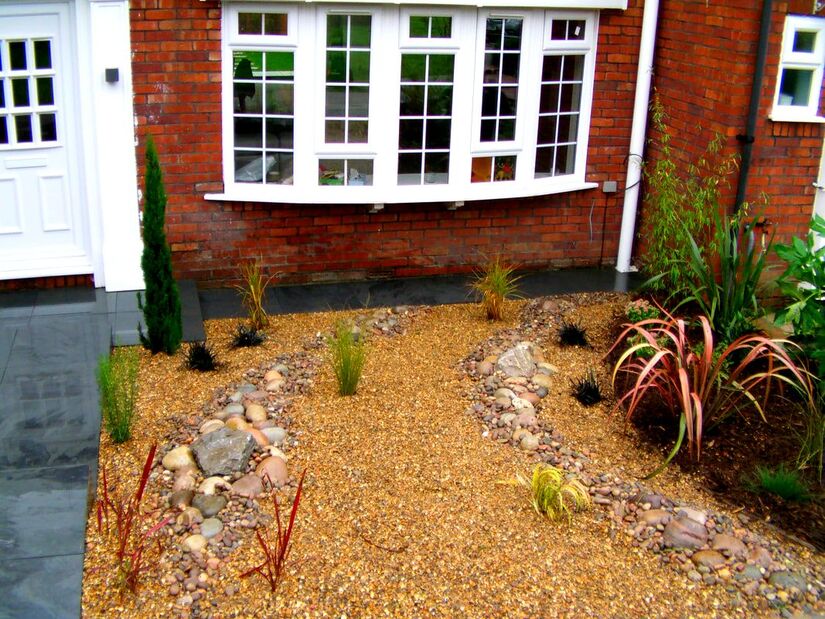
Utilise gabions
Gabions are strong, wire cages which are designed to be filled with rocks. When full with rocks, these large cubes of stone create the perfect retaining structure. These can be stacked high to retain large embankments or even raised beds. Gabions can also be topped with external grade timber to create benches and tables. The wire cages can be filled with rocks of different sizes and shapes. This can create the perfect building material providing fantastic visual textures within the landscape. Rocks are expensive so a good tip is to fill up the backs of gabions with old concrete rubble. This means you can get more for your money with the rocks you buy. 
Form rock piles
Rock piles may not seem the most functional use of rocks. However rock piles can actually be very beautiful installations within the landscape. Rock piles can create the perfect hibernacula’s and hiding places for beneficial wildlife in the garden. The multiple nooks and crannies can provide shelter for spiders, amphibians, reptiles and small mammals. All of which are vital for consuming garden pests and maintaining ecological balance. These can be even more beneficial if they are positioned around ponds or dense vegetation. 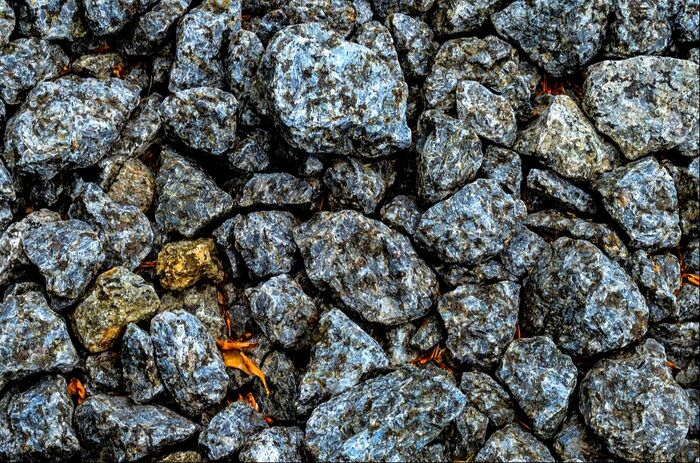
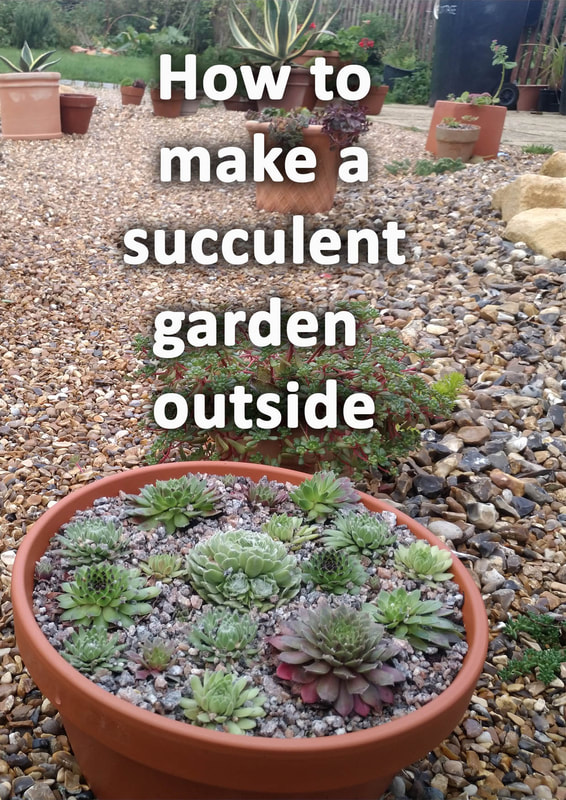
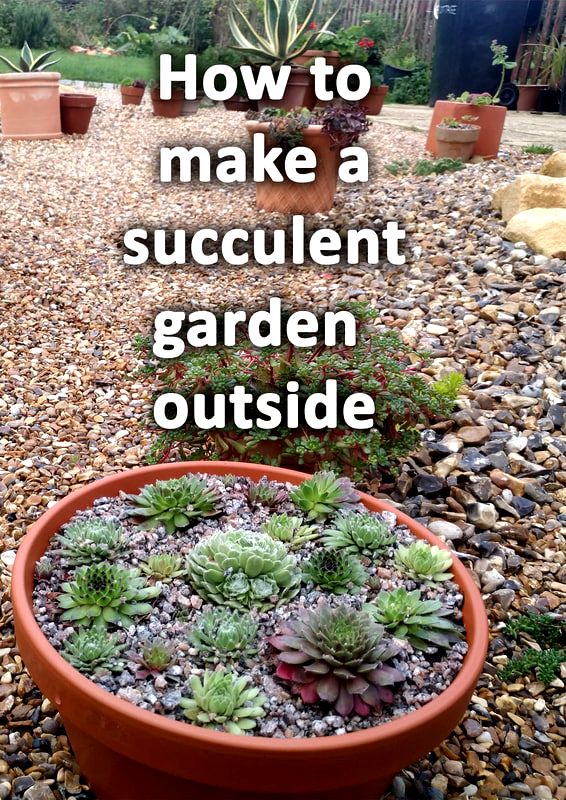
Create succulent gardens
Succulents are leathery plants which are naturally adapted to well drained and dry conditions. As many succulents look similar to cacti they have very interesting shapes and forms. This makes them quite a novelty within any planting scheme. Before planting a succulent garden you may have to check your local climate for an individual succulent’s suitability. 
Some succulents can take very cold and more moisture retentive conditions. However many cannot tolerate hardly any water and need warmer climates than others.
Nonetheless, succulents look very impressive in rock gardens and rockeries. Some succulents require such small amounts of soil they can actually be planted within the cracks of rocks. For more information on how to create succulent gardens outside view our article here. 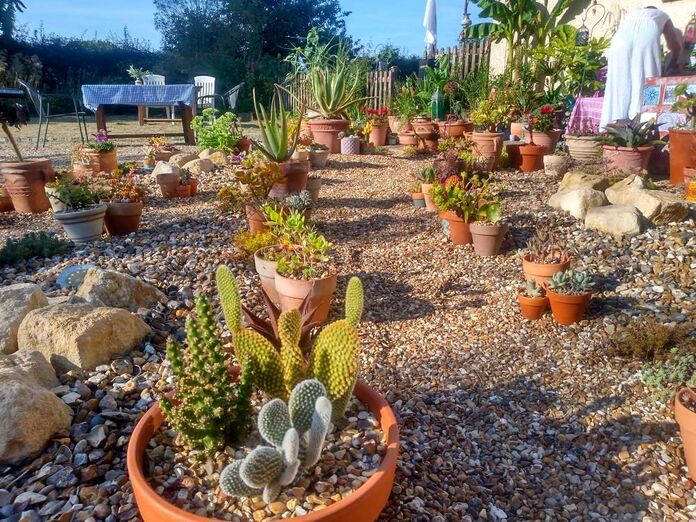
Utilise lighting
One of the best ways to fully appreciate your gardens rocks is at night. This can be achieved with spike lights or up lighters. Different colour lighting can make your rock gardens even more interesting. With modern solar panel technology you no longer even need external cabling. You can simply install solar up lighters around rock features and dry stone walls. 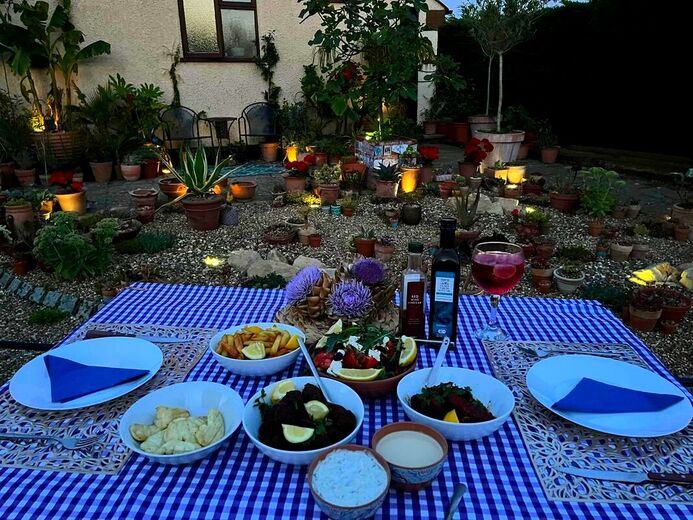
Create enclosure
The great thing about rocks and stonework in a garden is they can provide height and elevation. This can be extremely useful when creating enclosure and microclimate. When planning a rock garden try to think about how you can create enclosure with rocks. Perhaps you can build dry stone walls around a sunny patio or seating area? Or stone retaining beds with rockery features on top to create warm, sun, traps! 
Build waterfalls
There is probably nothing more ore inspiring within a garden than a natural looking waterfall. The combination of moving water upon rocks is one of the best examples of natural process at work. Combining stone and water within a landscaping scheme is always a recipe for success! Large rockery mounds can be built up with concrete and rocks. A deep plunge pond can be excavated at the base to capture and re-pump circulating water. You will have to design your waterfall with care so it does not loose water and empty too much over time. 
Explore textures
The great thing about rocks and builders is they display a variety of interesting textures. These can depend upon what geological material your rocks originate from. For example, slates will display more straight lines and smooth edges. Rocks like granite however will have more of a rough and course texture to them. Ultimately landscaping with rocks provides the potential to celebrate and contrast different visual textures. This can be effective by juxtaposing rocks with paving, decks, lawns, gravels and planting. 
Thank you for reading our article on Ideas and tips for landscaping with rocks. Below I will link to some other articles you may also find relevant. If you require landscaping services please do not hesitate to contact us.
'As an Amazon associate I earn from qualifying purchases'

This article contains affiliate links
Desert gardens are those which replicate the natural aesthetics of dry and arid parts of the world.
These distinct regions are famous for their rocky terrain, sandy gravels and sparse vegetation. Plants adapted for such regions have evolved for low rates of transpiration and moisture loss. This results in leathery skins and much defined, architectural, forms. These characteristics make desert landscaping unique with many interesting shapes, contrasts and textures. An emphasis on rocks and gravels means desert gardens lend themselves to favour low maintenance landscaping. This has great advantages for the busy gardener who would rather admire their garden on days off. Very often, desert gardens provide memory triggers to happy times travelling or family holidays abroad. Consequently, I will describe how to make a desert garden in any climate. I will describe typical desert garden elements and some considerations of desert garden landscaping. How to create a desert landscape
In order to create an effective desert landscape you must firstly choose a well drained, sunny site. If your ground is naturally moist you may need to raise your ground level up with well drained soil. You should surface your desert garden with light coloured gravels to reflect sunlight and boost temperatures. Boulders should be positioned to represent natural rock formations; these are most effective in varying sizes. The plants you plant within your garden will depend on where you live. 
If you live within a Mediterranean climate you will have much more planting choice. However if you live in a temperate climate you may need to be more creative.
There are many succulents which can survive cold temperatures. Furthermore there are many plants which have exotic forms but are actually from cold regions. Some of these can be found in our article 50 exotic looking plants which can live in a cold climate here. Enhance microclimates
Not all deserts in nature are hot, some exist in colder regions of the world. However, most seeking to create a desert garden are seeking to replicate a warmer desert. Consequently, it is important for your desert garden to feel as warm as possible! This is why selecting the right site for your desert garden is extremely important. You will want to sit back and enjoy your masterpiece during hot, summer, days! Therefore, the best location for a desert garden is against a south facing wall. 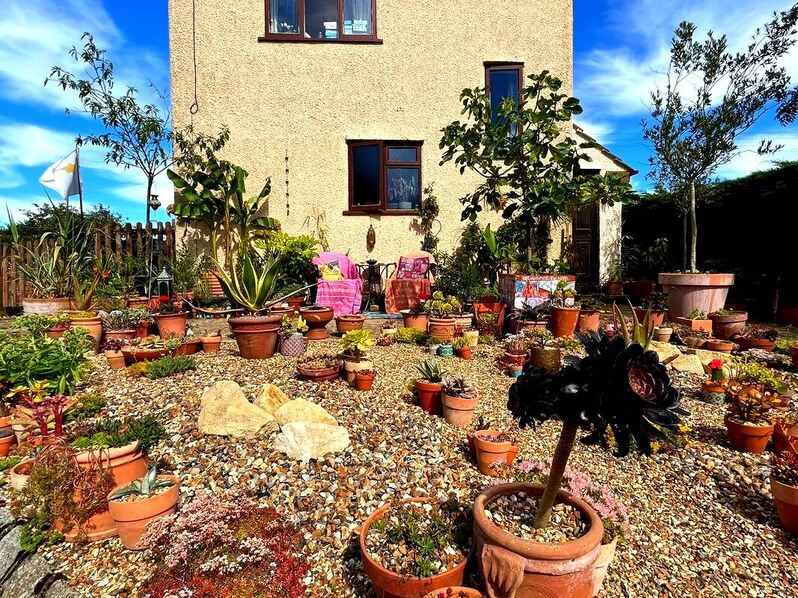
An ideal scenario would be a desert garden which surrounds a south facing patio. Such an arrangement will reflect and capture the sun’s heat energy.
This will create a warm, convection, current of forming the perfect micro-climate. Creating microclimates in this way can bring some real authenticity to desert garden design. You will be able to extend your season and grow more exotic plants with such micro-climates. Provide shelter
If you have to create your desert garden in a more exposed location it is advised to add shelter. This is particularly the case if you live in a colder climate. Even though deserts around the world can be very exposed and windswept desert gardens are best sheltered. This is because you want your garden to be comfortable for both plants and people. You will wish to maximise the effects of microclimate as much as possible. To provide more shelter you can build high structures around your garden. These can be walls, raised beds, screens and fences. On a larger scale you can also grade landform to provide some shelter to your desert garden. 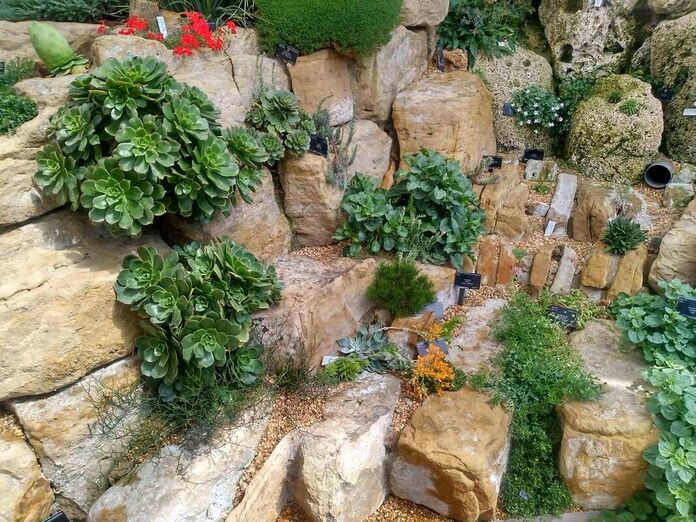
Soil
Desert garden soil will need to be well drained and not retain too much moisture. As in natural, desert, environments moisture levels should be kept to a minimum. This will reduce surface evaporation which could reduce the gardens climatic temperature. Well drained soil will also make your desert garden more favourable to desert and arid loving plants. The soil PH of deserts also tends to be more alkaline than acid. Make sure you mix in plenty of free draining materials such as grit to your topsoil. 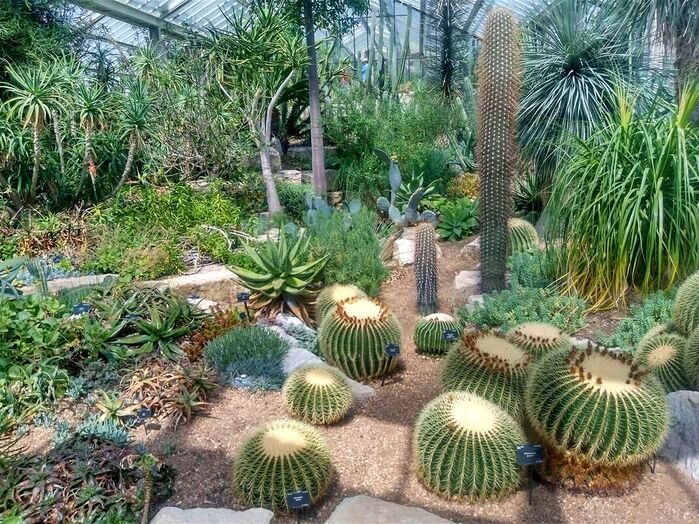
Installing drainage
If your existing garden has naturally wet soil you may wish to consider installing drainage. This will normally involve excavating free draining, drainage channels and a soak-away. You may also require a free draining soil layer installed just under the surface. For more information on how to drain your garden visit our comprehensive article here. If you are interested in our drainage surfaces pleasecontact us here. 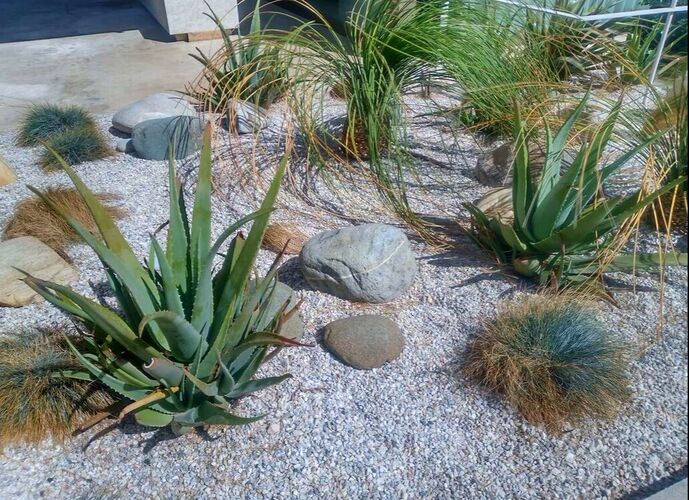
Gravels
As most deserts around the world have sandy, gravelly, soils it makes sense to surface desert gardens with gravels. The best gravels for desert gardens are those graded at 10mm or lower with light and natural tones. The gravel should be non-calcareous and impervious to water penetration. This will prevent algae blooms and gravel breaking down over time. Spreading a 40mm depth of gravel over a weed membrane will ensure a low maintenance and weed free surface. During sunny days gravels will heat up in sunlight contributing to a warmer microclimate. 
Rocks
Rocks can really add some authenticity and drama to a desert garden design. It is often a good idea to source rocks that have light and warm colours. This helps to exacerbate a feeling of warmth and heat. Try to also source rocks which do not vary too much in tone from your gravel. This will make the garden look more natural and believable. Rocks and boulders in varying sizes will also add to the authenticity of the desert landscaping. 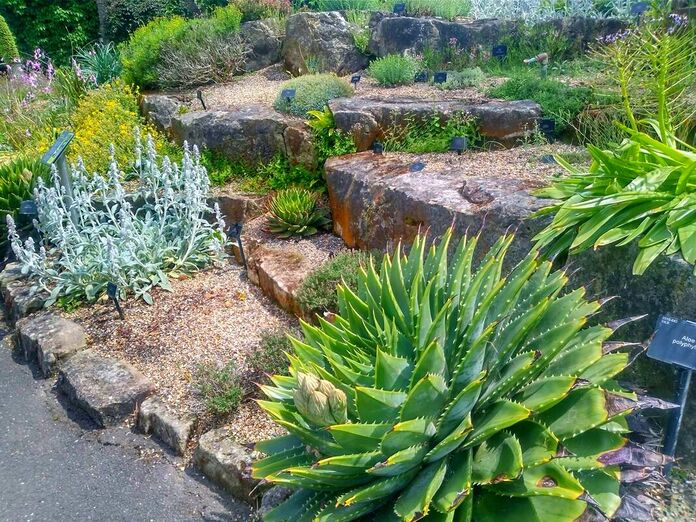
Dry stone walls
Dry stone walls can be a great way to further enhance a desert garden design. The stonework can add to the gardens rustic feel and provide extra rocky surfaces to the design. Dry stone walls are the perfect way to add more enclosure and boost microclimate. This is because the stonework reflects the suns light and heats up in the sun. Stone walls can also provide well drained raised beds, perfect for desert garden plants. Rock walls also provide the opportunity to plant succulents and air plants within the vertical structure. 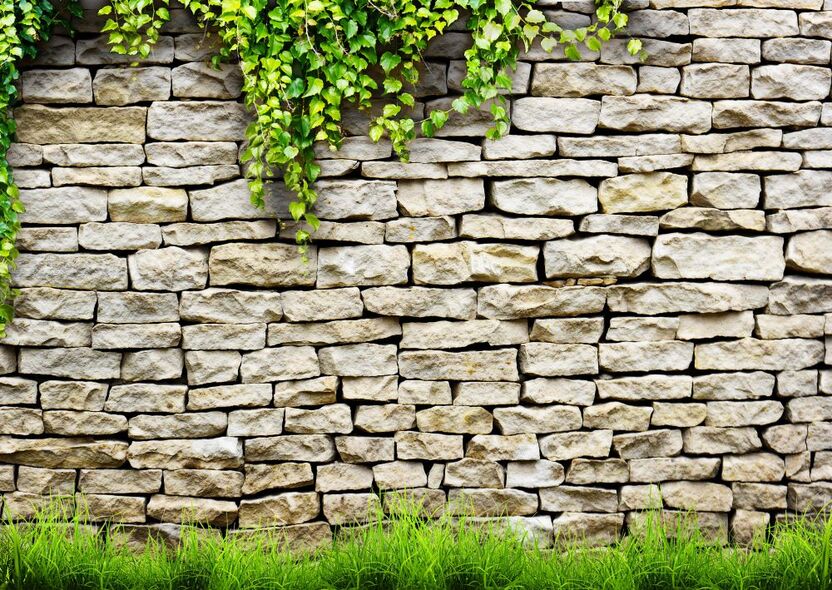
Extend seating areas
Desert gardens are a great way to extend seating areas such as patios. This is because they can actually help boost a patios microclimate and aesthetics. A great way to combine patios and desert gardens is to allow the two spaces to merge. Paving can slowly deconstruct around the edges slowly mixing into gravel areas. The desert landscaping can make the perfect visual display for your guests during warm summer parties. 
Planting a desert garden
The most important part of planting a desert garden is selecting the right plant species. This will completely depend upon the regional climate of where you live. Make sure you buy your plants from a reputable supplier who provide details of their climatic tolerances. Some of the best plants for desert gardens are cacti and succulents. Generally succulents are much more tolerant of cold conditions than cacti but it depends. If you live within a northern, temperate, region you may want to consider overwintering them. This is where you take potted plants inside during the winter. When the summer arrives the pot can be lowered into a planting hole and backfilled with gravel. 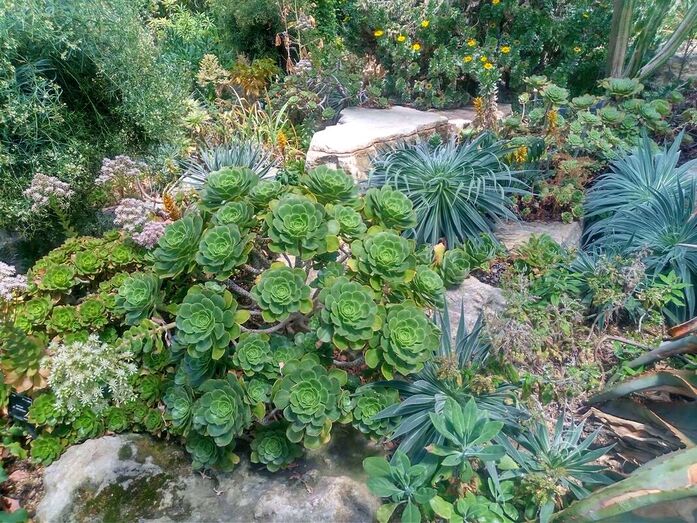
Lighting
If you really want to get the best out of your desert garden it is a great idea to install lighting. Up-lighters and spike lights can really help to illuminate rocks and architectural plants at night. Different coloured lighting can add even more interest to features such as dry stone walls and palm trees. An effective strategy is to combine both patio and desert garden lighting schemes. This allows your guests to appreciate your desert landscaping when the night draws in. If you do not have the budget to install outdoor cabling fear not! Many solar lights are now good enough to provide a reasonable night time display for desert gardens. 
Thank you for reading our article on how to create a desert garden. If you require desert garden services including design, planting or landscaping do not hesitate to contact us!
'As an Amazon associate I earn from qualifying purchases'

This article contains affiliate links
Grass lawns have become a must have element of many gardens throughout the ages.
Lawns provide a soft, green and regenerative surface which looks good and is also multifunctional. For some the perfect lawn is a labour of love and something to be admired. However, to some, lawns are an unnecessary chore that they would rather not participate in. The average lawn will need cutting around 12 times per year. This can simply become an annoyance to an already busy household. Consequently, in this article, I will identify and describe 10 garden ideas for no grass. 1. Decking
Decking is an extremely varied and versatile surface which comes in a variety of materials and colours. With decking it is easy to form varying level changes and incorporate other elements such as raised beds. Existing features can be built around while raised beds, water features and focal points can be easily be integrated. Decking provides the unique opportunity to clad over existing gardens with minimal groundwork. Unlike with other surfacing large quantities of topsoil and sub-base aggregates do not have to be shifted. This can literally save thousands and also save time being very rapid to install. However, be warned, decking does not last forever! Even non timber, composite decks will eventually need replacing. Timber frames can degrade while a build up of dirt and algae can turn decks slippery and hazardous. 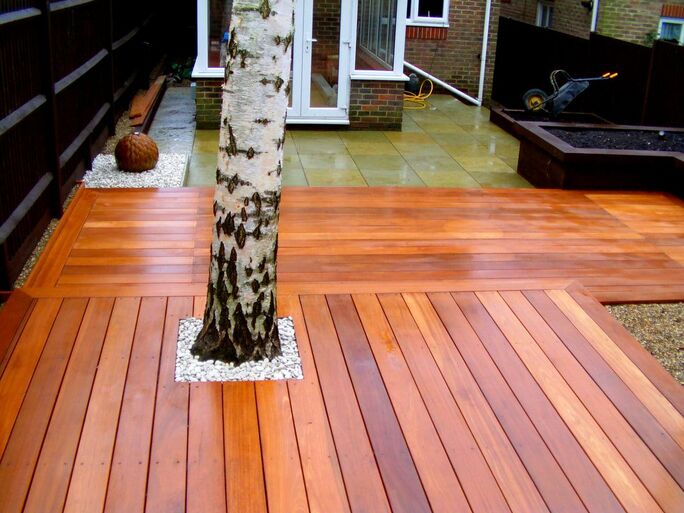
2. Free binding gravel
Free binding gravel is a finely graded aggregate gravel containing sand, crushed rock and clay. When compacted, it forms a smooth and pleasantly textured surface which binds hard. Self binding gravel has a pleasant aesthetic and comes in a variety of natural colours. This gravel inherits the colour of the bedrock where it is quarried making it perfect for contextual projects. A good example of this would be Cotswold self binding gravel which has the classic, Cotswold cream, tones. This has made binding gravel effective for sustainable projects seeking a reduced carbon footprint. The gravel can be perfect for seating areas, paths and even around planting beds. 
3. Artificial lawnArtificial lawn is a surface which seems to grow in popularity every year. The allure of a perfect lawn which never needs cutting can simply be too good to be true. It has to be said the turf has improved dramatically over the past couple of decades. Artificial lawns have become ever more robust, UV resistant and life like! This has provided the opportunity for millions to have the perfect, low maintenance, lawn. However, installing artificial lawn does have its drawbacks! Firstly, installing a robust project will require installing a reasonable depth of compactable sub-base. This involves removing the top level of soil from your garden which is expensive. Furthermore, artificial lawns can inhibit your gardens ability to naturally drain water. This can lead to pooling water and drainage problems. 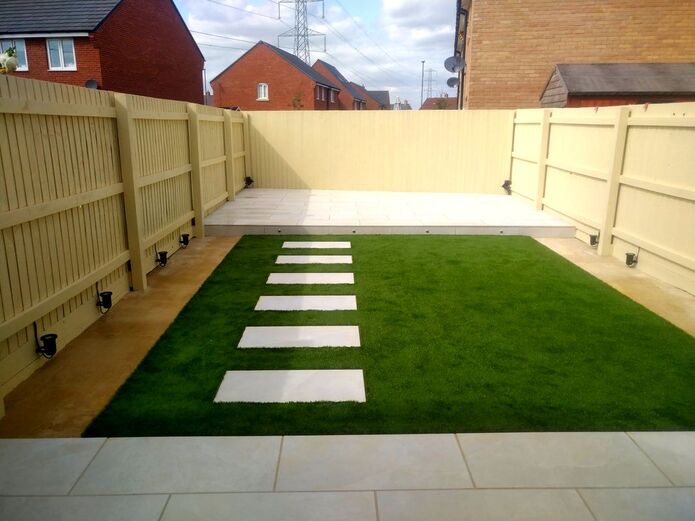
4. Allotments
Allotments are traditionally communal tracts of land set aside for the growing of fruit and vegetables. There is nothing better a single person can do for the environment than grow their own food! Not only is it good for the planet it is also good for us! Growing vegetables is positive for both our mental and physical health. Home grown vegetables are free from chemicals and also taste much better. Like in an allotment you may wish to create a series of raised beds and add good quality soil. For a lower maintenance option you may wish to grow perennial vegetables! Allotments and vegetable gardens are an exciting and eco friendly way to replace lawns. 
5. Gravels
Loose gravels can be a fast and cost effective way to replace a garden lawn. The great thing about gravels is they can neutralise the boundaries between walking areas and planting This is great for arid and desert planting schemes which incoorporate seating areas. Gravels come in a range of size grades, materials and colours providing plenty of choice. The key to replacing lawn with gravel is not scrimping on cost. Make sure you remove some topsoil and spread some sub-base to larger seating areas. Also a minimum depth of 40mm will create enough displacement to prevent weeds from establishing. Why not read our article on how to create a gravel seating area here. 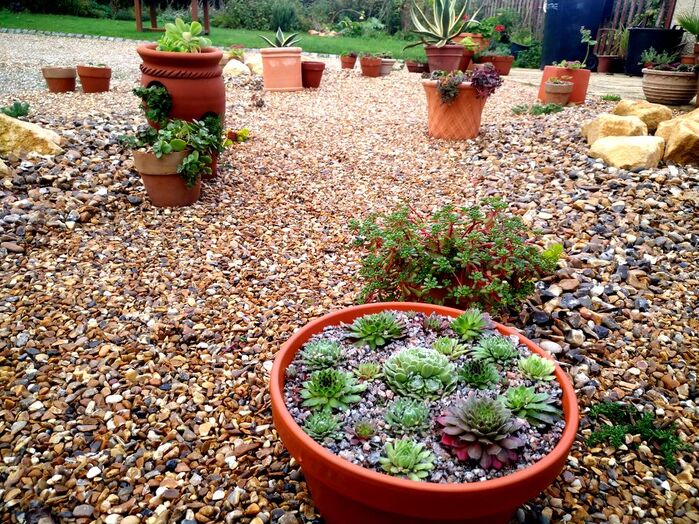
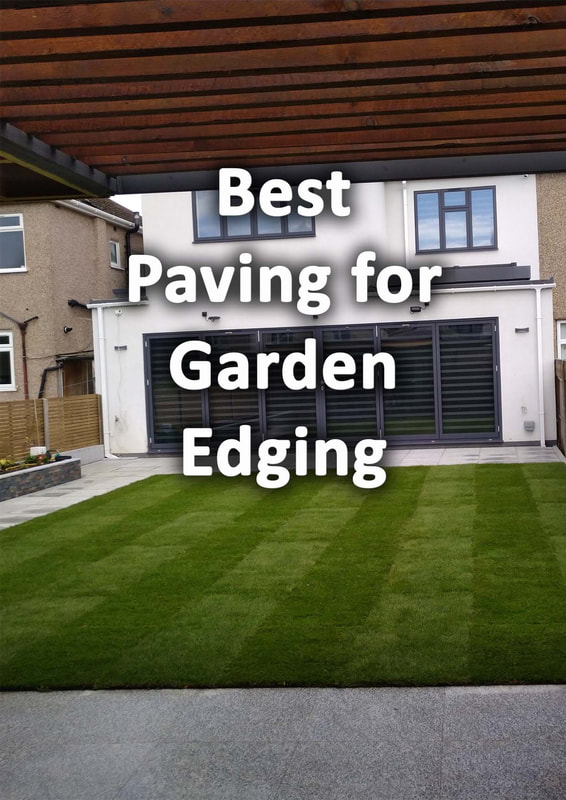
6. Paving
When it comes to the most solid way to replace a lawn, paving is probably the most efficient option. Paving comes in a wide variety of colours, textures and materials. Hard wearing, paved surfaces, if built correctly, will last a lifetime and reduce maintenance to a minimum. However, paving is also probably the most labour intensive and expensive of all your options. Paving over very large areas can look boring and lead to excess surface runoff. Slabbing over lawn areas can also reduce your gardens ability to absorb water. Therefore if you are paving over lawn, make sure you have an effective patio drainage strategy in place. 
7. Wildflower meadows
Wildflower meadows were once common across most agricultural landscapes. Historically diverse grasslands were grown and harvested to provide winter food and bedding for farm animals. Meadows evolved to become complex ecosystems for millions of species of insects, invertebrates, reptiles, amphibians, mammals and birds. However, with modern farming came agricultural feeds which removed the need for these precious habitats. Wildflower meadows if managed correctly can be extremely beautiful. Typically cut only once a year a meadow could be the perfect, ecological replacement for a lawn. 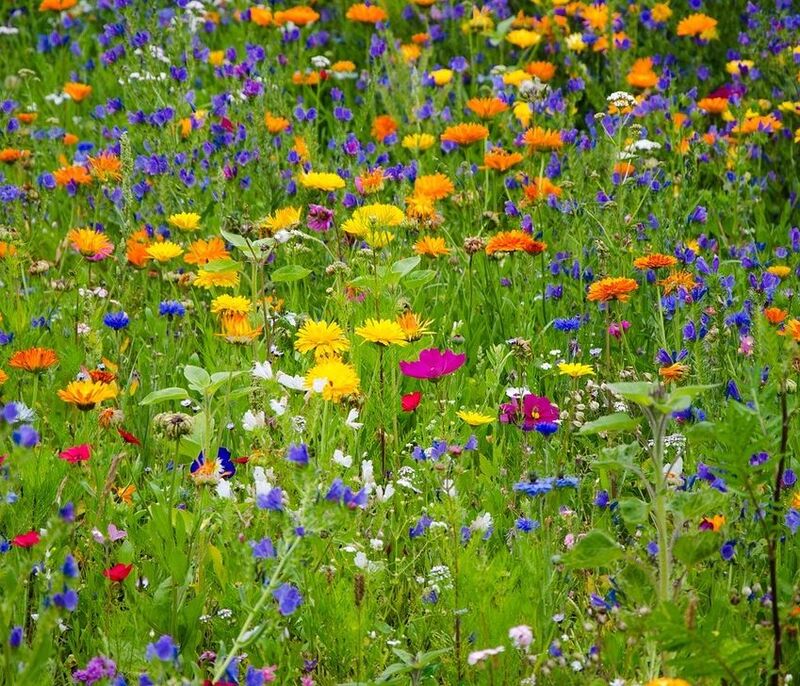
8. Food forestsFood forests may be a relatively new idea for many as they are not a mainstream idea. The concept of a food forest is establishing naturalistic forests and scrublands which yield crops. Once established, these forests will provide food year after year with little care of maintenance. Food forests are planted so they capture the suns energy at different heights. This allows for a stacking of nut and fruit crops which leads to a base level of perennial vegetables. The result is an established ecosystem that provides multiple crops throughout the season. For more information on food forests I will reference a very useful book on Amazon here. Below I will provide a video of the author explaining the concept of food forests. 
9. Mediterranean gardensMediterranean gardens are well known for their lack of lawns. This is because during the summer months Mediterranean regions are too hot and dry for conventional grass This makes creating such a garden a great idea if you wish to go lawn free. Mediterranean gardens make use of stonework, rock and loose gravels potentially making them very low maintenance. This style is particularly exciting if you have a very sunny site. Gravel surfaces reflect the sun’s ray’s raise and warm up creating a pleasant microclimate. This can extend your season and allow you to grow a greater diversity of plants. 
10. Wood chips
Wood chippings and bark mulch are a great way to create a usable garden surface. If laid at a reasonable depth bark chippings can provide a soft surface ideal for seating, planting and play. Bark chippings are really effective at creating cool woodland gardens. These shady garden zones can be the perfect garden retreat during very hot summers. Woodchips also allow excess rainwater to permeate through the ground easily. This helps to reduce flooding and boggy conditions. Woodchips slowly degrade over time by microorganisms, this helps to invigorate and improve your soil. The only drawback with wood chip is as it breaks down it will need to be topped up. 
Thank you for reading our article on 10 garden ideas for no grass. Below I have included some other articles you may find relevant.
'As an Amazon associate I earn from qualifying purchases'
This article contains affiliate links
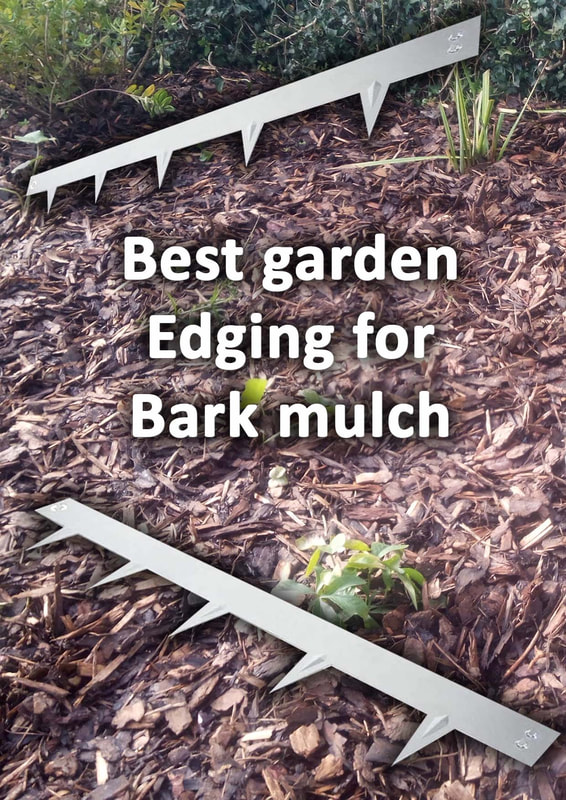
Mulching has become a very popular outdoor surface for both pedestrian areas and planting beds. Landscaping mulches provide natural surfaces which look great and improve the soils quality.
They can be used to provide soft playground surfaces, woodland gardens, pathways and borders. There are many different type of mulches, some being better suited for specific purposes. Wood chippings are more commonly utilised underfoot whilst finer mulches are best for borders. The question is often asked what is the best garden and landscaping edging for mulch? Typically, the best edging for mulch will have a broad width to prevent mulch escaping. Below I have listed the 6 best garden and landscape edgings for mulch. Brick on edge
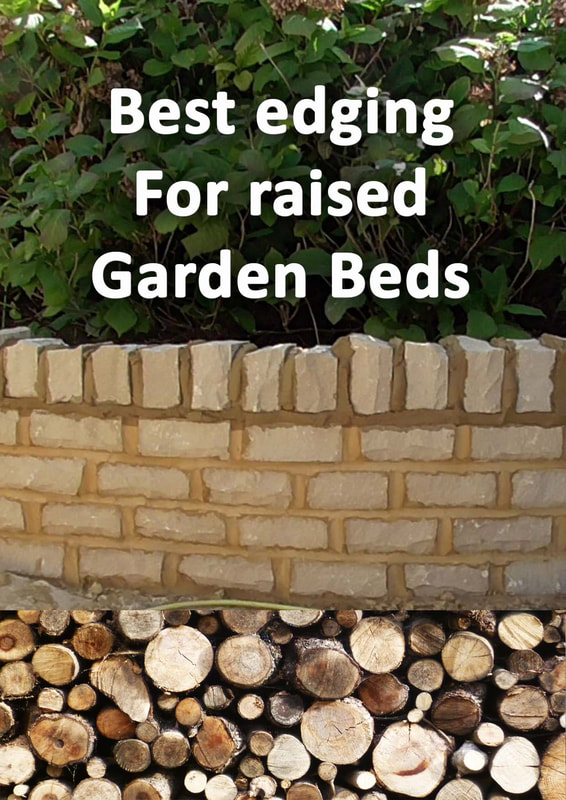
A brick on edge consists of a single course of brickwork laid widthways as an edging. These brick edgings are traditionally used to edge lawns, patios and flower borders. Brick edging laid this way makes a very effective edging for mulch as it is wide and robust. Like all brickwork these will need to be laid upon compacted hardcore or concrete. 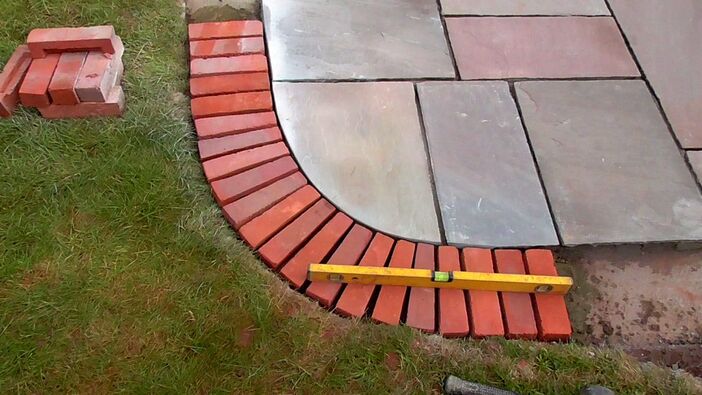
Block paving
Block paving comes in a wide variety of shapes, products, colours and styles. Typically used for surfacing driveways these thick, concrete, blocks are both versatile and robust. Block paving can visually cater for pretty much any garden style or design. From contemporary to traditional there is normally a block paving to suit. Like bricks these should be laid on a sturdy sub-base upon a strong mortar mix. Their durability and broad width makes them an effective garden edging for mulch. 
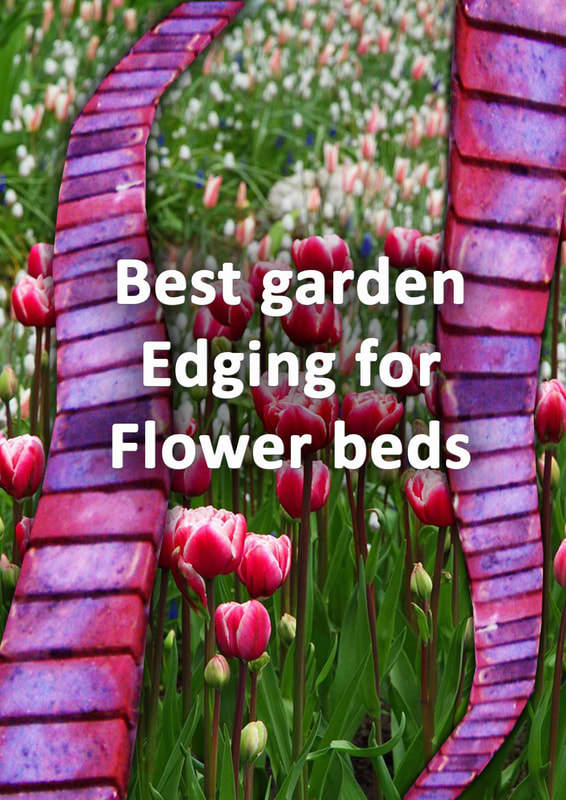
Granite sets
Granite setts are a favourite landscaping material which have been utilised for many centuries. These durable cubes of granite have pleasant aesthetics and a high compressive strength. This means they can easily endure the wear and tear of public streetscapes and commercial landscaping. These qualities also make them appropriate edgings for gardens. Setts can make an effective edging for mulch with its light tones contrasting darker, organic, materials. 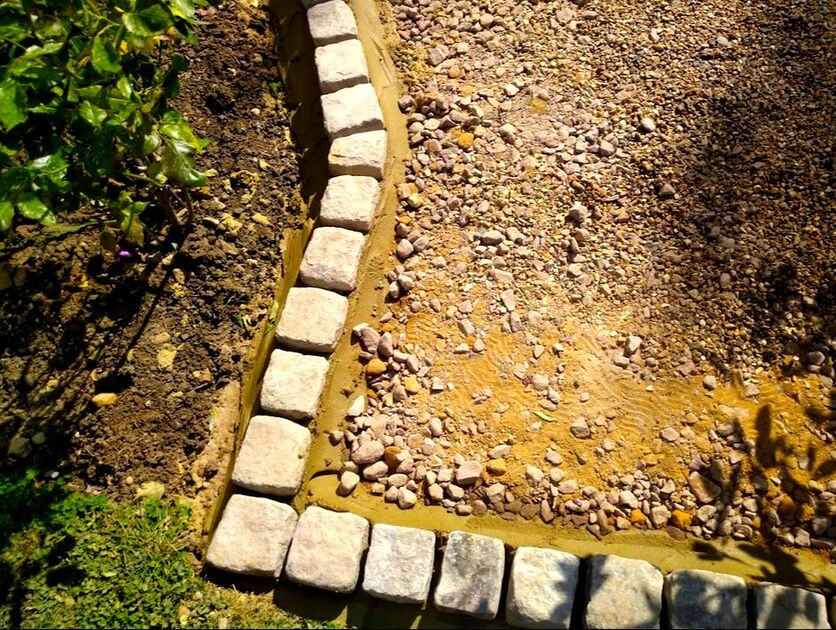
Gravel boards
If you want a thin and flexible edging for mulch then timber gravel boards could be a good choice. Generally the same colour as mulching materials gravel boards look almost invisible. This will provide a very clean line to mulched areas. To install board edging, fix boards securely to 50mm timber pegs driven deeply into the ground. 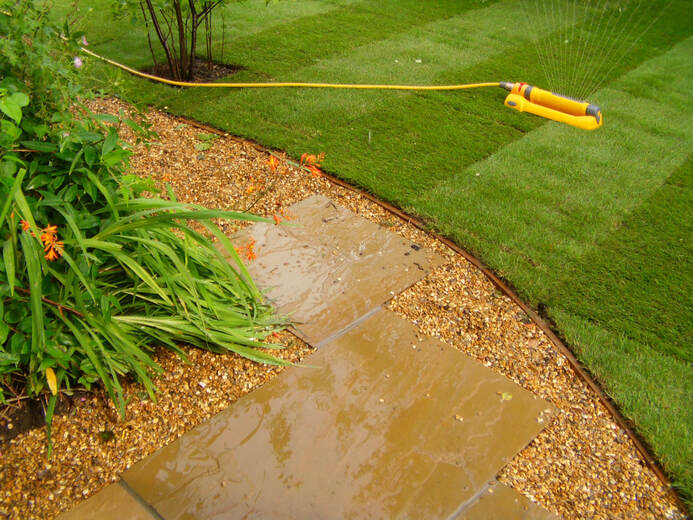
Sleepers
Timber sleepers can provide another robust edging material for retaining mulches. Like gravel boards, sleeper’s share a similar colour to most landscaping mulches. This can make them easily blend in with mulched areas such as flower beds and play areas. However, sleepers unlike gravel boards are quite bulky and inflexible. If you wish to install curved edging with sleepers you can cut them and lay them vertically. 
Flexible metal edging
Flexible metal edging is becoming a very popular way to edge gardens. This cotemporary and versatile edging is extremely durable, flexible and versatile. If you want an edging material which is thin enough to go unnoticed this could be a great choice. This metal edging is perfect for retaining areas of bark and mulch. We find the Core edge rust coloured metal edging looks extremely effective when providing edging to mulch. 
Thank you for reading our article on what is the best edging for mulch. Below I have linked to some other edging articles you may find useful.
If you need a garden edging installer in Buckinghamshire do not hesitate to contact us. We are experts in garden edging installation and serve most of Buckinghamshire. Our typical service areas include: Amersham, Aylesbury, Bovingdon, Chalfont, Chesham, Hyde Heath, Great Missenden, Princes Risborough, High Wycombe, Penn, Beaconsfield, Tring, Gerrard's Cross and Denham.
'As an Amazon associate I earn from qualifying purchases'
This article contains affiliate links
Modern and contemporary garden styles are very much in fashion today. Our love of minimalist spaces and clean finishes provide us a perception of order and cleanliness.
Such gardens have a need for bright contrasts and neutral colours. Today, the modern gardens of suburbia have a preference for whites, blacks and particularly grey colours. This has led to a growing popularity of granite, slate and porcelain surfaces. When it comes to garden edgings there is no exception! There has been a significant rise in the popularity of modern looking stainless steel and granite aggregate edgings. Here I will list and describe the best, modern, grey, garden edgings on the market. If you are planning a modern garden, see what contemporary garden edgings you prefer below. Path edging kerbs
Path edging kerbs are an extremely widespread and common building material. These edging kerbs have a long and thin profile and ideal for edging paths, lawns and flower borders. Path edgings are typically 900mm x 150mm x 50mm. This makes them a perfect separator between varying surfaces or as slightly raised kerbs. Made completely of concrete these edgings have an extremely clean and modern finish. 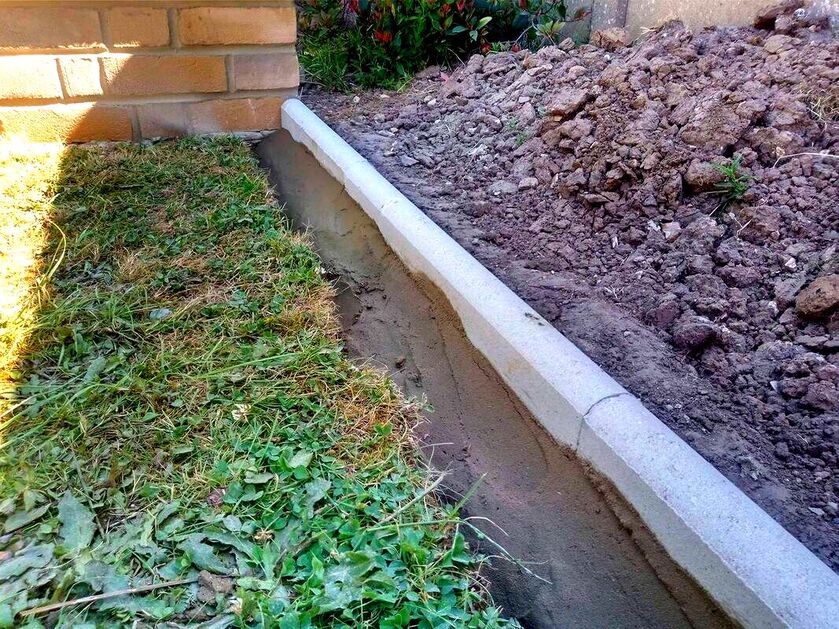
Grey composite decking
Normally used for surfacing decks, composite decking can be an effective edging material. This is especially so if you require a thin and grey garden edging. There are many different types of grey composite deck boards on the market today. It may be worth speaking with specific suppliers to see if their product is suitable. Some composite deck boards are also flexible making them perfect for curves. Generally composite decking is extremely durable, UV resistant and weatherproof.  Granite aggregate block paving
 is a fantastic contemporary and grey edging material. Specific products such as the Drivesett Argent are a great example of this block paving. These blocks can be bedded down on mortar as an edging to lawns and other landscape surfaces. The blocks can also be set on edge to create a shallow retaining edge. The Granite effect to the wearing surface creates the perfect, contemporary, visual texture. 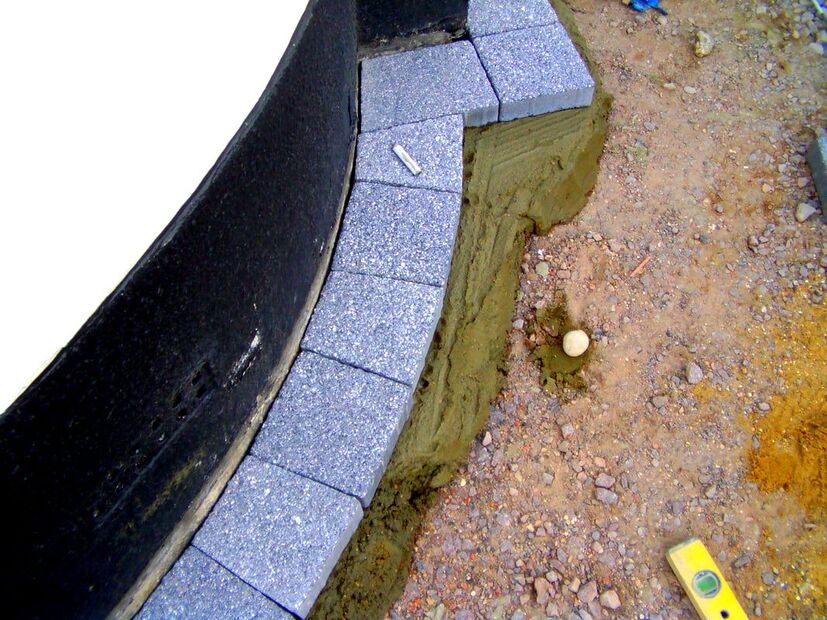
Stack cladding
Stack cladding is a random cladding system which stacks roughly textured layers of stone. The stacks of narrow rectangles form exciting shapes and textures laced with hairline shadows. Stack cladding is not characterised as garden edging but it can be used to clad other materials. Therefore, such a product can be used to clad concrete blocks or brickwork laid as edging. 
Rendered block
One of the most versatile ways of creating contemporary raised garden edging is with concrete blocks. Concrete blocks laid to any shape or form and then rendered for a smooth finish. This can then be capped with cut natural stone or other modern edgings. Rendered concrete blocks can then be painted any colour you wish including shades of grey. Remember that all block work like brickwork must be laid on a robust, concrete, foundation. 
Granite setts
Granite setts have a remarkable ability to work in any garden scheme or style. These cubes of stone have been utilised for a whole range of building projects for centuries. Even so, granite setts can still look strikingly contemporary in modern gardens. These grey edging stones are extremely effective bordering patios, pathways, lawns and flower borders. There are now a whole range of newly quarried granite sets on the market. These can range in colour from pale grey to charcoal, they also come in rough and smooth finishes. 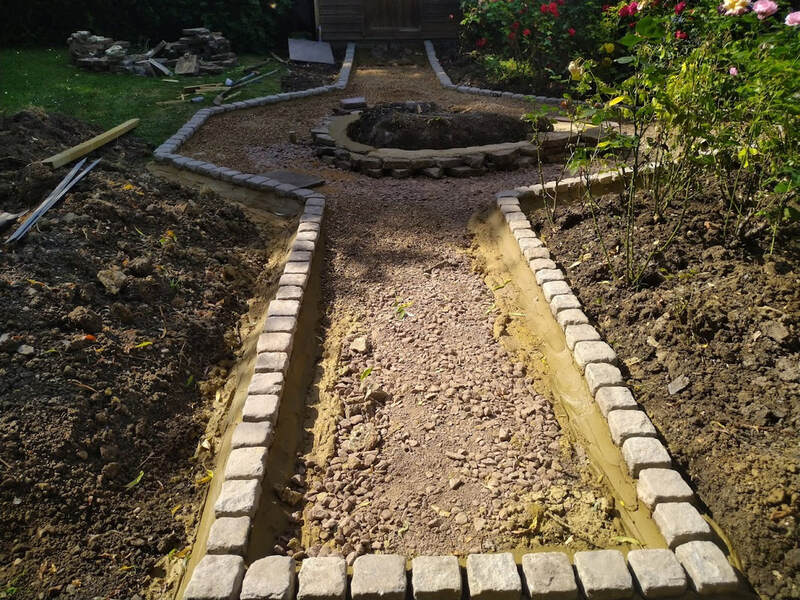
Flexible metal edging
A new and rising star in the landscape edging sector is flexible metal edging. This modern looking edging consists of a thin and flexible sheet of steel with anchor prongs. It is the perfect way to cleanly edge lawns, flower borders, pathways and aggregates. This contemporary edging is even more useful if you want to retain surfaces within a near invisible edge. For more robust applications metal edging can be secured with pegs and haunched within concrete. 
Thank you for reading our article about modern, grey, garden edging. Below we included some other articles you may find useful.
If you require help installing contemporary style garden edging pleasecontact us.
'As an Amazon associate earn from qualifying purchases'
This article contains affiliate links
Garden edging can provide outside spaces with structure, definition, mowing strips and retaining features. Edging can come in a wide variety of materials, styles and products.
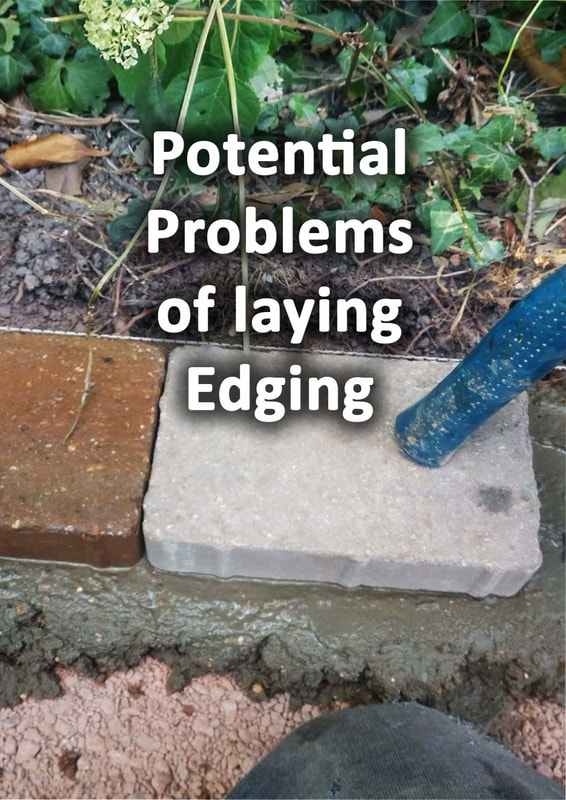
All types of garden edging require their own specific planning and preparation. One of the most common garden edging problems is incorrect installation. This could be the incorrect edging for the specific scenario or the incorrect installation being implemented. In this article I identify the potential problems when laying garden edging. I will also provide suggestions for installing the correct edging in the right place in optimum way. Poor quality garden edging
One of the biggest problems with garden edging is the availability of poor quality products on the market. Firstly, I do not think the installation of plastic into the natural landscape is at all ethical. Most of these products are extremely flimsy and not up to the rigours of external construction. Garden edging should be durable, hard wearing and made of sustainable materials. If you are planning on installing new edging, make sure it is durable enough to do the job. 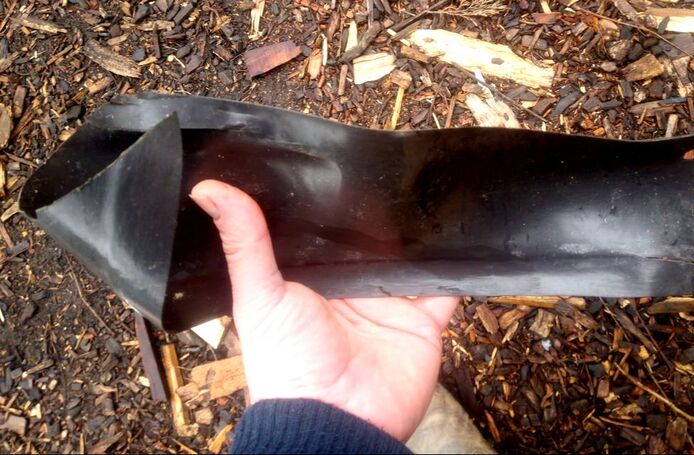
Installing weak retaining features
There are two main types of edging; flush edging and retaining edging. It is retaining edging which typically causes the most problems and failure. This is because any edging which is retaining a quantity of soil or aggregate must be strong. Not only must the edging itself be strong it must also be installed correctly. Typically, retaining edgings require the excavation of soft top-soil and the installation of a sub-base. 
Incorrectly resolving levels
Most do not give levels a second thought when installing garden edging. However, setting in your edgings to a consistent level can be the difference between success and failure. This is especially relevant if you are installing masonry edgings like concrete block or brick. The best way to reach a flush level is to set up a tight string line. Run the string from your source level to your destination level to see how the existing ground levels correlate. You can then see if your edgings or surrounding ground levels will need to be tweaked. 
Incorrect sub-base
Typical problems with masonry, edgings like kerb stones or bricks are the lack of a suitable base. Stone or concrete edgings really need a compacted hardcore sub-base to lay upon. Edging units should then be laid upon a strong mortar mix and haunched into position. Ideally however, all masonry edgings should really be laid upon an in-situ concrete foundation. This will prevent sinking and cracking during seasonal ground contractions. 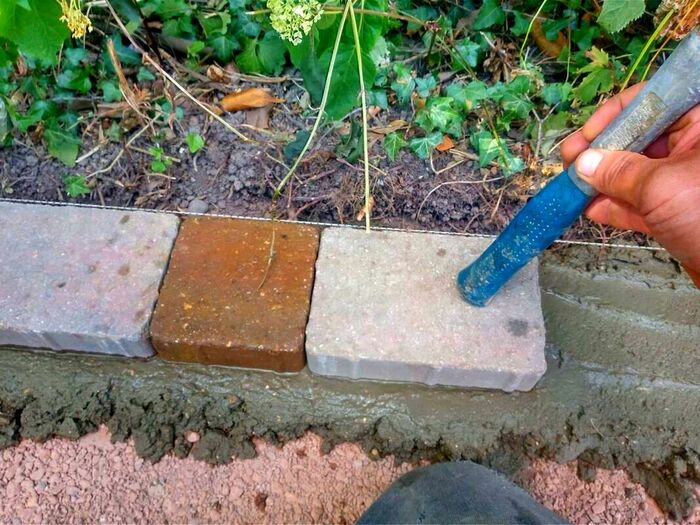
Poor drainage
Poor drainage can be a real threat to successfully edging your garden. If you have boggy conditions you may wish to scrutinise your gardens levels. It may be a good idea to grade your gardens surface levels to more effectively drain water. Installing your new edgings to falls can actually assist with this. If edgings are laid upon boggy ground it’s likely they could crack and fail with seasonal ground expansion. 
Submerged obstructions
A potential problem when installing garden edgings is encountering submerged obstructions. Most of the time this is not a common problem but you can be unlucky! Typical obstructions include buried masonry materials and concrete. In such cases these can usually be removed with Angle grinders and electrical breakers. Why not visit our article on how to remove buried concrete here. 
Tree roots
Trees roots can always hinder any landscaping installation which requires excavation. However, the biggest threat trees roots pose to new edgings are growing and expanding roots. These are more of an issue with younger trees still in their growth phase. As young trees grow they put out roots which can grow under and lift new edging. When planning for new edging assess surrounding trees to see if they have potential to grow much larger. If so, you may want to keep your edgings further back from their root mass. 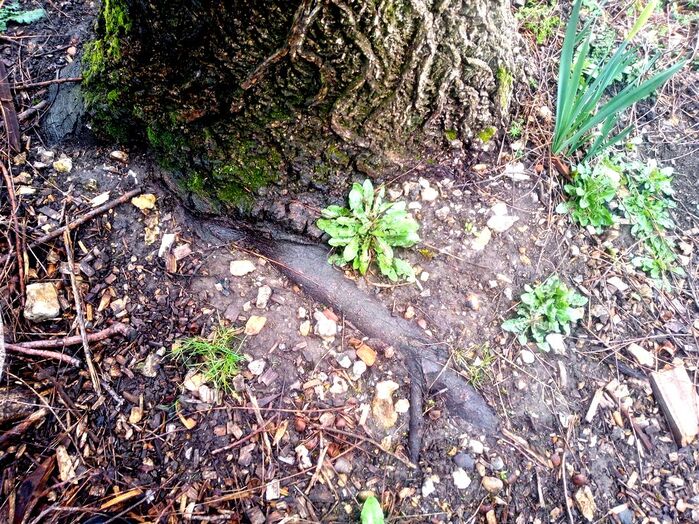
Thank you for reading our article on potential problems when laying garden edging.
If you require garden edging installation why not contact us here. Below we have included some other garden edging articles you may find useful.
'As an Amazon associate I earn from qualifying purchases'
This article contains affiliate links
Garden edging can have many different functions depending on the specific circumstances of your site. This is no less the case with garden edging for slopes!
Garden edging for sloping gardens must fulfil its primary function and provide separation between varying surfaces. However, with slopes they must be robust enough to resist the forces of gravity. This means edging for slopes will require having some retaining function. Retaining heavy materials such as aggregates and wet soil on slopes requires only robust edging solutions. In this article I will identify the 5 main types of robust garden edging suitable for slopes. What is the best garden edging for slopes?
The best garden edging for slopes will fulfil a gardens aesthetic aspirations as well as being practical. Sloping landscapes exert a greater amount of force onto garden edgings and retaining structures. Therefore, it is vital you choose the very best edging materials for slopes and install them correctly. Below we have identified five of the best types of garden edging for slopes. Brick edgings
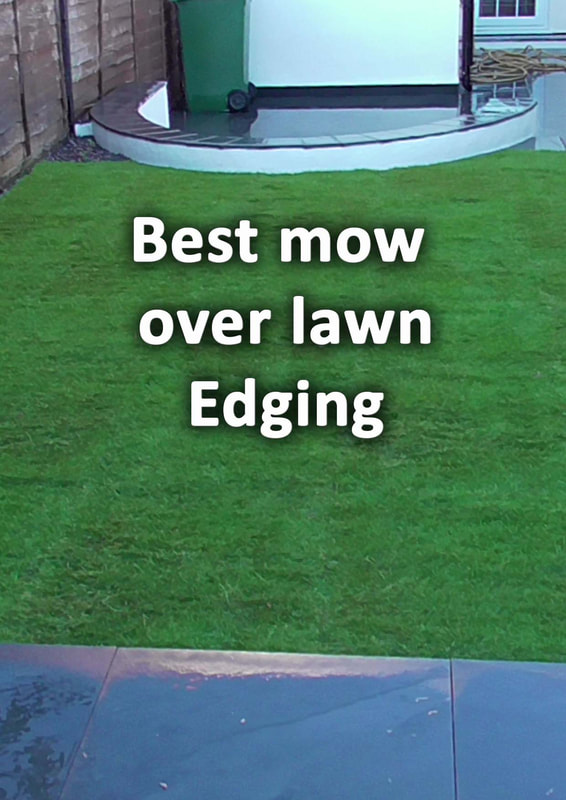
Bricks have been utilised for building robust structures for hundreds of years. These excellent building blocks come in a huge variety of colours and styles. All brickwork really needs to be bedded down upon mortar on top of a robust concrete foundation. This makes them perfect for creating robust garden edging on slopes. How large your brick edging structure will have to be will depend on its function and gradient of the slope. If you are installing brick mow over edging or a mowing strip this will be a simpler installation. However, if you are building brick retaining edging or low walls this will require more preparation and labour. 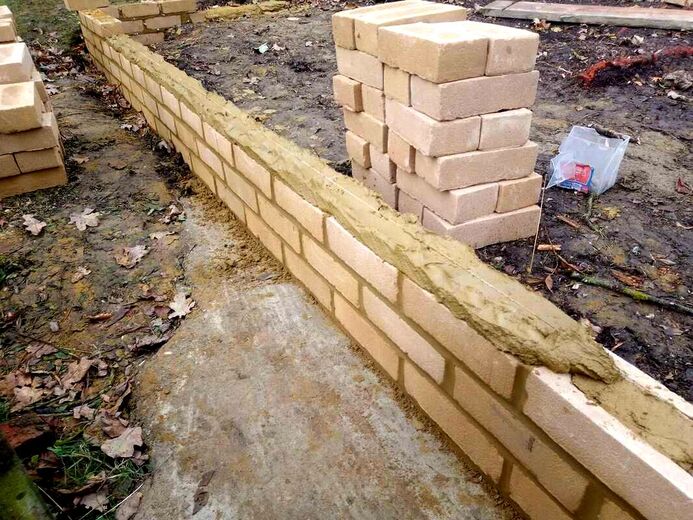
Brick mow stripsBrick mow-over edging on a slope will require more effort than conventional edging but is worth it! To install a mow strip you will need to concrete a robust and level concrete foundation around your lawn. This foundation needs to be at least 150mm deep and 250mm wide. This will create a robust anchor to sloping ground. Your bricks can then be tapped level to the top of the lawn with mortar and jointed. Brick mowing edges are perfect for maintaining lawns with no extra clipping or strimming. 
Brick retaining edging
If brick edgings require a retaining function their construction will depend upon what load is applied to them. If bricks are retaining only a couple of inches of soil or aggregates a single brick thickness is fine. If you have considerable gradients and retaining large volumes of material, brickwork will need to be much stronger. This will typically warrant a robust concrete foundation at least 300mm deep and 300 wide. Brickwork will need to be built two bricks thick and resemble a low retaining wall. 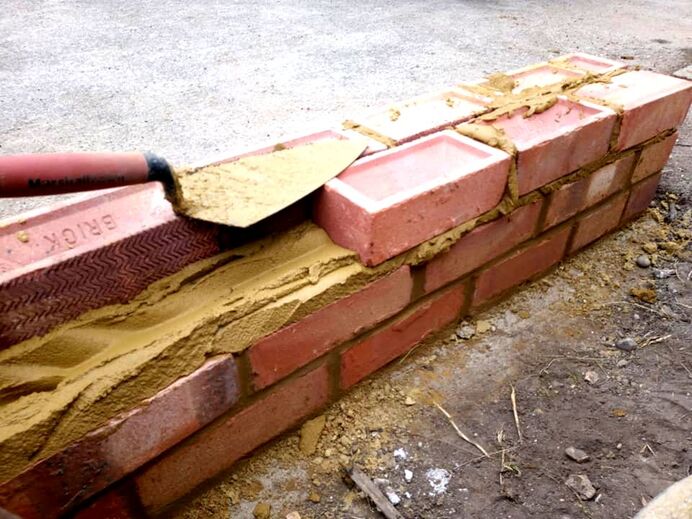
Concrete block edgings
Concrete blocks can be treated in exactly the same as bricks for edging on slopes. If you are not a skilled bricklayer concrete blocks are much easier and faster to lay. They also provide the option to clad them in a variety of other materials. Some of these include painted render, cladding, tiling and other materials. Concrete blocks are very suitable for slopes as they can be built as sturdy, retaining, edges and features. This helps to stabilise the ground, create flat terraces and form structure within a garden design. Smaller concrete blocks such as block paving can also make effective mow strips on slopes. 
Concrete kerb edgings
Concrete kerb edgings are specifically designed as retaining landscape edgings. These are typically utilised for step and raised bed construction on driveways. These come in a variety of colours, shapes and styles. Kerb edgings can also make the perfect edging on slopes or for retaining slightly higher levels on undulating ground. These edging kerbs need to be bedded down onto a robust concrete base using a strong mortar mix. 
Timber sleeper edgings
There is a very wide variety of ways timber can be used for garden edging. For curved garden edging the most typical solution is timber gravel boards fixed to pegs. For straight garden edging treated 6x2 timber has always been a popular solution. However for slopes these timbers are much less suitable. Gravel boards and 6x2 treated timber can be used on slopes if they are flush with the ground level. However, timber edging on gradients with a retaining function must be extremely thick and robust. 
Consequently, treated sleepers are the best timber edging for slopes.
For straight edging these can be run lengthways set into the landscape. Sleepers can then be securely fixed with timber lock fixings to 4x4 treated timber posts concreted into the ground. Sleepers also make fantastic curved retaining edging on slopes. They can be cut into smaller sections and concreted vertically into the ground like posts. The sleepers can be slightly splayed to create gentle curves within the landscape which is very effective. Flexible metal edgings
Most of the time, thin and flexible edging products on the market are not suitable for slopes. However, some metal edging like Core edge is suitable for edging on slopes if it is based correctly. This metal edging can be set firmly into concrete so the top edge is proud by a couple of inches. This provides more rigidity and the potential to retain shallow depths of soil and aggregates on gradients. Core edge flexible metal edging is now available to buy on Amazon. 
Thank you for reading our article on the best garden edging for slopes.
If you require edging installation for slopes please do not hesitate to contact us. We cover most of Buckinghamshire with typical project areas including: Amersham, Aylesbury, Bovingdon, Chalfont, Chesham, Hyde Heath, Great Missenden, Princes Risborough, High Wycombe, Penn, Beaconsfield, Tring, Gerrard's Cross and Denham. Below I have linked to some other relevant articles you may find useful.
'As an Amazon associate I earn from qualifying purchases'
This article contains affiliate links
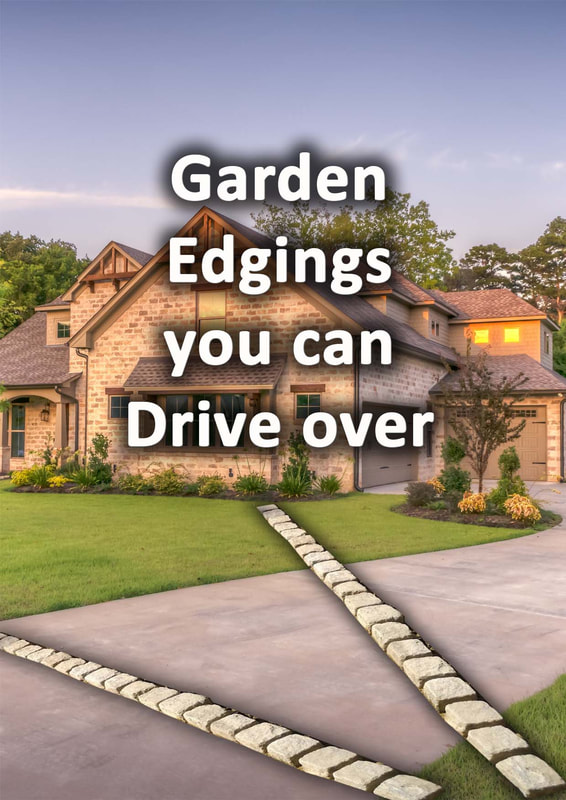
Being able to drive over garden edging is not the most traditional of edging requirements. However, being able to take the weight of a vehicle can become essential in some scenarios.
This is especially so if garden spaces border driveways or tight parking bays. The bumping sensation of mounting a low kerb will prevent you from squashing decorative borders. Summer also provides the opportunity for driveways to overflow on to large lawns. This can be extremely useful during large family events and get-togethers. In such cases it is advantageous to have garden edging which will easily take the weight of vehicles. Even if this idea is solely for the purpose of extended durability and longevity it is valid. Either way, in this article I will list the top six garden edgings you can drive over. Granite setts
Granite setts have been utilised for their aesthetic qualities and durability for centuries. Their high, compressive, strength made them the preferred surface for streets and roadways historically. Even today granite is still used extensively for public landscape installations and streetscapes. Granite setts can make the perfect drive over garden edging for lawns and flower beds. However, like all durable building materials they are only as robust as the base they are laid upon. Make sure your granite setts are laid on a strong mortar mix on top of a compacted sub-base. 
Kerb edging
Kerb edgings come in a wide variety of edging products. Typically constructed of concrete, these are installed as edgings to driveways, steps, lawns and flower borders. Many kerb edging products are designed to accompany block paving driveways. Typical examples include bull nose edging kerbs and chamfered edging kerbs. These can be set in deeply around driveways to provide shallow, drive over, retaining edges. 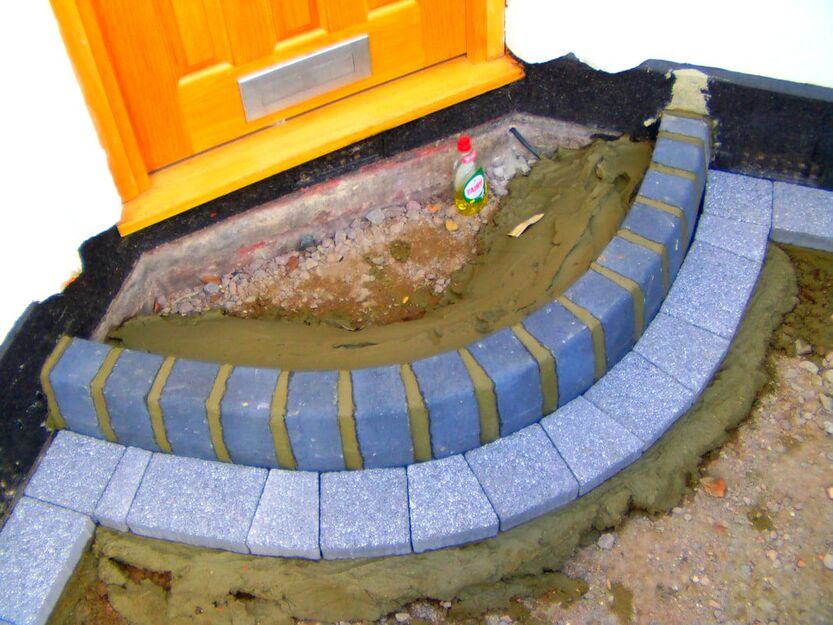
Block paving
Block paving is well known for its extensive use as a driveway paving surface. However, these, robust, blocks can also make effective drive over edging. Pavers can either be used as an edging flush with surrounding levels or flipped vertically on edge. With an average thickness of 60mm, block paving forms a robust drive over edge for multiple scenarios. These must be laid on a strong mortar mix upon a well compacted sub-base. Block edges must also be well haunched in with mortar to provide extra stability. 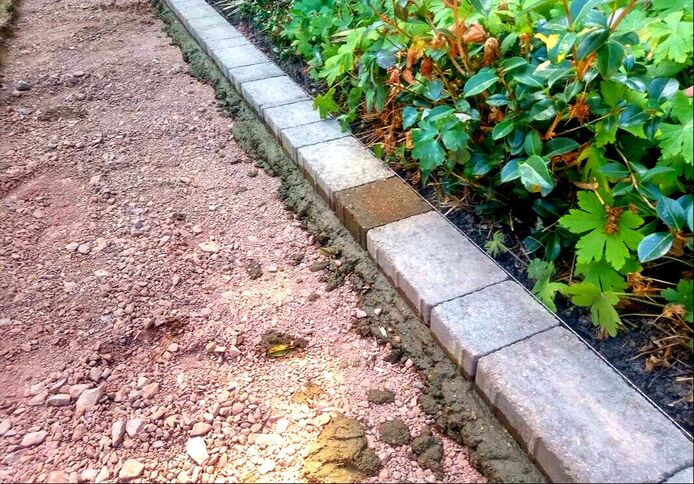
Brick on edge
Bricks have always been a great material for edging gardens and driveways. One of the most popular methods of doing this is a brick on edge. However, installing a raised brick edging as a drive over edge may not be a good idea. This is because the corners of clay bricks can easily break and chip under excessive force. For raised brick edges therefore a more durable brick such as an engineering brick would be best. Consequently laying brick edgings flush with surrounding surfaces is the best drive over option. 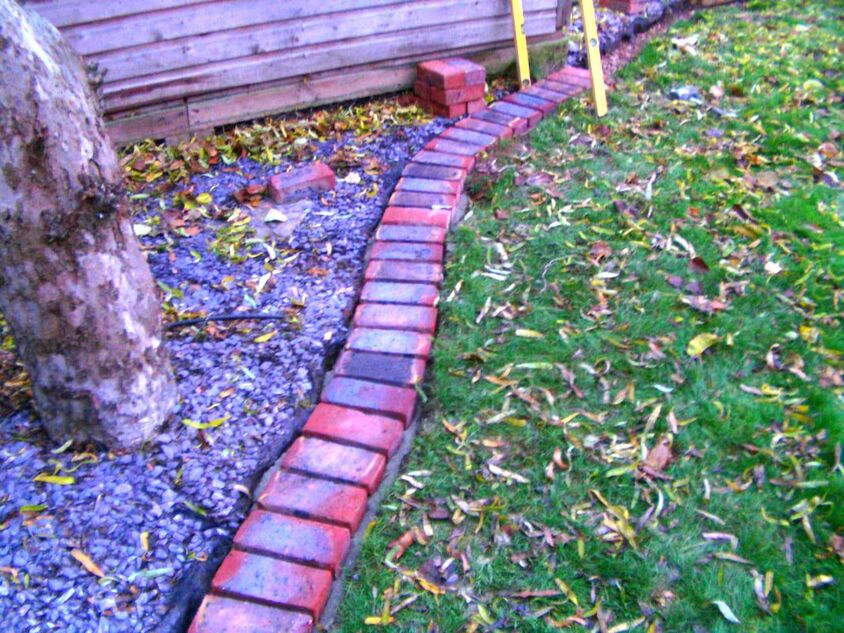
Thick steel edging
Most garden steel edgings are not durable enough to drive over. However there are now some products on the market which are ideal for driveways. These are normally around 6mm thick and have robust anchoring systems. These are ideal if you want a thin but strong edging which is generally unnoticeable.  Sleeper edging
If you want a robust edging made out of timber then your best option is probably sleepers.
Not only can these be installed lengthways they can also be set into concrete vertically. This provides you the added option of forming organic shapes and curves. If based properly, sleepers will take the weight of a vehicle. However, bear in mind, timber sleepers will eventually degrade. This could lead to sinking and breaking after around a decade. I would always recommend masonry and concrete materials for drive over edging. 
Thank you for reading our article on the best drive over edgings. If you require edging installation services do not hesitate to contact us. We cover most of Buckinghamshire with typical project locations including:
Amersham, Aylesbury, Bovingdon, Chalfont, Chesham, Hyde Heath, Great Missenden, Princes Risborough, High Wycombe, Penn, Beaconsfield, Tring, Gerrard's Cross and Denham. Below I will link to some other relevant articles you may find useful.
'As an Amazon associate I earn from qualifying purchases'
|
The Author
|


Landscaping services across Buckinghamshire, Amersham, Aylesbury & High Wycombe
Hyde Heath, Amersham, Buckinghamshire
|
|